ในบทความนี้ เราจะสร้างโมเดล Machine Learning สำหรับจำแนกภาพโดยใช้ TensorFlow และ Keras ซึ่งเป็นไลบรารียอดนิยมสำหรับการสร้างโมเดลปัญญาประดิษฐ์ (AI) โมเดลที่เราจะพัฒนาคือโมเดล Convolutional Neural Network (CNN) ซึ่งเป็น Supervised Learning ที่เรียนรู้จากภาพผ่าน Convolutional Layers เพื่อดึงลักษณะสำคัญของภาพ จากนั้นลดขนาดข้อมูลด้วย Pooling Layer และใช้ Fully Connected Layers เพื่อทำนายผล โดยเขียนด้วย Python และใช้ TensorFlow/Keras ในการพัฒนาโครงสร้างโมเดล ฝึกสอนด้วยชุดข้อมูล MNIST และประเมินผลด้วยค่าความแม่นยำของโมเดล
ขั้นตอนการทำงานของโมเดล
- นำเข้าไลบรารีที่จำเป็น
- โหลดและเตรียมข้อมูลภาพ (ใช้ชุดข้อมูล MNIST ซึ่งประกอบด้วยภาพตัวเลข 0-9)
- สร้างโครงสร้างของโมเดล CNN
- คอมไพล์และฝึกสอนโมเดล
- ทดสอบและประเมินผลโมเดล
1.นำเข้าไลบรารีที่จำเป็น
import tensorflow as tf
from tensorflow import keras
import matplotlib.pyplot as plt
import numpy as np
โค้ดด้านบนทำการนำเข้าไลบรารีที่จำเป็นในการพัฒนาโมเดล TensorFlow และ Keras สำหรับการสร้างโครงข่ายประสาทเทียม รวมถึง matplotlib และ numpy สำหรับการจัดการและแสดงผลข้อมูล
2.โหลดและเตรียมข้อมูลภาพ
mnist = keras.datasets.mnist
(x_train, y_train), (x_test, y_test) = mnist.load_data()
x_train, x_test = x_train / 255.0, x_test / 255.0
เราทำการโหลดชุดข้อมูล MNIST ซึ่งเป็นชุดข้อมูลภาพขาวดำของตัวเลข 0-9 ขนาด 28x28 พิกเซล จากนั้นปรับค่าพิกเซลให้อยู่ในช่วง 0-1 เพื่อให้โมเดลเรียนรู้ได้มีประสิทธิภาพมากขึ้น
3.สร้างโครงสร้างของโมเดล CNN
model = keras.Sequential([
    keras.layers.Conv2D(32, (3,3), activation='relu', input_shape=(28, 28, 1)),
    keras.layers.MaxPooling2D((2,2)),
    keras.layers.Flatten(),
    keras.layers.Dense(128, activation='relu'),
    keras.layers.Dense(10, activation='softmax')
])
โมเดลที่ใช้คือ Convolutional Neural Network (CNN) ซึ่งมีโครงสร้างดังนี้:
- Conv2D: ชั้นคอนโวลูชันที่ใช้ตัวกรองขนาด 3x3 จำนวน 32 ตัว เพื่อดึงคุณลักษณะจากภาพ
- MaxPooling2D: ลดขนาดของภาพลงโดยใช้ฟังก์ชันแมกซ์พูลลิ่ง
- Flatten: แปลงข้อมูลภาพให้อยู่ในรูปเวกเตอร์ 1 มิติ
- Dense: มีสองชั้น - ชั้นแรกใช้ 128 นิวรอนพร้อมฟังก์ชัน ReLU และชั้นสุดท้ายใช้ 10 นิวรอนพร้อมฟังก์ชัน Softmax สำหรับการจำแนกประเภท 10 หมวดหมู่
4.คอมไพล์และฝึกสอนโมเดล
model.compile(optimizer='adam', loss='sparse_categorical_crossentropy', metrics=['accuracy'])
model.fit(x_train.reshape(-1, 28, 28, 1), y_train, epochs=5)
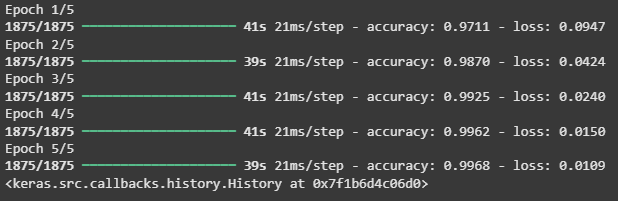
โมเดลถูกคอมไพล์โดยใช้ Adam Optimizer และค่าความสูญเสีย (loss) ใช้ sparse_categorical_crossentropy เพื่อจัดการกับการจำแนกประเภทหลายหมวดหมู่ จากนั้นโมเดลถูกฝึกสอน (fit) เป็นเวลา 5 รอบ (epochs)
จะได้ผลลัพธ์เป็น
5.ทดสอบและประเมินผลโมเดล
loss, accuracy = model.evaluate(x_test.reshape(-1, 28, 28, 1), y_test)
print(f"Accuracy: {accuracy*100:.2f}%")
โมเดลถูกนำไปทดสอบด้วยชุดข้อมูลทดสอบ และแสดงค่าความแม่นยำของโมเดล
จะได้ผลลัพธ์เป็น
![]()
ตัวอย่างการรันใช้งาน
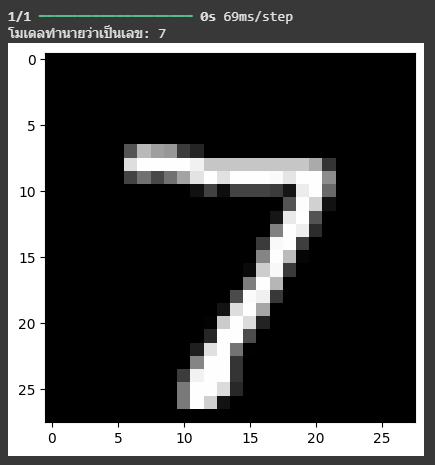
เมื่อรันโค้ดด้านล่าง โมเดลจะถูกฝึกด้วยข้อมูลภาพตัวเลข 0-9 และสามารถนำไปทดสอบกับชุดข้อมูลใหม่ได้ เช่น ใช้ภาพจากชุดข้อมูลทดสอบเพื่อให้โมเดลพยากรณ์ตัวเลขที่อยู่ในภาพ
# ทดสอบโมเดลด้วยภาพจากชุดข้อมูลทดสอบ
for i in range(5):  # ทดสอบ 5 ภาพแรกจากชุดข้อมูลทดสอบ
    plt.imshow(x_test[i], cmap='gray')
    prediction = np.argmax(model.predict(x_test[i].reshape(-1, 28, 28, 1)))
    plt.title(f"Prediction: {prediction}")
    plt.show()
    print(f"โมเดลทำนายว่าเป็นเลข: {prediction}")
จะได้ผลลัพธ์เป็น
ต่อไป เราจะลองมาสร้างตัวอย่างใหม่เป็นการจำแนกภาพด้วยสี
เนื่องจากมีการเปลี่ยนจากการใช้ตัวเลขเป็นสี จึงต้องมีการแก้ไขโค้ดตัวเดิมดังนี้
ขั้นตอนการทำงานของโมเดล
- นำเข้าไลบรารีที่จำเป็น
- กำหนดโฟลเดอร์ที่เก็บภาพสี
- ฟังก์ชันโหลดภาพและป้ายกำกับ
- โหลดข้อมูลสี
- แบ่งข้อมูลเป็นชุดฝึกและทดสอบ
- สร้างโมเดล CNN
- คอมไพล์โมเดล
- ฝึกโมเดล
- บันทึกโมเดล
1.นำเข้าไลบรารีที่จำเป็น
import os
import cv2
import numpy as np
from tensorflow.keras.models import Sequential
from tensorflow.keras.layers import Conv2D, MaxPooling2D, Flatten, Dense
from tensorflow.keras.optimizers import Adam
from sklearn.model_selection import train_test_split
เราจะใช้ไลบรารีต่างๆ เช่น TensorFlow/Keras สำหรับสร้างโมเดล, OpenCV สำหรับจัดการรูปภาพ และ Scikit-learn สำหรับแบ่งข้อมูลฝึกและทดสอบ
2.กำหนดโฟลเดอร์ที่เก็บภาพสี
color_images_dir = "color_images"
color_names = ['red', 'green', 'blue', 'orange', 'yellow']
เราจะใช้โฟลเดอร์ชื่อ "color_images" ซึ่งในนั้นจะมีโฟลเดอร์ย่อย เช่น "red", "green", "blue" ฯลฯ โดยแต่ละโฟลเดอร์จะเก็บรูปภาพของสีนั้นๆสำหรับการเทร
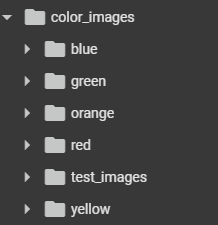
โดยที่เราจะนำภาพสีต่างๆทั้งหมดมาใส่ในโฟลเดอร์เพื่อนำมาเทรนให้กับAIนั่นเอง
3.ฟังก์ชันโหลดภาพและป้ายกำกับ
def load_color_images(color_folder, colors):
    X, y = []

    for color in colors:
        color_path = os.path.join(color_folder, color)
        if not os.path.exists(color_path):
            print(f"Folder for {color} does not exist.")
            continue

        for filename in os.listdir(color_path):
            if filename.endswith(".jpg") or filename.endswith(".png"):
                img_path = os.path.join(color_path, filename)
                img = cv2.imread(img_path)
                img = cv2.resize(img, (64, 64))  # ปรับขนาดเป็น 64x64
                img = img / 255.0  # แปลงค่าพิกเซลเป็น 0-1
                X.append(img)
                y.append(colors.index(color))  # กำหนดป้ายกำกับตามสี

    return np.array(X), np.array(y)
เราจะโหลดภาพจากแต่ละโฟลเดอร์, ปรับขนาดเป็น 64x64 พิกเซล, นำไปแปลงเป็นค่าระหว่าง 0-1 และสร้างป้ายกำกับตามสีของภาพ
4.โหลดข้อมูลสี
X, y = load_color_images(color_images_dir, color_names)
ใช้ฟังก์ชัน load_color_images เพื่อดึงข้อมูลภาพและป้ายกำกับ
5.แบ่งข้อมูลเป็นชุดฝึกและทดสอบ
X_train, X_test, y_train, y_test = train_test_split(X, y, test_size=0.2, random_state=42)
เราจะใช้ train_test_split เพื่อแบ่งข้อมูลเป็น 80% สำหรับฝึก และ 20% สำหรับทดสอบ
6.สร้างโมเดล CNN
model = Sequential([
    Conv2D(32, (3,3), activation='relu', input_shape=(64, 64, 3)),
    MaxPooling2D((2, 2)),
    Flatten(),
    Dense(128, activation='relu'),
    Dense(len(color_names), activation='softmax')
])
เราจะใช้ Convolutional Neural Network (CNN) ซึ่งประกอบไปด้วย
- Conv2D (ชั้นโครงข่ายประสาทเทียมแบบคอนโวลูชัน)
- MaxPooling2D (ลดขนาดภาพ)
- Flatten (แปลงข้อมูลเป็นเวกเตอร์)
- Dense (Fully Connected Layer)
7.คอมไพล์โมเดล
model.compile(optimizer=Adam(), loss='sparse_categorical_crossentropy', metrics=['accuracy'])
ใช้ Adam Optimizer และ Sparse Categorical Crossentropy เป็นค่าความสูญเสีย
8.ฝึกโมเดล
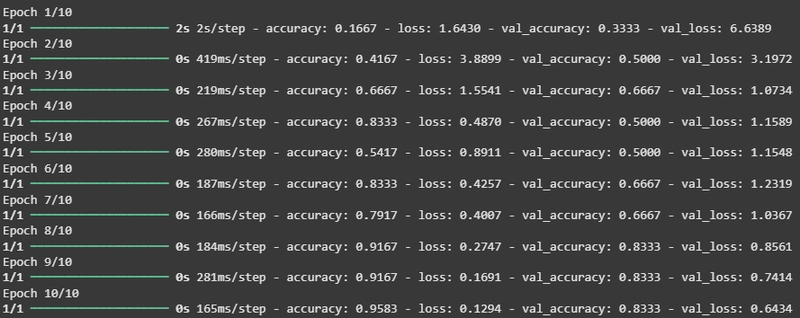
model.fit(X_train, y_train, epochs=10, validation_data=(X_test, y_test))
ให้โมเดลเรียนรู้จากข้อมูลที่เรามี โดยกำหนด epochs = 10
9.บันทึกโมเดล
model.save('color_classification_model.h5')
print("Model saved successfully!")
เมื่อโมเดลฝึกเสร็จแล้ว เราจะเซฟเป็นไฟล์ .h5 เพื่อให้สามารถโหลดกลับมาใช้งานได้
จะได้ผลลัพธ์เป็น
ในส่วนของการทดสอบ
โดยการทำงานของโค้ดจะมี
- นำเข้าไลบรารีที่จำเป็น
- โหลดโมเดลที่ฝึกเสร็จแล้ว
- ฟังก์ชันทำนายสีจากภาพ
- ฟังก์ชันทดสอบภาพทั้งหมดในโฟลเดอร์
- กำหนดโฟลเดอร์สำหรับทดสอบ
1.นำเข้าไลบรารีที่จำเป็น
import os
import cv2
import numpy as np
import matplotlib.pyplot as plt
from tensorflow.keras.models import load_model
เราจะใช้ TensorFlow/Keras ในการโหลดโมเดล, OpenCV ในการจัดการภาพ และ Matplotlib ในการแสดงผล
2.โหลดโมเดลที่ฝึกเสร็จแล้ว
model = load_model('color_classification_model.h5')
เราโหลดโมเดลจากไฟล์ color_classification_model.h5 ซึ่งเป็นโมเดลที่เราฝึกไว้
3.ฟังก์ชันทำนายสีจากภาพ
def predict_color(image_path):
    img = cv2.imread(image_path)
    if img is None:
        print(f"Unable to load image at {image_path}. Please check the path.")
        return

    img = cv2.resize(img, (64, 64))  # ปรับขนาดเป็น 64x64
    img = img / 255.0  # ปรับค่าให้เป็น 0-1
    prediction = model.predict(np.expand_dims(img, axis=0))
    predicted_color = np.argmax(prediction)  # หา index ของสีที่ทำนายได้

    # รายชื่อสี
    color_names = ['red', 'green', 'blue', 'orange', 'yellow']
    predicted_color_name = color_names[predicted_color]

    print(f"Predicted color for {image_path}: {predicted_color_name.upper()}")  # แสดงชื่อสีเป็นตัวใหญ่

    # แสดงภาพที่ทำนาย
    img = (img * 255).astype(np.uint8)  # แปลงกลับเป็น uint8 เพื่อแสดงภาพ
    plt.imshow(cv2.cvtColor(img, cv2.COLOR_BGR2RGB))
    plt.title(f"Predicted Color: {predicted_color_name.upper()}", fontsize=20)  # ใช้ตัวใหญ่ใน title
    plt.axis('off')  # ไม่ให้แสดงแกน
    plt.show()
ฟังก์ชันนี้จะ
- โหลดภาพจากพาธที่กำหนด
- ปรับขนาดเป็น 64x64 พิกเซล
- แปลงค่าสีให้อยู่ในช่วง 0-1
- ใช้โมเดลทำนายสีของภาพ
- แสดงผลชื่อสีที่ทำนายได้
- แสดงภาพพร้อมชื่อสี
4.ฟังก์ชันทดสอบภาพทั้งหมดในโฟลเดอร์
def test_all_images_in_folder(folder_path):
    if not os.path.exists(folder_path):  # ถ้าโฟลเดอร์ไม่มี ให้สร้าง
        print(f"Folder {folder_path} does not exist. Creating folder...")
        os.makedirs(folder_path)
    else:
        print(f"Folder {folder_path} exists.")

    # ตรวจสอบและทำนายทุกภาพในโฟลเดอร์
    for filename in os.listdir(folder_path):
        if filename.endswith(".jpg") or filename.endswith(".png"):
            image_path = os.path.join(folder_path, filename)
            predict_color(image_path)
ฟังก์ชันนี้จะ
- ตรวจสอบว่ามีโฟลเดอร์เก็บภาพหรือไม่ ถ้าไม่มีให้สร้าง
- วนลูปตรวจสอบทุกไฟล์ในโฟลเดอร์
- ทำนายสีของทุกภาพที่พบ
5.กำหนดโฟลเดอร์สำหรับทดสอบ
test_folder = "color_images/test_images"
test_all_images_in_folder(test_folder)  # ทดสอบทุกภาพในโฟลเดอร์
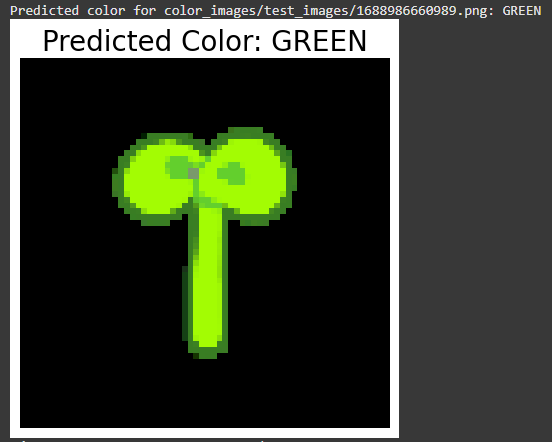
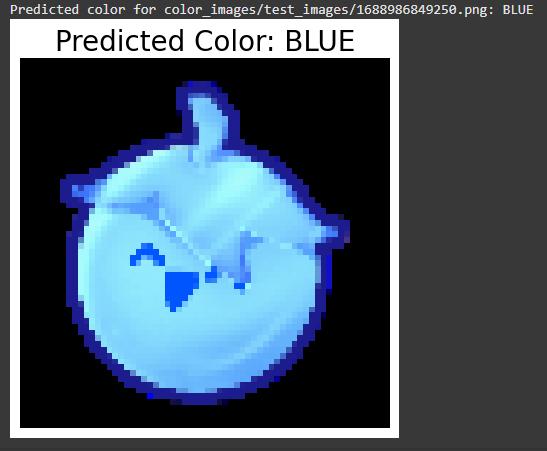
เราจะใช้โฟลเดอร์ "color_images/test_images" สำหรับใส่ภาพที่ต้องการทดสอบ
จะได้ผลลัพธ์เป็น
สรุปเนื้อหา
จากบทความนี้ เราได้เรียนรู้การสร้างโมเดล Machine Learning สำหรับการจำแนกภาพโดยใช้ TensorFlow และ Keras โมเดลที่ใช้คือ CNN ซึ่งเหมาะสำหรับการประมวลผลภาพและสามารถใช้งานได้จริงในหลายๆ ด้าน เช่น การจดจำลายมือ การวิเคราะห์ภาพทางการแพทย์ และอื่นๆ

Top comments (0)