
If you are looking to configure .NET Core custom controls in your Visual Studio toolbox, this article is right for you. I’ll guide you through configuring a .NET Core 3.0 custom control in Visual Studio 2019, available as a NuGet package. Following are the prerequisites for the toolbox configuration:
- Visual Studio 2019 (update 16.3.1 and later)
- .NET Core SDK 3.0
NuGet structure to support .NET Core 3.0 toolbox
The custom control will be populated in the toolbox only if the NuGet package has the VisualStudioToolsManifest file inside the tools folder. The tools folder will be present parallel to the lib folder inside the NuGet package. Refer to this link for more information about the structure of the VisualStudioToolsManifest file.
For the normal working of the NuGet package, this VisualStudioToolsManifest file isn’t necessary. Its only purpose is to configure a custom control in the Visual Studio toolbox. Add this file in the right location during NuGet packaging.
You can find the structure of the VisualStudioToolsManifest file in the following image. 
- The Reference attribute points to the name of the assembly.
- ContainsControls attribute specifies whether there are any controls to be listed in the Visual Studio toolbox for the given assembly.
- VSCategory/BlendCategory is the name for the toolbox to be displayed in Visual Studio.
- Type is the fully qualified name for the control including the namespace.
Install NuGet
Install NuGet to check if it adds the control to toolbox:
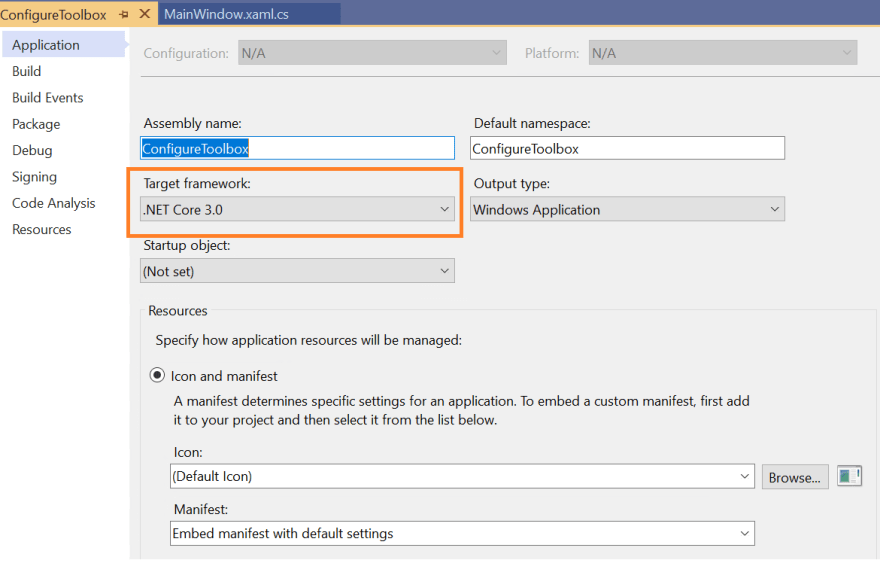
- Create a .NET Core project in the platform you intend to configure the .NET Core 3.0 controls in your toolbox.

- Ensure that the target framework is set to .NET Core 3.0.
- Right-click the project and select the Manage NuGet Packages … option.

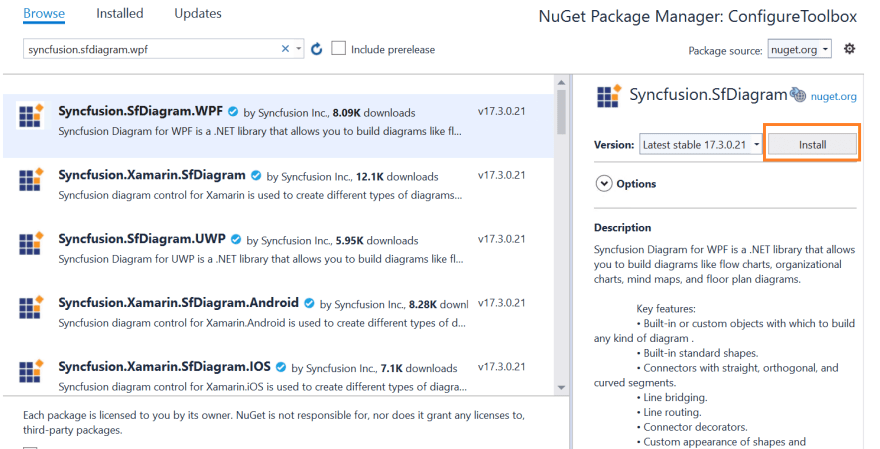
The NuGet Package Manager window will open. Navigate to the Browse tab and search for the NuGet package that has .NET Core 3.0 support.
Select the NuGet package and click Install.
A confirmation message will be displayed. Click OK. The Output window will display the NuGet installation details followed by a completion message.

Now, open Visual Studio toolbox to check if the control is displayed in it.
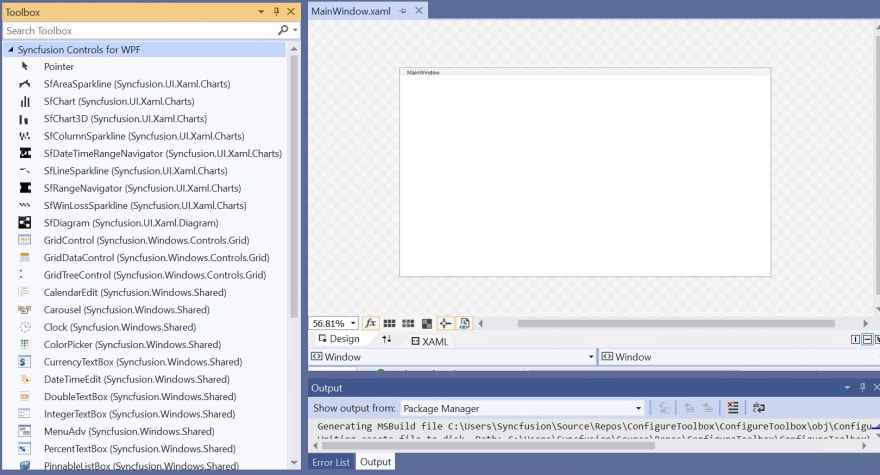
The control’s name will be displayed along with its Namespace.
Control name (Namespace)
Conclusion
I hope this blog was helpful in configuring your NuGet package to list custom controls in the Visual Studio toolbox for .NET Core 3.0.
Syncfusion provides 70+ high-performance, lightweight, modular, and responsive ASP.NET Core UI controls such as DataGrid, Charts, and Scheduler. You can use them to improve your application development.
Please share your feedback in the comments section. You can also contact us through our support forum, Direct-Trac, or feedback portal. We are waiting to hear your feedback!
The post How to Add a .NET Core 3.0 Custom Control to Your Visual Studio Toolbox in Less Than 3 Minutes appeared first on Syncfusion Blogs.

Oldest comments (0)