
You are a student or individual eager to experiment Amazon Web Service (AWS) but are reluctant to using your credit card? You fear that you will be billed excessively for things you didn't know you were even using? This blogpost addresses these worries and help you set up your AWS account securely and control your expenses at all times.
AWS free-tier is designed to give hands-on experience for the AWS Cloud Services without having to worry about spending money. It is available to everyone when registering a new AWS account. The ability to explore the AWS console and its 200+ services is ideal if you are getting started and what to know more about the power of cloud computing - benefit from scalable, reliable, fast and global cloud infrastructure. The free-tier consists of three categories:
- Always free: These free tier offers do not expire and are available to all AWS customers
- 12 months free: Enjoy these offers for 12-months following your initial sign-up date to AWS
- Trials: Short-term free trial offers start from the date you activate a particular service
- Additionally, follow this link to learn more about the free tier
A freshly created AWS account will automatically enroll for the AWS Free-Tier. Follow this page to sign up. Email addresses should be unique since it will create the new AWS username for your root account.
Next, you will be required to provide payment information so enter your credit card (Note: virtual pre-paid credit cards are also supported). Don't worry, we will make sure you understand how to stay in the free-tier and don't have to spend a dime.
Once you are done signing up, you will receive a confirmation email. Congratulations on your newly created AWS account.
There are a couple of steps to follow to make sure you are doing it right. At AWS, security is a top priority therefore make sure you enable Multi-Factor Authentication (MFA) on your root user by following these steps - using a virtual MFA device like Authy will suffice. Do not skip this step.
Plus, you will need to assign a new Identity and Access Management (IAM) user with permissions to perform and use the services . Don't use your AWS account root user credentials to access AWS, and don't give your credentials to anyone else. Instead, create individual users for anyone who needs access to your AWS account.
Create an IAM user for yourself as well, give that user administrative permissions, and use that IAM user for all your work. For information about how to do this, see Creating your first IAM admin user and user group or follow the simple steps bellow.
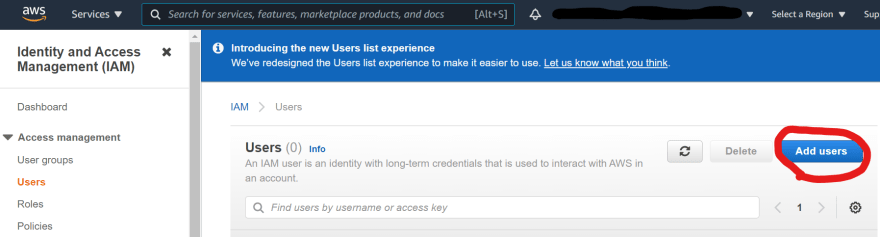
Go to your console and search for the IAM service. Under access management, click Users and add users. Give your new user a name, like AdminUser, choose AWS management console access then click next.
Enter a password of your choice by checking the Password box - then click next leaving the rest as default.
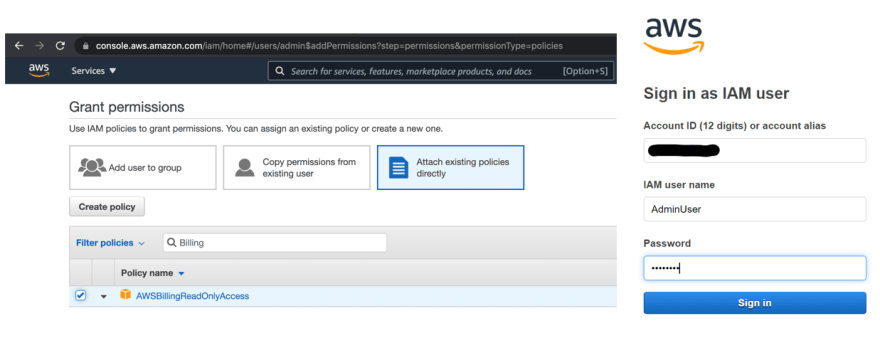
You will want to attach an AdministratorAccess policy to your new user and AWSBillingReadOnlyAccess, click next and review to create the user. Copy and save the log it link information to log into the console for next times.
Now, you need to secure your root account credentials and only use them to perform a few account and service management tasks (AWS Tasks that Require Root User). To start enjoying your free benefits worry free, you will simply login to your newly created AdminUser.
Tracking the usage of your free AWS account is important. To do so, you can either navigate to AWS Budgets and create a budget or alternatively, create an automated billing alarm (in eu-central-1) by following login into the console and clicking this CloudFormation link - CloudFormation is an AWS service that automates infrastructures with code for you.
You are now directed to a page where you can fill your email address as well as your phone number in order to receive billing alarms for your account on estimated charges.
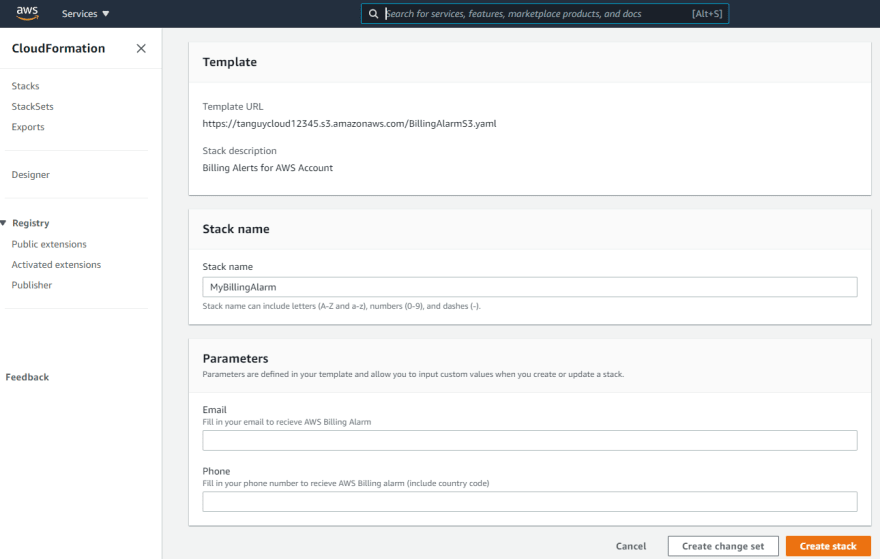
Press Create stack and then check you inbox for an email to confirm the alarm. Now you are all set and anytime your monthly expenses goes above 2$, 5$, 10$, 50$ or 100$ you will get notified for free. If you wish to remove this stack, simply delete it in CloudFormation>Stacks and the alarms will be disabled.
Note that if you ever want to see your actual/forecast spending in details, you can visit My Billings Dashboard when clicking your account on the top right of the console.
Congratulations, feel free to explore the endless possibilities of the cloud. For example, you can now build a tiny stateful web app with: multi-Availability Zone (AZ), stateless with up to 750h/month of EC2 instance, storing up to 25gb in DynamoDB and up to 5gb storage in S3. Moreover, you can run an AWS Lambda function for up to 1 month for free. If you are interested to dig deeper, you can practice to pass AWS Certifications exams to validate your skills.
Have fun exploring the AWS environment!

Top comments (0)