
I've been spending a lot of time recently digging into Azure Bicep and learning how to deploy Azure resources using this new domain specific language.
What is Azure Bicep?
Azure Bicep is a declarative language that will help you deploy your Azure resources. I've also heard Azure Bicep described as a Infrastructure as Code (IaC) tool.
Azure Bicep is an evolution from Azure Resource Manager (ARM) templates that we've had for many years. You don't need any prior knowledge of ARM templates to get started with Azure Bicep.
What do you need to get started with Azure Bicep?
You'll need Visual Studio Code, the Bicep extension and Azure CLI or Azure PowerShell, all installed locally. These tools will help you write, visualise and deploy your resources via an Azure Bicep template.
Azure Bicep Templates
Azure Bicep templates have the file extension .bicep When you use Visual Studio Code and the Bicep extension you'll be given help and warned about syntax errors or given help to author the template.
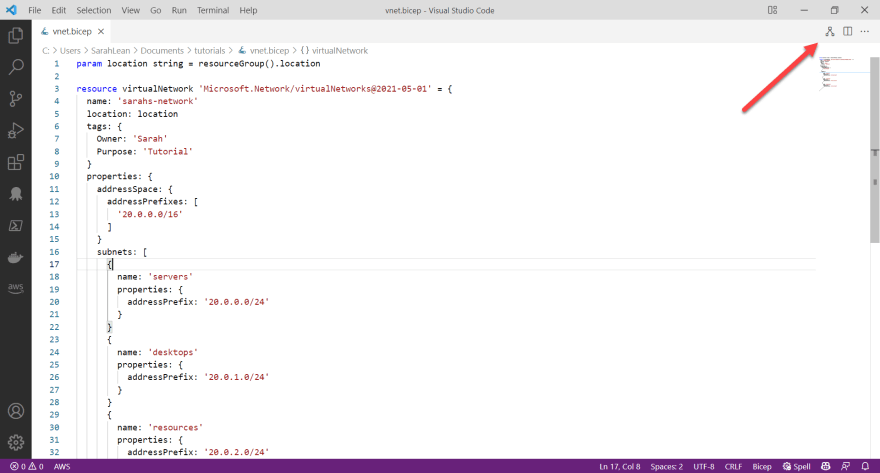
There are key areas to an Azure Bicep template, we're going to take a simple Azure Virtual Network template as an example to work on and deploy today.
param location string = resourceGroup().location

resource virtualNetwork 'Microsoft.Network/virtualNetworks@2021-05-01' = {
  name: 'sarahs-network'
  location: location
  tags: {
    Owner: 'Sarah'
    Purpose: 'Tutorial'
  }
  properties: {
    addressSpace: {
      addressPrefixes: [
        '20.0.0.0/16'
      ]
    }
    subnets: [
      {
        name: 'servers'
        properties: {
          addressPrefix: '20.0.0.0/24'
        }
      }
      {
        name: 'desktops'
        properties: {
          addressPrefix: '20.0.1.0/24'
        }
      }
      {
        name: 'resources'
        properties: {
          addressPrefix: '20.0.2.0/24'
        }
      }
    ]
  }
}
Let's look closely at some key parts of this resource definition:
The first line is a defining the parameter for our resources' location. We've set it so the resource is deployed in the same Azure location as our resource group.
The *resource * keyword at the start tells Bicep that you're defining a resource.
The next part is a symbolic name. In the example, the resource's symbolic name is virtualNetwork. Symbolic names are used within Bicep to refer to the resource.
We then have the resource type and API version of the resource - Microsoft.Network/virtualNetworks@2021-05-01. This tells Bicep we're declaring a Virtual Network and then which version of the API to use.
We've then declared the resource name in the second line, we're calling this Virtual Network "Sarahs-Network".
We then set information like location, tags for the resource.
We then start to declare information about the Virtual Network and the subnets we want to be deployed.
We've kept the template simple in this example, but you could declare things like DHCP options, DDOS Protection, BGP, encryption and much more. To find out more about what you can declare for a Virtual Network check out the documentation here.
Visualise your Azure Bicep template
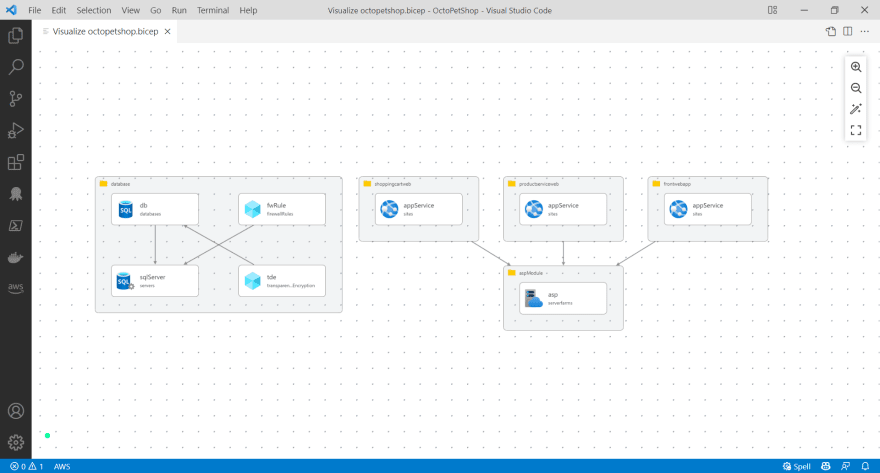
As part of the Azure Bicep extension for Visual Studio Code you have the ability to visualise your template. You can press CTRL + K V on a Windows machine or you can select the visualise button in the right hand corner.
Because we have a simple template the visualiser doesn't add much value however, if we visualise a a Bicep template with nested templates then we can see the power of the visualiser.
Deploy an Azure Template using Azure CLI
The first thing we need to do before deploying our template, is make sure we are logged into Azure CLI on our local machine. We type in the following command that will log us in to our relevant Azure subscription.
az login
Now we need to create an Azure Resource Group for our resources to reside in. We'll use a Azure CLI command to do that.
az group create -l westus -n vnet-tutorial --tags Owner=Sarah Purpose=Tutorial
Now to deploy our template:
az deployment group create --resource-group vnet-tutorial --template-file vnet.bicep
In the command we are saying deploy to our vnet-tutorial resource group and we're telling the command to deploy our vnet.bicep template.
The command will start to run and after a few minute you should have your Virtual Network deployed.

Is Azure Bicep production ready?
Yes, as of version 0.3 Azure Bicep is production ready. It is supported by Microsoft Support Plans and Bicep has 100% parity with what can be accomplished by ARM template.
I hope that helps you get started and explains a bit more about Azure Bicep. Do check out the Microsoft Learn module or my video explaining why Azure Bicep has become so popular.

Top comments (0)