DevOps tool of the month is a series, where each month I introduce one new useful DevOps tool in 2021 🙌🏼
For April I chose: TeamCity 🎉 - the general-purpose CI/CD solution by JetBrains. It's a powerful platform for DevOps-centric teams
Strengths of TeamCity ⭐️
⚡️ Simple Configuration
One of the main advantages of TeamCity is its simple configuration.
Compared to Jenkins e.g., you don't need to install and configure plugins for each and every common task like,
- triggering the build automatically
- using build tools like Maven, npm or Gradle
- connecting to a Docker registry
These out-of-the-box integrations with many popular tools (version control, issue tracker, package repository, ...) make it really easy to use, as you don't need any third-party plugins/addons for the common tasks.
⚡️ Configuration as Code
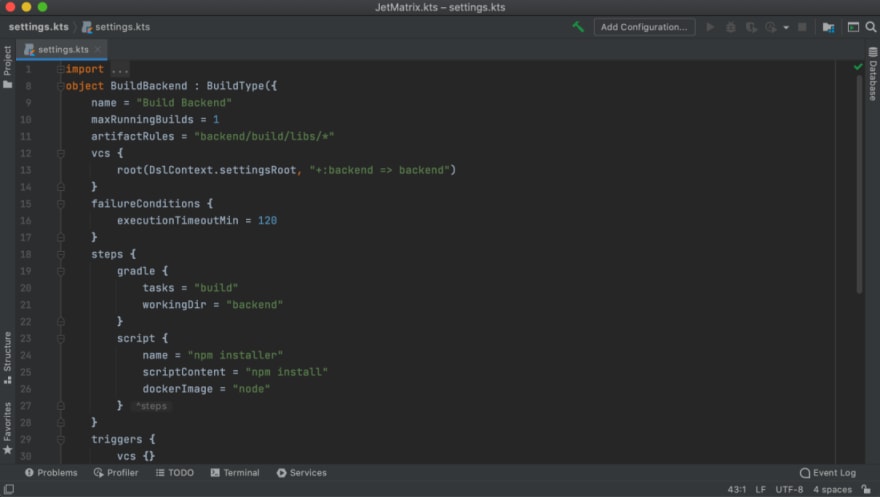
Configuring the build in a nice UI is great, however nowadays, we want to configure builds, tests, and deployment as code that is trackable and stored in a version control system.
In TeamCity you can write your configuration code using a real programming language, which is Kotlin (developed by JetBrains itself 🤓).
So you have the power of a full-featured programming language and can use its libraries and tool set as well as make use of autocompletion and refactoring in your IDE etc. This can help you keep your CI/CD configuration clean and maintainable. 👍
⚡️ Build Chains
In TeamCity you can create build chains 🔗 from your builds by defining dependencies between them. That means you can configure which builds depend on which ones in a chain. So whenever you run a build, TeamCity will check for all of its dependent builds and run them first in a correct order. You can also easily pass the artifacts or other outputs from one build to another.
In addition to running builds in sequence, you can also run them in parallel. An example use case for this would be, if you want to run the same tests on different platforms or environments, like on different operating systems or different cloud platforms etc, before building and deploying the application.
⚡️ Personal Builds
One more great feature I want to mention is that you can run what's called "Personal" builds directly from your code editor. Personal builds are like developer's own builds which ONLY they can access. 😎
So this is a very convenient way to trigger builds on a remote TeamCity server from your local development environment. This can be really useful if you want to test your changes before committing your code. Personal builds are available for all major IDEs.
How TeamCity works - TeamCity Architecture 💡
Now let's see how TeamCity works. It has a very clean architecture.
TeamCity Server
You have a central management component, called TeamCity server, where you can configure your builds and see your build information, all in a nice UI.
Build Agent
Once you configure the builds they need to run somewhere, right? For that TeamCity has Build Agents. And you can add and connect any number of build agents to your server. These agents can be installed anywhere, on an EC2 server, on your own on-premise servers, it could be a Docker container etc. And each agent can have different tools installed on them.
Automatic Detection
And for each build TeamCity will automatically detect what build agent can execute that build based on the steps configured in that build.
For example, if your build is using npm command to run JS tests, you will need a build agent with npm installed on it to run the build. If your build creates Docker image from your application and pushes it to Docker registry, obviously Docker will be needed to run these steps. So TeamCity will automatically detect a build agent with Docker installed on it and execute the build on that build agent.
Get started with TeamCity - Setup CI Pipeline from Scratch 👩🏻💻
Depending on which option you choose:
- self-managed or
- fully-managed TeamCity Cloud the steps will be different.
In the video I show you the self-managed alternative, meaning installing and configuring the TeamCity server and connecting the Build Agents ourselves. Note that when using TeamCity Cloud you don't have to do this setup, so you can get started much faster.
Steps to setup our CI Pipeline from scratch:
1. Install TeamCity Server
2. Configure CI Pipeline

3. Connect Build Agents
4. Run the Build
So, first we will install TeamCity server and then configure a continuous integration pipeline for a simple Java Gradle project that builds a Docker image and pushes it to a private DockerHub registry. After which we will connect Build Agents to it to run our build. 🔥
Check out my video for the step by step demo:
Let me know what you think about it! 🤓 🧐
More awesome tools coming up next on this series, so stay tuned for it! 🎬 😊
Like, share and follow me 😍 for more content:


Oldest comments (0)