Introduction
One of the most common comments I've heard from event organizers is, "I would stream my events live if I knew how. I've seen How-to videos but it seems confusing". In this post, I want to go over step-by-step in the most simplest way, and help others troubleshoot any issues they are having via comments as this is something I am really enjoying and would like to master over time.
Event organizers are contributing their free time running multiple community events, and many do not have the budget to upgrade their Zoom account, so I'm providing a work around to still provide live streamed/recorded events for their community without having to upgrade your Zoom account. The free Zoom account allows for up to 3 participants in your Zoom call and a 40 minute session. If you do choose to pay for the upgrade, that's great, you can have more than 3 participants as well as have your event much longer.
Goal
Using Zoom for the Event host(s) and the presenter with a maximum of 3 people in the Zoom meeting for a 40 minute stream using the Free version of Zoom. Your community will be on Twitch watching the event and asking questions to the presenter live and collaborating with the chat. See an example of "DevRel Meetup - Streaming Developer Relations & Coding on Twitch" as an example of a meetup on Twitch.
Prerequisite
Minimum Specifications to Stream on your PC.
Note: I do not recommend doing this set-up on a Mac as I've put quite a few hours in realizing that the GPU is not good enough for what is needed to stream and StreamLabs OBS was just released for the Mac on March 31st, 2020, so I wouldn't say it's necessarily "bug free". There's ways around the issues you'll run into, but in this post I will only go over (and help you troubleshoot) with the PC version of the software.
Also, using a monitor that's a minimum of 24 inches would be helpful as you are using multiple windows on your main monitor.
Step 1: Create a Twitch Account
- You can create a Free Twitch account here.
- All you need to do is update your profile with what the channel is about by going to twitch.tv/YourTwitchUsername/about
- Update your events on the schedule page at twitch.tv/YourTwitchUsername/schedule
- Upload the event photo and banner background to look more professional found here dashboard.twitch.tv/u/YourTwitchUsername/settings/channel
and then you are all set on the Twitch side!
Step 2: Download StreamLabs OBS
Download StreamLabs for PC. Why StreamLabs? First off, it's FREE. Second, it's Open Source. If anyone knows me, I'm a huge advocate for Free and Open Source Software (FOSS). StreamLabs is the software that allows you to create the "view" that is going to be live streamed. You can add sources, such as your webcam, microphone, what browser/window/monitor you will be displaying. You can add a lot of other things, like the Twitch chat window right on the video, or even custom graphics and animations.
Step 3: Register for a Zoom Account
TLDR; Use the Application version of Zoom
I'd recommend using the Software version of Zoom, not the browser version. For some reason the browser only shows two maximum webcam views: Your own video on the top right corner, and the main person speaking. The 3rd person won't show up, at least for all the time I tried to troubleshoot that, I didn't find another way around it. It doesn't matter though as you cannot add a browser version of "Zoom" as a source URL on StreamLabs OBS, so it's important to use the application version of Zoom.
Step 4: Open StreamLabs OBS and Set-Up
Go through the guided set-up process for StreamLabs OBS. It should be a few questions about your webcam/mic and it will ask you to connect to your Twitch account.
It may create a custom Scene for you with all the added sources you need. You don't want to use that. Let's start from scratch.
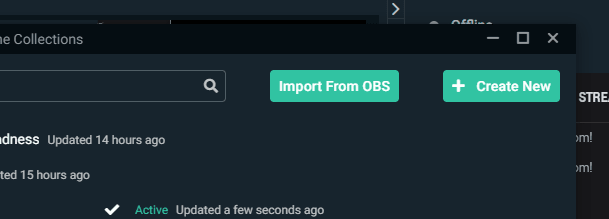
Step 5: Click on "Manage All" under "Scenes"
Step 6: Click on "+ Create New" to add a new Scene
You will notice it saved as Scene (1) or maybe Scene (2). You can click on "Manage All" under "Scenes" again and click on "Rename" on the right side of the new Source name.
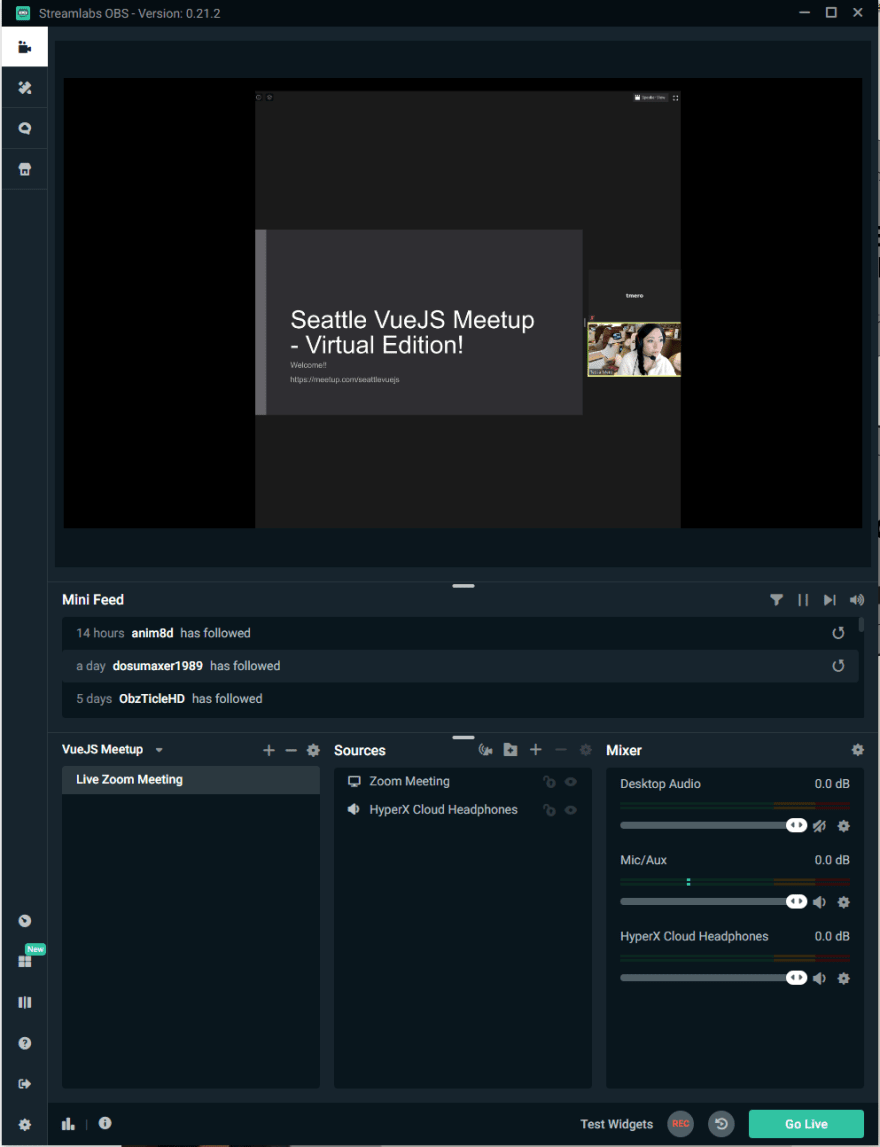
As you can see, I renamed it to VueJS Meetup. You can have a different setup for different events you have as you may want to use custom graphics/layouts.
Now you will see the word "Scene" and you can right click it and rename it.
As you can see, I renamed it to "Live Zoom Meeting" as that will be the scene you can change it to, as it'll be your Zoom meeting that is live.
Step 7: Add Sources
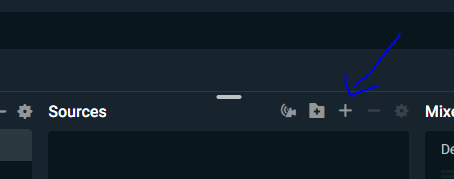
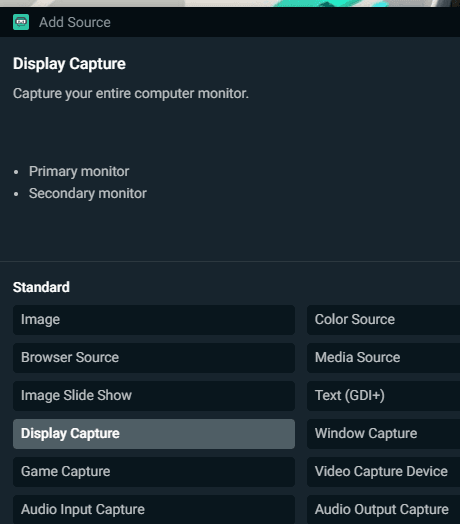
Click on the "+" sign under the middle column called "Sources". These are
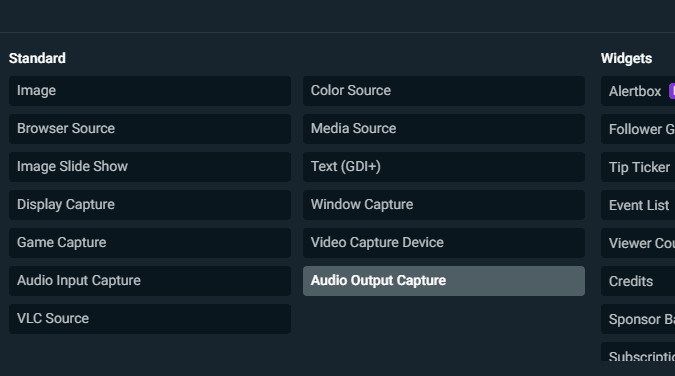
Add Your Microphone and Computer Sound by clicking on "Audio Output Capture" and clicking on "Add Source" at the bottom right corner of that dialogue box.
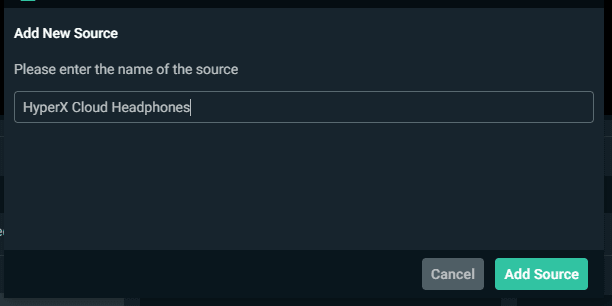
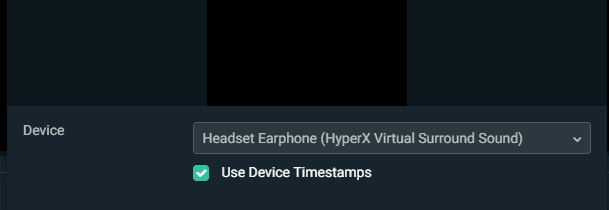
Rename your Source to something recognizable, exactly to that device. In this case, I am using my HyperX Cloud Headphones for sound and microphone, so I renamed it to that and then clicked on "Add Source".
Click on the Device on the list and click "Done".
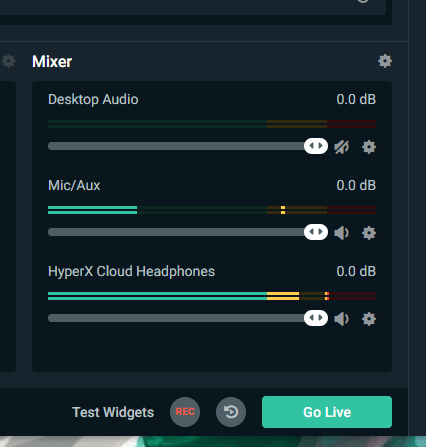
You can see it working by playing a YouTube video in the background while talking at the same time. You will see your Mic/Aux light up a different green color as well as the "HyperX Cloud Headphones". I muted "Desktop Audio" as it was set up there by default and I already have sound on the headset.
Step 8: Turn on Your Zoom Meeting
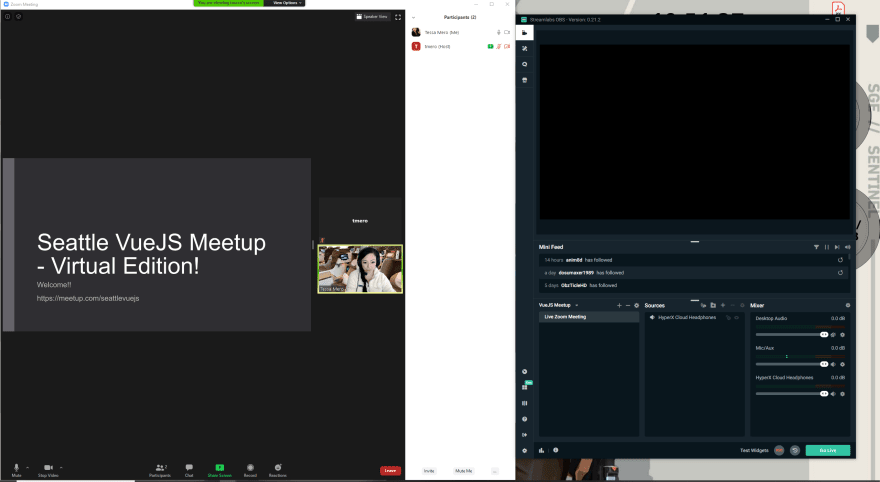
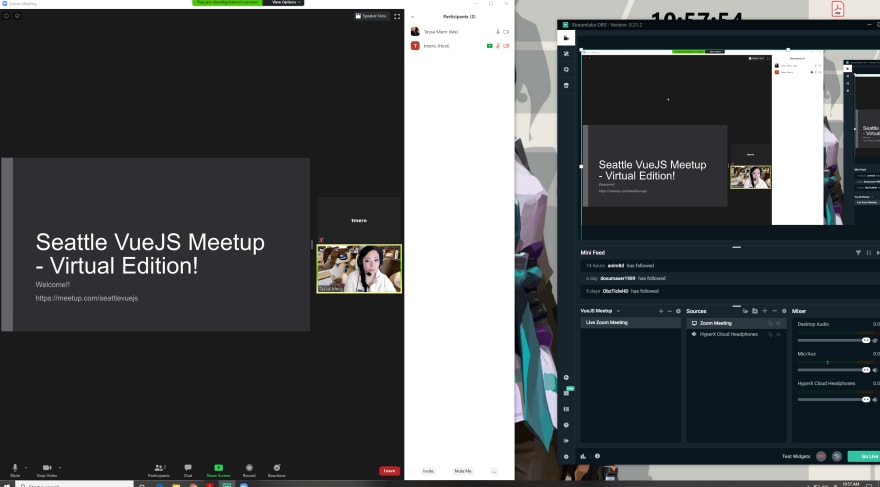
Okay so you have your Zoom meeting open and your presenter and you or your presenter has the slides open. You should use your main monitor to have the Zoom meeting window on the left side of your screen, taking up about 65% of your screen, and on the right side you should have StreamLabs OBS (for viewing your Twitch chat and making sure your video feed is showing up appropriately to Twitch). Why am I not using a second monitor? Well that would be weird if my eyes were constantly looking to the right. I want to stay engaged and keep my head and eyes forward towards the camera. ;-)
Now that your Monitor 1 view is set up, you can add the next Source!
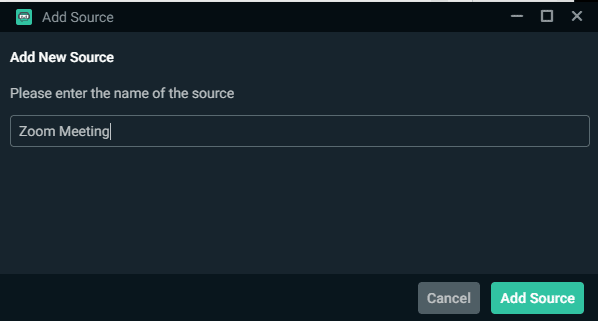
Rename it to "Zoom Meeting"
Okay, now if you are seeing something like this on StreamLabs OBS where it looks a bit messy as you have Zoom on the left side and StreamLabs OBS on the right side with some kind of inception going on, then you are on the right track!
Step 8: Time to Crop the Zoom meeting!
You can click on the corners to resize the screen. Resize it so it fits the maximum space of the black box. THEN you can CROP it. Crop only the Zoom meeting window cutting off the left edge, top edge, right side of your monitor view, and the bottom Zoom buttons, so all you see is the participants of up to 3 organisers/speaker and the screenshared presentation.
Step 9: Adjust your Settings before going Live!
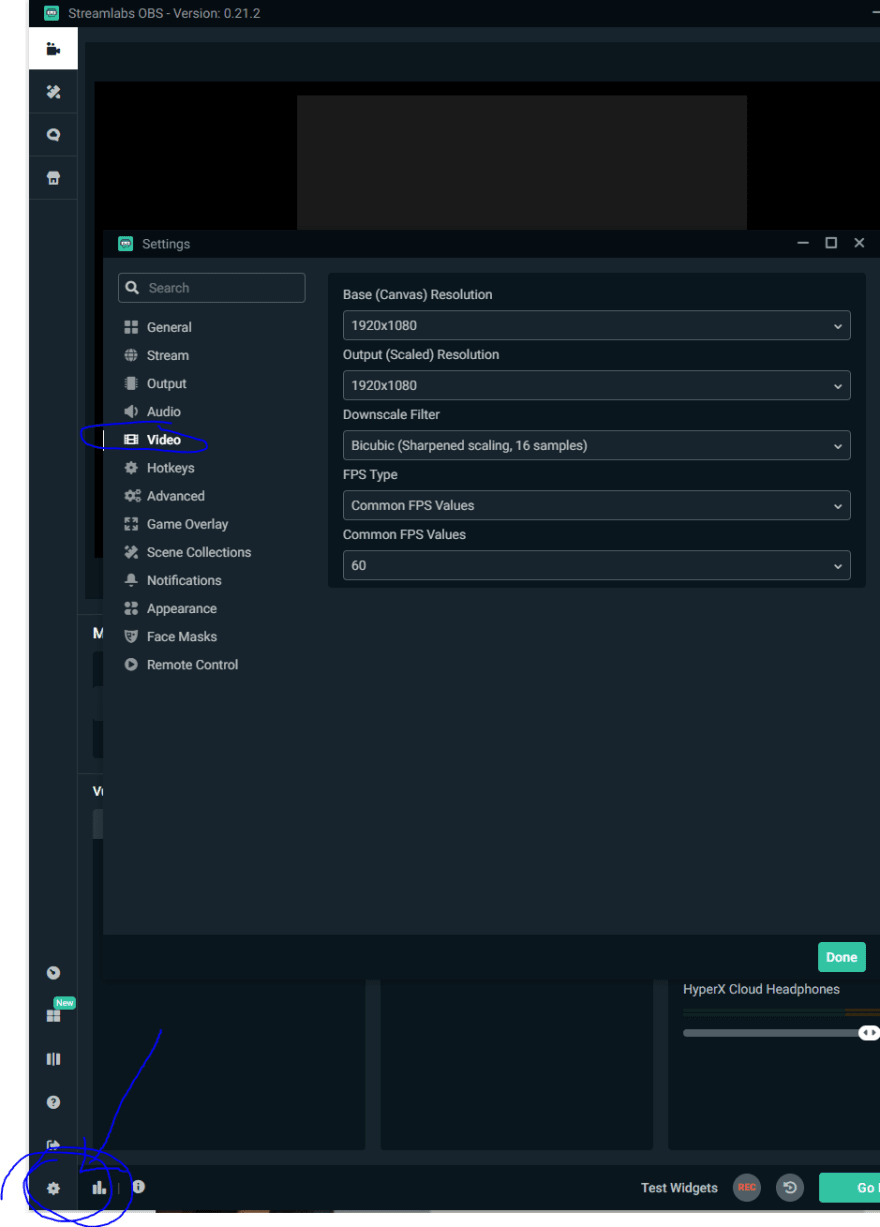
Click on the Settings wheel at the very bottom left corner of your StreamLabs OBS. Go through each tab and make adjustments that work for you. I wouldn't change ANY setting unless you know exactly what it's doing.
Go to "Video" and change your Base (Canvas) Resolution and Output (Scaled) Resolution to 1920x1080.
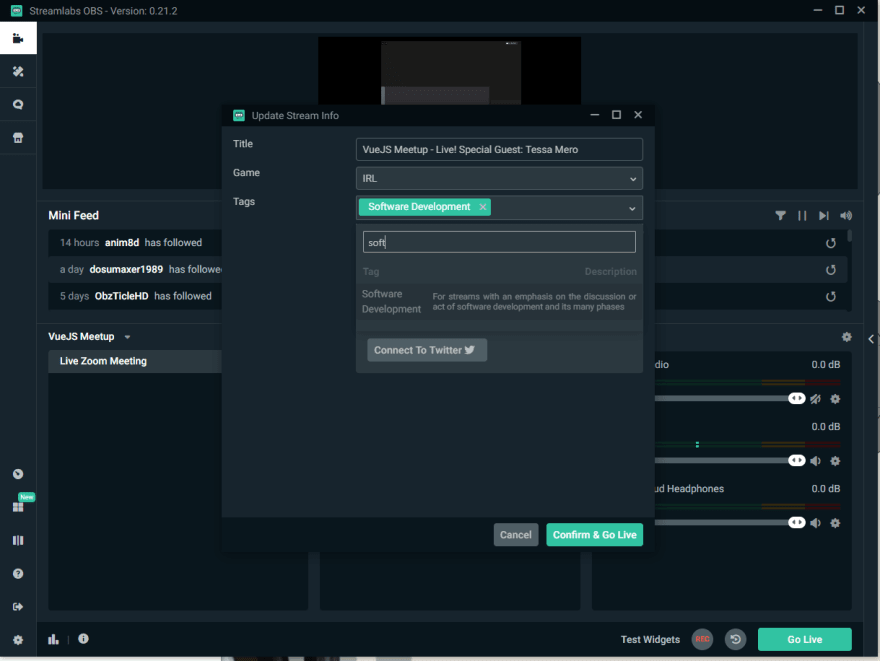
Now you are ready to Go Live! Click on the "Go Live" button at the bottom right corner.
- Give it a Title that people will see on Twitch
- Select "IRL" for the Game, as "IRL" means In Real Life related streaming, not video games.
- Tags: "Software Development" as I don't know what other tags we can add.
- Then "Confirm & Go Live"
Step 10: Test Before Going Live!
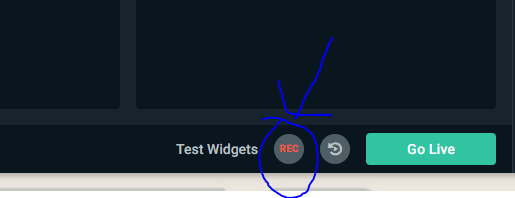
Before pushing live, you would probably want to do a quick test to see what it's going to look/sound like on Twitch. You can do this by clicking on "REC" to the left of the Go Live button.
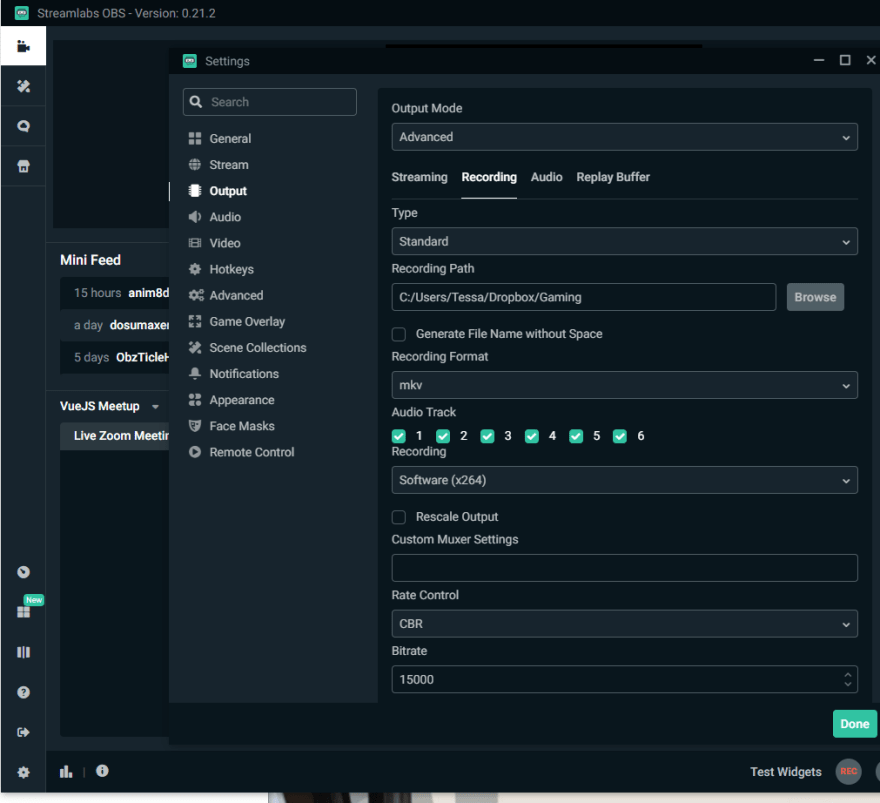
Before you record, you should probably want to know where your recording is going and be able to select the file format you'd want.
Go to the pinwheel icon to enter your "Settings" and click on "Output" tab on the left column. Then change the "Output Mode" from Simple to "Advanced". Click on the Recording tab and you can change your Recording Path and the Recording Format.
Now you made your test video, which what you see in the video is exactly what will show up on Twitch.
You can see the results from this set-up here on YouTube, which would be the exact view of what would be streamed on Twitch.
Conclusion
Hopefully this tutorial helps get other developer community leaders set-up to live stream their events. If you run into any issues, please make a comment and I will adjust this tutorial accordingly.
Good luck everyone and looking forward to troubleshooting with you!





Top comments (0)