Generally
Positioning and spacing is one of the core reasons of css existence. Slick designs simply need a little whitespace around them so that every element can shine with its own glamour.
One of the concepts that i didn't really get in the beggining of web development was the difference of padding and margin. In my eyes these two were doing identical things as i wasn't using them for any cutting-edge design.
Therefore i decided to run back on the basics and talk about some good old margin and padding.
Box model
Before beggining we need to clear up what the box model is. To better understand how margin and padding
actually differ from each other we need to first see how they are different in the box model

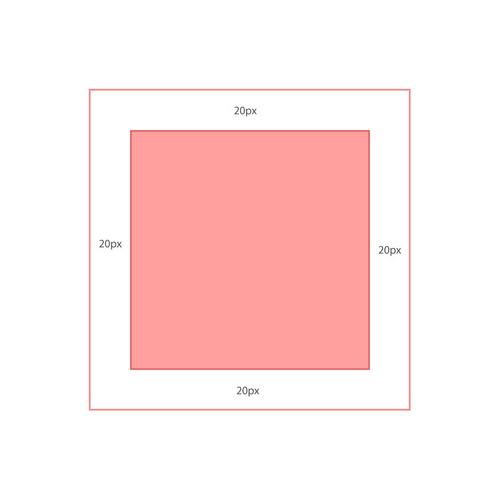
As you can see above, every element has the content area where all the content we can see resides. For example on a p tag that would be the text within.
Then we have the padding which extends the inner elements width and height and pushes outwards the border and margin of the element. After that the border is outside of the padding giving us the option to create a square outside the padding area.
Last but not least the margin is outside
of our element giving us the option to move the element around ( Note here that the margin still affects the height and
width of our element. You still need to count it in when you want the absolute height and width of an element)
Css by default assigns the height and width of an element to the content area. So to actually get the real width
and height of an element you need to calculate the following:
actual height and width of an element: height + padding + border + margin
Tip: By opening the developers console (right-click inspect element) you will see the box model on the right.
This should give us an easier time understanding what a margin and padding property is.
Margin
Now we are ready to talk about the margin property
As our respected friend w3schools states:
The CSS margin properties are used to create space around elements, outside of any defined borders.
Let's begin by seeing the properties:
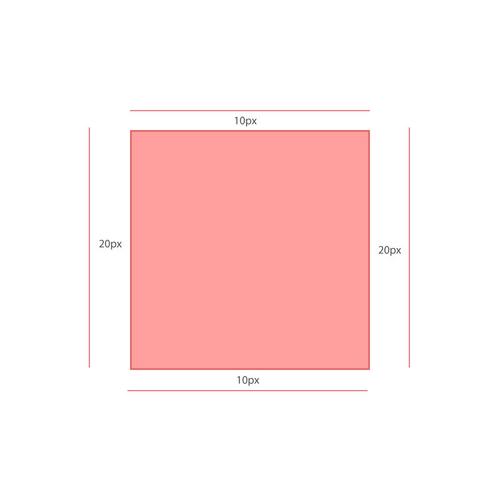
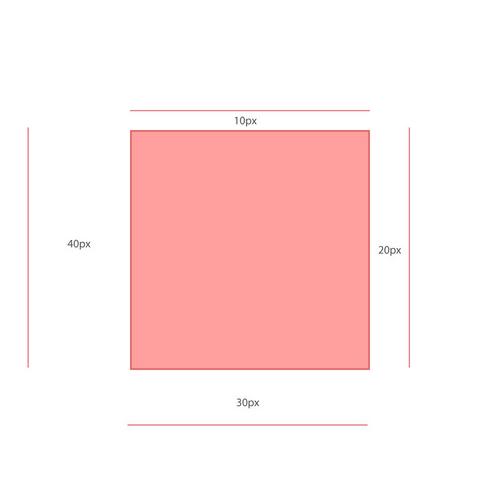
margin-left: x;
margin-right: x;
margin-top: x;
margin-bottom: x;
margin: x ?y ?z ?w
where x,y,z,w can have the values of px|rem|%|vw|vh.
margin is shorthand for all the 4 of the above margin properties. It goes clockwise starting from the top element if you add all 4 of the values. If you just add x,y the the margin of x will be applied on top and bottom of the element and the margin of y will be applied to the left and right of the element. If only x is applied the the margin will be applied to all 4 sides
Examples
margin:20px
margin:10px 20px
margin:10px 20px 30px 40px
Margin is perfect for "pushing" your element away from other elements. For example when you got a p element that you need to move a bit away from other p elements, just a bit whitespace to make our paragraph visually pleasing.
tip: You can use margin: 0 auto to horizontically center an element's content. Be aware that the element needs to have a width specified for this to work.
Padding
Now it's time for the padding.
Padding properties are almost identical to margin properties in a lot of ways which is logical considering the similarities these 2 share.
padding-left: x;
padding-right: x;
padding-top: x;
padding-bottom: x;
padding: x y z w
Where x,y,z,w can have the values of px|rem|%|vw|vh.
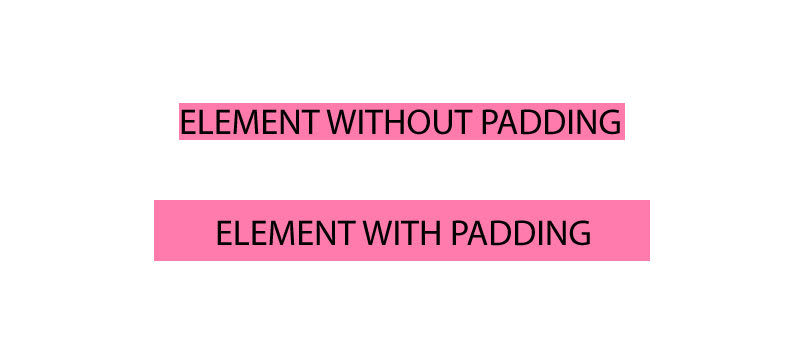
Same as above padding is a shorthand for all the other properties. Padding is ideal for cases where you want to extend the border
away from the element or if i want to give space between the background color of an element and the content inside.
I hope this guide was helpful! Have a nice day and remember to stay inside 🦄

Top comments (0)