
For this section, I will assume prior knowledge to Angular, NPM and Git (and that you followed the steps mentioned in Part 1).
Plus there are plenty of other tutorials on how to set it up, without me butchering explanations. 😅
If you clone the repo for this project, and add your environment details, you could skip majority of the next few sections (just trying to save you some time).
🛡️🛡️ Creating an Angular Application 🛡️🛡️
Most of this process can be followed by having a look at the Angular Documentation on getting started.
🚧🚧🚧 Generate angular project 🚧🚧🚧
Assuming you have everything set up, you can easily use the Angular CLI to set up an Angular project.
Simply create a directory for your app 📂, open a terminal in the current directory and run:
ng new <your-app-name-here>
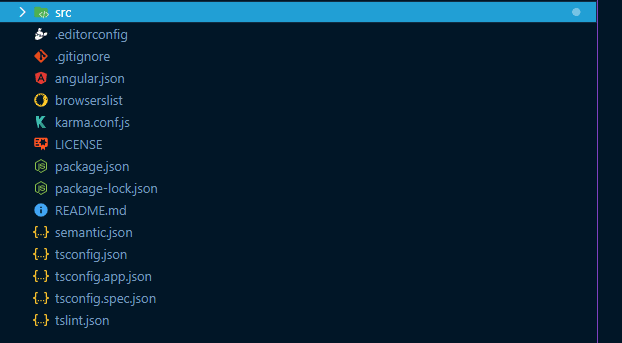
This command pretty much does everything for you, all you need to do is follow the prompts, and be sure to add an app-routing.module.ts file.
This will provide you with the basic shell for your app and it should look like this:
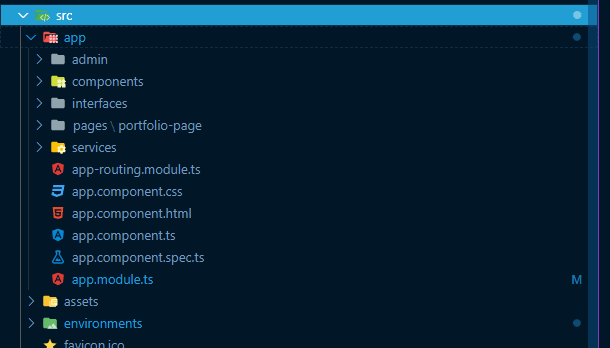
While you're here, go ahead and create the following directories inside the /app directory:
- admin
- components
- interfaces
- pages
- services
🔌🔌🔌 Install dependencies 🔌🔌🔌
There are 3 main dependencies for this project, namely:
Let's have a look at how to install them. 🚀🚀🚀
1. Installing Firebase
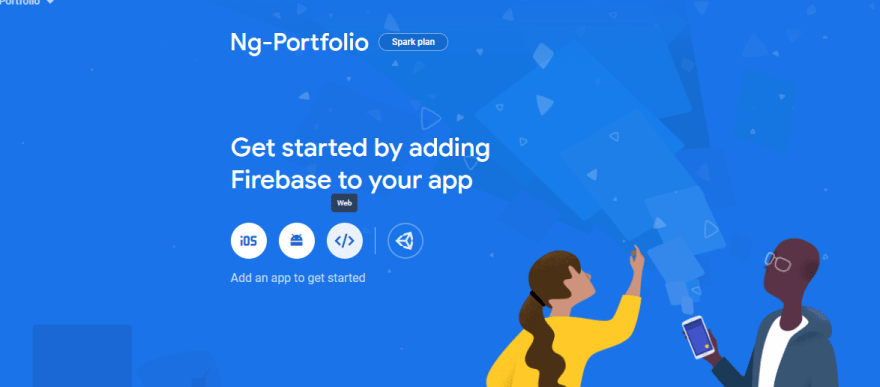
Navigate to the Firebase project that you created in the previous section of this tutorial. 👀
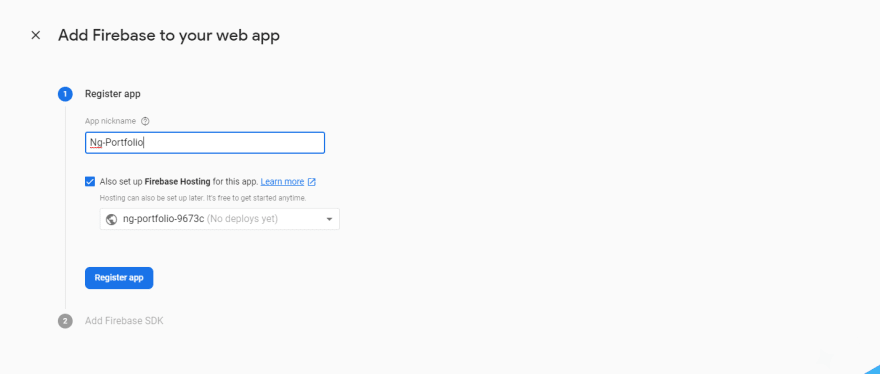
Add Firebase to your web app.
Provide an app name.
Be sure to select Firebase Hosting
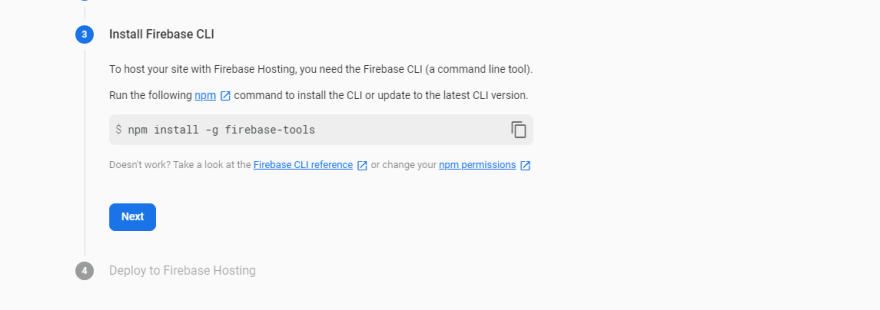
Install Firebase CLI.
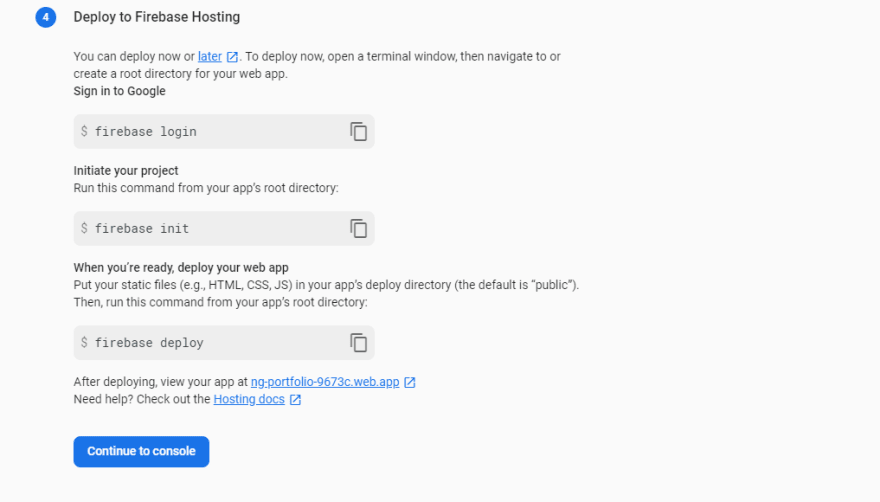
Retrieve hosting details. We'll need this when we actually host our application.
2. Installing AngularFire
Use the terminal you previously had open (hopefully inside your application) run the following command:
ng add @angular/fire
3. Installing Semantic UI
This is way too lengthy to include in this tutorial but there is an article which walks you through integrating Semantic UI with Angular. The author does an amazing job at explaining this. 💪
📄📄📄 Create pages 📄📄📄
These are the pages that the user will navigate to. The term "page" is misleading, because this is simply a component that will be treated as a page.
Open a terminal in the /pages directory and create a page (component) using the command:
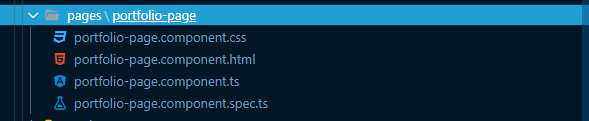
ng generate component portfolio-page
You'll end up with a folder with the following content
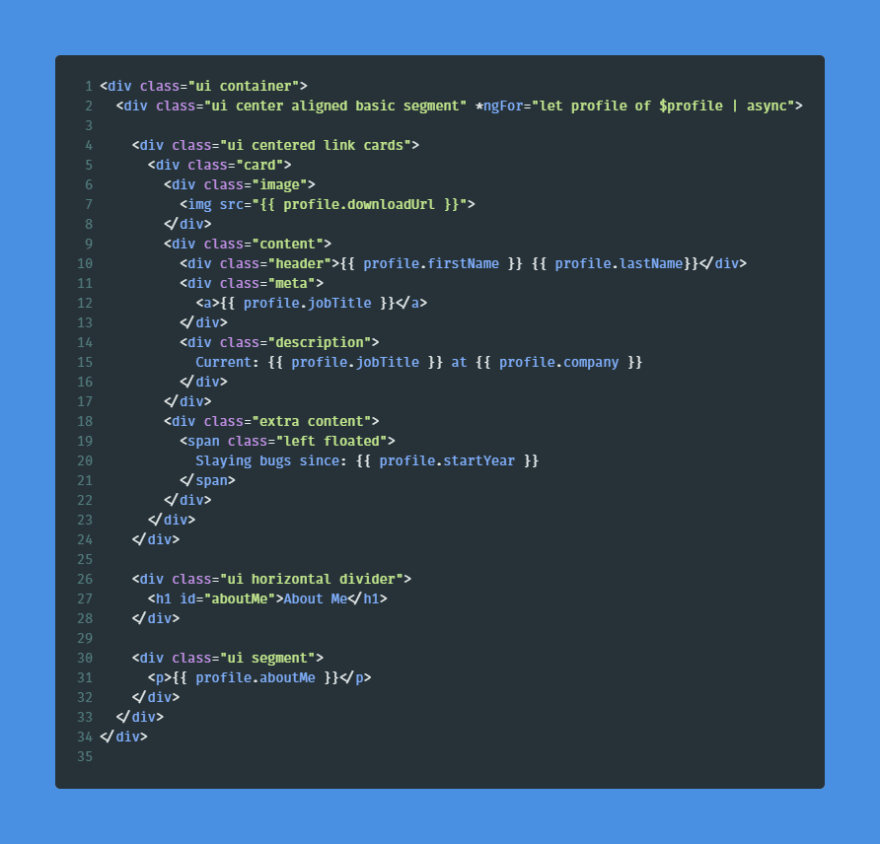
Inside portfolio-page.component.html, paste in the following:
<app-header></app-header>
<app-about-me></app-about-me>
<app-projects-list></app-projects-list>
<app-skills-list></app-skills-list>
<app-tools-list></app-tools-list>
<app-contact-form></app-contact-form>
This will be used as the main page for your portfolio, and all the components will be added inside this page.
Your IDE will probably light up, but rest assured, we will generate the components in the next few steps. 😉
🧬🧬🧬 Create interfaces 🧬🧬🧬
Interfaces are a nice way of creating a "blueprint" for data that you will be interacting with throughout your application.
The regular user will only really need one interface for the contact form component. This will dictate the shape of the data being input in the form, and the data written to the DB.
In your /interfaces directory, create a file named contact-form.interface.ts and add the following content to it:
export interface IContactForm {
  id?: string;
  name: string;
  email: string;
  message: string;
  contactNumber?: string;
  read: boolean;
  date: Date;
}
This will be used inside our contact form component.
🛰️🛰️🛰️ Create services 🛰️🛰️🛰️
Services are basically responsible for the transfer of data between your components and your data source.
We will only need one service here in order to fetch and display data on your portfolio.
To generate a service, navigate to your /services directory and run the command:
ng generate service data
Inside your data.service.ts file, add the following code:
import { Injectable } from '@angular/core';
import { AngularFirestore } from '@angular/fire/firestore';
import { IContactForm } from '../interfaces/contact-form.interface';

@Injectable({
  providedIn: 'root'
})
export class DataService {

  constructor(
    private firestore: AngularFirestore
  ) { }

  public createCollection(path: string) {
    return this.firestore.collection(path).valueChanges();
  }

  public saveContactDetails(details: IContactForm) {
    const { name, email, message, contactNumber } = details;
    return this.firestore.collection('email-list')
      .add({
        name,
        email,
        message,
        contactNumber,
        read: false,
        date: new Date()
      });
  }
}
🧱🧱🧱 Create components 🧱🧱🧱
Components are the basic building blocks of your application which can be added to other components(pages) in order to form a complete application.
To create the components which we added inside the portfolio-page.component.html, open up a terminal in your components directory and run:
ng g c about-me
ng g c contact-form
ng g c header
ng g c projects-list
ng g c skills-list
ng g c tools-list
You should end up with a components directory like the following:

For each of the following component files, add the following code to them:
about-me
about-me.component.html
about-me.component.ts

header
header.component.html

header.component.ts
The link to your resume is the download link to your resume which you uploaded to Firebase storage in the previous tutorial.

projects-list
projects-list.component.html

projects-list.component.ts

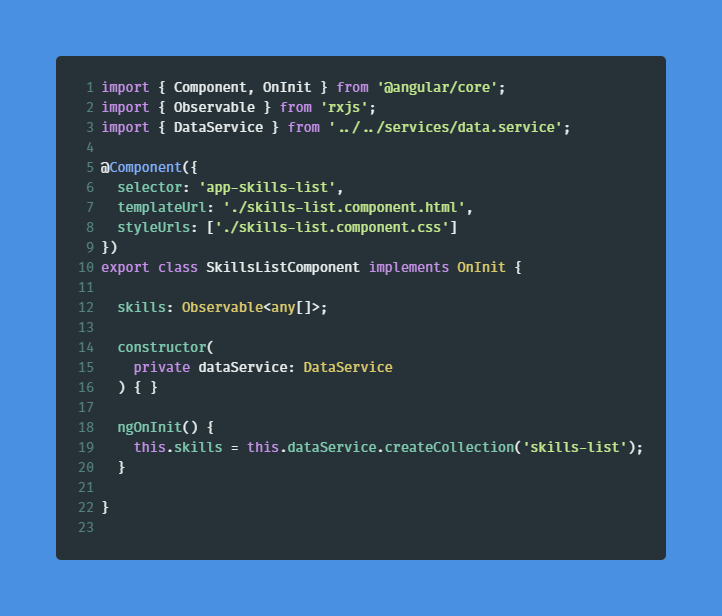
skills-list
skills-list.component.html

skills-list.component.ts
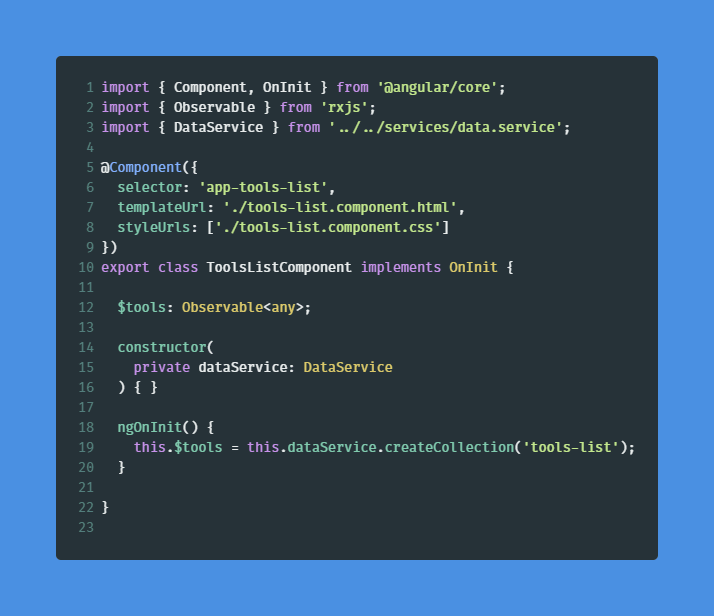
tools-list
tools-list.component.html

tools-list.component.ts
contact-form
The contact form contains a bit more code so I'll include the code instead, so you could copy and paste it in:
contact-form.component.html
<div class="ui container">
  <div class="ui horizontal divider">
    <h1>Contact Me</h1>
  </div>
  <form [ngClass]="formClassState" [formGroup]="contactMeForm" (ngSubmit)="sendEmail()">
    <div class="ui success message" *ngIf="!hideSuccess()">
      <div class="header">Message Submitted</div>
      <p>Your message has been sent.</p>
    </div>
    <h2 id="contact">Get In Touch</h2>
    <div class="fields">
      <div class="field">
        <label>
          Name
          <input placeholder="First Name" formControlName="name" type="text">
        </label>

        <div *ngIf="contactMeForm.get('name').invalid && (contactMeForm.get('name').dirty || contactMeForm.get('name').touched)" class="ui negative message">
          <div class="header">
            There were some errors with your name entry
          </div>
          <ul class="list">
            <li>Name is required.</li>
            <li>Name must consist of at least 2 letters.</li>
          </ul>
        </div>
      </div>

      <div class="field">
        <label>
          Email Address
          <input placeholder="Email" formControlName="email" type="email">
        </label>
        <div *ngIf="contactMeForm.get('email').invalid && (contactMeForm.get('email').dirty || contactMeForm.get('email').touched)" class="ui negative message">
          Must be a valid email.
        </div>
      </div>
    </div>

    <div class="fields">
      <div class="field">
        <label>
          Contact Number (Optional)
          <input placeholder="Contact Number" formControlName="contactNumber" type="text" maxlength="10">
        </label>
        <div *ngIf="contactMeForm.get('contactNumber').invalid && (contactMeForm.get('contactNumber').dirty || contactMeForm.get('contactNumber').touched)" class="ui negative message">
          <div class="header">
            Must be a valid contact number.
          </div>
          <ul class="list">
            <li>Contact number must be 10 digits.</li>
          </ul>
        </div>
      </div>
    </div>

    <div class='fields'>
      <div class="field">
        <label>
          Message
          <textarea placeholder="Enter your message here ..." formControlName="message"></textarea>
        </label>

        <div *ngIf="contactMeForm.get('message').invalid && (contactMeForm.get('message').dirty || contactMeForm.get('message').touched)" class="ui negative message">
          <div class="header">
            Message does not appear to be valid.
          </div>
          <ul class="list">
            <li>Message must be a <strong>minimum</strong> length of 10 characters.</li>
            <li>Message must be a <strong>maximum</strong> length of 200 characters.</li>
          </ul>
        </div>
      </div>
    </div>

    <button class="ui primary button" type="submit" [disabled]="!contactMeForm.valid">Send Email</button>
    <div class="ui error message"></div>
  </form>
</div>
contact-form.component.ts
import { Component, OnInit } from '@angular/core';
import { FormControl, FormGroup, Validators } from '@angular/forms';
import { DataService } from '../../services/data.service';

@Component({
  selector: 'app-contact-form',
  templateUrl: './contact-form.component.html',
  styleUrls: ['./contact-form.component.css']
})
export class ContactFormComponent implements OnInit {

  isLoading = false;
  isSuccessful = false;
  formClassState = 'ui equal width form segment';

  contactMeForm = new FormGroup({
    name: new FormControl('', [
      Validators.required,
      Validators.minLength(2)
    ]),
    contactNumber: new FormControl('', [
      Validators.maxLength(10),
      Validators.pattern('^(\\+\\d{1,2}\\s)?\\(?\\d{3}\\)?[\\s.-]?\\d{3}[\\s.-]?\\d{4}$')
    ]),
    email: new FormControl('', [
      Validators.required,
      Validators.email
    ]),
    message: new FormControl('', [
      Validators.required,
      Validators.minLength(10),
      Validators.maxLength(200)
    ])
  });

  constructor(private dataService: DataService) { }

  ngOnInit() {
  }

  public sendEmail() {
    this.toggleLoading();
    this.dataService.saveContactDetails(this.contactMeForm.value)
      .then(() => {
        this.toggleSuccess();
      })
      .catch(err => {
        console.error('An error has occurred: ', err.message);
      })
      .finally(() => {
        this.contactMeForm.reset();
        if (!this.isSuccessful) {
          this.toggleLoading();
        }
      });
  }

  public toggleLoading() {
    if (this.isLoading) {
      this.isLoading = false;
      this.formClassState = 'ui equal width form segment';
    } else {
      this.isLoading = true;
      this.formClassState = 'ui equal width form loading segment';
    }
  }

  public toggleSuccess() {
    if (this.isSuccessful) {
      this.isSuccessful = false;
      this.formClassState = 'ui equal width form segment';
    } else {
      this.isSuccessful = true;
      this.formClassState = 'ui equal width form segment success';
    }
  }

  public hideSuccess(): boolean {
    return this.contactMeForm.touched;
  }

}
🗝️🗝️🗝️ Create admin module 🗝️🗝️🗝️
We'll need to create the admin module which can be done by navigating to the admin directory and running the command:
ng generate module admin --routing=true
Navigate back to your app.module.ts and ensure that the following is included:
import { BrowserModule } from '@angular/platform-browser';
import { NgModule } from '@angular/core';

import { AppRoutingModule } from './app-routing.module';
import { AppComponent } from './app.component';
import { AboutMeComponent } from './components/about-me/about-me.component';
import { ContactFormComponent } from './components/contact-form/contact-form.component';
import { HeaderComponent } from './components/header/header.component';
import { ProjectsListComponent } from './components/projects-list/projects-list.component';
import { SkillsListComponent } from './components/skills-list/skills-list.component';
import { ToolsListComponent } from './components/tools-list/tools-list.component';
import { PortfolioPageComponent } from './pages/portfolio-page/portfolio-page.component';
import { ReactiveFormsModule } from '@angular/forms';
import { AngularFirestoreModule } from '@angular/fire/firestore';
import { AngularFireAuthModule } from '@angular/fire/auth';
import { AngularFireModule } from '@angular/fire';
import { environment } from '../environments/environment';
import { AngularFireStorageModule } from '@angular/fire/storage';

@NgModule({
  declarations: [
    AppComponent,
    AboutMeComponent,
    ContactFormComponent,
    HeaderComponent,
    ProjectsListComponent,
    SkillsListComponent,
    ToolsListComponent,
    PortfolioPageComponent
  ],
  imports: [
    BrowserModule,
    AppRoutingModule,
    ReactiveFormsModule,
    AngularFireModule.initializeApp(environment.firebaseConfig),
    AngularFirestoreModule,
    AngularFireAuthModule,
    AngularFireStorageModule
  ],
  providers: [],
  bootstrap: [AppComponent]
})
export class AppModule { }
In your app-routing.module.ts you want to add the following:
import { NgModule } from '@angular/core';
import { Routes, RouterModule } from '@angular/router';
import { PortfolioPageComponent } from '../app/pages/portfolio-page/portfolio-page.component';


const routes: Routes = [
  { path: '', component: PortfolioPageComponent },
  { path: 'home', component: PortfolioPageComponent },
  { path: 'auth', loadChildren: './admin/admin.module#AdminModule' },
  { path: '**', component: PortfolioPageComponent }
];

@NgModule({
  imports: [RouterModule.forRoot(routes)],
  exports: [RouterModule]
})
export class AppRoutingModule { }
We have now lazy-loaded our admin module. 💪
We will now create some directories as we did when we created our application. This will allow us to have a separate section for the admin, which will allow you to create, edit and remove skills. There will also be a messages page to view emails that users have submitted.
You should end up with the following app structure:

🧬🧬🧬 Create admin interfaces 🧬🧬🧬
Inside the /admin/interfaces directory, go ahead and create the following interface files:
form-fields.interface.ts
export interface IFormFields {
  label: string;
  formControlName: string;
  placeholder?: string;
}
form-modal.interface.ts
import { IFormFields } from './form-fields.interface';

export interface IFormModal {
  title: string;
  buttonText: string;
  isVisible: boolean;
  isEditing: boolean;
  formFields: Array<IFormFields>;
}
profile.interface.ts
export interface IProfile {
  id?: string;
  firstName: string;
  lastName: string;
  jobTitle: string;
  company: string;
  startYear: string;
  aboutMe: string;
}
🛰️🛰️🛰️ Create admin services 🛰️🛰️🛰️
The admin user has elevated privileges, hence we will need two services to be created:
- auth (for authentication)
- data (for data transfer)
In the /admin/services directory, run the following commands:
ng g service auth
ng g service data
Add the code to the following services.
auth.service.ts
import { Injectable } from '@angular/core';
import { AngularFireAuth } from '@angular/fire/auth';

@Injectable({
  providedIn: 'root'
})
export class AuthService {

  constructor(
    private firebaseAuth: AngularFireAuth
  ) { }

  public async login(email: string, password: string): Promise<firebase.auth.UserCredential> {
    return await this.firebaseAuth.auth.signInWithEmailAndPassword(email, password);
  }

  public async logout(): Promise<void> {
    return await this.firebaseAuth.auth.signOut();
  }
}
data.service.ts
import { Injectable } from '@angular/core';
import { AngularFirestore, AngularFirestoreCollection } from '@angular/fire/firestore';
import { map } from 'rxjs/operators';

@Injectable({
  providedIn: 'root'
})
export class DataService {

  constructor(
    private firestore: AngularFirestore
  ) { }

  public createCollection(collectionName: string): AngularFirestoreCollection {
    return this.firestore.collection(collectionName);
  }

  public getData(profileCollectionRef: AngularFirestoreCollection) {
    return profileCollectionRef.snapshotChanges().pipe(
      map(actions => {
        return actions.map(action => {
          const data = action.payload.doc.data();
          const id = action.payload.doc.id;
          return { id, ...data };
        });
      })
    );
  }

  public saveDownloadURL(documentId: string, downloadUrl: string, profileCollectionRef: AngularFirestoreCollection) {
    profileCollectionRef.doc(documentId).update({ downloadUrl });
  }

  public getMessagesCount() {
    return this.firestore.collection('email-list', message => message.where('read', '==', false)).valueChanges();
  }

}
Data should now be live as soon as we wire up our components. ✨
💂💂💂 Create admin auth-guard 💂💂💂
This will help prevent unauthorized access to you admin pages.
To generate a guard navigate to the guards directory run the command:
ng g guard auth
Be sure to select canActivate and paste the following code in the auth.guard.ts file:
import { Injectable } from '@angular/core';
import { CanActivate, ActivatedRouteSnapshot, RouterStateSnapshot, UrlTree, Router } from '@angular/router';
import { Observable } from 'rxjs';
import { first, map } from 'rxjs/operators';
import { AngularFireAuth } from '@angular/fire/auth';

@Injectable({
  providedIn: 'root'
})
export class AuthGuard implements CanActivate {
  constructor(
    private firebaseAuth: AngularFireAuth,
    private router: Router
  ) {}

  canActivate(
    next: ActivatedRouteSnapshot,
    state: RouterStateSnapshot): Observable<boolean | UrlTree> | Promise<boolean | UrlTree> | boolean | UrlTree {

    return this.firebaseAuth.authState.pipe(
      first(),
      map(user => {
        if (user) {
          return true;
        }
        this.router.navigate(['/']);
        return false;
      })
    );
  }

}
This will only allow user's who have been authenticated on your Firebase console, to access the admin page.
📄📄📄 Create admin pages 📄📄📄
By now we should be familiar with the process of generating new components so I'll skip the commands.
We'll create 3 components inside our /admin/pages directory and
create:
admin-pageauth-pagemessages-page
Add the following code to the respective pages:
admin-page.component.html
<app-header></app-header>
<app-admin-about-me></app-admin-about-me>
<app-projects-page></app-projects-page>
<app-skills-page></app-skills-page>
<app-tools-page></app-tools-page>
auth-page.component.html
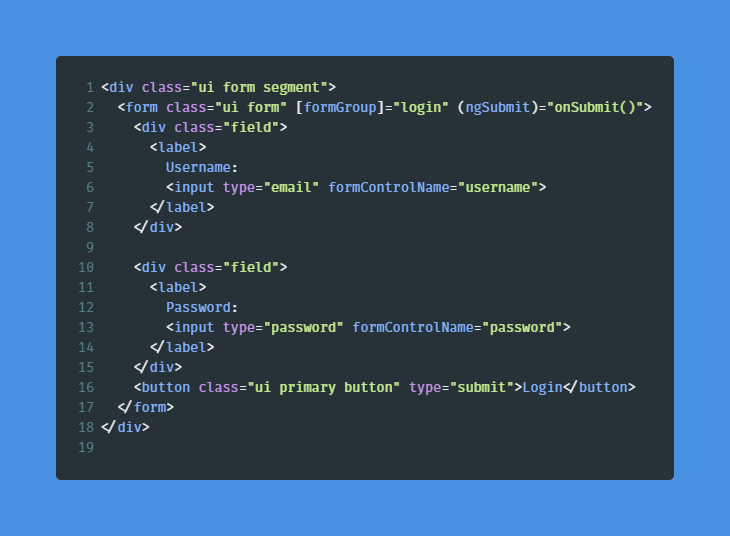
auth-page.component.ts

message-page.component.html
<app-header></app-header>
<app-admin-messages></app-admin-messages>
You should end up with the pages folder looking like this:

🧱🧱🧱 Create admin components 🧱🧱🧱
All the admin components are fairly similar to the components that you previously created, with some extra functionality.
You'll need to create the following:
admin-about-meadmin-messagesadmin-projects-listadmin-skills-listadmin-tools-listform-modal-
header
admin-about-me.component.html

admin-about-me.component.ts

admin-messages.component.html

admin-messages.component.ts

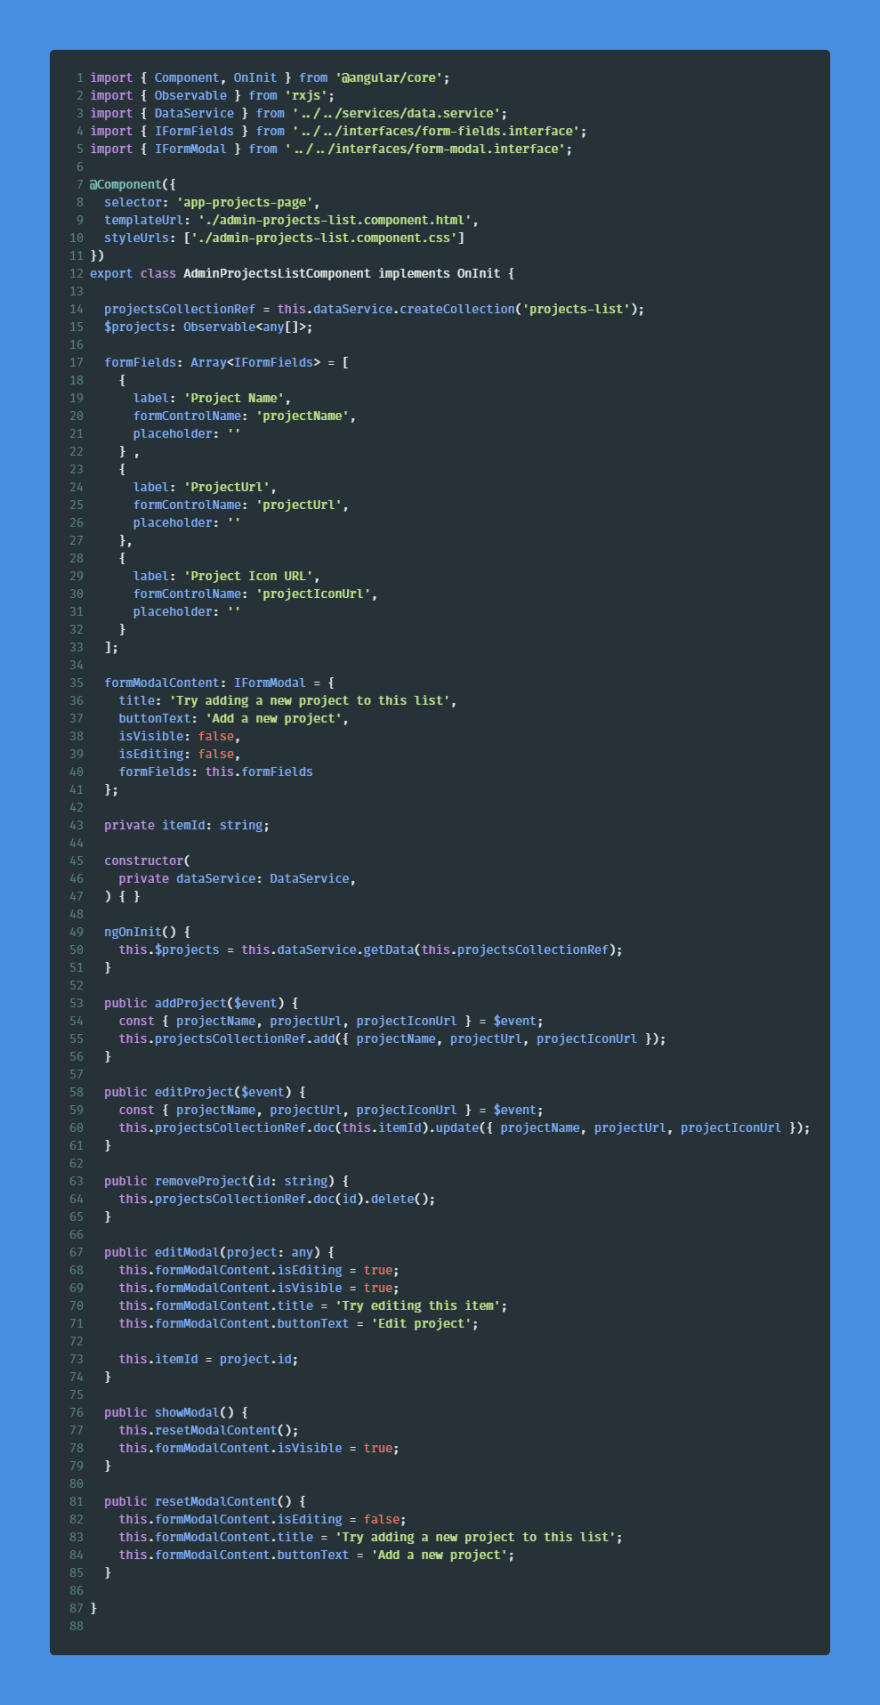
admin-projects-list.component.html

admin-projects-list.component.html
admin-skills-list.component.html

admin-skills-list.component.ts

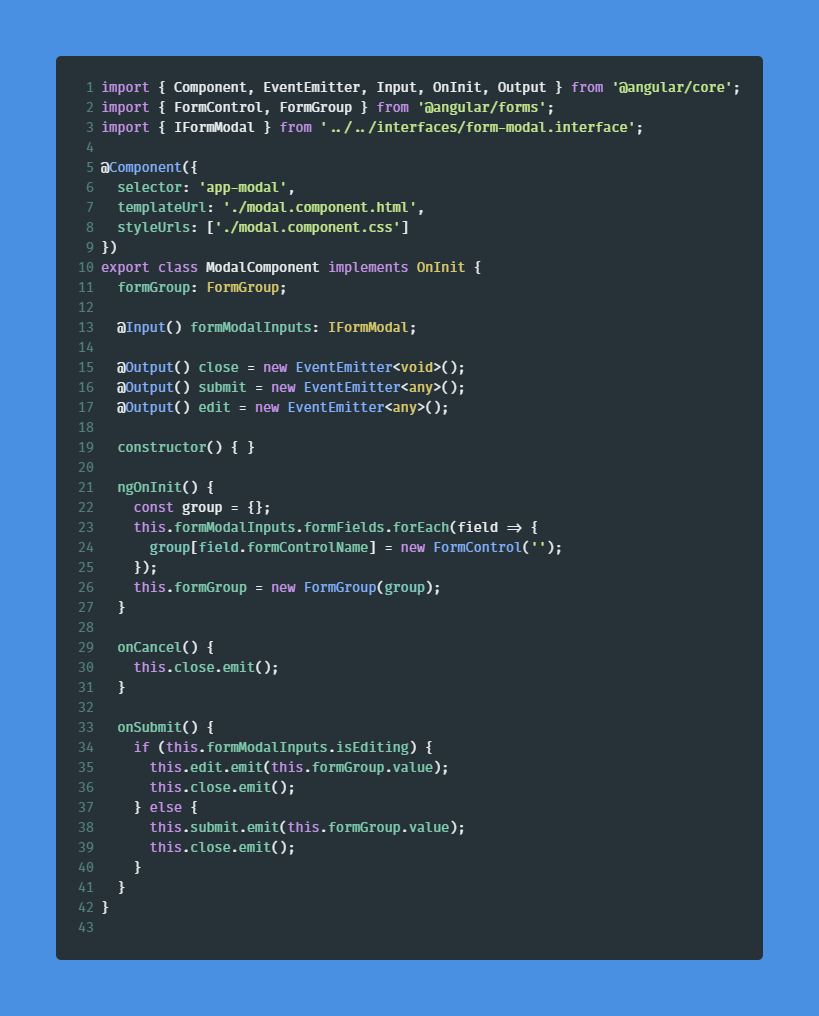
form-modal.component.html

form-modal.component.ts
header.component.html

header.component.ts

My apologies for adding all the screenshots, instead of code that could be copied and pasted. I figured I'd rather have you type this out and get the feel for the components that you're creating. 😅
🌍🌍🌍 Set up environment 🌍🌍🌍
We're almost there! Let's set up our environment files so we can connect to Firebase!
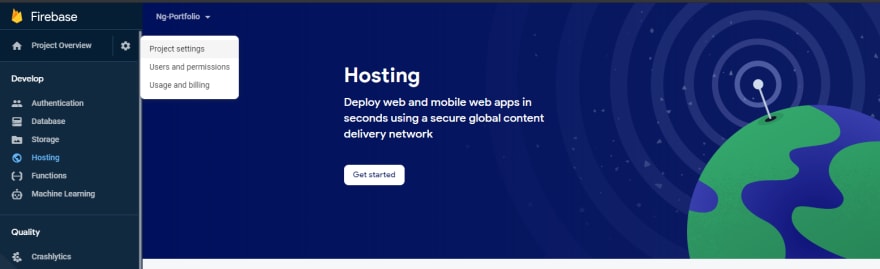
You'll need to navigate to your Firebase project and select "Project settings":
Copy the config content:

and paste it in both your environment.ts and environment.prod.ts files:
environment.ts
export const environment = {
  production: false,
  firebaseConfig: {
    apiKey: "<credentials>,
    authDomain: "<credentials>",
    databaseURL: "<credentials>",
    projectId: "<credentials>",
    storageBucket: "<credentials>",
    messagingSenderId: "<credentials>",
    appId: "<credentials>"
  }
};
environment.prod.ts
export const environment = {
  production: true,
  firebaseConfig: {
    apiKey: "<credentials>,
    authDomain: "<credentials>",
    databaseURL: "<credentials>",
    projectId: "<credentials>",
    storageBucket: "<credentials>",
    messagingSenderId: "<credentials>",
    appId: "<credentials>"
  }
};
🚀🚀🚀 Build and Deploy 🚀🚀🚀
We're in the Endgame now...
Let's try out our app by running ng serve there shouldn't be any errors, but you should see a blank page with a few headings:

Navigate to the /auth section and enter the email and password of the authenticated account that you're using:

If you entered your password correctly you will gain access to the admin page:
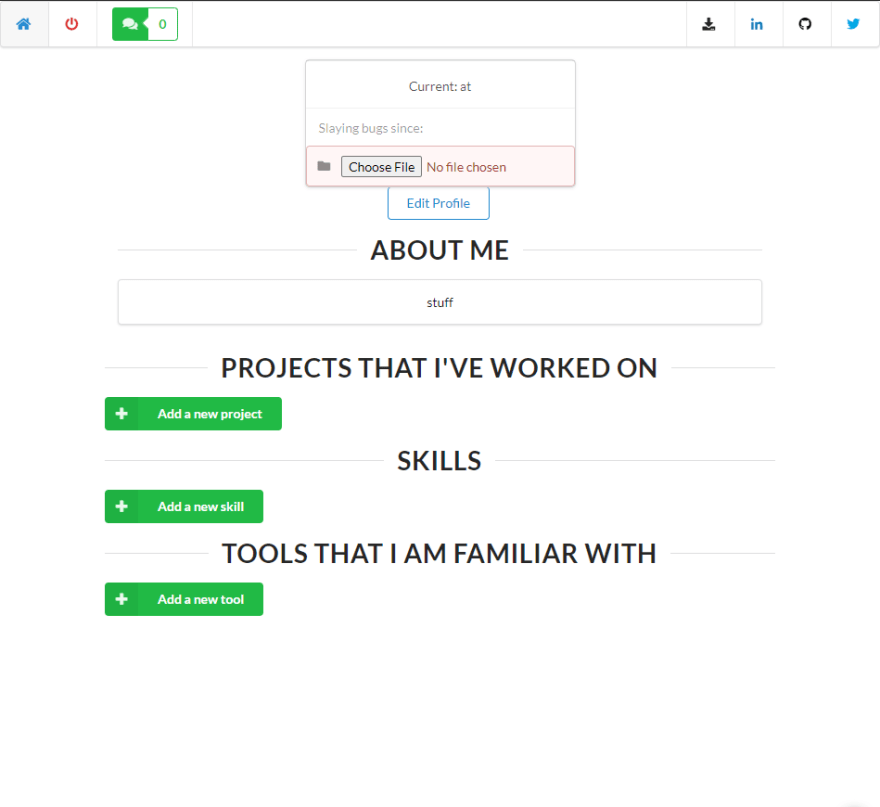
This will be super bare but you can go ahead and add some content. 👍
Now that we know everything works, let's deploy our application.
🔥🔥🔥 Firebase Init 🔥🔥🔥
Run the following commands in your terminal:
firebase login
You'll be prompted to enter your password and the cli will handle the rest.
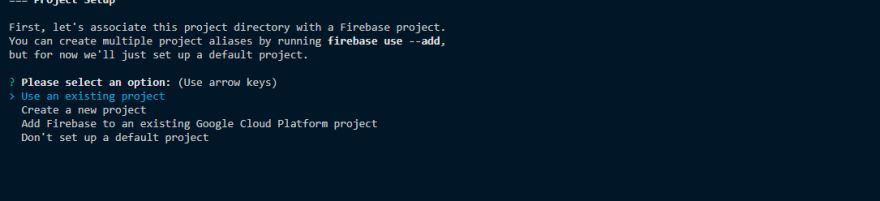
firebase init

Be sure to select Firestore and Hosting

Select an existing app and be sure to select the application that you created in the previous half of this tutorial:
Ensure that the public directory is the same as the build 'outputPath' in the angular.json

Lastly ensure that you configure this as a single page application
🧱🧱🧱 Ng Build 🧱🧱🧱
Be sure to remove the /dist directory before building your application:
ng build --prod
This will create a production build for us:

🚀🚀🚀 Firebase Deploy 🚀🚀🚀
Now that your app has successfully been built, let's deploy it to Firebase!
Open a terminal in the directory containing the built project and run the command:
firebase deploy --only hosting
When this completes successfully you will be able to click the link and view the hosted version of your portfolio site!!

🎉🎉🎉 AND WE ARE DONE !!! 🎉🎉🎉
This has been one insane journey and I hope this helps.
Don't forget to check out my Github and collaborate with me on this project... I plan on adding cooler features and making some awesome changes in the near future 😜

Top comments (5)
I like your article, I think that it is very useful to understand how to connect Angular with Firebase. Thanks so much for this article.
Thank you for this awesome tutorial ❤️
Thank you so much for this awesome portfolio tutorial.
Hello my Friend. Do you not configure Sdk in Firebase or not is necessary?. Tks.
Hi there, apologies for the late response. This is set up by firebase and your credentials are generated automatically. Essentially it's the firebaseConfig that gets used in the environment.ts files