
Originally published on Medium.
The holiday season gives us good downtime to relax and reflect on the past year and to prepare for the New year. For me, this year had a lot of things in store, I started Android Development, fell in love with Kotlin, attended my first AndroidDevSummit at Computer History Museum which was also the 10 years celebration of Android and most importantly met a lot of amazing people & made some new good friends.
For a long time, I wanted to develop a custom annotation processor as its present everywhere in android. I finally developed one, learned a lot of things in the process and I’m excited to share my learnings.
Android is filled with annotations whether it’s a simple @Override for a class or a @BindView from ButterKnife. Annotation along with code generation makes our life easier. It assists in the principle of DRY (Don’t Repeat Yourself) and helps us in developing a better application easily and quickly. In this article, we are going to learn a basic annotation processor written in Kotlin for an Android application. We will also be generating the code ourselves without using any custom libraries like KotlinPoet or JavaPoet.
Let’s get started…
Understanding how Annotation Processing Works
Annotations are metadata. We can add annotations metadata to any class, methods or parameters by adding @ in front of them.
Java compiler does an exhaustive search and finds all the elements in the project annotated by our annotations and pass it to the Annotation Processor to process them.
Annotation processor gets all the elements with annotations, their types and the process environment.
The annotation processor then processes the received elements and in our case, we generate the required class files.
References for more detailed explanation:
Annotation Processing in a Kotlin World by Henri Zac Sweers
Annotation Processing Boilerplate Destruction by Jake Wharton
MerryAnnotation — Overview
In MerryAnnotation, we will be generating a “Merry Christmas” greeting by annotating a Greeter class.
Our MainActivity will look like as follows:
package io.navendra.merryannotation

import android.support.v7.app.AppCompatActivity
import android.os.Bundle
import io.navendra.annotation.GreetingGenerator
import kotlinx.android.synthetic.main.activity_main.*

class MainActivity : AppCompatActivity() {

    val TAG = MainActivity::class.java.simpleName

    @GreetingGenerator
    class Santa

    override fun onCreate(savedInstanceState: Bundle?) {
        super.onCreate(savedInstanceState)
        setContentView(R.layout.activity_main)
        val textView = greetingView
        textView.text = Generated_Santa().greeting()
    }
}
As you can see we have created a “class Santa” on line 13 and annotated it with our custom @GreetingGenerator annotation. We are then using the greeting() method of “Generated_Santa” class in line 19 and setting our textView text with the returned greeting.
The “Generated_Santa class” is generated automatically on runtime with a method greeting() that returns a string. This is our final goal!
Github Link
If you directly want to jump straight to the full source code then visit here.
Otherwise, follow through the whole blog for a detailed step by step implementation of a custom annotation processor using Kotlin.
Creating Annotation and CodeGen Module
We will work in multi-module format. Follow the steps below to set up a multi-module project in Android Studio.
- Create a New Project in Android Studio and check Kotlin Support.
- Create a New Module from File > New > New Module > Java Library.
- Name Java Library as “annotation”. In this module, we will include all our custom annotations in this module.
- Repeat the above steps to create a new module and name it “codegen”. We will include all our code generation logic here. At this stage, we have four build.gradle files — app, annotation, codegen, and project.Modify them as shown below
build.gradle (Module: app)
apply plugin: 'kotlin-kapt'
dependencies {
    ...
    implementation project(':annotation')
    kapt project(':codegen')
}
build.gradle (Module: annotation)
apply plugin: 'kotlin'

dependencies {
    implementation fileTree(dir: 'libs', include: ['*.jar'])
    implementation "org.jetbrains.kotlin:kotlin-stdlib-jdk7:$kotlin_version"
}

sourceCompatibility = "7"
targetCompatibility = "7"

repositories {
    mavenCentral()
}
compileKotlin {
    kotlinOptions {
        jvmTarget = "1.8"
    }
}
compileTestKotlin {
    kotlinOptions {
        jvmTarget = "1.8"
    }
}
build.gradle (Module: codegen)
apply plugin: 'kotlin'
apply plugin: 'kotlin-kapt'

kapt {
    generateStubs = true
}

sourceSets {
    main {
        java {
            srcDir "${buildDir.absolutePath}/tmp/kapt/main/kotlinGenerated/"
        }
    }
}

dependencies {
    kapt project(":annotation")
    compileOnly project(':annotation')
    implementation fileTree(include: ['*.jar'], dir: 'libs')
    implementation "org.jetbrains.kotlin:kotlin-stdlib-jdk7:$kotlin_version"

    // configuration generator for service providers
    implementation "com.google.auto.service:auto-service:1.0-rc4"
    kapt "com.google.auto.service:auto-service:1.0-rc4"

}

sourceCompatibility = "7"
targetCompatibility = "7"
Let's understand what we are doing here. In our app module, we have added dependencies for the annotation module and using kapt (Kotlin annotation processor) for codegen module which is our custom annotation processor.
For annotation and codegen module build.gradle we have just transformed it from Java-library to Kotlin library. In Codegen, we have also added AutoService dependencies to link services.
Creating our Custom Annotation in Annotation Module
Create a new Kotlin file in annotation module and name it GreetingGenerator. Kotlin has great support for annotation classes and we will be using Kotlin’s annotation class to create our custom annotation as follows:
//GreetingGenerator.kt
package io.navendra.annotation
/**
* Custom Annotation class
* For more information check - "https://kotlinlang.org/docs/reference/annotations.html"
*/
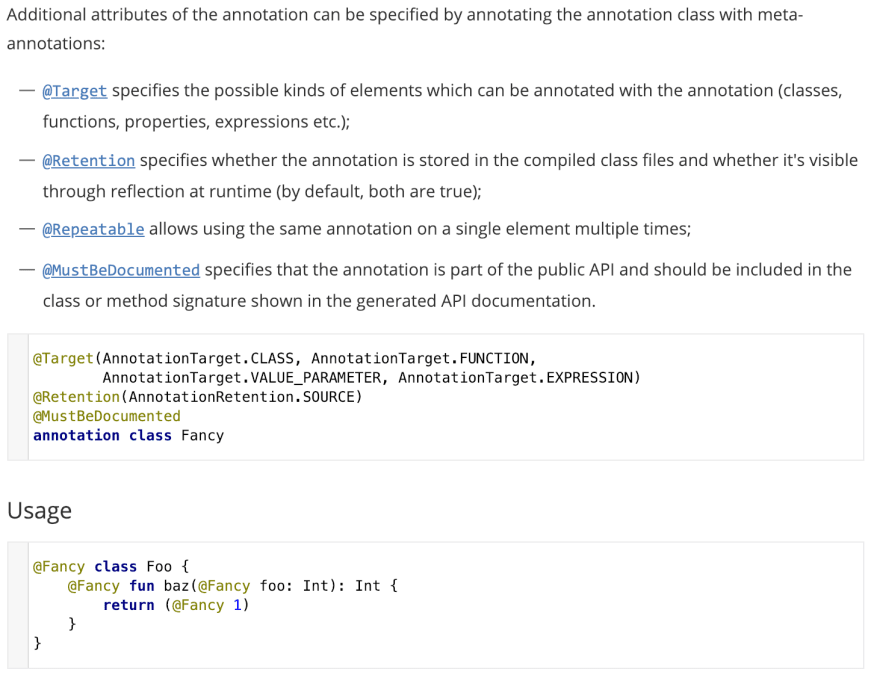
@Target(AnnotationTarget.CLASS)
@Retention(AnnotationRetention.SOURCE)
@MustBeDocumented
annotation class GreetingGenerator
Here we have created a new annotation class GreetingGenerator with attributes as required. The additional attributes are described as below. (Shamelessly copied from Kotlin Docs. Can be found here.)
Creating our custom Annotation Processor in CodeGen Module
Create a new Kotlin file in codegen module and name it FileGenerator. Create a new class FileGenerator and extend it from AnnotationProcesor class which will provide us with environment data which will be useful for generating code.
package io.navendra.codegen

import com.google.auto.service.AutoService
import io.navendra.annotation.GreetingGenerator
import io.navendra.codegen.simplePoet.KotlinClassBuilder
import java.io.File
import javax.annotation.processing.*
import javax.lang.model.SourceVersion
import javax.lang.model.element.TypeElement

@AutoService(Processor::class) // For registering the service
@SupportedSourceVersion(SourceVersion.RELEASE_8) // to support Java 8
@SupportedOptions(FileGenerator.KAPT_KOTLIN_GENERATED_OPTION_NAME)
class FileGenerator : AbstractProcessor(){

    override fun getSupportedAnnotationTypes(): MutableSet<String> {
        return mutableSetOf(GreetingGenerator::class.java.name)
    }

    override fun getSupportedSourceVersion(): SourceVersion {
        return SourceVersion.latest()
    }


    override fun process(set: MutableSet<out TypeElement>?, roundEnvironment: RoundEnvironment?): Boolean {

        roundEnvironment?.getElementsAnnotatedWith(GreetingGenerator::class.java)
            ?.forEach {
                val className = it.simpleName.toString()
                val pack = processingEnv.elementUtils.getPackageOf(it).toString()
                generateClass(className, pack)
            }
        return true
    }

    private fun generateClass(className: String, pack: String){
        val fileName = "Generated_$className"
        val fileContent = KotlinClassBuilder(fileName,pack).getContent()

        val kaptKotlinGeneratedDir = processingEnv.options[KAPT_KOTLIN_GENERATED_OPTION_NAME]
        val file = File(kaptKotlinGeneratedDir, "$fileName.kt")

        file.writeText(fileContent)
    }

    companion object {
        const val KAPT_KOTLIN_GENERATED_OPTION_NAME = "kapt.kotlin.generated"
    }

}
Let’s see what we are doing here.
process() Method
- This is one of the most important method of the class, here we write our processing logic. Override this method. We receive RoundEnvironment in the method which we will use to get all the elements annotated with a GreetingGenerator annotation as shown in the following line:
roundEnvironment
    ?.getElementsAnnotatedWith(GreetingGenerator::class.java)
- This gives us a list of elements annotated with our annotation. Then for each element, we will get class name, package name and then generateClass which is our custom function to generate code during compile time as shown in the following lines:
?.forEach {
    val className = it.simpleName.toString()
    val pack = processingEnv.elementUtils
                     .getPackageOf(it).toString()
    generateClass(className, pack)
}
generateClass Method
In this method, we write logic to generate our class. First, we get fileName and use our Custom KotlinClassBuilder class to generate required file content as shown:
val fileName = "Generated_$className"
val fileContent = KotlinClassBuilder(fileName,pack).getContent()
Then we get the destination directory and create a new file in that directory with previously obtained fileContent as shown:
val kaptKotlinGeneratedDir = processingEnv
                         .options[KAPT_KOTLIN_GENERATED_OPTION_NAME]
val file = File(kaptKotlinGeneratedDir, "$fileName.kt")         file.writeText(fileContent)
The KAPT_KOTLIN_GENERATED_OPTION_NAME is defined in the component object as “kapt.kotlin.generated” which is directory from which kapt will compile all the files together with main sources.
Here, we could have generated our file content using any code generator library like KotlinPoet but for learning purpose, lets build our simple CodeGenerator too.
KotlinClassBuilder — Our custom CodeGenerator
Create a KotlinClassBuilder class and add getContent() method which returns the required fileContent string as shown:
package io.navendra.codegen.simplePoet

/**
 * Custom Kotlin Class Builder which returns file content string
 * This is for learning purpose only.
 * Use KotlinPoet for production app
 * KotlinPoet can be found at https://github.com/square/kotlinpoet
 */
class KotlinClassBuilder(className: String,
                         packageName:String,
                         greeting:String = "Merry Christmas!!"){

    private val contentTemplate = """
        package $packageName
        class $className {
             fun greeting() = "$greeting"
        }
    """.trimIndent()

    fun getContent() : String{

        return contentTemplate

    }

}
Here we have added className, package, and greeting as constructor variables and used them to generate our file content. As we know we need to generate following final class:
package <package_name>
class <class_name> {
    fun greeting() = "<greeting>"
}
In this KotlinClassBuilder, we have used String templating and generated the above string by passing the appropriate package Name, class name, and greeting.
Hit Run
Finally hit build and check app > build > generated >kaptKotlin > debug, it will contain our generated class — Generated_Hello() as required.
Now hit run and you will be greeted with an activity with a textView saying “Merry Christmas!!”.
Happy Coding & Merry Christmas!

Top comments (0)