Read the original at CodeThat.today
Open-source software is by definition, open to inspect, modify and contribute. This solely created a thriving community and ecosystem of sharing and collaboration between academics, businesses and individuals.
Nowadays, the worlds biggest organisations, rely on open source software for day to day operations. Many of them also take it into the next level, by open sourcing their internal tooling and creating more helpfulness. Some prolific examples include Apache Cassandra and Kafka.
In this series, we are going exploring popular and authentic open source projects, talk about their history and look at their architecture. We aim to help future contributors or interest parties, better understand their structure, their usage, logic, reasoning and their limitations. After all, software is meant to be read and be maintainable if it has the right to last over time.
Let's launch our series with a exceptionally interesting project,, which is the redis-py which is a Redis Python Client. In the first part we are going to walk though the project documentation, structure and git history and issues. In the following part we are going more in detail about how to install and use it, the code structure and analysis, how to test and how to contribute.
Let's get started.
Overview
The project is listed on Github. It's also listed in the PyPi package index and the latest version is 3.3.8 which was released on Aug 19, 2019.
The Github repo has more than 7800 stars which is very good and it's maintained by Andy McCurdy.
Documentation
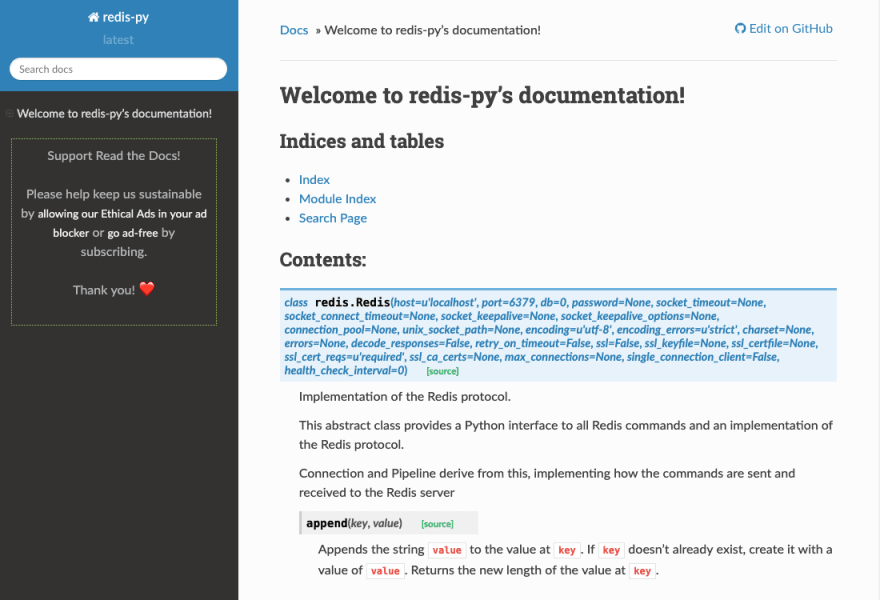
The docs are listed in a readthedocs repo although it's one big reference page so it's quite raw to read. Most of the official documentation is located in the Readme file.
Overall the documentation is extensive but it could help it if we had more examples.
Folder Structure
The project follows a traditional Python Project structure:
➜ tree .
.
├── CHANGES
├── INSTALL
├── LICENSE
├── MANIFEST.in
├── README.rst
├── RELEASE
├── benchmarks
│   ├── __init__.py
│   ├── base.py
│   ├── basic_operations.py
│   ├── command_packer_benchmark.py
│   └── socket_read_size.py
├── build_tools
│   ├── bootstrap.sh
│   ├── build_redis.sh
│   ├── install_redis.sh
│   ├── install_sentinel.sh
│   ├── redis-configs
│   │   ├── 001-master
│   │   └── 002-slave
│   ├── redis_init_script
│   ├── redis_vars.sh
│   ├── sentinel-configs
│   │   ├── 001-1
│   │   ├── 002-2
│   │   └── 003-3
│   └── sentinel_init_script
├── docs
│   ├── Makefile
│   ├── _static
│   ├── _templates
│   ├── conf.py
│   ├── index.rst
│   └── make.bat
├── redis
│   ├── __init__.py
│   ├── _compat.py
│   ├── client.py
│   ├── connection.py
│   ├── exceptions.py
│   ├── lock.py
│   ├── sentinel.py
│   └── utils.py
├── setup.cfg
├── setup.py
├── tests
│   ├── __init__.py
│   ├── conftest.py
│   ├── test_commands.py
│   ├── test_connection_pool.py
│   ├── test_encoding.py
│   ├── test_lock.py
│   ├── test_monitor.py
│   ├── test_multiprocessing.py
│   ├── test_pipeline.py
│   ├── test_pubsub.py
│   ├── test_scripting.py
│   └── test_sentinel.py
├── tox.ini
└── vagrant
    └── Vagrantfile

10 directories, 51 files
Here is the breakout of the folders:
-
benchmarks: Contains benchmarking tests for the most important operations. docs: Contains the assets for the documentation site on readthedocs which it uses Sphinx Docs.tests: Contains the main test suite.build_tools: Contains provision scripts for the Vagrantfile located in the folder. This is used for running Redis and Redis Sentinel inside a VM.redis: Contains the main source code of the client library.
Important project Files
The project level files are:
-
CHANGES: The changelog of the project. It has information starting from v2.2.0 up to the latest. -
RELEASE: Information about the release process. This is very simple and clear. -
INSTALL: Information on how to install the library. It's recommended to use python setup tools:
python setup.py install
-
README.rst: The Readme documentation of the project. -
LICENSE: MIT License -
setup.py: The setup file for installing and releasing the project. It specifies support for the following python versions:
python_requires=">=2.7, !=3.0.*, !=3.1.*, !=3.2.*, !=3.3.*",
For testing it requires pytest and mock:
tests_require=[
        'mock',
        'pytest>=2.7.0',
    ],
If you notice it requires hiredis which is a minimalistic Redis Client written in C:
extras_require={
        'hiredis': [
            "hiredis>=0.1.3",
        ],
    },
As mentioned in the Readme, by default, redis-py will attempt to use the HiredisParser included in the hiredis module and will fallback to the PythonParser otherwise. This is purely for performance reasons as Hiredis can provide up to a 10x speed improvement in parsing responses from the Redis server.
Git history
The project has good stats with more than 1300 commits and 174 contributors:
The commit history is spread out over the years with some occasional spikes. Here are the top 4 contributors:
The project started in Nov 1, 2009 which is a few months after Redis was born in Mar 22, 2009.
The earliest releases start from v2.4.6 which is after the 273th commit.
Important Issues
We explore some of the important issues that are recorded in the repo issue tracker.
The project currently has 140 open issues out of the 556 all together, which is fairly high. It has quite a lot of open pull requests (57) and the last merged commit was done 20 days ago.
Here is the breakdown of the top 10 most commended PRs:
Most of those PRs are optional and not needed as commended by Andy.
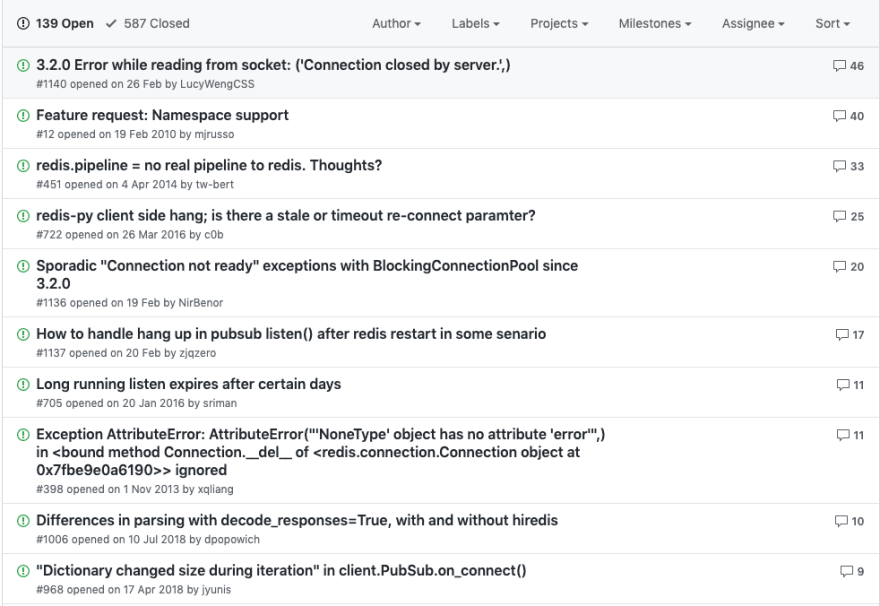
Here is the breakdown of the top 10 most commended Issues:
It looks like that after the 3.2.0 release there were some connectivity issues with the library in certain scenarios. If we look at the changelog for that version:
- Added support for
select.pollto test whether data can be read on a socket. This should allow for significantly more connections to be used with pubsub. Fixes #486/#1115
This was a major change because it changes the select strategy when polling for changes from the socket.
The other issues are sporadic connection problems.
Installation
Now that we have a good grasp of the project details, let's try to install it and run it in the repl.
First you need to have Redis installed. Follow those instructions here.
Next create a test folder and a python virtual env:
$ python3 -m venv .env
source .env/bin/activate
Clone the repository and run the setup process:
$ git clone git@github.com:andymccurdy/redis-py.git && cd redis
$ python setup.py develop
$ pip install hiredis
In a different terminal start the Redis Server:
$ redis-server &
Check that you can connect to the server using the redis-cli tool:
➜ redis-cli
127.0.0.1:6379> INFO
# Server
redis_version:5.0.0
...
Now let's start a Python repl and try to run a few queries with Redis.py:
$ python3
Python 3.7.3 (default, Mar 27 2019, 09:23:39)
[Clang 10.0.0 (clang-1000.11.45.5)] on darwin
Type "help", "copyright", "credits" or "license" for more information.
>>> import redis
>>> r = redis.Redis(host='localhost', port=6379, db=0)
>>> r
Redis<ConnectionPool<Connection<host=localhost,port=6379,db=0>>>

>>> r.hset("dictionary", "Abate", "become less intense or widespread")
1
>>> r.hget("dictionary", "Abate")
b'become less intense or widespread'

>>> r.hkeys("dictionary")
[b'Abate']
Most of the commands have the same name with the Redis command list
Next Part
In the next part of this series we are going more in-depth and explore the code that runs the library. Hopefully we can learn some amazing architectural patterns and tricks.


Top comments (3)
Nice article, I liked a lot but couldn't find anything related with architectures. I suppose you would talk about the files and folders and the reason for them or an explanation at a high level of the code.
I broke the article in two parts so it's easier to read. Architecture evolves over time so I thought it was important to describe the overall picture of the project first after so many years in development.
Thanks for the answer. Waiting for the next article to read ;)