The ::before and ::after pseudo-elements in CSS allows us to insert content onto a page without it needing to be in the HTML.
1. Some people gets confused in colons. Let me clarify this doubt first. It is used to be single colon initially, but in order to distinguish between pseudo classes (example- :hover) and pseudo elements, single colon (:) gets reserved for pseudo classes and double colon (::) for pseudo elements in CSS3. Although, browsers still support single colon (:), the correct way is to use double colon (::).
2. For pseudo elements "::before" and "::after" to work we must include the "content" property in the ::before (::after) block.
here, we are applying ::before to p (paragraph element):
p::before{
    content: "anything you want";
    }
3. As the name clearly signifies using ::before will let us add content before our text and using ::after will let us add content after our text.
4. default pseudo elements have "display: inline".
  ```html
  <!DOCTYPE html>
  <html lang="en">
  <head>
         <meta charset="UTF-8">
         <meta http-equiv="X-UA-Compatible" content="IE=edge">
         <meta name="viewport" content="width=device-width, initial-scale=1.0">
         <title>Document</title>
         <style>
                  p::before{
                        content: "Hi! ";
                        background-color: red;
                        color: white;
                     }
         </style>
  </head>

  <body>
        <p>How are you doing</p>
  </body>
  </html>
  ```
![]()
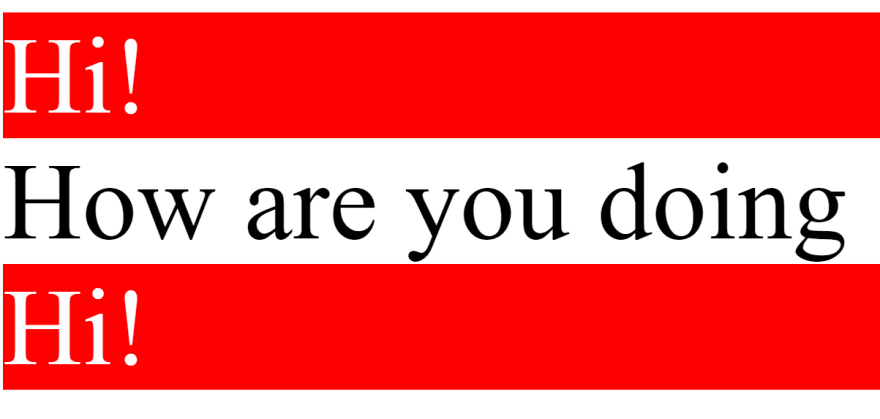
If we give "display: block" to the pseudo elements they will behave like block elements:
p::before{
            content: "Hi!";
            color: white;
            background-color: red;
            display: block;
        }

        p::after{
            content: "Hi!";
            color: white;
            background-color: red;
            display: block;
        }
5. The properties in "p::before" will get applied to the content and not the whole paragraph element.

6. Whatever we write with pseudo elements is actually not in the DOM and hence we cannot copy it.

See "Hi!" is not selected.
7. The above pseudo elements property can also be applied on image:
- On image
p::before{
            content: url("image address");
            color: white;
            background-color: red;
        }
Let us create this by applying ::before on image👇

Below 👇 is the code for the same:
<!DOCTYPE html>
<html lang="en">
<head>
    <meta charset="UTF-8">
    <meta http-equiv="X-UA-Compatible" content="IE=edge">
    <meta name="viewport" content="width=device-width, initial-scale=1.0">
    <title>Document</title>
    <style>

    body{
        margin: 0;
        padding: 0;
        display: flex;
        flex-direction: column;
        position: relative;
    }

    .navigation-bar{
        display: flex;
        color: white;
        padding: 0.8rem;
        font-size: 12px;
        justify-content: space-around;
    }

    .main-div{
        display: flex;
        flex-direction: column;
        justify-self: center;
        align-self: center;
        justify-content: center;
        align-items: center;
        color: white;
        flex-grow: 1;
        height: 50vh;
        width: 50vw;
        text-align: center;
    }

    .description{
        font-size: 8px;
    }

    .main-div::before{
        content: url("https://picsum.photos/750/400");
        position: absolute;
        z-index: -1;
        opacity: 0.4;
    }

    </style>
</head>

<body>
    <nav class="navigation-bar">
        <p>Home</p>
        <p>Select the route</p>
        <p>Testimonials</p>
        <p>Contact Us</p>
    </nav>
    <div class="main-div">
        <p class="main-line">Cycling Is Meditation</p>
        <p class="description">Lorem ipsum dolor sit amet consectetur adipisicing elit. Neque consequuntur omnis error doloremque eveniet sint cum, nesciunt magni. Temporibus placeat hic incidunt velit nisi quo possimus! Sint odio, adipisci consectetur eveniet fuga, quibusdam laboriosam libero quas praesentium provident dolore corporis!</p>
    </div>
</body>
</html>
Ok, don't panic, if you do not understand the above code. I showed the above code only to let you know that we can give images in the background using these pseudo classes.
Just concentrate on this:
.main-div::before{
        content: url("https://picsum.photos/750/400");
        position: absolute;
        z-index: -1;
        opacity: 0.4;
    }
Here☝️ we gave "position: absolute" so that the image behaves relative to body (irrespective of the document flow). I gave z-index -1 as the image was covering our text and gave opacity to image so that we can see the text clearly.
(if you wanna understand flex, z-index and opacity more clearly read my blogs on these topics.)
I hope the above article helps you in some way
I write one article every day related to web-development. Follow me here if you are learning the same.
Have an awesome day ahead 😀!
my twitter handle: @therajatg

Top comments (2)
this is really helpful.
Thanks Linc