
Need to create an IOT HUB ?
Trying to authenticate a connection to an IoT device using a Raspberry Pi device simulator?
Let's create one together... First, let's try to understand what Azure IOT is.
What is Azure IOT Hub ?
Azure IoT Hub is a cloud service within Microsoft Azure that facilitates secure and scalable communication between IoT applications and the devices they manage. Azure IoT Hub provides a cloud-hosted solution back end to connect any device virtually.
It seamlessly integrates with other Azure services, allowing developers to build end-to-end solutions, and provides monitoring and diagnostics capabilities for tracking solution health and performance.
Now create an Azure IOT HUB via Azure portal using these basic steps:
Step 1:
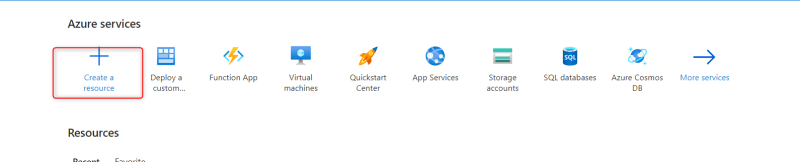
Log in to the Azure portal, Locate virtual Machine on the Azure portal and create
Step 2:
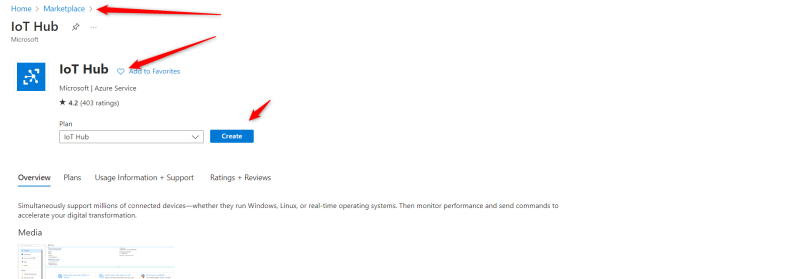
Search or Locate IOT Hub on the list of resources from the category "Internet of things"
Step 3:
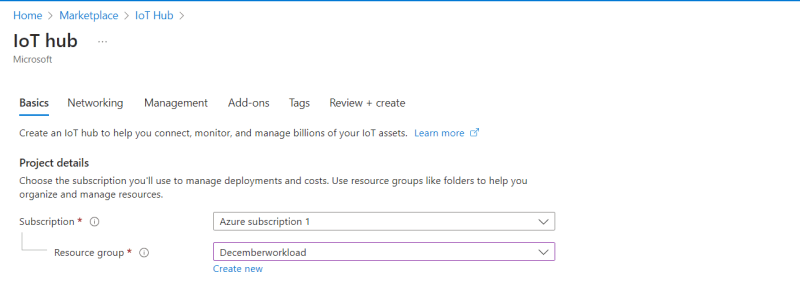
For the Basics Category;
Under Project details (resource group )- I will use an existing resource group "Decemberworkload" but if you don't have one create a new resource group and name it.
Step 4:
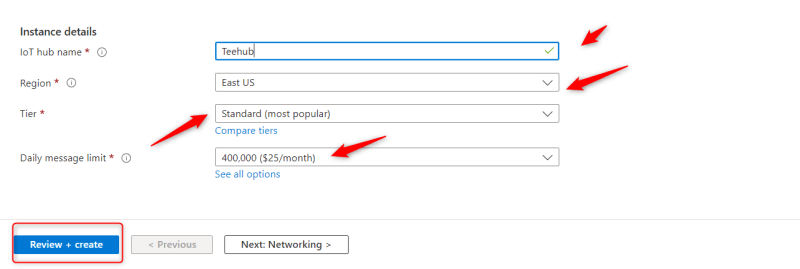
Under Instance details - we have to name the IOT HUB
"Teehub"
Region: East US
Tier : Standard
Daily message limit : 400,000
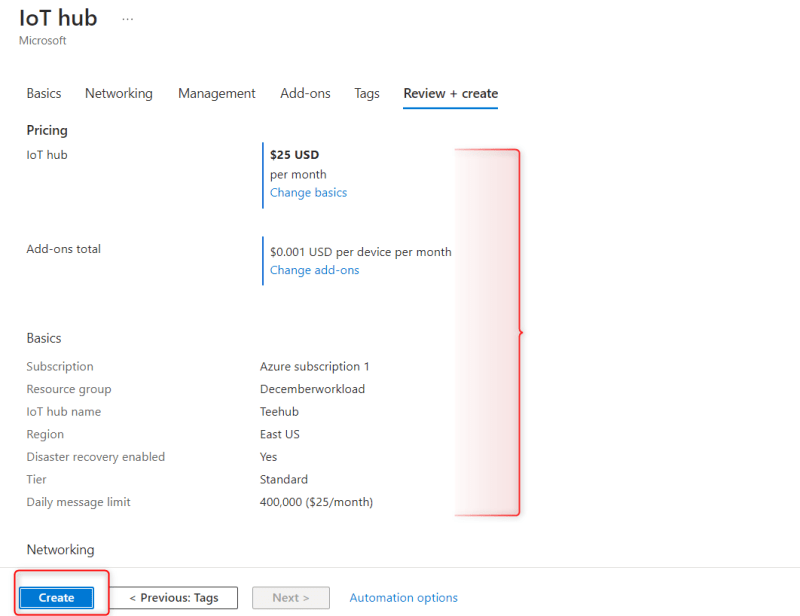
THEN - REVIEW AND CREATE
Step 5:
You will get the full details of the resource - Click the 'Create button'
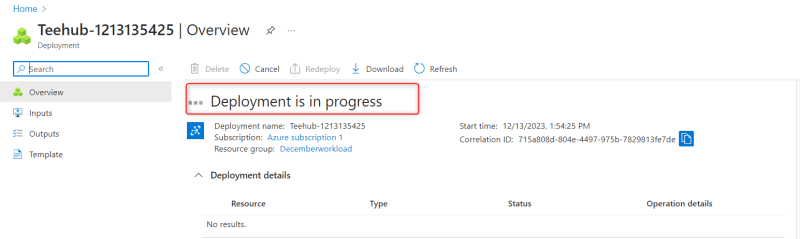
Step 6:
Give the deployment time to be completed.
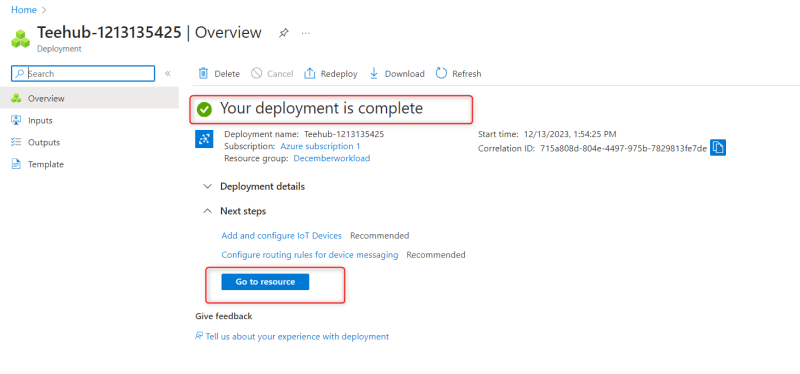
Step 7:
Deployment is complete, Click on 'Go to resource'
Step 8 :
Take note of the IOT HUB Usage

Now we will be registering a new device in the Azure IoT hub
Go back to the home page and search for IOT hub, you will see the hub that was just created. click on it
Step 9:
On the left hand panel , under device management, click on devices - then add a new device

Step 10 :
Create a Device ID - Then 'click on save' to save

Step 11 :
Once the device is created successfully, click on it to view.
Then go ahead to copy the 'primary connection'. Make sure to use the copy icon.
Step 12:
Go to the Azure raspberry pi simulator web page,go ahead to replace the string on line 15 with the one we copied in step 11.
Step 13:
Click on 'run' to run the command
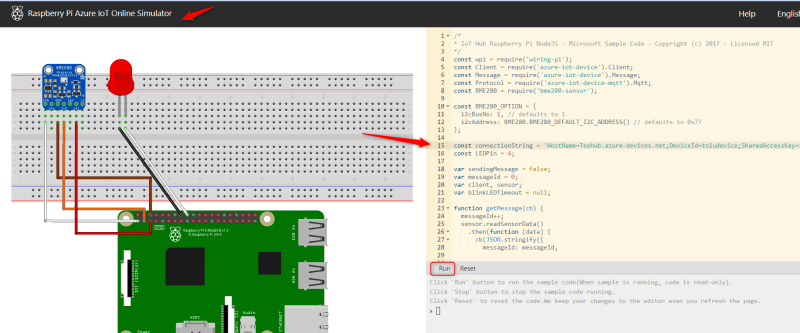
Step 14:
Once you run with the primary connection string. The red light beeps and that shows you have successfully added a new device and authenticated a connection.

Yippee🎉and Well done Mate👌


Top comments (0)