This tutorial requires you to have Git, Python, pip, and VSCode (or another IDE). There are many related tutorials available, so if you haven't set up these applications, please search online or ask an AI for help.
PS: The tutorials I write are usually based on what I find useful and have successfully replicated on multiple devices. They are not just simple summaries by AI; every word is typed by me. If you find it helpful, please give a free like. Thank you very much!
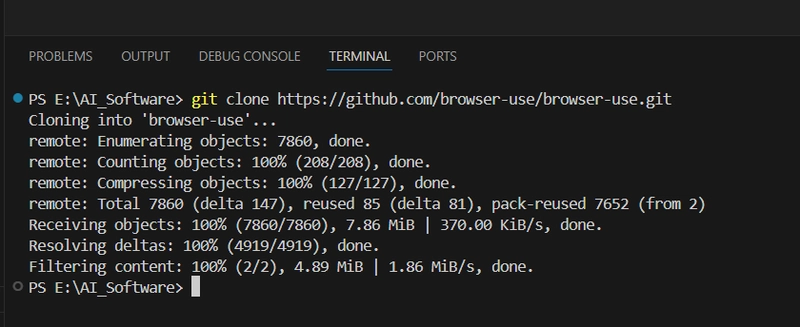
Step 1: Clone the browse-use repository
In VSCode, select an appropriate folder by choosing "Open Folder," and run the following command in the VSCode terminal: (If you can't clone it, you can also download the ZIP package directly from the repository and extract it.)
git clone https://github.com/browser-use/browser-use.git
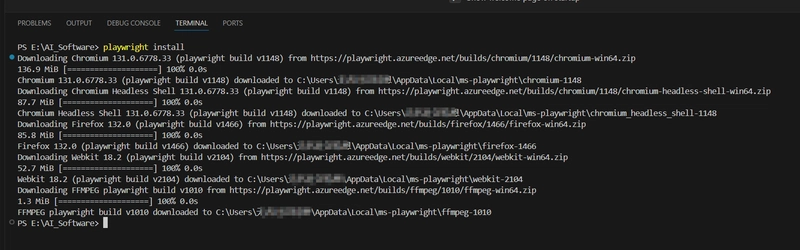
Step 2: Install the browser-use library, the playwright library, and the gradio library
Still using the terminal, run the following commands in sequence (requires Python ≥ 3.11):
pip install browser-use
playwright install
pip install gradio
Step 3: Modify the code configuration for low-cost usage
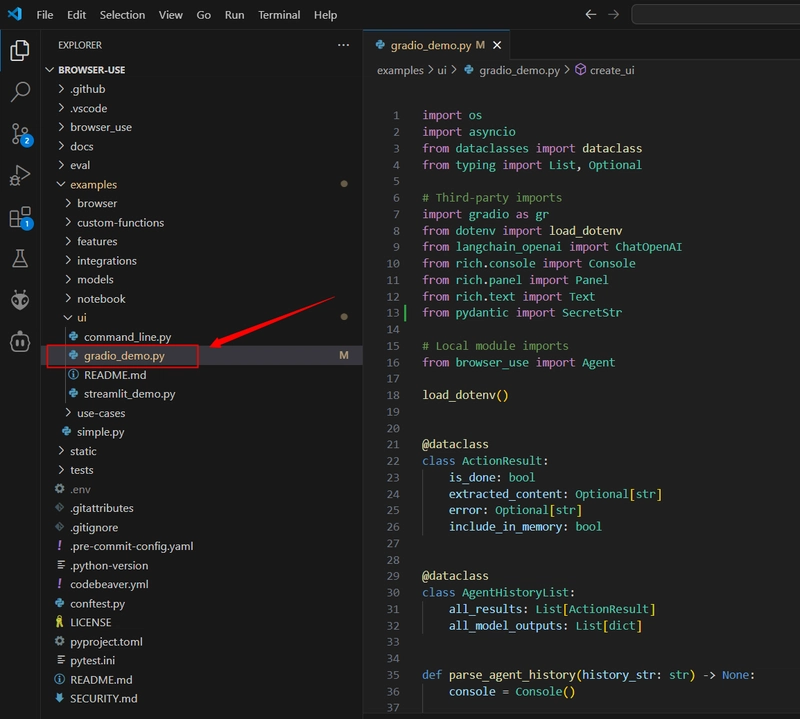
3.1 Locate the gradio_demo.py file in the cloned repository and completely replace it with the code I've edited below: (I've made several changes, so I'm sharing it directly for everyone's convenience.)
import os
import asyncio
from dataclasses import dataclass
from typing import List, Optional

# Third-party imports
import gradio as gr
from dotenv import load_dotenv
from langchain_openai import ChatOpenAI
from rich.console import Console
from rich.panel import Panel
from rich.text import Text
from pydantic import SecretStr

# Local module imports
from browser_use import Agent

load_dotenv()


@dataclass
class ActionResult:
    is_done: bool
    extracted_content: Optional[str]
    error: Optional[str]
    include_in_memory: bool


@dataclass
class AgentHistoryList:
    all_results: List[ActionResult]
    all_model_outputs: List[dict]


def parse_agent_history(history_str: str) -> None:
    console = Console()

    # Split the content into sections based on ActionResult entries
    sections = history_str.split('ActionResult(')

    for i, section in enumerate(sections[1:], 1):  # Skip first empty section
        # Extract relevant information
        content = ''
        if 'extracted_content=' in section:
            content = section.split('extracted_content=')[1].split(',')[0].strip("'")

        if content:
            header = Text(f'Step {i}', style='bold blue')
            panel = Panel(content, title=header, border_style='blue')
            console.print(panel)
            console.print()


async def run_browser_task(
    task: str,
    api_key: str,
    model: str = 'gpt-4o',
    headless: bool = True,
) -> str:
    if not api_key.strip():
        return 'Please provide an API key'

    os.environ['OPENAI_API_KEY'] = api_key

    try:
        agent = Agent(
            task=task,
            # llm=ChatOpenAI(model='gpt-4o'),
            llm=ChatOpenAI(base_url='https://api.cursorai.art/v1', model='gpt-4o', api_key=SecretStr(api_key)),
        )
        result = await agent.run()
        #  TODO: The result cloud be parsed better
        return result # type: ignore
    except Exception as e:
        return f'Error: {str(e)}'


def create_ui():
    with gr.Blocks(title='Browser Use GUI') as interface:
        gr.Markdown('# Browser Use Task Automation')

        with gr.Row():
            with gr.Column():
                api_key = gr.Textbox(label='OpenAI API Key', placeholder='sk-...', type='password')
                task = gr.Textbox(
                    label='Task Description',
                    placeholder='E.g., Find flights from New York to London for next week',
                    lines=3,
                )
                model = gr.Dropdown(
                    # choices=['gpt-4', 'gpt-3.5-turbo'], label='Model', value='gpt-4'
                    choices=['gpt-4o'], label='Model', value='gpt-4o'
                )
                headless = gr.Checkbox(label='Run Headless', value=True)
                submit_btn = gr.Button('Run Task')

            with gr.Column():
                output = gr.Textbox(label='Output', lines=10, interactive=False)

        submit_btn.click(
            fn=lambda *args: asyncio.run(run_browser_task(*args)),
            inputs=[task, api_key, model, headless],
            outputs=output,
        )

    return interface


if __name__ == '__main__':
    demo = create_ui()
    demo.launch()
3.2 Navigate to the root directory of the browser-use folder using cd, and run the following command in the terminal:
cd browser-use
python examples/ui/gradio_demo.py

3.3 After starting the service, open http://127.0.0.1:7860/ in your browser, and enter the API Key and task description.
(The method to obtain the API Key is provided at the end of the document.)

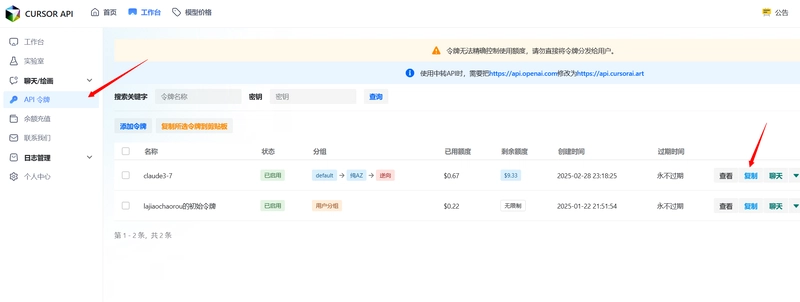
Additional: How to Obtain the API Key
After registering and logging in on the CURSOR API official website, click on API Tokens and copy your own API token from the right side.
Thank you for watching, and I wish you great prosperity!

Top comments (0)