When trying to take care of recurring chores, I often find that simple scheduled reminders, like a repeating calendar event, just don't work for me. Some chores don't have a fixed schedule but just a rough time scale, after which they should be done.
For instance, my partner and I have two cats and we have an automatic food dispenser for the dry food that they mostly eat. The dispenser holds enough food for a little under two weeks but we never know whether it will be ten days or twelve because how much they eat depends on their activity and how many treats and other food we give them. If I just set a reminder for every ten days, the dispenser might still have a few days worth of food and I decide to wait. However, now my scheduled reminders are off by a few days and I would have to manually postpone them all.
As a solution, I have set up an Airtable base that does the following:
- It lists our recurring chores with a description, a number of days after which it may need to be repeated, and a list of assignees.
- When a chore is due, it is marked as such and a daily reminder is sent to the assignees. (I'll cover the email in another post.)
- When the chore is marked as done by a user, the due date is updated by the defined number of days and the task is moved back to the future chores.
Why Airtable?
At first my plans for this chore tracker were to build a small web app, maybe in Django or maybe I'd go through some tutorials for a FARM stack app (FastAPI, React, MongoDB). The thing, however, is that this often felt like it would take me too much time to get started, so I never did start the project.
Then I realized that I can set it up in Airtable very quickly and just went for it. At work, we are using Airtable as a product information manager (PIM) and I have been adding automations where necessary, so I was already familiar with its capabilities and limitations.
Setting up the base and the chores table
To get started, you'll need to sign up at Airtable. A free account will provide all the features that you need (as of writing this).
Once you are signed up, click Create a base.
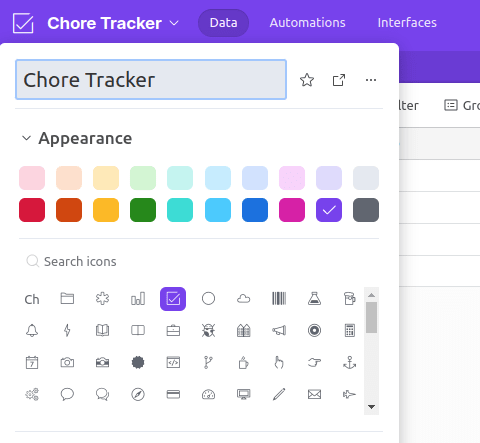
Give it a name, e.g. Chore Tracker, by clicking the current name. You can also change the color and icon.
Now, let's set up the chores table:
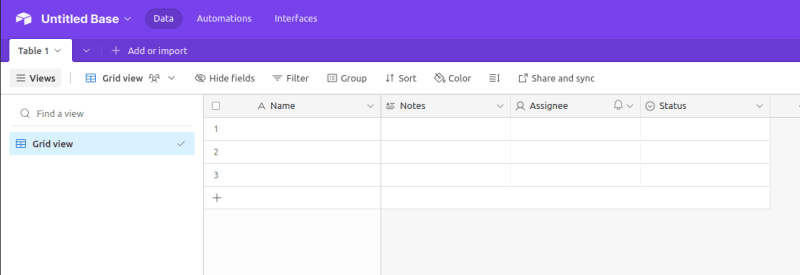
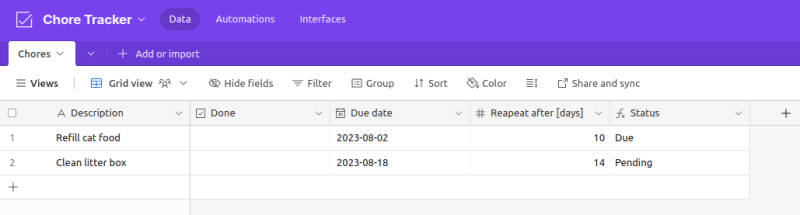
- You'll start with an empty table named Table 1, see figure 1. Rename it by clicking on the table name and then Rename table. Change the name to Chores. You can also change what the records/rows will be called. Tasks is the most fitting term, I think.
- The Table started with a few fields/columns that we won't need. For the fields Notes, Assignee, and Status, click the header and then Delete field.
- You need to keep the first field, currently called Name. This field will contain the descriptions of the chores, so rename it to Description. You probably have figured out how to rename a field by now. If not, click the header and then Edit field.

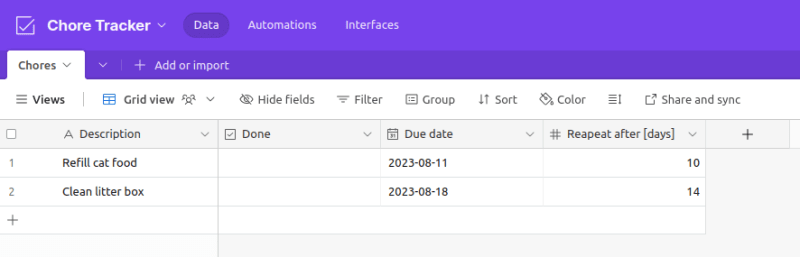
You'll need three additional fields in the chores table for starters. For each of them, click the plus sign next in the table header, enter the field name, and select its type:
- Done (Checkbox)
- Due date (Date, selecting your preferred format)
- Repeat after [days] (Number, set the precision to Integer)

Now you can enter your chores, giving them an initial due date and a number of days, after which they should be repeated. Note that there are currently three empty records in the table. If you need more, just click one of the the plus signs below the records. If you only need one or two records, you can right click empty (and other) records and then Delete task.
You can also sort the chores by due date but right now, you will have to check the dates to see which chore is due. Let's make this clearer.
Separating chores that are due
In order to distinguish chores that are due from those that are pending, you can assign a status dynamically using a formula field. Create a new field named Status and of type Formula. As the formula, enter:
IF(TODAY() >= {Due date}, "Due", "Pending")
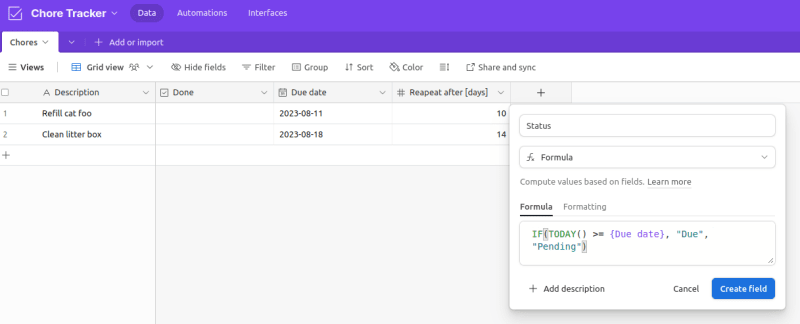
This field will thus say Pending when the due date is in the future and otherwise it will say Due. In order to test the formula, set one chore to a past date and another to a future date.
Lastly, to separate pending chores from those that are due, click Group at the top of the table and select the Status field. You can then also hide the Status field to keep the table tidy by right click Status in the header. Additionally, feel free to sort the table by the due date. This will sort the chores inside each grouping.
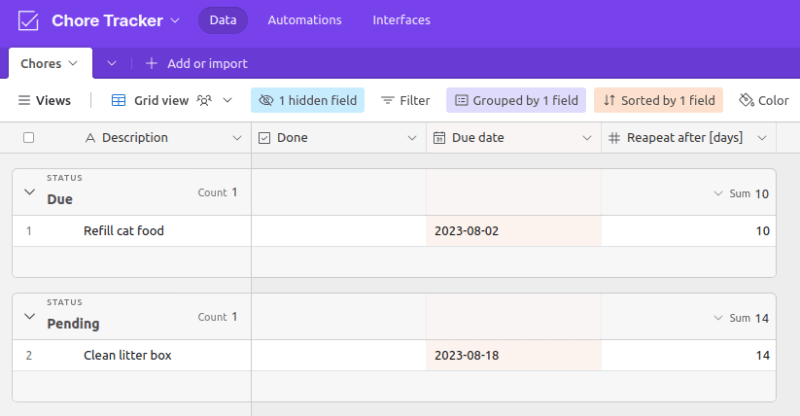
Now it is obvious which chores are due at a glance. Next we will set up the automation that reschedules completed tasks.
Rescheduling completed tasks automatically
Airtable provides a simple no-code system for automation. This can be great if you're not a software developer and just want to automate some simply but for developers, limitations can be frustrating (as we'll see in a bit). These limitation can be overcome by adding a script to an automation but that is a only possible on a paid Airtable plan. Fortunately, in this case we can work around it.
First, the automation needs a trigger. At the top of the page click Automations to navigate to the automations page. Select the empty automation that is already there and give it a name. Then click Add trigger and select the following properties:
- Trigger type: When record matches conditions
- Table: Chores
- Conditions: When Done is checked

Now you just need to add an action that updates the record but trying this will reveal the aforementioned limitation: you cannot calculate new values inside an automation without using a script, i.e. we cannot determine the new date the task should be scheduled at here. Luckily, we can circumvent this by adding another formula field to the table.
Return to the table view by clicking Data at the top of the page. In the Chores table, add a new field of type Formula named Next due date with the following formula:
DATEADD(TODAY(), {Repeat after [days]}, "days")
This will always show a date in the future by the defined number of days. Feel free to adjust the formatting of the field. By default it will show the time but we don't need that level of precision here. You can also hide this field if you like. I will leave it visible for now for testing.

Now return to the automations page, click Add advanced logic or action, and select Update record. In the properties, select the following:
- Table: Chores
- Record ID: Click the plus sign and selec the Record ID of the record from the trigger (this should be your only option)
-
Fields: Click Choose field to add two field to update
- Done: unchecked
- Due date: Click the gear icon to the right to switch the field to Dynamic, then click the plus sign and select the Next due date field of the record from the trigger.
Now the automation is ready to be tested. Before you return to the table view, don't forget to switch the automation on.

To test the automation, return to the table view and check the checkbox in the Done field of one of the task. (Note that this will work whether a task is due or not, i.e. you can use it if you took care of a chore early.) It may take a few second but you should see the task update to the new due date and Done should be unchecked. If the task was due, it will now be grouped under Pending again.
Next steps
Now that we have a working automated tracker for your chores and tasks, we could just check it every day to see what needs to be done. But if you are as prone to forgetting this as me, you will want to add daily email reminders if there are chores. These reminders will be implemented in my next post.

Top comments (0)