So I did this for Windows and the WSL here. If we rip everything referring to Windows out, it's the same setup on regular Ubuntu.
So I am making a couple of assumptions. One, you have a current version of Ubuntu installed. Let's say 18.04 or beyond. I think it's safe to say it should also work on the following, as long as snapd is installed. Just type sudo apt install snapd, it will either install or tell you it is.
- Linux Mint
- elementary
- KDE Neon
- All the other Ubuntus.. Kubuntu, Budgie, Mate, Xubuntu, Lubuntu..
First I like to use Visual Studio Code as my editor. If everything above has been done or is correct you just need to type..
sudo snap install code
This will install VSCode for you.
Next I like to use the Zsh shell as my main shell. You by no means are required to use it. If you choose to stick with bash the only step you have is to make it your default shell in the Terminal App. But Zsh has some nice optimizations that I believe improve life a little.
You can install Zsh simply by typing sudo apt install zsh in your Terminal.
Next we are going to run just a couple more commands before we set up our zsh config.
- We are going to install Oh-My-Zsh which they themselves describe as "Oh My Zsh is a delightful, open source, community-driven framework for managing your Zsh configuration. It comes bundled with thousands of helpful functions, helpers, plugins, themes, and a few things that make you shout... 'Oh My ZSH!'" and to do this you type the following in the terminal.
sh -c "$(curl -fsSL https://raw.github.com/robbyrussell/oh-my-zsh/master/tools/install.sh)"
- We'll add the plugin 'zsh-autosuggestions' this is very handy by using past commands to help you auto fill future ones. The command for install is..
git clone https://github.com/zsh-users/zsh-autosuggestions ~/.oh-my-zsh/custom/plugins/zsh-autosuggestions
- And finally zsh-nvm will help us keep a current node install and even change versions if needed.
git clone https://github.com/lukechilds/zsh-nvm ~/.oh-my-zsh/custom/plugins/zsh-nvm
Once you have done all of the above commands we will edit our .zshrc. First make sure your in your /home directory by typing cd and pressing enter. Next run nano .zshrc.
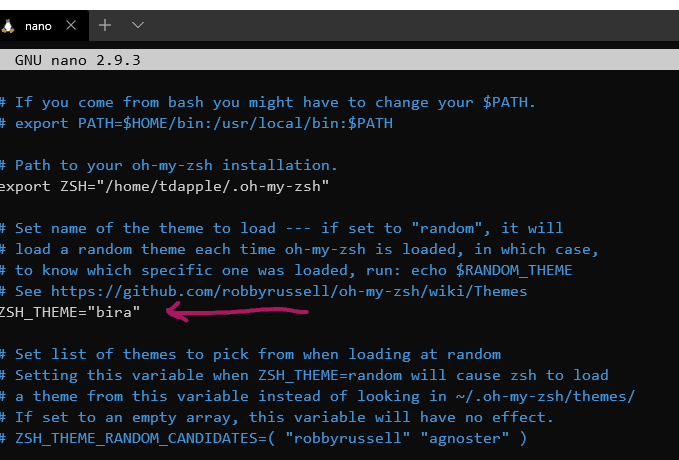
First you can change your theme if you want, I have 'bira' selected for myself at this time. You can see some of your options at https://zshthem.es/all/ .
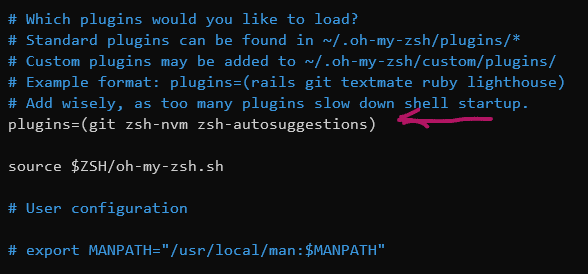
Next we want to add the plugins we installed earlier. This is a little further down the config. Just enter them as I have in the picture below.
Once this is done you will press ctrl + o to write the file and ctrl + X to close nano.
Now type source .zshrc to load your plugins and theme.
And now we install the LTS version of node simply by typing nvm install --lts
Let's also make a directory for our future projects by typing mkdir Projects or whatever you would like to call it.
So now you can cd Projects which will put you in that directory. From there we can open that folder with VSCode by typing code . while we are in the working directory of our choice.
You should be able to 'Rock and Roll' at this point. Feel free to reach out with any questions.

Top comments (0)