
A good user experience is what separates a awesome app from a regular one. Users expect their apps to be blazing fast since no one enjoys waiting. When building mobile apps, we often use loaders, progress bars, loading indicators to tell users when something is happening or loading.
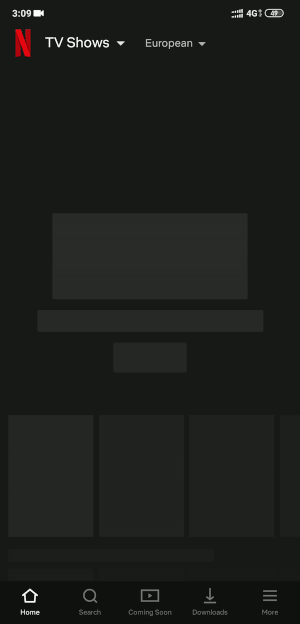
The latest trend is to show placeholder/skeleton screens as loaders. This pattern of using placeholder improves the user's perceived experience when waiting for something to load. You might have seen these kinds of loaders in apps like Facebook and Netflix.
Loaders in React Native
In most cases, using the good Ol' ActivityIndicator along with React Native modal would suffice. However, as a user and as a developer, I find them to be too mundane and old fashioned.
To make these loaders interesting, I created a React Native package that uses Airbnb's Lottie and Modals to create beautiful animated loaders. If you want to read more more on how to use it read this article.
In this article we will be learn how to implement placeholder screens using rn-placeholder library. We will also use Google Books API to fetch some books data.
Prerequisites
To follow this tutorial, please make sure you have the following installed on your local development environment and have access to the services mentioned below:
Make sure to update expo-cli if you haven't updated in a while since expo releases are quickly out of date.
Getting Started
Let's set up a new Expo project using expo-cli.
$ expo init placeholderLoading
- Choose blank template and hit
Enter - Then it will ask to name the project, type
Placeholder Loadingand hitEnteragain. - Lastly, it will ask you to press
Yto install dependencies withyarnornto install dependencies withnpm. Pressy.
This will create a new React Native app using expo-cli.
Running App and Installing Dependencies
Go into the project directory that we just created.
$ cd placeholderLoading
To run the project type:
$ yarn start
Press i to run the iOS Simulator. This will automatically run the iOS Simulator even if it's not opened.
Press a to run the Android Emulator. Note that the emulator must be installed and started already before typing a otherwise it will throw an error in the terminal.
You can also run the app in your device by installing expo app from the app store and then scanning the QR code.
Now, install rn-placeholder and react-native-responsive-dimensions packages
$ yarn add rn-placeholder react-native-responsive-dimensions
The rn-placeholder will help us display some placeholder stuff before rendering our text or media content.
And, react-native-responsive-dimensions will provide us with responsive height and width that automatically adjust themselves based on the screen size of the device.
Creating Components
Now we'll create two components BookCardComponent and BookCardPlaceholderComponent.
Here is the code for BookCardComponent:
const BookCardComponent = props => {
  const { thumbnail, title, authors, onPress } = props;

  return (
    <View style={styles.shadow}>
      <TouchableOpacity
        onPress={onPress}
        style={{
          flexDirection: "row",
          padding: 8
        }}
      >
        <View
          style={{
            flex: 1,
            height: responsiveHeight(16),
            width: responsiveWidth(16),
            marginRight: 10
          }}
        >
          <Image
            source={{ uri: thumbnail }}
            style={{
              borderRadius: 4,
              resizeMode: "contain",
              height: "100%",
              width: "100%"
            }}
            imageStyle={{ borderRadius: 1 }}
          />
        </View>

        <View
          style={{
            flex: 3,
            padding: 5
          }}
        >
          <Text style={{ marginBottom: 5, fontSize: 20 }}>{title}</Text>
          <Text
            style={{ marginBottom: 5 }}
            numberOfLines={1}
            ellipsizeMode="tail"
          >
            by {authors}
          </Text>
        </View>
      </TouchableOpacity>
    </View>
  );
};
Code for BookCardPlaceholderComponent:
const BookCardPlaceholderComponent = () => (
  <Placeholder
    Animation={ShineOverlay}
    style={{
      marginVertical: 6,
      marginHorizontal: 15,
      borderRadius: 4
    }}
    Left={props => (
      <PlaceholderMedia
        style={[
          props.style,
          {
            width: responsiveWidth(22),
            height: responsiveHeight(16)
          }
        ]}
      />
    )}
  >
    <PlaceholderLine style={{ marginTop: responsiveHeight(1) }} width={70} />
    <PlaceholderLine style={{ marginTop: responsiveHeight(1.5) }} width={50} />
    <PlaceholderLine width={50} />
  </Placeholder>
);
The BookCardPlaceholderComponent will be rendered initially until we received data from the Google Books API and after receive data we'll use the BookCardComponent for rendering the books data.
Update App.js
We'll be using React Hooks in this tutorial but you can easily convert it for classes.
Add the following code to your App.js:
export default function App() {
  const [books, setBooks] = useState([...new Array(10).fill({})]);
  const [isDataFetched, setDataFetched] = useState(false);

  useEffect(() => {
    fetch(
      "https://www.googleapis.com/books/v1/volumes/?maxResults=30&q=danbrown"
    )
      .then(response => response.json())
      .then(responseJson => {
        const { items } = responseJson;

        const booksList = items.map(book => {
          const {
            volumeInfo: { title, authors, imageLinks },
            id: bookId
          } = book;

          return {
            bookId,
            thumbnail: imageLinks
              ? imageLinks.thumbnail
              : "https://i.ibb.co/YLC0nQQ/not-found.png",
            title,
            authors: authors ? authors.toString().replace(/,/g, ", ") : "-"
          };
        });

        setBooks(booksList);
        setDataFetched(true);
      })
      .catch(error => {
        console.error(error);
      });
  }, []);

  const renderBookComponent = ({ item }) => {
    const { thumbnail, title, authors, bookId } = item;

    return (
      <BookCardComponent
        key={bookId}
        title={title}
        authors={authors}
        thumbnail={thumbnail}
      />
    );
  };

  const renderX = () => (
    <FlatList
      data={books}
      renderItem={renderBookComponent}
      keyExtractor={item => item.bookId}
    />
  );

  const renderPlaceholders = () =>
    books.map((e, i) => <BookCardPlaceholder key={i} />);

  return (
    <SafeAreaView style={styles.container}>
      {isDataFetched ? renderX() : renderPlaceholders()}
    </SafeAreaView>
  );
}
First, we setup some initial state using useState hook.
const [books, setBooks] = useState([...new Array(10).fill({})]);
const [isDataFetched, setDataFetched] = useState(false);
In books state we'll update all the books that we'll receive from the API and for the initial state we created an array of empty 10 objects.
We also initialized isDataFetched state and set its initial value false. It will be used to track the status of the data received from the API. When we received the data and done with the data manipulation, we'll set its value to true by using setDataFetched.
In the next step, we'll use useEffect hook to call the Google Books API and update our respective states with the data received.
useEffect(() => {
  fetch("https://www.googleapis.com/books/v1/volumes/?maxResults=30&q=danbrown")
    .then(response => response.json())
    .then(responseJson => {
      const { items } = responseJson;

      const booksList = items.map(book => {
        const {
          volumeInfo: { title, authors, imageLinks },
          id: bookId
        } = book;

        return {
          bookId,
          thumbnail: imageLinks
            ? imageLinks.thumbnail
            : "https://i.ibb.co/YLC0nQQ/not-found.png",
          title,
          authors: authors ? authors.toString().replace(/,/g, ", ") : "-"
        };
      });

      setBooks(booksList);
      setDataFetched(true);
    })
    .catch(error => {
      console.error(error);
    });
}, []);
Now, in the return we'll make use of the isDataFetched state to conditionally render the components.
{
  isDataFetched ? renderX() : renderPlaceholders();
}
In renderX() we'll return a FlatList which will render the list of Books using renderBookComponent.
In renderPlaceholders() we'll render BookCardPlaceholder using the map function. This is what the users will see during the data fetching.
So during the data fetching BookCardPlaceholder will be rendered and when the data is fetched successfully BookCardComponent will be rendered by the FlatList.
Here is how the final app looks like:

Conclusion
We have successfully created a React Native app that uses rn-placeholder to show placeholder as loaders during data fetching just like facebook, Netflix and other popular apps.
This is just a simple implementation of placeholders screens as loaders. You can customize these placeholder components according to your need or app theme.
Find the source code in the Github repo here.
Bonus
I've also created a Open source Book Searching React Native app in which I used these placeholder components as loaders. Feel free to have a look at its source code here.

Oldest comments (0)