Also posted on https://virenb.cc/footbot
These are my notes on building a Twitter bot, @FootbotTrivia. It is something I built a couple of months ago, and I just wanted to document it if it can help anyone else out. Twitter bots are a very popular project (judging by all the other blog posts that are out there) and it seems like it would be a good addition to one's portfolio.
My motivation for this project was to build something new, work with a new tool (Puppeteer), and combine my two of my passions (soccer/football and programming).
So, let's get started.
The technologies I used for this project were:
-Node.js
-Puppeteer
-Twit (Twitter API Client)
-GitHub Actions
-Wikipedia.org
Before writing any code, it is important to establish what you exactly want your bot (or any project) to accomplish. I wanted a simple output from my Twitter bot. I wanted it to tweet out a trivia question (a Wikipedia screenshot of a footballer's bio) and tweet out the answer, revealing the footballer's name some hours later. Okay, now on to the actual project.
Before writing 'npm init' in your command line, I went to https://developer.twitter.com/ to register an application. You will need a API key, API secret, access token, and a access token secret. You'll just need to fill in some information and details about your application.
mkdir footbot
cd footbot
npm init -y
I start with initializing an npm project, with -y for the yes flag. Next, I created the file, server.js, in my project folder.
touch server.js
I'll go ahead and install all the packages I know I'll need.
npm install dotenv
npm install puppeteer
npm install twit
We need the package, dotenv, in order to hide our Twitter API information. We do not want to leave them for the public eye to see on your GitHub repository.
Once your Twitter application is approved, you can go back to https://developer.twitter.com/ to add your API keys and access token information into the project.
touch .env
We'll make a hidden file, .env, to store this information. Your .env file would look something like this.
// .env

CONSUMER_KEY=copypaste
CONSUMER_SECRET=theinformation
ACCESS_TOKEN=intothis
ACCESS_TOKEN_SECRET=file
(They're actually much longer strings of letters and numbers ^^)
Okay, next we can explore the Twit documentation so we can get our bot tweeting, starting with some 'Hello World' action.
https://github.com/ttezel/twit
A lot can be done with this API. You can have your Twitter bot tweet, search, get followers, post media, etc.
You can copy some of the code from the project to get your bot started up.
// server.js
const Twit = require('twit')

const T = new Twit({
  consumer_key:         '...',
  consumer_secret:      '...',
  access_token:         '...',
  access_token_secret:  '...',
})

//  tweet 'hello world!'
//
T.post('statuses/update', { status: 'hello world!' }, function(err, data, response) {
  console.log(data)
})
The only thing we'll have to update in the above is plugging in our API key and tokens. If the project is staying on your machine, you can directly add the information to server.js. If the code is going to be pushed onto a GitHub repository, it is better to hide your information (that is why we're using dotenv). So we'll have to add the below to server.js -
require('dotenv').config();

const consumer_key = process.env.CONSUMER_KEY;
const consumer_secret = process.env.CONSUMER_SECRET;
const access_token = process.env.ACCESS_TOKEN;
const access_token_secret = process.env.ACCESS_TOKEN_SECRET;

const  T = new  Twit({
    consumer_key,
    consumer_secret,
    access_token,
    access_token_secret,
});

//  tweet 'hello world!'
T.post('statuses/update', { status: 'hello world!' }, function(err, data, response) {
  console.log(data)
})
In our package.json, we can add the following to 'scripts' -
"scripts": {
    "start": "node server.js"
},
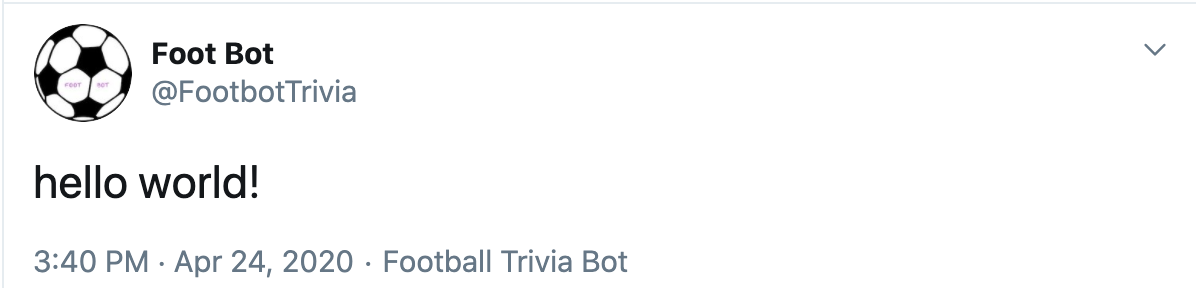
Once we run npm run start, our bot will tweet out 'hello world!'.
Okay, great! We have a working Twitter bot. We'll definitely be referencing those docs again as our goal is to post media (Wikipedia screenshots).
So, what we have left, is to -
-Get our information from Wikipedia
-Puppeteer, take screenshots the Wikipedia pages
-Tweet out the image(s)
-Deploy
Moving on to the information part of the project, Wikipedia!
https://en.wikipedia.org/wiki/Romelu_Lukaku
The above link is an example of Wikipedia we'd be using.
We're interested in the information box on the right side. Our bot would tweet out an image, without the name, picture, information (name, age, etc.), just the team information. Our 'answer' tweet would have an image of the box with all the information.
We'll need to rely on the browser's DevTools a lot in order to remove a bunch of the information in the information box (a table actually) as see below -

The next step was to determine how to get rid of the information for the question tweet. Using the browser's DevTools, we were able to look at the HTML on the page. Then came a lot of vanilla JavaScript methods:
https://developer.mozilla.org/en-US/docs/Web/API/Document/querySelector
https://developer.mozilla.org/en-US/docs/Web/API/Document/querySelectorAll
https://developer.mozilla.org/en-US/docs/Web/API/Node/parentNode
https://developer.mozilla.org/en-US/docs/Web/API/ChildNode/remove
https://developer.mozilla.org/en-US/docs/Web/API/Node/nextSibling
let img = document.querySelector('.image');
let nickname = document.querySelector('.nickname');
let age = document.querySelector('.ForceAgeToShow');
let bplace = document.querySelector('.birthplace');
let role = document.querySelector('.role');
let org = document.querySelector('.org');
if (img) img.parentNode.remove();
if (nickname) nickname.parentNode.remove();
age.parentNode.parentNode.remove();

bplace.parentNode.nextSibling.remove();
bplace.parentNode.remove();

role.parentNode.remove();

if (org.parentNode.nextSibling) org.parentNode.nextSibling.remove();
if (org) org.parentNode.remove();

let birthname = document.querySelector('.nickname');
if (birthname) {
  birthname.parentNode.remove();
}
let fullname = document.querySelector('.fn');
fullname.remove();

After running the above code, our screenshot would look something like this:
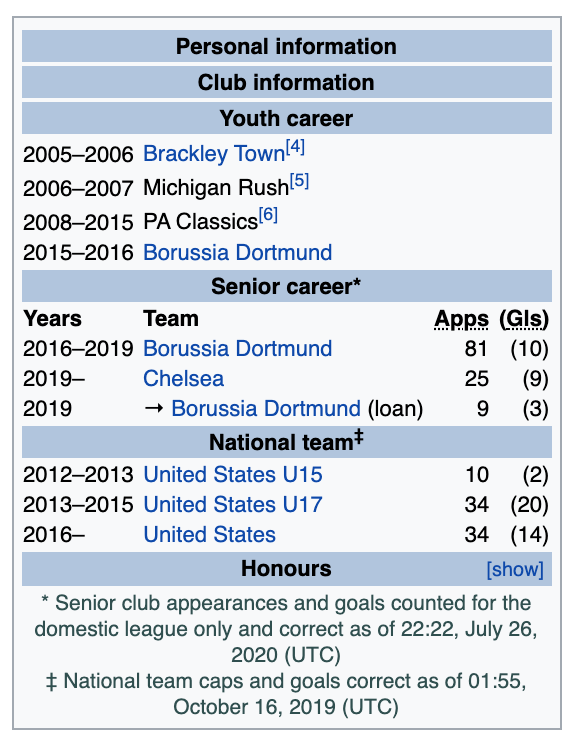
That was the 'trivia' aspect I was going for. Having the user being able to see the footballer's teams but no other information to guess from.
So now we have the data we need, how do we actually take a screenshot of each image? Puppeteer! This was my first time using this tool.
From the Puppeteer website,
Puppeteer is a Node library which provides a high-level API to control Chrome or Chromium over the DevTools Protocol. Puppeteer runs headless by default, but can be configured to run full (non-headless) Chrome or Chromium.
What can I do?
Most things that you can do manually in the browser can be done using Puppeteer! Here are a few examples to get you started:
- Generate screenshots and PDFs of pages.
- Crawl a SPA (Single-Page Application) and generate pre-rendered content (i.e. "SSR" (Server-Side Rendering)).
- Automate form submission, UI testing, keyboard input, etc.
- Create an up-to-date, automated testing environment. Run your tests directly in the latest version of Chrome using the latest JavaScript and browser features.
- Capture a timeline trace of your site to help diagnose performance issues.
- Test Chrome Extensions.
From some browsing, Puppeteer is a popular tool for testing, automating, and scraping data from websites. I wanted to use it because of the first bulletpoint mentioned above, taking a screenshot of a page.
After spending a lot of time reading documentation, this was the basic code I would need to take my screenshot -
const puppeteer = require('puppeteer');

(async () => {
  const browser = await puppeteer.launch();
  const page = await browser.newPage();
  await page.goto('https://example.com');
  await page.screenshot({path: 'screenshot.png'});
  await browser.close();
})();
The above code is an async immediately invoked function expression. Line by line, it launches a browser, goes to a website you input, and saves a screenshot.
This would take a screenshot of the whole page, where I was looking for a screenshot of the little infographic box with the footballer's details.
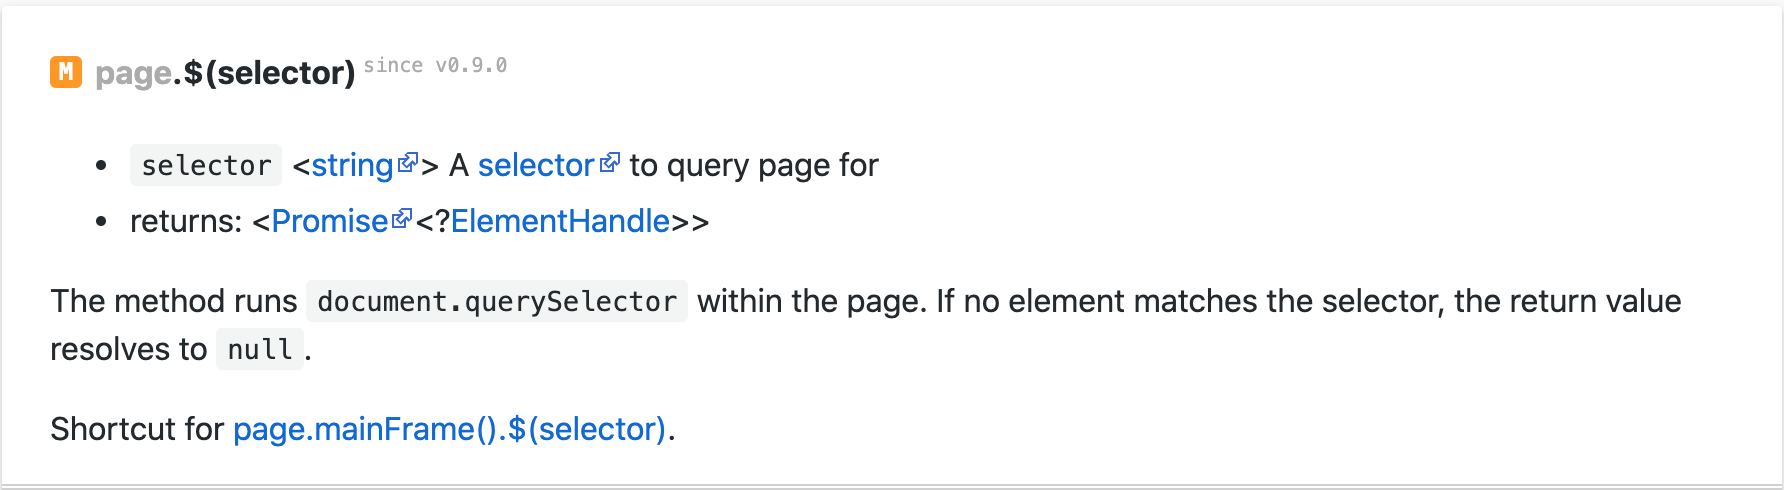
I used the above method to narrow in on the page element I wanted the screenshot of, tbody.
const element = await page.$('tbody');
After narrowing down the element, we can take a screenshot. That would have all the footballer's information, therefore, that would be our 'answer' screenshot.
await element.screenshot({ path: 'answer.png' });
We now need to take a screenshot of our infographic box after removing most of the data. How can this be done?
After some more scouring of the documentation and a bit of searching the Internet, we find the correct method.
This will allow use to run our JavaScript (querySelector(), parentNode.remove(), etc) like we mentioned earlier. We can remove all the DOM elements we need, then take a screenshot.
await page.evaluate(() => {
    try {
      if (document.contains(document.querySelector('.box-Tone'))) {
        document.querySelector('.box-Tone').remove();
      }
      if (document.contains(document.querySelector('.box-Expand_language'))) {
        let languageBox = document.querySelectorAll('.box-Expand_language');
        if (languageBox.length > 1) {
          let languageBoxes = Array.from(languageBox);
          languageBoxes.map((box) => box.remove());
        } else {
          languageBox.remove();
        }
      }
      let img = document.querySelector('.image');
      let nickname = document.querySelector('.nickname');
      let age = document.querySelector('.ForceAgeToShow');
      let bplace = document.querySelector('.birthplace');
      let role = document.querySelector('.role');
      let org = document.querySelector('.org');
      if (img) img.parentNode.remove();
      if (nickname) nickname.parentNode.remove();
      age.parentNode.parentNode.remove();

      bplace.parentNode.nextSibling.remove();
      bplace.parentNode.remove();

      role.parentNode.remove();

      if (org.parentNode.nextSibling) org.parentNode.nextSibling.remove();
      if (org) org.parentNode.remove();

      let birthname = document.querySelector('.nickname');
      if (birthname) {
        birthname.parentNode.remove();
      }
      let fullname = document.querySelector('.fn');
      fullname.remove();
    } catch (err) {
      console.log(err);
    }
  });
  await element.screenshot({ path: 'player.png' });
  await browser.close();
})();
So we're doing good, we have our screenshots! The next step is to get our bot to tweet these out.
As we mentioned earlier, the Twitter API Client let's us tweet out media, which is what we'll be doing (images).
Going back to the twit documentation, this is the sample code provided for tweeting images -
//
// post a tweet with media
//
var b64content = fs.readFileSync('/path/to/img', { encoding: 'base64' })

// first we must post the media to Twitter
T.post('media/upload', { media_data: b64content }, function (err, data, response) {
  // now we can assign alt text to the media, for use by screen readers and
  // other text-based presentations and interpreters
  var mediaIdStr = data.media_id_string
  var altText = "Small flowers in a planter on a sunny balcony, blossoming."
  var meta_params = { media_id: mediaIdStr, alt_text: { text: altText } }

  T.post('media/metadata/create', meta_params, function (err, data, response) {
    if (!err) {
      // now we can reference the media and post a tweet (media will attach to the tweet)
      var params = { status: 'loving life #nofilter', media_ids: [mediaIdStr] }

      T.post('statuses/update', params, function (err, data, response) {
        console.log(data)
      })
    }
  })
})
We just have to change the file, change the alt text, and provide the status (as this will show as the text in our tweet).
I wrapped it in a function named postPlayer().
function postPlayer() {
  let b64content = fs.readFileSync('./player.png', { encoding: 'base64' });
  bot.post('media/upload', { media_data: b64content }, function (
    err,
    data,
    response
  ) {
    let mediaIdStr = data.media_id_string;
    let altText = "Unknown footballer's statistics and information.";
    let meta_params = { media_id: mediaIdStr, alt_text: { text: altText } };

    bot.post('media/metadata/create', meta_params, function (
      err,
      data,
      response
    ) {
      if (!err) {
        let params = {
          status: 'Guess that player #footballtrivia #PremierLeague',
          media_ids: [mediaIdStr],
        };
        bot.post('statuses/update', params, function (err, data, response) {
          console.log(data);
        });
      }
    });
  });
}
I used the same code again for posting the answer (just swapping out the file and the content of the tweet).
function postAnswer() {
  let b64answer = fs.readFileSync('./answer.png', { encoding: 'base64' });
  bot.post('media/upload', { media_data: b64answer }, function (
    err,
    data,
    response
  ) {
    let mediaIdStr = data.media_id_string;
    let altText = 'Answer';
    let meta_params = { media_id: mediaIdStr, alt_text: { text: altText } };

    bot.post('media/metadata/create', meta_params, function (
      err,
      data,
      response
    ) {
      if (!err) {
        let params = {
          status: `Today's answer #footballtrivia #PremierLeague`,
          media_ids: [mediaIdStr],
        };
        bot.post('statuses/update', params, function (err, data, response) {
          console.log(data);
        });
      }
    });
  });
}
The next challenge was to ensure that the bot would not tweet these out simultaneously. We want to give the users some time to see and guess before posting the answer. setTimeout() is a good way to provide a delay between tweets.
postPlayer();
setTimeout(postAnswer, 18000000); // in milliseconds, ~ 5 hours
Alright, great! Our bot is functioning. The next and final challenge is how to keep it running? We have to find where to host our project, where it will run once a day, tweeting out the question and five hours later (thanks to setTimeout()), the answer. We could manually run the project locally once a day but that is not a feasible solution. Looking at other bot projects, Heroku and Glitch were popular places to host your Twitter bot project.
Glitch actually has a good starter template if you want to build a bot project -
[https://glitch.com/~twitterbot][https://glitch.com/~twitterbot "Twitterbot project on Glitch"]
You can schedule a cron job to visit your Glitch url daily, which would set off the Twitter bot. I had some trouble working with that and wanted to try another solution. I found GitHub Actions.
GitHub Actions makes it easy to automate all your software workflows, now with world-class CI/CD. Build, test, and deploy your code right from GitHub. Make code reviews, branch management, and issue triaging work the way you want.
-https://github.com/features/actions
This also took me a while to figure out but I was able to get it running, eventually. My issue was regarding my environment variables. They were not pushed to my GitHub repository for security concerns and this was causing issues with getting Actions up and running.
To get started with GitHub Actions, you add the below folder to your project (root) -
Actual Guide: https://docs.github.com/en/actions/configuring-and-managing-workflows/configuring-a-workflow
mkdir .github/workflows
touch .github/workflows/tweetbot.yml
I was able to schedule an action which is what I originally wanted. You can run an action on a schedule or anytime a commit is pushed to your repository, etc. I was able to run my project daily on at a scheduled time. It runs npm install, plugs in the env variables, and runs the server.js file. This was my first .yml file, so make sure your indentations are correct.
name: Tweet

on:
  schedule:
    - cron: "0 12 * * 0-6"

jobs:
  build:
    runs-on: ubuntu-latest

    strategy:
      matrix:
        node-version: [12.x]

    steps:
      - uses: actions/checkout@v2
      - name: Use Node.js ${{ matrix.node-version }}
        uses: actions/setup-node@v1
        with:
          node-version: ${{ matrix.node-version }}
      - run: npm install
      - name: set environment variables
        uses: allenevans/set-env@v1.0.0
        with:
          consumer_key: ${{ secrets.CONSUMER_KEY }}
          consumer_secret: ${{ secrets.CONSUMER_SECRET }}
          access_token: ${{ secrets.ACCESS_TOKEN }}
          access_token_secret: ${{ secrets.ACCESS_TOKEN_SECRET }}
      - name: Start server
        run: npm run start
Full source code for the project can be found here, https://github.com/virenb/fbot
The bot can use some followers, please share with anyone you think would be interested!
https://twitter.com/footbottrivia
[Project is definitely a work in progress.]
Thank you for reading!
Resources
Thank you to Tom Baranowicz & Carolyn Stransky for sharing your Twitter projects, both were an inspiration in building this.

Top comments (1)
the timeout problem is what pushed me away from self-hosted chromium
snapapi.pics handles this externally — you set a timeout in the request, their infra deals with the rest