Angular is by far the most popular single-page application (SPA) framework used by .NET developers. Until this project, I hadn't used Angular since before it dropped the JS from its name. Consequentially, I was excited to try my hat at it again, this time using it to show off Vonage's Video API. You can follow along in this tutorial, where we'll be creating a basic video chat application using Angular (though it'll always have the JS in my ❤).
Prerequisites
- Visual Studio (I’m using 2019, though older versions ought to work)
- .NET Core 3.1 developer kit
- A Vonage Video API account
- A Vonage Video API project, which can be created from your account page
Straight to the Code
If you just want to pull the code for this walk-through down, visit the GitHub page for this blog post, follow the instructions, and you'll be all set.
First Things First
Let's start by opening Visual Studio. Click Create a new project -> ASP.NET Core Web Application -> give it a name (I'm calling mine BasicVideoChatAngular) -> Create -> Angular.
Doing this is going to build you a shell ASP.NET application with all of your client-side code under the ClientApp folder.
Import Nuget Packages
Import the following NuGet packages for this project:
- OpenTok
- Microsoft.EntityFrameworkCore.SqlServer (I'm using 3.1.3)
Create the Entity Model
We're going to use some very basic Entity Framework here. Add a Model.cs file to the project. Delete the Class declaration and add the following code to it:
public class OpentokContext : DbContext
{
    public DbSet<Room> Rooms { get; set; }
    protected override void OnConfiguring(DbContextOptionsBuilder options)
        => options.UseSqlite("Data Source=VonageVideo.db");
}
public class Room
{
    public int RoomId { get; set; }
    public string SessionId { get; set; }
    public string RoomName { get; set; }
    public string Token { get; set; }
}
You'll also need to add the following to your using section:
using Microsoft.EntityFrameworkCore;
Create the Database
With that added, let's create the database. Navigate to your project folder and execute the following:
dotnet tool install --global dotnet-ef
dotnet add package Microsoft.EntityFrameworkCore.Design
dotnet ef migrations add InitialCreate
dotnet ef database update
This will create a database file that will hold your rooms and sessionIds.
Create a Session Controller
Right click the Controllers folder -> Add -> Controller - MVC Controller - Empty -> name it SessionController.
In the SessionController, dependency inject an IConfiguration object, and create an elementary form class to hold our room name called RoomForm:
private IConfiguration _Configuration;
public SessionController(IConfiguration config)
{
    _Configuration = config;
}
public class RoomForm
{
    public string RoomName { get; set; }
}
After this, add a HttpPost request called GetSession that takes a RoomForm as an argument:
[HttpPost]
public IActionResult GetSession([FromBody]RoomForm roomForm)
{
    var apiKey = int.Parse(_Configuration["ApiKey"]);
    var apiSecret = _Configuration["ApiSecret"];
    var opentok = new OpenTok(apiKey, apiSecret);
    var roomName = roomForm.RoomName;
    string sessionId;
    string token;
    using (var db = new OpentokContext())
    {
        var room = db.Rooms.Where(r => r.RoomName == roomName).FirstOrDefault();
        if (room != null)
        {
            sessionId = room.SessionId;
            token = opentok.GenerateToken(sessionId);
            room.Token = token;
            db.SaveChanges();
        }
        else
        {
            var session = opentok.CreateSession();
            sessionId = session.Id;
            token = opentok.GenerateToken(sessionId);
            var roomInsert = new Room
            {
                SessionId = sessionId,
                Token = token,
                RoomName = roomName
            };
            db.Add(roomInsert);
            db.SaveChanges();
        }
    }
    return Json(new { sessionId = sessionId, token = token, apiKey = _Configuration["ApiKey"] });
}
This method checks the database to see if the roomName already has a sessionId. If it does, it generates a token for that sessionId. If not, it makes a new session and token. Then, it creates a new row in the database for that room. In both cases, it returns a sessionId, token, and ApiKey as JSON.
Build the Client
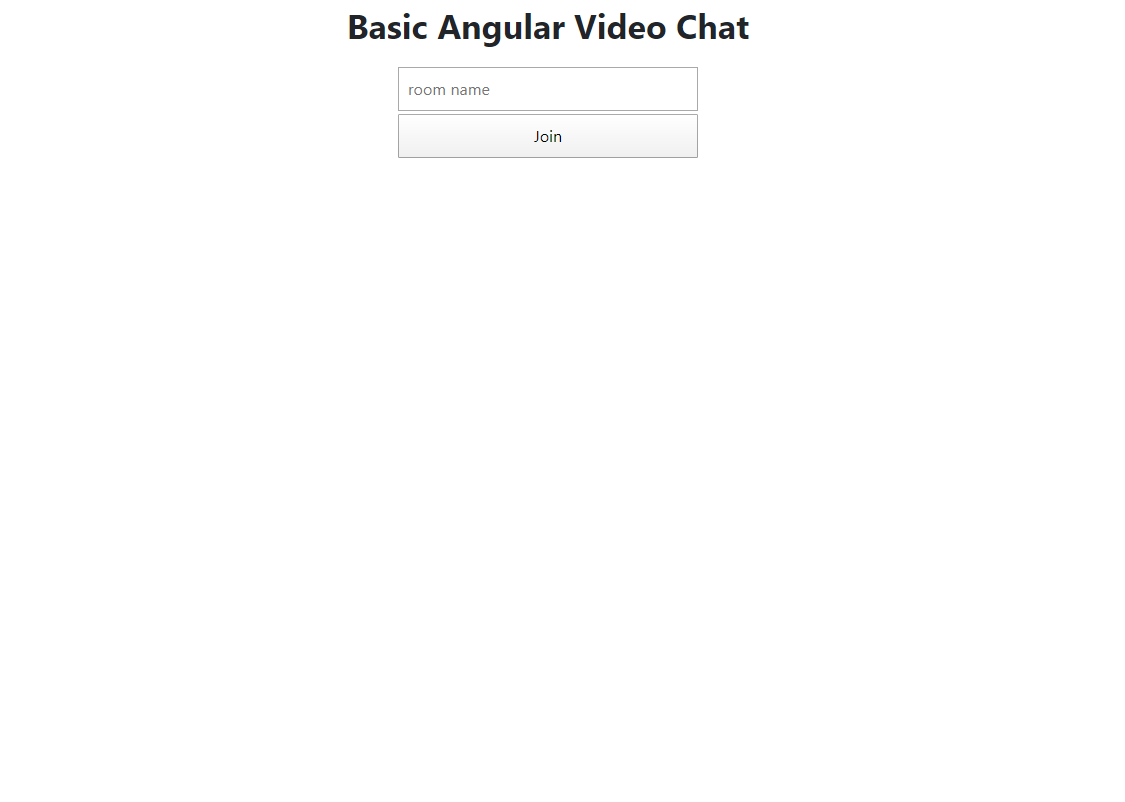
With the back end out of the way, let's get down to building the client. We're going to have two primary views—our Join view, where the user will input the room name they would like to join:
And a Video view that will contain the video call:

Install npm Dependencies
First things first, navigate to the ClientApp directory in your terminal and run:
npm install --save @opentok/client
Clean Out Demo Views
When you create an Angular project in Visual Studio, a bunch of demo components are auto-populated under ClientApp\src\app, including counter, fetch-data, home, and nav-menu. We aren't going to need any of these, so let's just delete them all from the jump.
Add Needed Files
Create the following folders/files:
- Under
ClientApp\srcaddconfig.ts - Under
ClientApp\src\appaddstateService.ts - Under
ClientApp\src\appcreate directories:join,subscriber,video - Under
ClientApp\src\joincreatejoin.component.css,join.component.html,join.component.ts - Under
ClientApp\src\subscribercreatesubscriber.component.html,subscriber.component.ts,subscriber.component.css - Under
ClientApp\src\videocreatevideo.component.css,video.component.html,video.component.ts
Build Out the Config
In ClientApp\src\config.ts, we are going to set up our configuration, which contains one field, SAMPLE_SERVER_BASE_URL. Set this to the base URL you end up using for IIS—the file should look like:
export default {
    SAMPLE_SERVER_BASE_URL: 'https://localhost:44340'
}
If you are using IIS Express to debug, find the base_url by right-clicking on your project file -> Properties -> Debug, and at the bottom you'll see the IIS URLs.
Build Out the StateService
We are going to have a transition between components after we click the Join button. We'll need to carry the token, sessionId, and ApiKey between the Join component and the Video component so that the Video component can join the call. To solve this problem, we're going to share this state using a state service—we'll inject the state service into the next component as we transition between them. We just need an Injectable to accomplish this with some observable fields:
import { Injectable } from "@angular/core";
@Injectable({providedIn:'root'})
export class StateService {
    public token$: string;
    public sessionId$: string;
    public apiKey$: string;
    constructor() {}
}
Note: At this stage, you might get an IntelliSense error "Experimental support for decorators is a feature that is subject to change in a future release. Set the 'experimentalDecorators' option to remove this warning." To resolve this, you need to set the build action of ClientApp\tsconfig.json file to Content, and you may need to restart Visual Studio.
Build the Subscriber Component
The Subscriber component will be the component responsible for holding the incoming video stream. To build this, remove all the pre-added HTML from subscriber.component.html and add this line:
<div class="subscriber-div" #subscriberDiv></div>
It will only hold a div, which will serve as the target for the incoming stream.
Now in subscriber.component.css, add a couple styles:
.subscriber-div {
  height: 100%;
  width: 100%;
  position: fixed;
  top:50px;
  bottom: 0;
  left: 0;
  z-index: 0;
}
.container {

  background: black;
  color: white;
  height: 100%;
}
This CSS will make the component take up the full screen and will push it to the bottom of the z-index, which will prevent it from overtaking the publisher's video, which will appear as a PIP in the bottom.
In the subscriber.component.ts file, we're going to create a component with a session and stream input. It also needs an element reference to the SubscriberDiv from the HTML template, as well as a session and stream that we'll be getting from the video component. Finally, it needs a subscribe method to subscribe to a session stream when the onStreamCreate event fires. Add the following code to the file:
import { Component, ElementRef, ViewChild, Input } from '@angular/core';
import *  as OT from '@opentok/client';
@Component({
  selector: 'app-subscriber',
  templateUrl: './subscriber.component.html',
  styleUrls: ['./subscriber.component.css']
})
export class SubscriberComponent {
  @ViewChild('subscriberDiv', { static: true }) subscriberDiv: ElementRef;
  @Input() session: OT.Session;
  @Input() stream: OT.Stream;
  constructor() { }
  subscribe(): void {
    const subscriber = this.session.subscribe(this.stream, this.subscriberDiv.nativeElement, {
      insertMode: "append",
      width: "100%",
      height: "100%"
    }, (err) => {
      if (err) {
        alert(err.message);
      }
    });
  }
}
Build the Video Component
Let's start with the video.component.html file. First delete any auto-generated html added to this file. Then add the template:
<div class="publishingDiv" [ngClass]="{'publishing': publishing}" #publisherDiv></div>
<div>
  <ng-template #subscriberHost></ng-template>
</div>
The publishingDiv will be the anchor in the DOM that we are going to be using for our publisher's video feed. The subscriberHost template is going to be where our subscriber is added when a subscriber joins a call. In the CSS file, let's drop any auto-generated CSS. Add styles that will set the publishingDiv to the bottom left-hand corner of the screen in a fixed position, take up 25% of the the height and width of the window, and sit at a z-index of 1 (immediately above where we put our subscriberDiv). Add the following to the video.component.css file:
.publishingDiv {
  height: 25%;
  width: 25%;
  left: 0;
  bottom: 0;
  position: fixed;
  z-index: 1;
}
Finally, we need to set up the component itself. Remember the StateService from earlier? We are going to be injecting it; from it, we'll be getting the sessionId, token, and ApiKey from the SessionController we created earlier.
Imports and Dressing the Component
First, import all the stuff we're going to need and build the VideoComponent class.
import { ViewContainerRef, Component, ElementRef, AfterViewInit, ViewChild, ComponentFactoryResolver, OnInit } from '@angular/core';
import * as OT from '@opentok/client';
import { SubscriberComponent } from '../subscriber/subscriber.component';
import { StateService } from '../stateService';
import { Router } from '@angular/router';
@Component({
  selector: 'app-video',
  templateUrl: './video.component.html',
  styleUrls: ['./video.component.css']
})
export class VideoComponent implements AfterViewInit, OnInit {
}
Component Fields and Constructors
Next, set up some fields for the VideoComponent class and constructor. In the constructor, we inject a ComponentFactoryResolver, which we use to grab the subscriberHost's native reference later, and the StateService, which is where we're going to pull our apiKey, token, and sessionId. The Router will help us route between components in our project; specifically, you'll need it to navigate back to the join controller if the state service doesn't contain an apiKey, token, or sessionId.
Inside the VideoComponent class add the following:
@ViewChild('publisherDiv', { static: false }) publisherDiv: ElementRef;
@ViewChild('subscriberHost', { read: ViewContainerRef, static: true }) subscriberHost: ViewContainerRef;
session: OT.Session;
publisher: OT.Publisher;
publishing;
apiKey: string;
token: string;
sessionId: string;
constructor(
  private componentFactoryResolver: ComponentFactoryResolver,
  private stateService: StateService,
  private router: Router
) { }
On Init Logic
Next, we'll set up the ngOnInit function. The StateService is injected immediately upon init, so that's where we're going to grab the apiKey, token, and sessionId. This function is going to store those items. If any of them don't exist, we're going to reroute to the Join page.
ngOnInit(): void {
  if (!this.stateService.apiKey$ || !this.stateService.token$ || !this.stateService.sessionId$) {
    this.router.navigate(['/']);
  }
  this.apiKey = this.stateService.apiKey$;
  this.token = this.stateService.token$;
  this.sessionId = this.stateService.sessionId$;
}
Publish the User's Stream
Next, we'll set up the publish method. We're going to call this after the view finishes initializing. This function will call the session's publish method, passing in the publisher element. It will transition the publishing field to true when the callback resolves. Add the following after ngOnInit:
publish() {
    this.session.publish(this.publisher, (err) => {
      if (err) {
        console.log(err)
      }
      else {
        this.publishing = true;
      }
    });
  }
Handle a Stream's Creation
Upon stream creation, we'll need to subscribe to it. The way we'll manage this is by grabbing the reference to that subscriber template we created in the HTML, initializing a Subscriber component for it, assigning the stream and session Id to it, and telling it to subscribe. Add the following after the publish method:
onStreamCreated(stream) {
  const componentFactory = this.componentFactoryResolver.resolveComponentFactory(SubscriberComponent);
  const viewContainerRef = this.subscriberHost;
  const componentRef = viewContainerRef.createComponent(componentFactory);
  (<SubscriberComponent>componentRef.instance).stream = stream;
  (<SubscriberComponent>componentRef.instance).session = this.session;
  (<SubscriberComponent>componentRef.instance).subscribe();
}
Set Up the Publisher
After the view has been initialized, ngAfterViewInit fires. At this point in the controller's life cycle, we have everything we need to get us into the video call. We're going to initialize the publisher, initialize the session, connect to the session, and in the callback after we connect to the session we're going to tell our stream to publish. We're also going to subscribe to the streamCreated event, which is going to call the onStreamCreated function that we made earlier. Add the following ngAfterViewInit function:
ngAfterViewInit(): void {
  this.publisher = OT.initPublisher
    (
      this.publisherDiv.nativeElement, {
      height: "100%",
      width: "100%",
      insertMode: 'append'
    });
  this.session = OT.initSession(this.apiKey, this.sessionId);
  this.session.connect(this.token, (err) => {
    if (err) {
      console.log(err);
    }
    else {
      console.log("connected");
      this.publish()
      let that = this;
      this.session.on("streamCreated", function (event) {
        that.onStreamCreated(event.stream);
      });
    }
  })
}
Build the Join Component
With the video component built, we just need to set up the join component and the app module.
Setup the Html
In the join.component.html file we're going to create a joinForm, which will only have one input, a roomName, which we are going to use to grab/generate the sessionId's and tokens. The template for the component is going to look like this:
<form class="joinForm" [formGroup]="joinRoomForm" (ngSubmit)="onSubmit(joinRoomForm.value)">
  <div>
    <input placeholder="room name" id="roomName" type="text" formControlName="roomName" align="center">
  </div>
  <button align="center" class="button" type="submit">Join</button>
</form>
Add Some Styles
We're not going to do anything too fancy with the styles here—we're just going to make sure that button and the input are centered and are the same size. Add the following to join.component.css:
form {
  display: normal;
  text-align: center;
  margin: auto;
}
input {
  display: inline-block;
  font-size: inherit;
  padding: .5em;
  margin-bottom: .2em;
  width: 300px;
}
button {
  display: inline-block;
  font-size: inherit;
  padding: .5em;
  width: 300px;
}
Build the Component
The join component is going to have a submission function for the join form, which is going to grab the session data from our back end and route the session data over to the video component via the state service. To do this, it will bring in the HttpClient, FormBuilder, StateService, and Router services through dependency injection, then build the room form. Next it will wait for an onSubmit from joinRoomForm, at which point it will post the roomName to the session controller, and use that response to build the Video component.
import { Component } from '@angular/core';
import { Router } from '@angular/router';
import { FormBuilder } from '@angular/forms';
import { HttpClient } from '@angular/common/http';
import config from '../../config';
import { StateService } from '../stateService';
@Component({
  selector: 'app-join',
  templateUrl: '/join.component.html',
  styleUrls: ['/join.component.css']
})
export class JoinComponent {
  joinRoomForm;
  constructor(
    private http: HttpClient,
    private formBuilder: FormBuilder,
    private stateService: StateService,
    private router: Router) {
    this.joinRoomForm = this.formBuilder.group({
      roomName: ''
    });
  }
  onSubmit(roomData) {
    let get_session_url = config.SAMPLE_SERVER_BASE_URL + '/session/getSession'
    this.http.post(get_session_url, roomData).subscribe(
      (res) => {
        this.stateService.token$ = res['token'];
        this.stateService.sessionId$ = res['sessionId'];
        this.stateService.apiKey$ = res['apiKey'];
        this.router.navigate(['/video'])
      }
    )
  }
}
Set Up the App
Before any of our Angular will work, we're going to have to set up the whole app module. We'll start by setting up the base HTML. In ClientApp\src\app\app.component.html, I added a title above the router-outlet, which guarantees that the title will display on our child pages. Also make sure you remove the <app-nav-menu></app-nav-menu>, as that pre-exists from the originally built template:
<body>
  <div class="container">
    <b><p style="font-size: 34px; text-align:center">Basic Angular Video Chat</p></b>
    <router-outlet></router-outlet>
  </div>
</body>
Next, in ClientApp\src\app\app.module.ts, we need to define our module, which means adding the new components that we created, removing the components that we removed at the very beginning, and establishing the routes that we are going to want to use. Add the components as imports, and then in the declarations field make sure you have the HttpClientModule, FormsModule, ReactiveFormsModule, and RouterModule in your import section. SubscriberComponent will be an entry component. The routes will look as follows: '' -> JoinComponent, video -> VideoComponent, subscriber -> SubscriberComponent.
Configure your App.
You have to set up configuration in two places, config.ts and appsettings.json. You should have set up config.ts earlier, so I won't go over that again. For appsettings.ts, just add apiKey and apiSecret as fields and populate with the ApiKey and ApiSecret from your Vonage Video API account. The file will look something like this:
{
  "Logging": {
    "LogLevel": {
      "Default": "Warning"
    }
  },
  "AllowedHosts": "*",
  "ApiKey": "",
  "ApiSecret": ""
}
With that, you should be all set! I did run into some issues with Angular versioning when I built the demo app the first time—feel free to borrow my package.json file from GitHub.
Testing
All you need to do to test is fire it up in IIS Express—hit the Debug button or press f5 in Visual Studio. Doing this launches the Join page. Enter a room name, and you'll join a new session associated with that room. You can have another endpoint navigate to that same endpoint and join the same room, and they will join with you in the room.
Wrapping up
Now that you have a basic shell of a video chat application in Angular, you can explore doing so much more with the Vonage Video APIs. You can record sessions, share your media, stream your video calls, and much more!

Top comments (0)