
Have you ever gotten halfway through writing a long message to someone in a chat and think; wouldn’t this just be so much easier if I could talk to them? Of course, you have! By using the Nexmo Client SDK in your chat application, you’ll be able to do just that.
The demo application and a finished example can be found on GitHub now.
Prerequisites
Node & NPM
To get started you’re going to need Node and NPM installed. This guide uses Node 8 and NPM 6. Check they’re installed and up-to-date.
node --version
npm --version
Both Node and NPM need to be installed and at the correct version. Go to nodejs.org and install the correct version if you don’t have it.
Nexmo CLI
To set up your application, you’ll need to install the Nexmo CLI. Install it using NPM in terminal.
npm install -g nexmo-cli@beta
Sign up for a free Nexmo account and set up the Nexmo CLI with the API key and secret which can be found on the dashboard.
nexmo setup <your_api_key> <your_api_secret>
Git (Optional)
You can use git to clone our demo application from GitHub.
For those not comfortable with git commands, don’t worry, I’ve you covered. This guide contains instructions on downloading the project as a ZIP file.
Follow this guide to install git
The Demo Application
The application is, first and foremost, a simple chat client. It allows two users (or more, if you configure it to do so) to log in and start chatting.
Basic Installation
To keep this guide easy to follow, clone the demo application straight from GitHub.
git clone https://github.com/nexmo-community/enable-audio-in-chat.git
For those not comfortable with git commands, you can download the demo application as a zip file and unpack it locally.
Once cloned or unpacked, change into the new demo application directory.
cd enable-audio-in-chat
Install the npm dependencies.
npm install
Now, start the application.
npm start
Now you can try it out in your favourite browser and view the application, which should be running at the default address: http://127.0.0.1:8080.
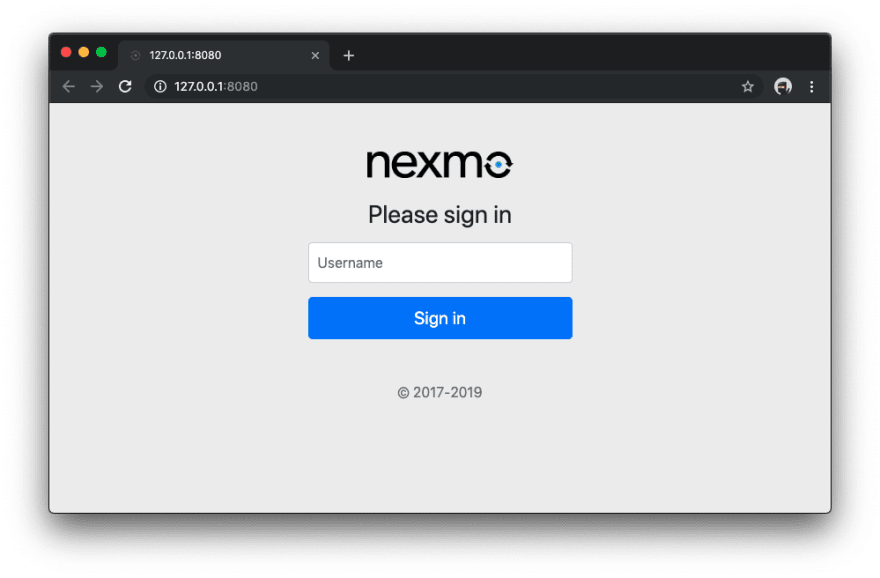
Unconfigured, you’ll see a login box. You can’t log in because you don’t know who can log in yet!
Keep in mind, you’re just mocking authentication here, and you should be prepared to set up something real and secure for production applications.

Stop the application: In terminal or bash, you can use CTRL+C to stop the running process. As you make changes, you shouldn’t need to start or stop the application, as everything is requested fresh from the server every time you reload a page.
Super Simple Setup
In the demo (the one you’re running now,) there is a script to make the next steps much easier.
How the script works: It asks you for some input and then creates the application, conversation and users required for this guide by running all the setup commands you’d otherwise have to do manually. It then goes on to generate the config for the demo application. You can check out the code here to make sure it doesn’t do anything naughty.
Woah , you don’t want to run my script? You’d rather generate the config file manually? I’ve got your back – steps to create the config file manually.
Run the Setup Script
So, to configure the application for the coming steps, run the setup script.
npm run setup-script
The script asks some questions.
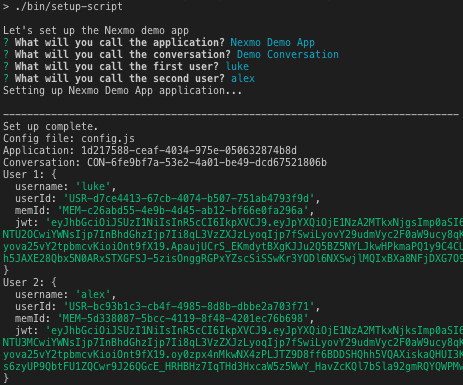
By the end of it, it updates the config.js to look more like this.
const USERS = {
  luke: 'eyJhbGciOiJIkpXVCJ9.eyJpYXQiOnt9fX19.EDHi1R61yh01oeZ9DYQ',
  alex: 'eyJhbGciOi234JXVCJ9.eyJpyXQiOjt9fX19.VqLdU97Fdb2ZiOfqmoQ',
}

const CONVERSATION_ID = 'CON-da9c1a6b-c2dc-4bdd-ac03-cc041ef03502'
So What Did That Script Do?!?
So, behind the scenes, the script carries out the following steps.
- Create a Nexmo application using the
nexmo app:createcommand and keeps note of the ID. - Create a Nexmo conversation using the
nexmo conversation:createcommand and keeps note of the ID. - Create both users using the
nexmo user:createcommand and keeps note of the IDs. - Add both users to the Nexmo conversation with
nexmo member:add. - Generate JWTs for both users to access the application and keeps note of the JWTs.
- Writes out the config to config.js using the IDs and JWTs it has kept.
Chitty Chitty Chat Chat
Now, you’ve configured our basic demo application; you can have a little chat! Here’s me testing it out with one of my colleagues.

Enable Audio
Now, you’re up and running. You have a demo application that you can use to chat with other people. Next, add a button to enable audio so you can also talk to each other.
The HTML
Find the following code inside the index.html file.
  <section id="messages">
    <!-- /audio-toggle -->
    <h1>Messages</h1>
    <div id="messageFeed"></div>

    <textarea id="messageTextarea"></textarea>
    <br>
    <button id="send">Send</button>
  </section>
Replace the line <!-- /audio-toggle --> with the following HTML.
    <div>
      <audio id="audio">
        <source>
      </audio>
      <div class="btn-group" data-toggle="buttons">
        <label class="btn btn-secondary">
          <input type="checkbox" autocomplete="off" id="audioToggle"> <span id="audioToggleText">Enable Audio</span>
        </label>
      </div>
    </div>
Now, let me explain the above code.
<audio> tags were added to the HTML spec to allow for embedding audio files (or streams) onto webpages. The <source> tag is used to indicate a source (path/url) and version for the audio, allowing for multiple versions of the audio to be embedded/encoded for different contexts (or browsers, operating systems, etc).
Additionally, you’re adding a button that will be our toggle.
The index.html file should now contain a section that looks something like this.
  <section id="messages">
    <div>
      <audio id="audio">
        <source>
      </audio>
      <div class="btn-group" data-toggle="buttons">
        <label class="btn btn-secondary">
          <input type="checkbox" autocomplete="off" id="audioToggle"> <span id="audioToggleText">Enable Audio</span>
        </label>
      </div>
    </div>
    <h1>Messages</h1>
    <div id="messageFeed"></div>

    <textarea id="messageTextarea"></textarea>
    <br>
    <button id="send">Send</button>
  </section>
These are all the HTML changes this time. So, what’s next?
The JavaScript
Next, you’ll edit the JavaScript for our demo application.
Find the following code inside the chat.js file.
  constructor() {
    this.messageTextarea = document.getElementById('messageTextarea')
    this.sendButton = document.getElementById('send')
    this.loginForm = document.getElementById('login')
    this.loginButton = document.getElementById('loginButton')
    this.messages = document.getElementById('messages')
    this.messageFeed = document.getElementById('messageFeed')
    // audio-elements
    this.setupUserEvents()
  }
Replace the line // audio-elements with the following JavaScript code.
    this.audio = document.getElementById('audio')
    this.audioToggle = document.getElementById('audioToggle')
    this.audioToggleText = document.getElementById('audioToggleText')
This code ‘registers’ 3 new elements so you can more easily use the on-page elements throughout the JavaScript file.
Now, find this code inside the same chat.js file.
    // audio-toggle-event

    this.showConversationHistory(conversation)
Replace the line // audio-toggle-event with the following JavaScript code.
    conversation.on("member:media", (member, event) => {
      console.log(`*** Member changed media state`, member, event)
      const text = `${member.user.name} <b>${event.body.audio ? 'enabled' : 'disabled'} audio in the conversation</b><br>`
      this.messageFeed.innerHTML = text + this.messageFeed.innerHTML
    })
This code also ‘registers’ a listener for the member:media event. When it sees that event, it then sends a console.log to the browser; like, member and event data. Especially useful for debugging. It’s also going to create some formatted text and update the messageFeed by prepending the text onto the existing feed.
Then, find this code inside the chat.js file.
    })

    // audio-click-event
  }
Replace the line // audio-click-event with the following JavaScript code.
    this.audioToggle.addEventListener('click', () => {
      const buttonContainer = this.audioToggle.parentNode
      if (this.audioToggle.checked) {
        this.audioToggleText.innerHTML = 'Disable Audio'
        buttonContainer.classList.add('btn-danger')
        buttonContainer.classList.add('active')
        buttonContainer.classList.remove('btn-secondary')
        this.conversation.media.enable().then(stream => {
          // Older browsers may not have srcObject
          if ("srcObject" in this.audio) {
            this.audio.srcObject = stream
          } else {
            // Avoid using this in new browsers, as it is going away.
            this.audio.src = window.URL.createObjectURL(stream)
          }

          this.audio.onloadedmetadata = () => {
            this.audio.play()
          }

          this.eventLogger('member:media')()
        }).catch(this.errorLogger)
      } else {
        this.audioToggleText.innerHTML = 'Enable Audio'
        buttonContainer.classList.remove('btn-danger')
        buttonContainer.classList.remove('active')
        buttonContainer.classList.add('btn-secondary')
        this.conversation.media.disable().then(this.eventLogger('member:media')).catch(this.errorLogger)
      }
    })
This code is a biggy. And, this too also registers a listener. This time, it is listening for when the user clicks on our audioToggle button that you’ve just added.
If a user clicks on the button and it was already toggled on, it toggles-off. If it was toggled off, it toggles-on.
When on, it enables audio by adding the audio stream’s URL to the tag and updates the styling of the button. Therefore, when off, it disables audio by removing the audio stream’s URL from the tag and updates the styling of the button.
The entire chat.js file should now look something (long) just like this.
class ChatApp {
  constructor() {
    this.messageTextarea = document.getElementById('messageTextarea')
    this.sendButton = document.getElementById('send')
    this.loginForm = document.getElementById('login')
    this.loginButton = document.getElementById('loginButton')
    this.messages = document.getElementById('messages')
    this.messageFeed = document.getElementById('messageFeed')
    this.audio = document.getElementById('audio')
    this.audioToggle = document.getElementById('audioToggle')
    this.audioToggleText = document.getElementById('audioToggleText')
    this.setupUserEvents()
  }

  joinConversation(userToken) {
    new NexmoClient({ debug: false })
      .login(userToken)
      .then(app => {
        console.log('*** Logged into app', app)
        return app.getConversation(CONVERSATION_ID)
      })
      .then((conversation) => {
        console.log('*** Joined conversation', conversation)
        this.setupConversationEvents(conversation)
      })
      .catch(this.errorLogger)
  }

  showConversationHistory(conversation) {
    conversation
      .getEvents({ page_size: 20 })
      .then((events_page) => {
        var eventsHistory = ""

        events_page.items.forEach((value, key) => {
          if (conversation.members.get(value.from)) {
            const date = new Date(Date.parse(value.timestamp))
            switch (value.type) {
              case 'text':
                eventsHistory = `${conversation.members.get(value.from).user.name} @ ${date.toLocaleString('en-GB')}: <b>${value.body.text}</b><br>` + eventsHistory
                break;
              case 'member:joined':
                eventsHistory = `${conversation.members.get(value.from).user.name} @ ${date.toLocaleString('en-GB')}: <b>joined the conversation</b><br>` + eventsHistory
                break;
            }
          }
        })

        this.messageFeed.innerHTML = eventsHistory + this.messageFeed.innerHTML
      })
      .catch(this.errorLogger)
  }

  setupConversationEvents(conversation) {
    this.conversation = conversation
    this.messages.style.display = "block"

    // Bind to events on the conversation
    conversation.on('text', (sender, message) => {
      const date = new Date(Date.parse(message.timestamp))
      console.log('*** Message received', sender, message)
      const text = `${sender.user.name} @ ${date.toLocaleString('en-GB')}: <b>${message.body.text}</b><br>`
      this.messageFeed.innerHTML = text + this.messageFeed.innerHTML
    })

    conversation.on("member:joined", (member, event) => {
      const date = new Date(Date.parse(event.timestamp))
      console.log(`*** ${member.user.name} joined the conversation`)
      const text = `${member.user.name} @ ${date.toLocaleString('en-GB')}: <b>joined the conversation</b><br>`
      this.messageFeed.innerHTML = text + this.messageFeed.innerHTML
    })

    conversation.on("member:media", (member, event) => {
      console.log(`*** Member changed media state`, member, event)
      const text = `${member.user.name} <b>${event.body.audio ? 'enabled' : 'disabled'} audio in the conversation</b><br>`
      this.messageFeed.innerHTML = text + this.messageFeed.innerHTML
    })

    this.showConversationHistory(conversation)
  }

  errorLogger(error) {
    console.log(error)
  }

  eventLogger(event) {
    return () => {
      console.log("'%s' event was sent", event)
    }
  }

  setupUserEvents() {
    this.sendButton.addEventListener('click', () => {
      this.conversation.sendText(this.messageTextarea.value)
        .then(() => {
            this.eventLogger('text')()
            this.messageTextarea.value = ''
        })
        .catch(this.errorLogger)
    })

    this.loginForm.addEventListener('submit', (event) => {
      event.preventDefault()
      const userName = this.loginForm.children.username.value
      const userToken = this.authenticate(userName)
      this.loginForm.children.username.value = ''
      if (userToken) {
        this.joinConversation(userToken)
        this.loginForm.style.display = 'none'
      } else {
        alert('user not found')
      }
    })

    this.audioToggle.addEventListener('click', () => {
      const buttonContainer = this.audioToggle.parentNode
      if (this.audioToggle.checked) {
        this.audioToggleText.innerHTML = 'Disable Audio'
        buttonContainer.classList.add('btn-danger')
        buttonContainer.classList.add('active')
        buttonContainer.classList.remove('btn-secondary')
        this.conversation.media.enable().then(stream => {
          // Older browsers may not have srcObject
          if ("srcObject" in this.audio) {
            this.audio.srcObject = stream
          } else {
            // Avoid using this in new browsers, as it is going away.
            this.audio.src = window.URL.createObjectURL(stream)
          }

          this.audio.onloadedmetadata = () => {
            this.audio.play()
          }

          this.eventLogger('member:media')()
        }).catch(this.errorLogger)
      } else {
        this.audioToggleText.innerHTML = 'Enable Audio'
        buttonContainer.classList.remove('btn-danger')
        buttonContainer.classList.remove('active')
        buttonContainer.classList.add('btn-secondary')
        this.conversation.media.disable().then(this.eventLogger('member:media')).catch(this.errorLogger)
      }
    })
  }

  authenticate(username) {
    return USERS[username] || null
  }
}
new ChatApp()
Assuming you’ve got everything right, run npm start again and open the application at http://127.0.0.1:8080. If it was already running, you should just be able to refresh the page to get the latest version.

If you don’t think the JavaScript is working and restarting NPM doesn’t help, use CTRL+F5 to refresh the webpage, which requests all the JS and CSS on the page fresh.
Login using the test credentials you’ve set up.

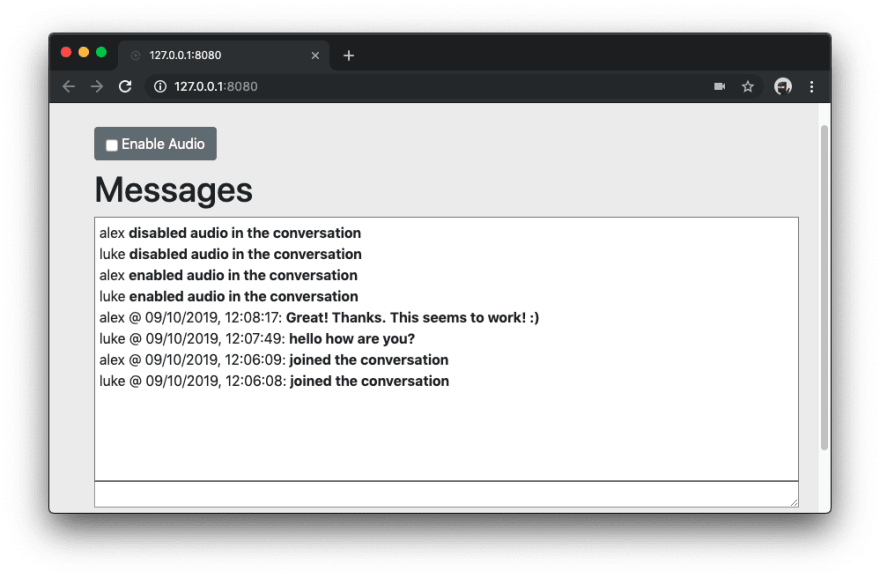
Now you’re logged in, you can see the message feed as before, and the button to Enable Audio. Go ahead and click on Enable Audio.
Allow the application to use your microphone. This is in Chrome for MacOS, other browsers and operating systems may vary.

With both users logged in and having enabled audio, you can hold a conversation between the two users.

At this point, if you’re in a coffee shop and you’re testing it in two browser windows like I was, be prepared for frowns from your co-coffee-drinkers when you generate a noisy feedback loop.
Now you can click on Disable Audio to turn the microphone back off. Other users are alerted that you have disabled audio.
The Results
There is always going to be a need to enable audio communication between web users and our Client SDK is a perfect solution for this.
Give it a try and let me know what you think in our Community Slack or in the comments section below.
The post Enable Audio in an Existing Chat Application appeared first on Nexmo Developer Blog.

Top comments (0)