I completed the Cloud Resume Challenge and lived to tell about it.

With no prior experience or education in technology, the tools required to successfully master this challenge were completely foreign to me. The finished product - which required several weeks of early morning study, research, coding, and troubleshooting - was difficult but fun to bring to life. Opening myself up to the tech world has certainly been a rewarding experience, so I'm grateful to Forrest for the challenge!
This wrap-up post provides an overview of my experience with the challenge and a few tips for others tackling the project. For anyone like me intimidated by this challenge (or already stumbling through it): don't panic. You'll be surprised by what you can accomplish!
Jump to Section
- Why I Took the Challenge
- Challenge Overview
- Taking the AWS Certified Cloud Practitioner Exam
- Building the Resume Site
- Building the Visitor Count Functionality
- Creating Pipelines for CI/CD
- Summary
Why I Took the Challenge
After spending the past nine years growing an auto retail startup I founded with two remarkable business partners, I decided to make a change and recently transitioned to a board level role in pursuit of new ventures. While my background in finance and experience founding a company have honed my analytical and leadership skills, I've determined that improving my talent stack with technical skills will help me in my next venture, whether that's launching a new company or joining an existing one. In an effort to better understand cloud and voice technologies - areas that are particularly compelling to me - I began following a few interesting folks in the space on Twitter and stumbled upon Forrest Brazeal, the benefactor (aka evil genius) behind the Cloud Resume Challenge.
Introducing the #CloudResumeChallenge. I'm volunteering my network to help you get your first job in the cloud. But I can only share a certain kind of resume. Thread -> forrestbrazeal.com/2020/04/23/the…17:19 PM - 27 Apr 2020
75
142


The project sounded fun, provided a practical complement to my conceptual learning, and offered exposure to people and companies doing work that aligns with my personal interest in cloud and voice technologies. Why not give it a shot?
Challenge Overview
The challenge in and of itself sounds straightforward: create a simple resume site with a visitor count feature using Amazon Web Services (AWS). Easy enough, right?
Well, Forrest provides specific instructions in the form of 16 distinct steps that must be completed to successfully meet the challenge. These steps might be a breeze for tech professionals with AWS experience, but for a novice like me...

Each step led me down a rabbit hole of tutorials, Googling, coding, and troubleshooting that took me on a roller coaster of emotions from frustration and despair when my fixes wouldn't work to elation when something finally clicked.

Taking the AWS CCP Exam
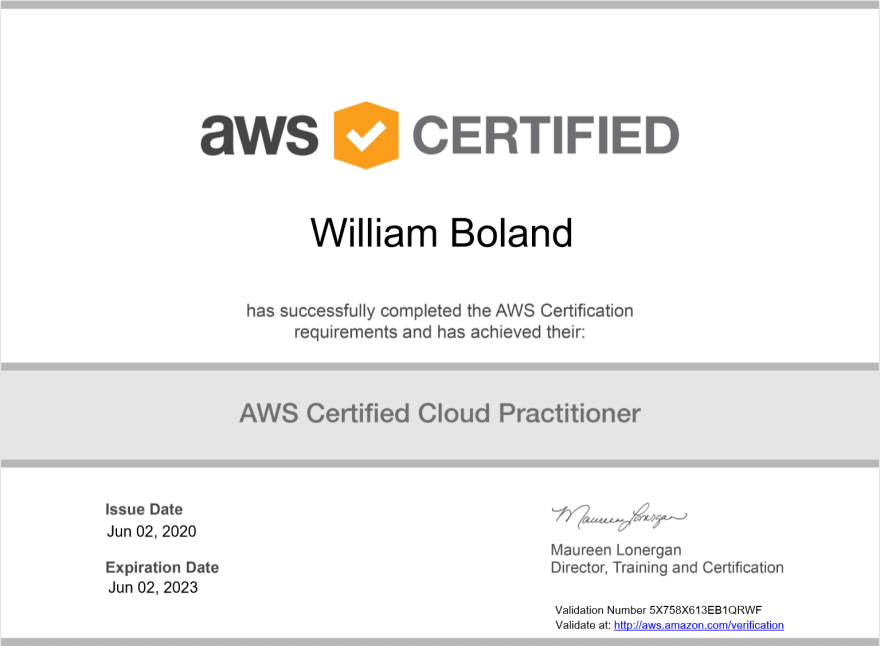
As a first step, I spent a few weeks preparing for the AWS Certified Cloud Practitioner exam. Given the scope of services offered by AWS, I was a little overwhelmed at first, but it eventually came together. Overall, I found getting certified before building the resume site helpful because it provided a strong understanding of various AWS services I used in completing the challenge.
Below are the steps I took to prepare:
- Took AWS Cloud Essentials Course. This is a good starting point because it's AWS official, free, and takes about 6 hours.
- Reviewed the overview pages for the key AWS resources covered on the exam and took notes for future reference. This YouTube video provides a helpful index of links.
- Took A Cloud Guru - CCP Course. This added a helpful layer to the AWS Cloud Essentials Course because it's specifically focused on helping pass the exam and includes some labs that got me playing around in my AWS account. They currently have a 7-day free trial you can use to access the course, though I ended up purchasing an annual subscription because I intend to pursue additional certifications.
- Read the following AWS guides and whitepapers:
- Did tons of practice questions and exams. This was the most helpful study tactic, as it helped me identify my weak areas so I could attack those with additional study. AWS offers some free questions, and the ACG - CCP course provided practice questions at the end of each section along with a comprehensive final exam. That said, I found the two paid resources below to be the most helpful. They each cost $15, and their content was quite different so complemented each other well.
That might be overkill, but mission accomplished.
Step 1 down, 15 to go...
Building the Resume Site
Creating resume content in HTML/CSS
Since the resume site needed to be written in HTML and styled with CSS, I took a helpful HTML/CSS course from Khan Academy to get a decent grasp on webpage fundamentals. The initial resume site I built from scratch was functional but had a face only a mother could love.

Fortunately, I found a resume template I loved. Using Notepad++ along with my newfound HTML/CSS knowledge, I adapted the template to my needs and made my resume site much easier on the eyes.

Steps 2 + 3 down, 13 to go...
Deploying static S3 site with custom domain and HTTPS
Once I had my site content ready, I needed a place to host it publicly on the web. Enter Amazon Simple Storage Service (S3). The first step is to create an S3 bucket and enable it to host a static website:
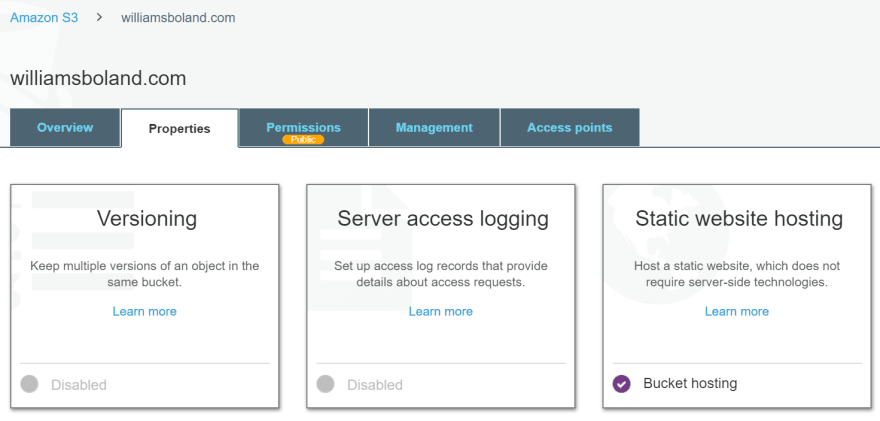
After uploading my HTML/CSS files, I had a working site, and with a URL like this, who who wouldn't want to visit?

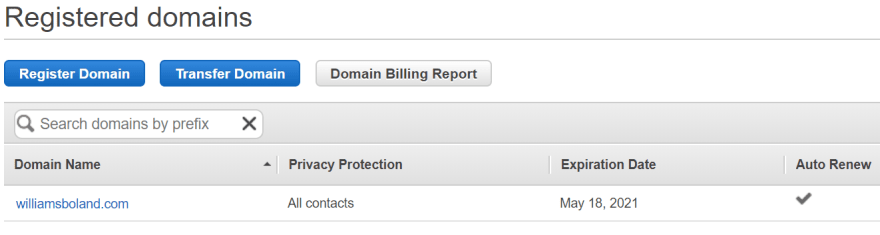
To make it a little easier for visitors to find my site, I used Route 53 to purchase a domain.
From there, I used AWS Certificate Manager to secure the site with SSL so it could be served over HTTPS and then set up a distribution through CloudFront, AWS' content delivery network.
CloudFront uses cached content at AWS edge locations to improve user latency (ie, the time it takes for users around the world to access your site content). As such, when you update your site content down the road, it may take up to the default cache time to live of 24 hours before CloudFront begins serving your new content. If you want to serve the new content immediately, you'll need to invalidate your CloudFront distribution.

Some Tips if you're Troubleshooting:
- Make sure your S3 bucket has the same name as your custom domain.
- When you create your static site bucket, make sure it's public, and also make sure any objects your upload to the bucket are public.
- Check your DNS records and make sure the naming conventions match CloudFront.
Steps 4 + 5 + 6 down, 10 to go...
Placing visitor count on page using Javascript
While my site was live and looking good, I still needed a way to get the required visitor count on my page. Specifically, I would need JavaScript to call the latest visitor count from an API endpoint that I set up in subsequent steps. This tutorial was a helpful introduction to JavaScript, but it took Googling around a bit to find the right method to meet my specific use case. I experimented until I landed on something that would hopefully work, uploaded my JavaScript code, referenced it in my HTML, and moved onto the next steps. When I later got my API working, I came back to my JavaScript, pasted in the API endpoint, and voila, I had a dynamic visitor count.


Tip if you're Troubleshooting:
- For your JavaScript, take a look at FetchAPI and XMLHttpRequest.
Step 7 down, 9 to go...
Building the Visitor Count Functionality
Using AWS Lambda, DynamoDB, and API Gateway to create visitor count function
We now enter the tricky phase. The steps I describe at a high level below do no justice to the cringe-worthy amount of tutorials, Googling, and trial & error I performed before I had everything working properly. The feeling of elation when everything started to click, however, was well worth it.

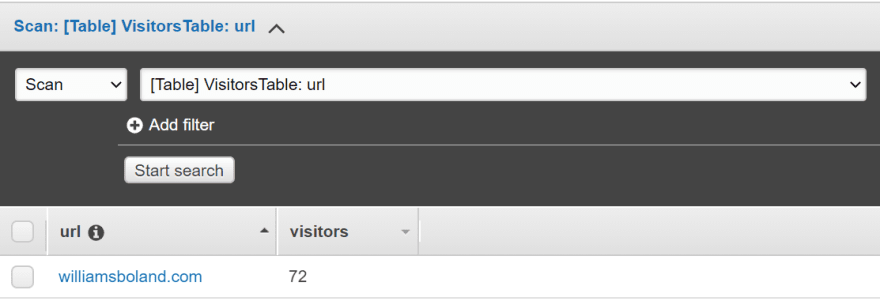
- Created a DynamoDB table to update and store the number of visitors to my resume site. This was fairly straightforward once I figured out the primary key and attribute conventions.
- Built a Lambda function using Python and the AWS SDK for Python called boto3. When triggered, the Lambda function updates the number of visitors stored in my DynamoDB table by exactly 1. This was one of the most fun parts of the process, and I'm excited to continue learning Python.
- Implemented testing for my Python code. There are several ways to do this, but I used unittest.
- Created an API using API Gateway that sits in between my front-end website and my back-end Lambda function. Using the API's invoke URL, my JavaScript code calls my API whenever someone visits my website, and the API immediately triggers my Lambda function to update the number of visitors in my DynamoDB table and return the updated count to my API, which JavaScript then displays on my site. Super cool.
Tip if you're Troubleshooting:
- If you're struggling to get your API endpoint to work, try enabling Cors and adjusting your Lambda return so it passes the correct headers back in its response (you need to do both when using a proxy integration for your API).
Steps 8 + 9 + 10 + 11 down, 5 to go...
Defining back-end AWS resources in SAM template and deploying using SAM CLI
While you could configure the AWS resources above (DynamoDB, Lambda, and API Gateway) individually in the AWS console, a best practice would be to configure and deploy them as a unified application using the SAM CLI. Figuring out how to define my AWS resources in a SAM template.yaml took some time, but once that code was cracked, deploying and updating using the SAM CLI was super easy and demonstrated the power of Infrastructure as Code. Watching my application come to life in CloudFormation after deploying with AWS CLI was awesome!
Tips if you're Troubleshooting:
- When defining your Lambda function in the SAM template.yaml file, use the convention "filename.functionname" for your Handler property so your SAM template references your Python function appropriately. For example, for a Python file named "lambdafunction.py" with the Lambda function inside defined as "handler", your Handler property in the SAM template would be "lambdafunction.handler". This tripped me up initially.
- Finding the right API invoke URL can be tricky, but if you define it as an Output in your SAM template.yaml file, you can access it more easily post-deployment.

Step 12 down, 4 to go...
Creating Pipelines for CI/CD
This was one of the most fun and most useful steps in the process. While I had a working application tying together my front-end resume website and back-end visitor count function code, I would certainly need to make updates. Setting up a CI/CD pipeline would allow me to update my code from an online repository and automatically push those updates to my front-end website and back-end app/infrastructure.
- Created a GitHub account and set up two private code repositories, one for my front-end (HTML, CSS, JavaScript) and one for my back-end (Python function/tests, SAM templates), and uploaded my files.

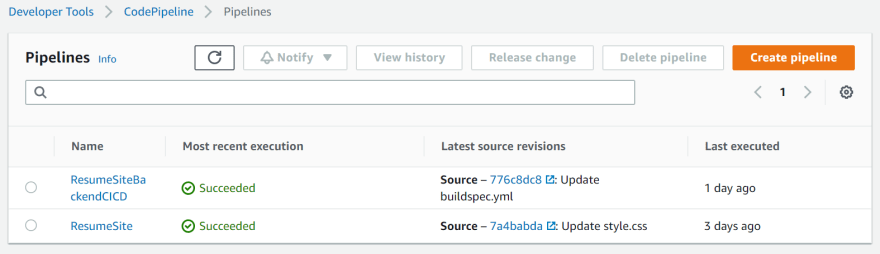
- Set up a continuous deployment pipeline using AWS CodePipeline using my front-end code repository on GitHub as the source. Now, whenever I make updates to my HTML/CSS/JavaScript code on GitHub, CodePipeline automatically deploys those changes to my S3 bucket.
- Set up a second pipeline using CodePipeline, this time using my back-end code repository as the source. This pipeline was trickier than the front-end because I added a build stage that would test and package my application before deploying to production, but now that this is setup, my updates to my back-end code in GitHub automatically test and deploy!
Tip if you're Troubleshooting:
- If you're using CodePipeline for continuous deployment, be sure to check the "enable logs" box when setting up your pipeline, as it will provide more detailed insight into any pipeline errors/failures. My pipeline failed repeatedly during the test stage, leading me to spend even more time troubleshooting my buildspec.yml, which ultimately proved unnecessary, as once I enabled build logs in my pipeline settings, I was able to see exactly why my builds were failing: my CodePipeline service role did not have the proper permissions to interact with my DynamoDB table. Easy fix from there.
Steps 13 + 14 + 15 down, just this blog post to go!

Summary
Overall, the Cloud Resume Challenge was a fun, engaging project with "challenge" being the operative word. I learned a lot about cloud services, infrastructure-as-code, serverless applications, CI/CD, and some programming skills. I also learned a lot about myself, namely that a beginner's mindset is powerful and that I'm excited to keep going. Thanks again to Forrest Brazeal for putting this out there.

It's clear from Forrest's challenge and from the various resources I came across during the process that the tech community is open, supportive, and encouraging. To that end, if you're working through this challenge, good luck, and I hope this post was helpful. If you're still considering the challenge, I encourage you to give it a shot.
If you would like to connect or learn more about my experience with the Cloud Resume Challenge, please comment here or find me on LinkedIn or Twitter.

Top comments (5)
Nice write up Will! I can see a real logic to your thinking from the post — starting with why and then breaking everything down. Seems like you had no problem taking the challenge apart (or maybe that's just hindsight!) best of luck in the future!
Thanks for the note Lou! Breaking the project down and tackling one step at a time definitely helped overcome the overwhelm I felt at the beginning. I certainly faced loads of problems along the way, so recapping my experience with this write-up provided some nice perspective on how far I'd come!
well done! love the writeup. what certifications are you going to pursue next?
Thanks so much! As a next step, I would like to pursue AWS Certified Solutions Architect - Associate, Certified Developer - Associate, and Certified Alexa Skill Builder - Specialty.
This is great, I had a great time completing the Cloud Resume Challenge using Azure! Thank you for sharing your experience