- What is Django:
Django is a full stack web framework in python, it provides a fully functional MVC(Model-View-Control) framework for the developer which greatly increases the developers efficiency when creating a fully functional web app with requirements such as database management. With Django, the developer can create a functional web app without any third party packages or tools. Django is even more than that. When I was learning web programming, I always thought about how convenient it would be if an HTML page could use logic such as ‘if’ sentences or ‘for’ loops. Django made this come true!
- Getting Started:
First of all install the package with:
pip install Django
After that let’s create a new project:
Django comes with a “django-admin” command, which helps developers to manage their projects and that is what we are going to use right now for creating a new project:
django-admin startproject project1
After creating the project, we can move to the project folder and see what the new project brings us:
cd project1

python manage.py runserver
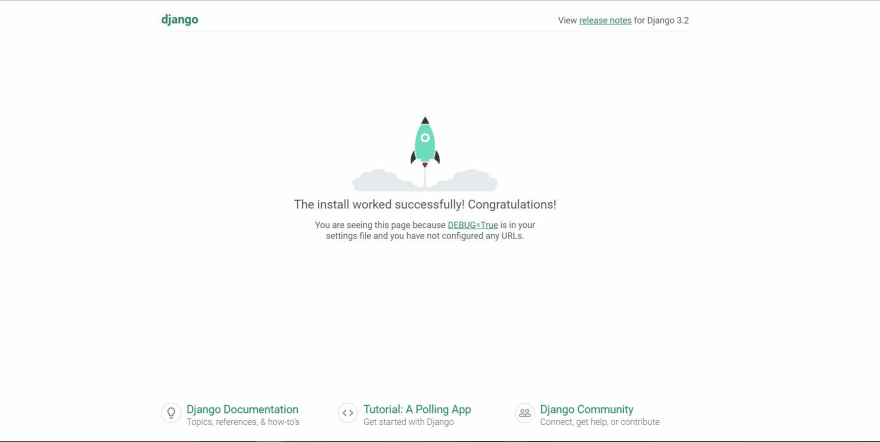
If everything runs smoothly, this page will show up at our local host’s port 8000. (http://127.0.0.1:8000/)
Now, if we look into the folder we have just created, there would be a folder called “project1” there would be two python files called “settings.py” and “urls.py”. They are very important to the web app we are going to create. “Settings.py” stores all the configurations and plugins that we may use in the app. For example, the database engine we are going to use, error monitoring service such as sentry, etc. They are all set up here. Django’s default database is SQLite. However, besides that, Django also officially supports PSQL, MySQL and Oracle. Besides “Settings.py”, “url.py” stores all the paths of our project, indicating how different apps under this project relate to each other. These are settings on the project level, now let’s switch our view to the app.
In Django, an app falls under a project. So since now we have created a new project, let’s initiate a new app under this project:
cd project1

django-admin startapp app1
In the app1 folder, we can see several python files. Among them, contents in “models.py” defines instances that will be used in the app. For example, this part of script:
class User(models.Model):

    user = models.CharField(max_length=32)

    email = models.EmailField(max_length=32)

    pwd = models.CharField(max_length=32)
This class defines what information a “User” instance contains and how it will be saved in the database. In the database, it will be looked like this:
Now, as we have changed the model, we need to apply these changes to the database by migrations.
python manage.py makemigrations

python manage.py migrate
Note that this command will generate a python file “0001_initial.py” since this is the first time we migrate. The number before the underscore indicates the serial number of that migration. Also by executing:
python manage.py sqlmigrate app1 0001
We can check the sql script that actually altered the database.
The ‘view.py’ in this folder contains the actual code that controls the whole app. Each view function that interacts with a real page will take in a variable called “request” and this “request” is what connects front end pages and back end python codes. Before creating a view, let’s first create a front end page for it to render. The default Django directory to store front end pages is a folder called “templates”, notice that it is not automatically generated. After creating a template page, let’s call it ‘index.html’ here, we need to add it into the app’s ‘url.py’ (not the project’s url.py!). In order to do that we need to add a ‘path’ object to the ‘urlpatterns’ array in ‘url.py’. The ‘path’ function looks like this:
path('', index, name='index')
It takes in 3 variables, the first one is the url pattern that will lead to this page, the second one is the view function the app is going to call if a user requested this url pattern, the third one is the name on this page. If a user has sent a request to visit this page, it will call the function “index()” from the “views.py” we’ve just mentioned. This “index()” function will then return a rendered page by:
return render(request, ‘index.html’, context)
Django will then look for a page called “index.html” in the “templates” folder and render it on the browser. The variable “context” is a dictionary that contains information we want to send to the template page. Enabling python scripts in an HTML page is one of the best features Django has. Developers can use {{context.key}} to get variables sent from view functions. This makes front end programming much easier.
After finishing the steps above our first Django app is ready to serve! Switch back to the project folder (where manage.py locates), use:
python manage.py runserverto start the web app, type 127.0.0.1:8000 and you will see the first page of our app!


Latest comments (0)