What you’ll be building
Introduction
Building a marketplace website is a great way to learn frontend programming. This is because it requires both creating a good user interface experience 🖥 and interacting with backend APIs 🧠.
On top of a basic marketplace website, by the end of this tutorial you will be equipped with the knowledge of how to integrate live chat 🗣 using simple yet powerful CometChat Pro SDKs & API. We will be focusing on using the Angular UI Kit out of the many supported CometChat Pro UI Kits.
All source code in this tutorial can be found in this Github repo. It consists of two main folders:
- a starter folder for you to follow along and
- a final folder that you can quickly spin up to experience the end result.
With that said, let’s jump right in for an exciting learning journey 🚀!
Prerequisites
This tutorial is geared towards a beginner with a few intermediate level usage of Angular. The intention is to maximise 📈 learning and to create a good working demo of an Etsy marketplace clone.
Listed below are what you will need to get the most out of this tutorial:
- A basic understanding of HTML, JavaScript and TypeScript.
- Angular Version 11.
- Node JS Version 10 or higher.
- Any modern text editor, VS Code is recommended.
Running the Angular Marketplace Example Online
To instantly ⚡ dip your toe into running and changing the website content, you can use the Stackblitz online editor and preview shown below. Note that this is the starter website and not our final version shown as GIFs at the top of this article.
Here it is in action:
After exploring the code and the website in StackBlitz, it is still recommended to run the example locally due to performance and security reasons. That will be covered in the next section.
Running the Angular Marketplace Example Locally
- Install Node.js and NPM from https://nodejs.org/
- Download or clone the project source code from https://github.com/wizlee/angular-marketplace.
- Note: If you are using git clone in windows, you may need to run
git config --global core.longpaths truebefore cloning in order for the clone to be successful. This is to overcome the windows filepath length limitation.
- Note: If you are using git clone in windows, you may need to run
- Change directory to the ‘angular-marketplace’ folder that you just downloaded/cloned -
cd angular-marketplace. - We will use the 'angular-marketplace-start’ folder as our base project and work our way to the final version. First, change directory into it by running
cd angular-marketplace-start. - Install all required npm packages by running
npm installornpm ifrom the command line in the 'angular-marketplace-start’ project folder. - Install Angular CLI version 11 globally on your system by running
npm install -g @angular/cli@11. - Start the application by running
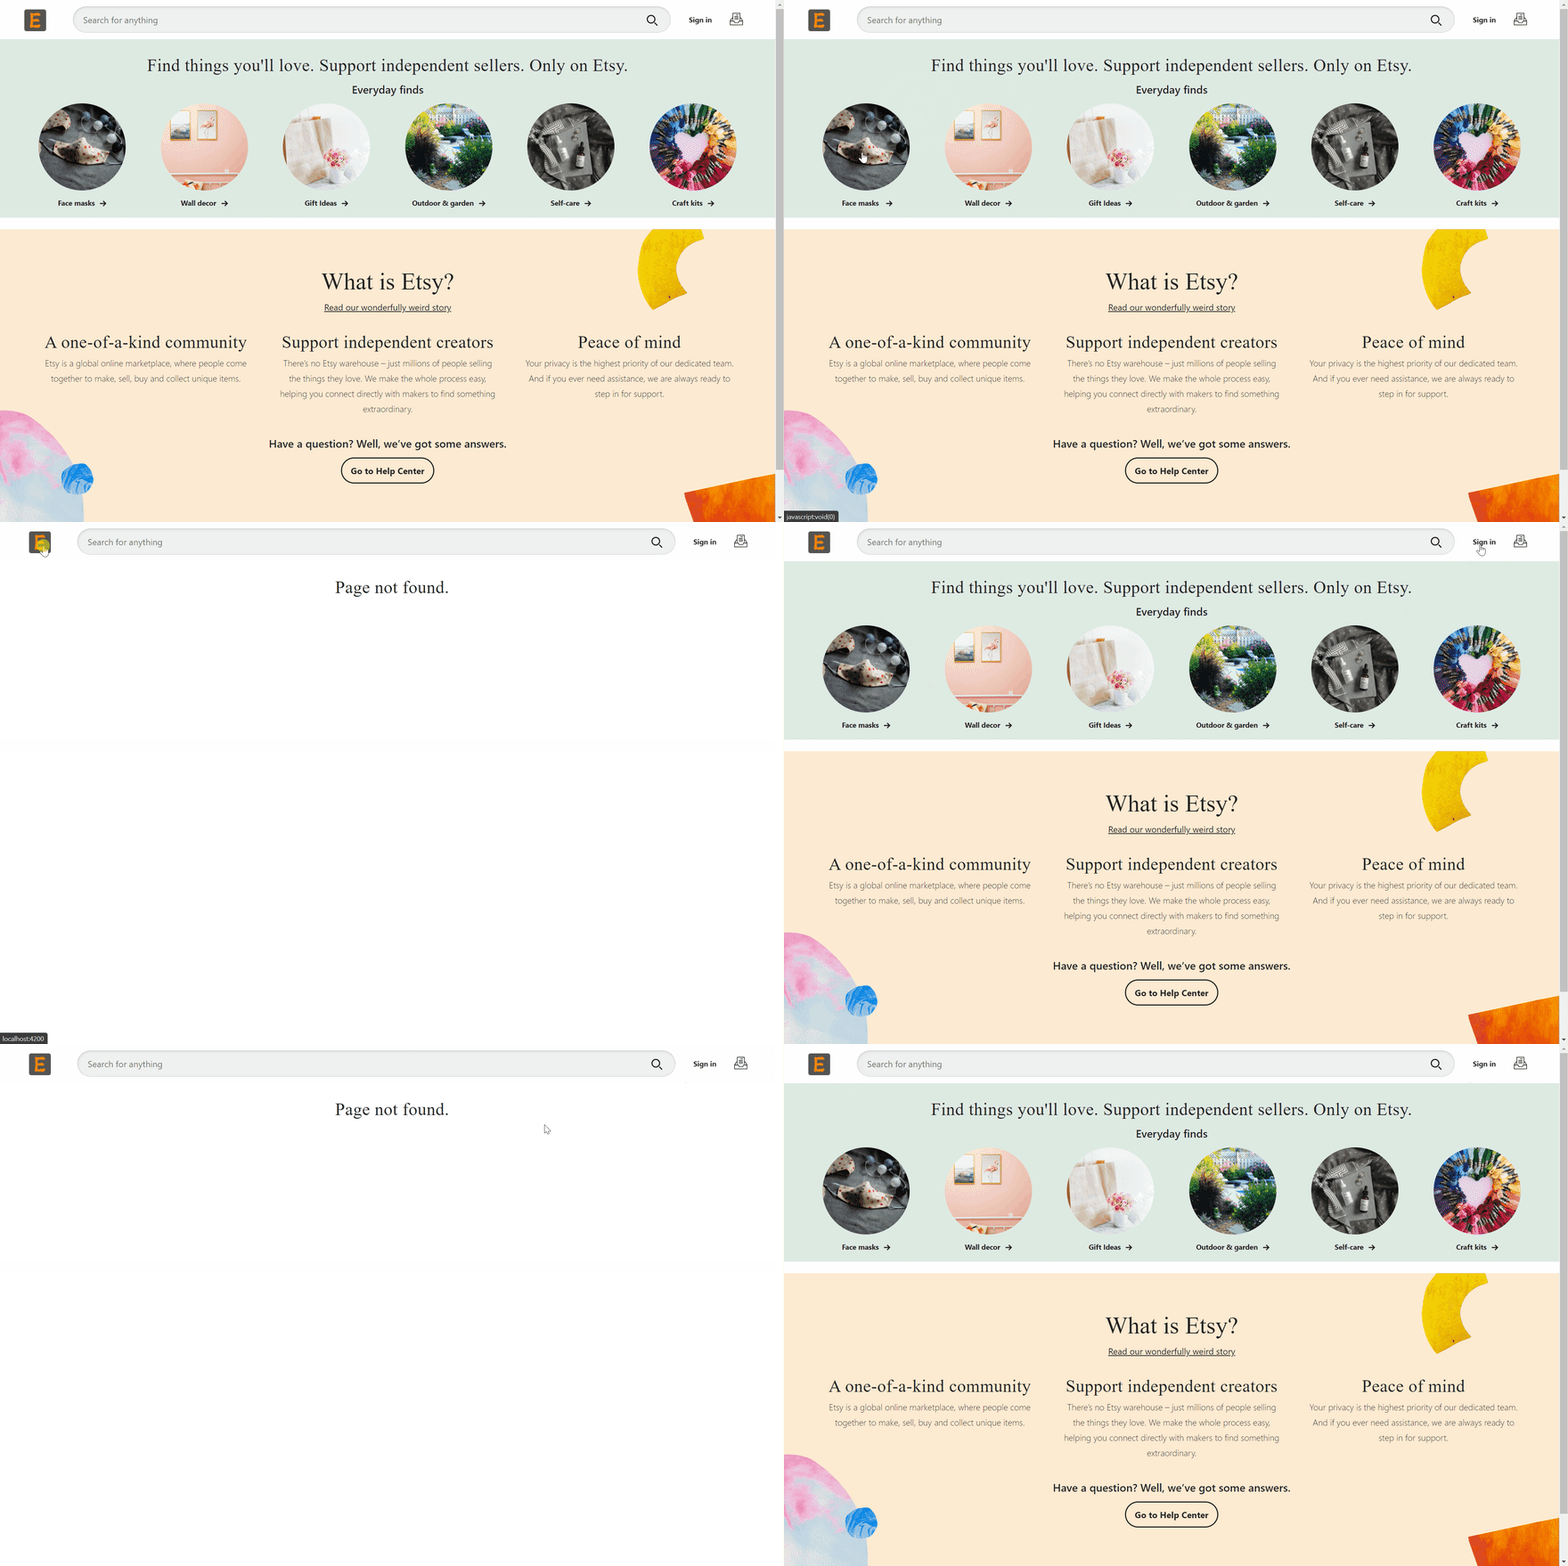
npm startfrom the command line in the project folder. - The following screen will greet you after Angular prompted you to view the website by going to http://localhost:4200/.
Project Structure 🏗
Before going into the step by step tutorial, a list of important folders are shown below, followed by its explanation. Most files and folders are excluded to focus 🎯 on the items that will provide the best overview for you.
- angular-marketplace-final
    - ...
- angular-marketplace-start
    - src
        - app
            - account
                - ...
            - app-routing.module.ts
            - app.component.html
            - app.component.ts
            - app.module.ts
            - chat
                - ...
            - home
                - ...
            - product
                - …
        - assets
            - ...
        - CONSTS.ts
        - index.html
        - main.ts
Going from top to bottom, we will be focusing on angular-marketplace-start because angular-marketplace-final contains identical folder structures. The only difference being that the final folder is what we will achieve by the end of this tutorial. You can choose to quickly run the final version by following the steps in Github before going for the detailed step by step tutorial in this article.
We will spend most of our time in the src folder. The files outside of this folder are configuration files for Angular, TypeScript or NPM.
- The app 📦 folder contains all our Angular modules and components. Every folders inside here is an Angular module that serves a specific feature for our marketplace website. The 4 files prefixed with the word app in this folder are for the default App module. They serves as an entry point for the 4 modules.
- Account module: Handles everything that relates to authentication (sign up, login, etc).
- Chat module: Provides chat functionality.
- Home module: Contains all the UI components for the home page.
- Product module: Fetches, add and displays products.
- The asset 📂 folder contains all our static resources such as pictures and external files from the internet.
- CONSTS.ts is a file that stores all the CometChat constants of our website.
- Finally, index.html and main.ts are the entry point for any Angular project. Specifically, index.html is often the default file to serve for a website while main.ts bootstraps the Angular default App module.
Step 1️⃣: Integrate CometChat 💬
- This section is the continuation of “Running the Angular Marketplace Example Locally” section above. Make sure to complete the steps in that section before starting here.
- Head to CometChat Pro and create an account.
-
From the dashboard, create a new app called "Angular Marketplace" as shown below:
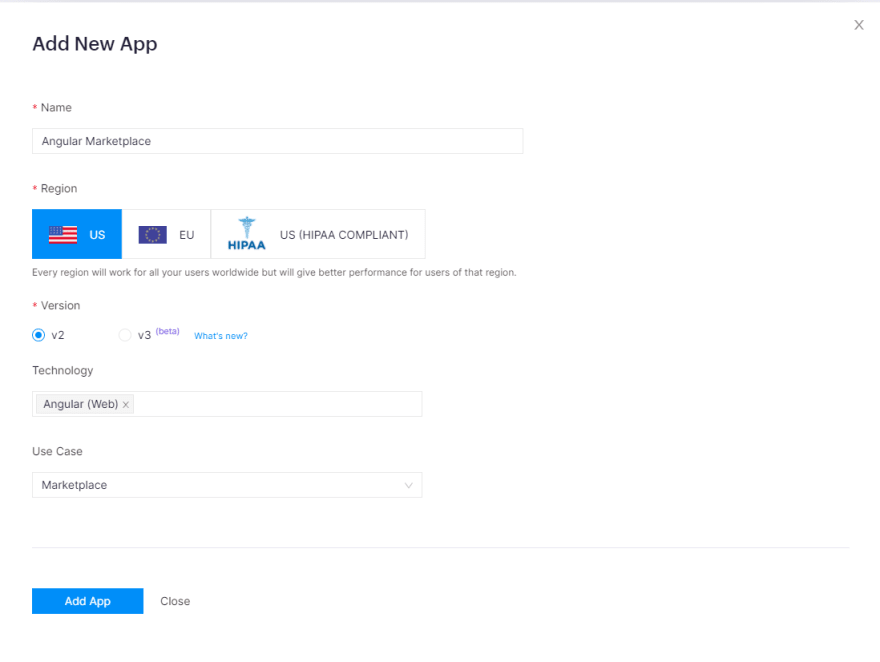
CometChat add new app screenshot -
Once created, go into your app, and you will be presented a quick start page as below. Take note of the
APP ID,RegionandAuth Keyvalues.

CometChat quick start screenshot If you haven’t done so, open the angular-marketplace-start folder in VS Code or any other modern text editor.
Modify the
APP ID,RegionandAuth Keyvalues in angular-marketplace-start/src/CONSTS.ts into the values you get from step #3 above.-
Setup CometChat’s Angular UI Kit:
- Add CometChat dependency -
npm install @cometchat-pro/chat@2.2.1 --save - Initialize CometChat ✨ by modifying angular-marketplace-start/src/main.ts into the following: https://gist.github.com/wizlee/9fb5bc670cace9971bbc13b369e7fffd
- Add CometChat dependency -
- Add CometChat Angular UI Kit into the starter project:
    - Download Angular UI Kit using [this link](https://github.com/cometchat-pro/cometchat-pro-angular-ui-kit/archive/refs/tags/v2.2.1-1.zip).
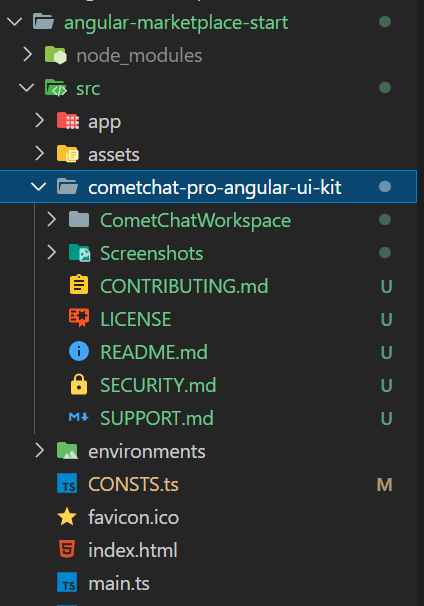
    - Rename the unzipped folder into **cometchat-pro-angular-ui-kit** and copy the folder into **angular-marketplace-start/src/.** The directory should look similar as below:
- Install @ctrl/ngx-emoji-mart by running `npm install @ctrl/ngx-emoji-mart@5.1.1 --save`
- Modify the styles in **angular-marketplace-start/angular.json** to the values as shown below:
"styles": [
  "src/styles.css",
  "node_modules/@ctrl/ngx-emoji-mart/picker.css",
  "src/cometchat-pro-angular-ui-kit/CometChatWorkspace/projects/angular-chat-ui-kit/src/css/styles.scss"
  ]
- That’s all for the CometChat integration! Let’s have a pit stop 🛑 here and make sure everything is working correctly.
- At this stage, we had initialize CometChat and install all the dependencies that our website requires.
- We can verify this by running our website using the
npm startcommand.- You can directly start with the steps below if you always kept the website running all these while. By now you will realized that Angular supports hot reload ⚡ by default, which means that any changes we made to the source code will automatically reflect in our website.
- Our website is running at http://localhost:4200/ by default. Open it in any modern browser and press the ‘F12’ key to bring up the developer console.
- If everything is smooth sailing ⛵ so far you will see “CometChat initialized successfully” in the console log as shown below.

Browser Dev Tool console log
Step 2️⃣: Sign In & Inbox 📥 Features
-
In this section, we will first start with the Sign In feature. The result is as shown below:
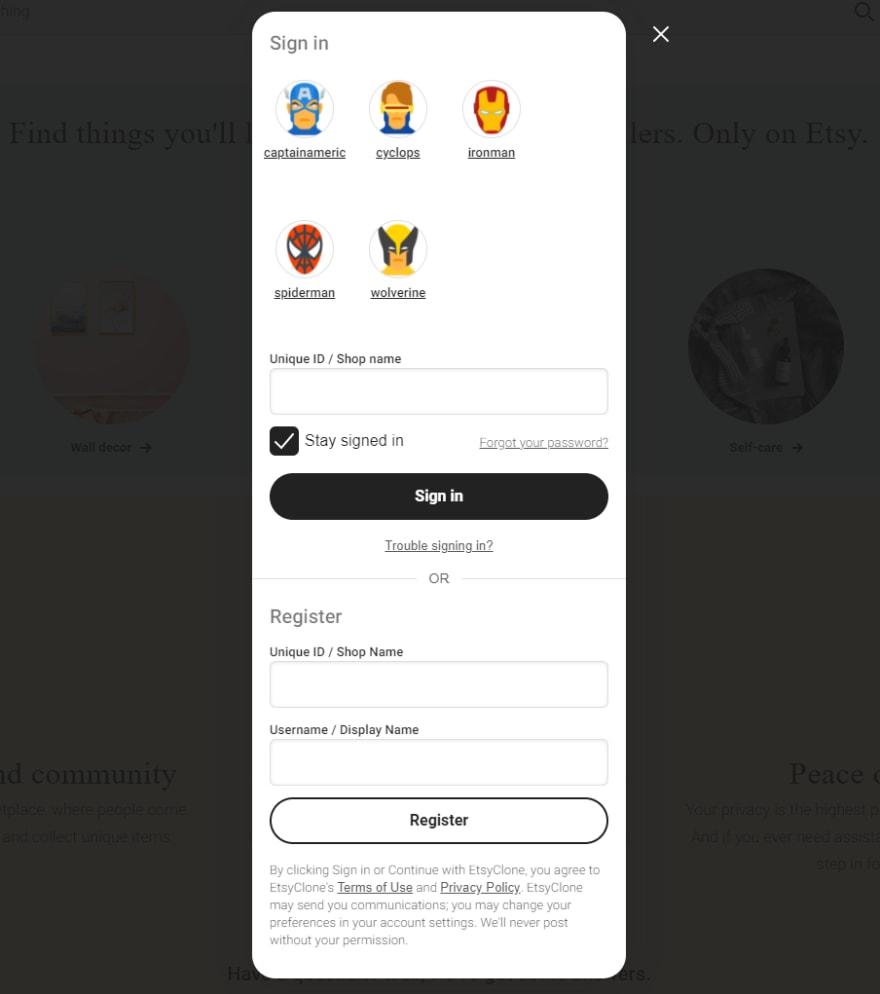
Screenshot for Sign In and Register - The ‘Sign In and Register dialog’ is a modal dialog that overlays any existing page by giving it a grey overlay to make the modal dialog stand out.
- All UI and logic 🧠 for this dialog are handled in two files:
- angular-marketplace-start/src/app/account/login.component.ts
- angular-marketplace-start/src/app/account/login.component.html
- No change is required for the UI code (login.component.html), while login.component.ts already contains most of the code for it to work. The complete changes are shown below, or you can always refer to the angular-marketplace-final folder for the full version anytime throughout this tutorial. https://gist.github.com/wizlee/3c7bd741f0a0467ba44dc39fea7e2089
-
After successfully login or registering new users, it’s time for the inbox 📥 feature.
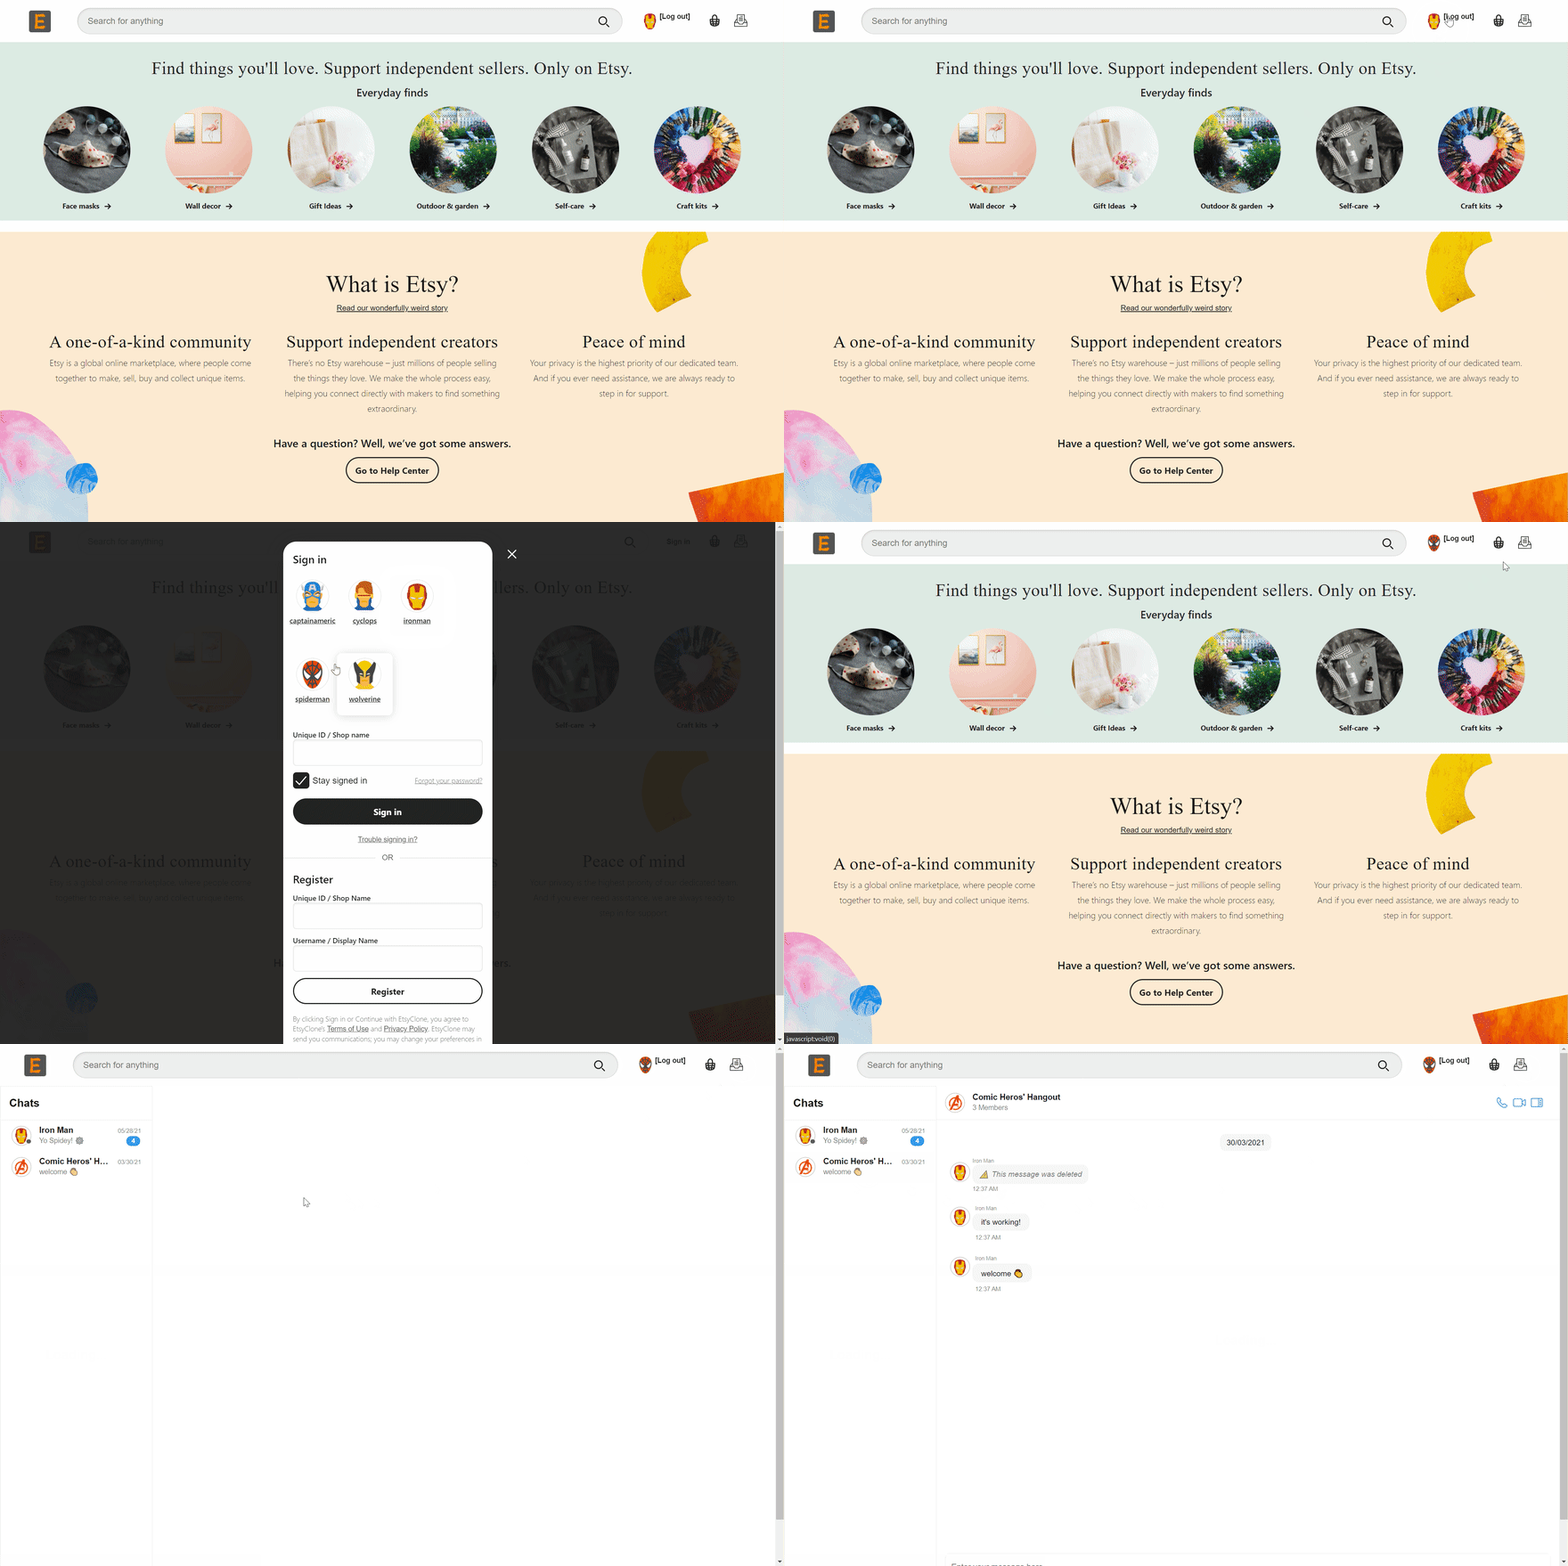
Demo for Inbox feature - The inbox button navigation is already implemented by the Inbox component (src/app/inbox/inbox.component.ts). navigateToConversationListScreen() { this.router.navigate(["/conversation"]); }
- On the other hand, the CometChat inbox component is already done by the CometChatConversation component (src/app/inbox/comet-chat-conversation.component.html).
- So why the inbox feature is still not working? 🤔 If you guess that the Chat module has not routed the Inbox component request to the CometChatConversation, you are spot on ✅. Update src/app/inbox/chat.module.ts to the same as below to connect the dots! https://gist.github.com/wizlee/2c5c7f466d036c4fb9d0bfc83f784e6c
Step 3️⃣: List & Add Goods
-
First, we will enable the feature to list goods 🛒. A ‘fake’ backend is used to retrieve our goods to keep the code and the setup simple. The result is as shown below:
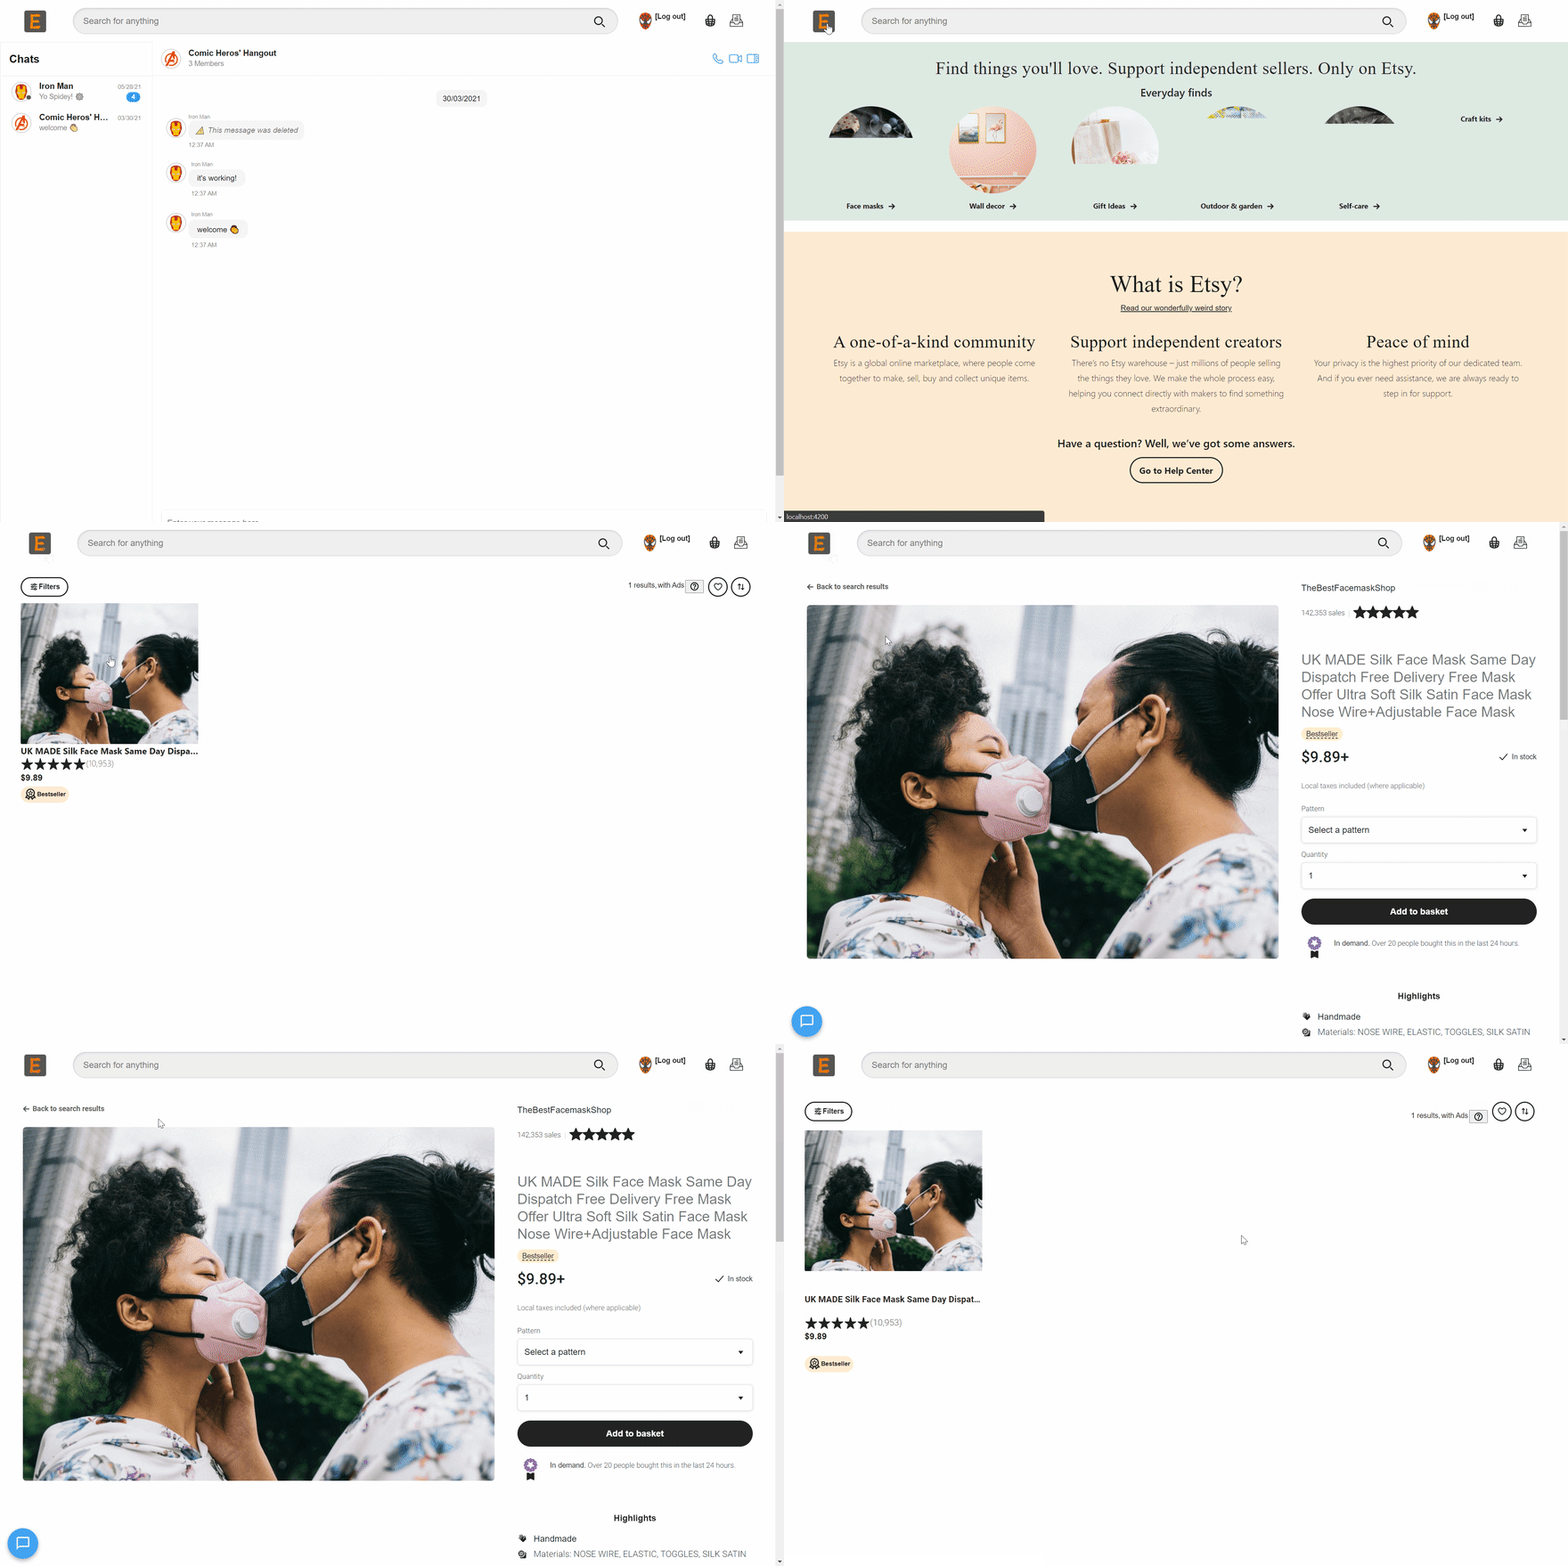
Demo for listing goods using the ‘fake’ backend - src/product/_api - Most of the code related to goods can be found in the Product module in src/product/ folder.
-
src/product/_api is the ‘fake’ backend. It is consisted of:
- A JSON file (facemasks.json) that acts as a database 📜 to store all the product information - image encoded as base64 string, title of the product, seller, shop name, etc.
- get-product-detail-service.ts, which is an Angular service that provides the interfaces to any of our components to interact with facemasks.json.
- By tracing 🕵️♂️ from the home page, we can figure out that product-banner.component.ts is responsible to route to the component that shows the facemask products. onViewFaceMask(): void { this.router.navigate(["facemask"]); }
- Even with all that code, you may again wonder why clicking on the face masks category will still show ‘Page Not found’ 🤔. If you guess that the Home module hasn’t yet routed the request to the correct component, you are right ✅ again! Add the code below into src/app/home/home.module.ts and witness the facemask products get listed!
// ... import { ProductModule } from "../product/product.module"; import { FaceMaskProductListComponent } from "../product/face-mask-product-list.component"; import { ProductDetailComponent } from "../product/product-detail.component"; const routes: Routes = [ { path: "home", component: ContentComponent, }, { path: "facemask", component: FaceMaskProductListComponent, }, { path: ":product/detail/:id", component: ProductDetailComponent, }, ]; imports: [ // all the previous imports are not shown, only the one below is new ProductModule, ],- Checkpoint 🛑 : Note that only one facemask product is listed. For those of you with eagle 🦅 eyes, you will notice this is due to the
isVisiblekey in the facemasks.json file. We will go through how to workaround this and ‘add’ more facemasks in the next step.
Snippet of facemasks.json to illustrate isVisible key
-
In this step, we will learn about how to add more goods 🛍. In a nutshell, the browser’s localStorage is used as a workaround to the static nature of our facemask.json file.
- Instead of showing the end result first, we will see the final result towards the end of this step for this feature.
- As programmatically or manually changing the value of
isVisiblekey in facemasks.json file as a method to ‘add’ good is either impossible or not a good user experience ❌, we will instead use the values in the file as the ‘initial’ state of our marketplace website. - The initial state of all facemasks are loaded when our app first startup in src/app/product/_api/get-product-detail.service.ts.
- Below is the relevant snippet of get-product-detail.service.ts.
-
initProductMetadataLocalStorage()will read facemasks.json and save it into the localStorage -window.localStorage[PRODUCT_METADATA] = JSON.stringify(facemaskMetadata); - Then, the rest of the functions in
GetProductDetailServicewill either get or set the values saved in the localStorage instead of directly modifying the JSON file. - The values will persist throughout the current browser session, thus mimicking the effect of a database. export class GetProductDetailService { constructor() { // ... if (window.localStorage[PRODUCT_METADATA]) { // always remove so that newly added product in facemasks.json will be added into the metadata window.localStorage.removeItem(PRODUCT_METADATA); } this.initProductMetadataLocalStorage(); } private initProductMetadataLocalStorage(): void { let facemaskMetadata: Metadata[] = []; MockAPI.facemasks.forEach((facemask, index) => { facemaskMetadata.push({ productId: index, isProductAdded: facemask.isVisible, }); }); window.localStorage[PRODUCT_METADATA] = JSON.stringify(facemaskMetadata); }
// ...
}- For further illustration 🔍, let’s look at how facemasks are put on sale to be listed on the website. The function below is inside the same get-product-detail.service.ts file. putFacemaskOnSale(id: number): void { if (window.localStorage[PRODUCT_METADATA]) { let facemaskMetadata: Metadata[] = JSON.parse( window.localStorage[PRODUCT_METADATA] ); if (id < facemaskMetadata.length) { facemaskMetadata[id].isProductAdded = true; window.localStorage[PRODUCT_METADATA] = JSON.stringify(facemaskMetadata); } } }
- Now comes the million-dollar 💰question, with all that code why our code still doesn’t work? Turns out that what prevents us from adding goods is the button for it is not shown 🤷♂️. Add the code below into src/app/home/header.component.html right between the login and inbox button.
- Bravo! You have successfully added the button. The entire demo is as shown below. Remember 📝, if you are facing difficulty you can also refer to the angular-marketplace-final folder as a reference 😉.
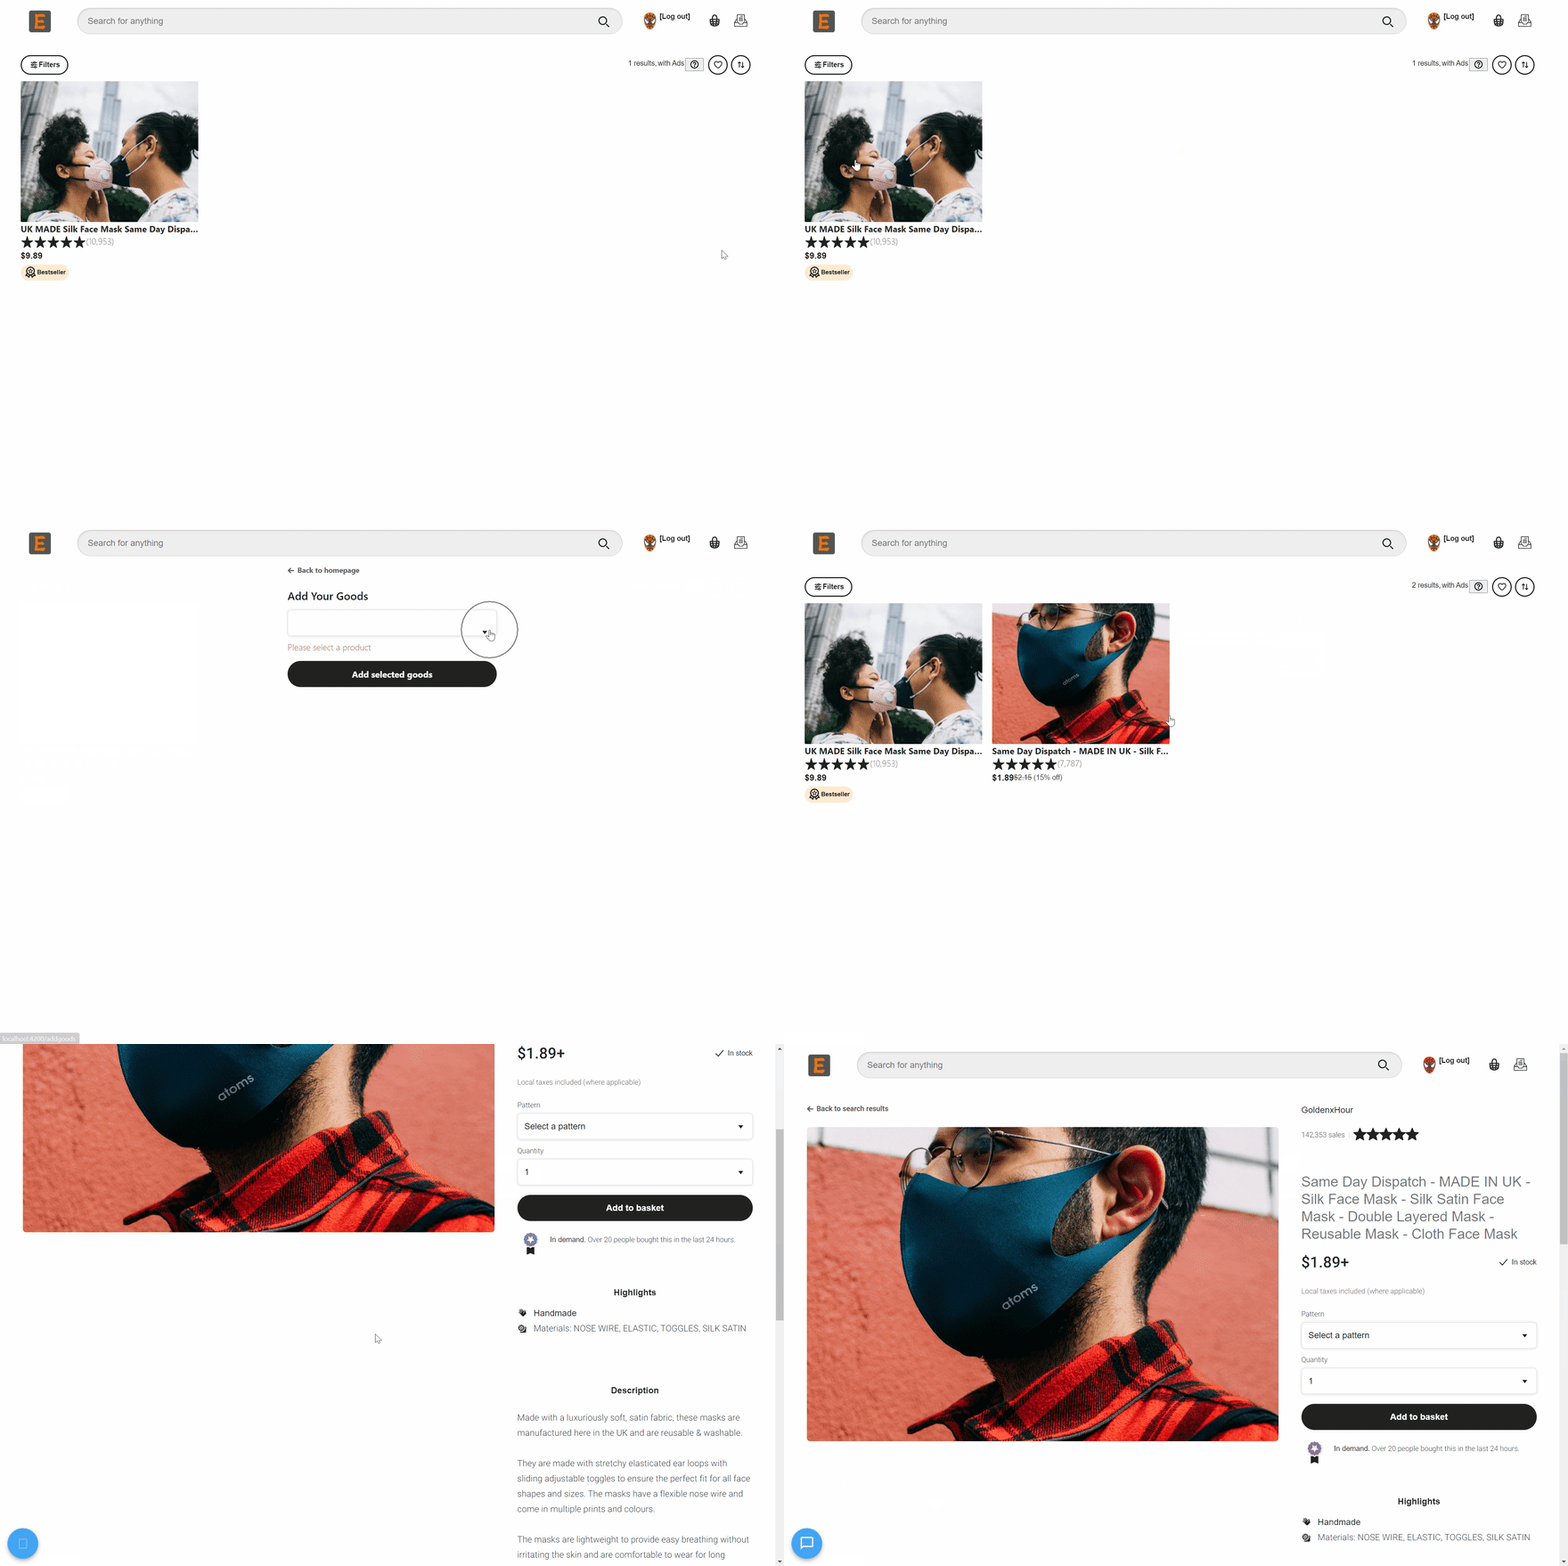
Demo for adding goods
Step 4️⃣: Chat 🗣 With Seller
- As of version 2.2.1, CometChat Angular UI Kit provides eight different components that can be used easily as an Angular component. An example is the
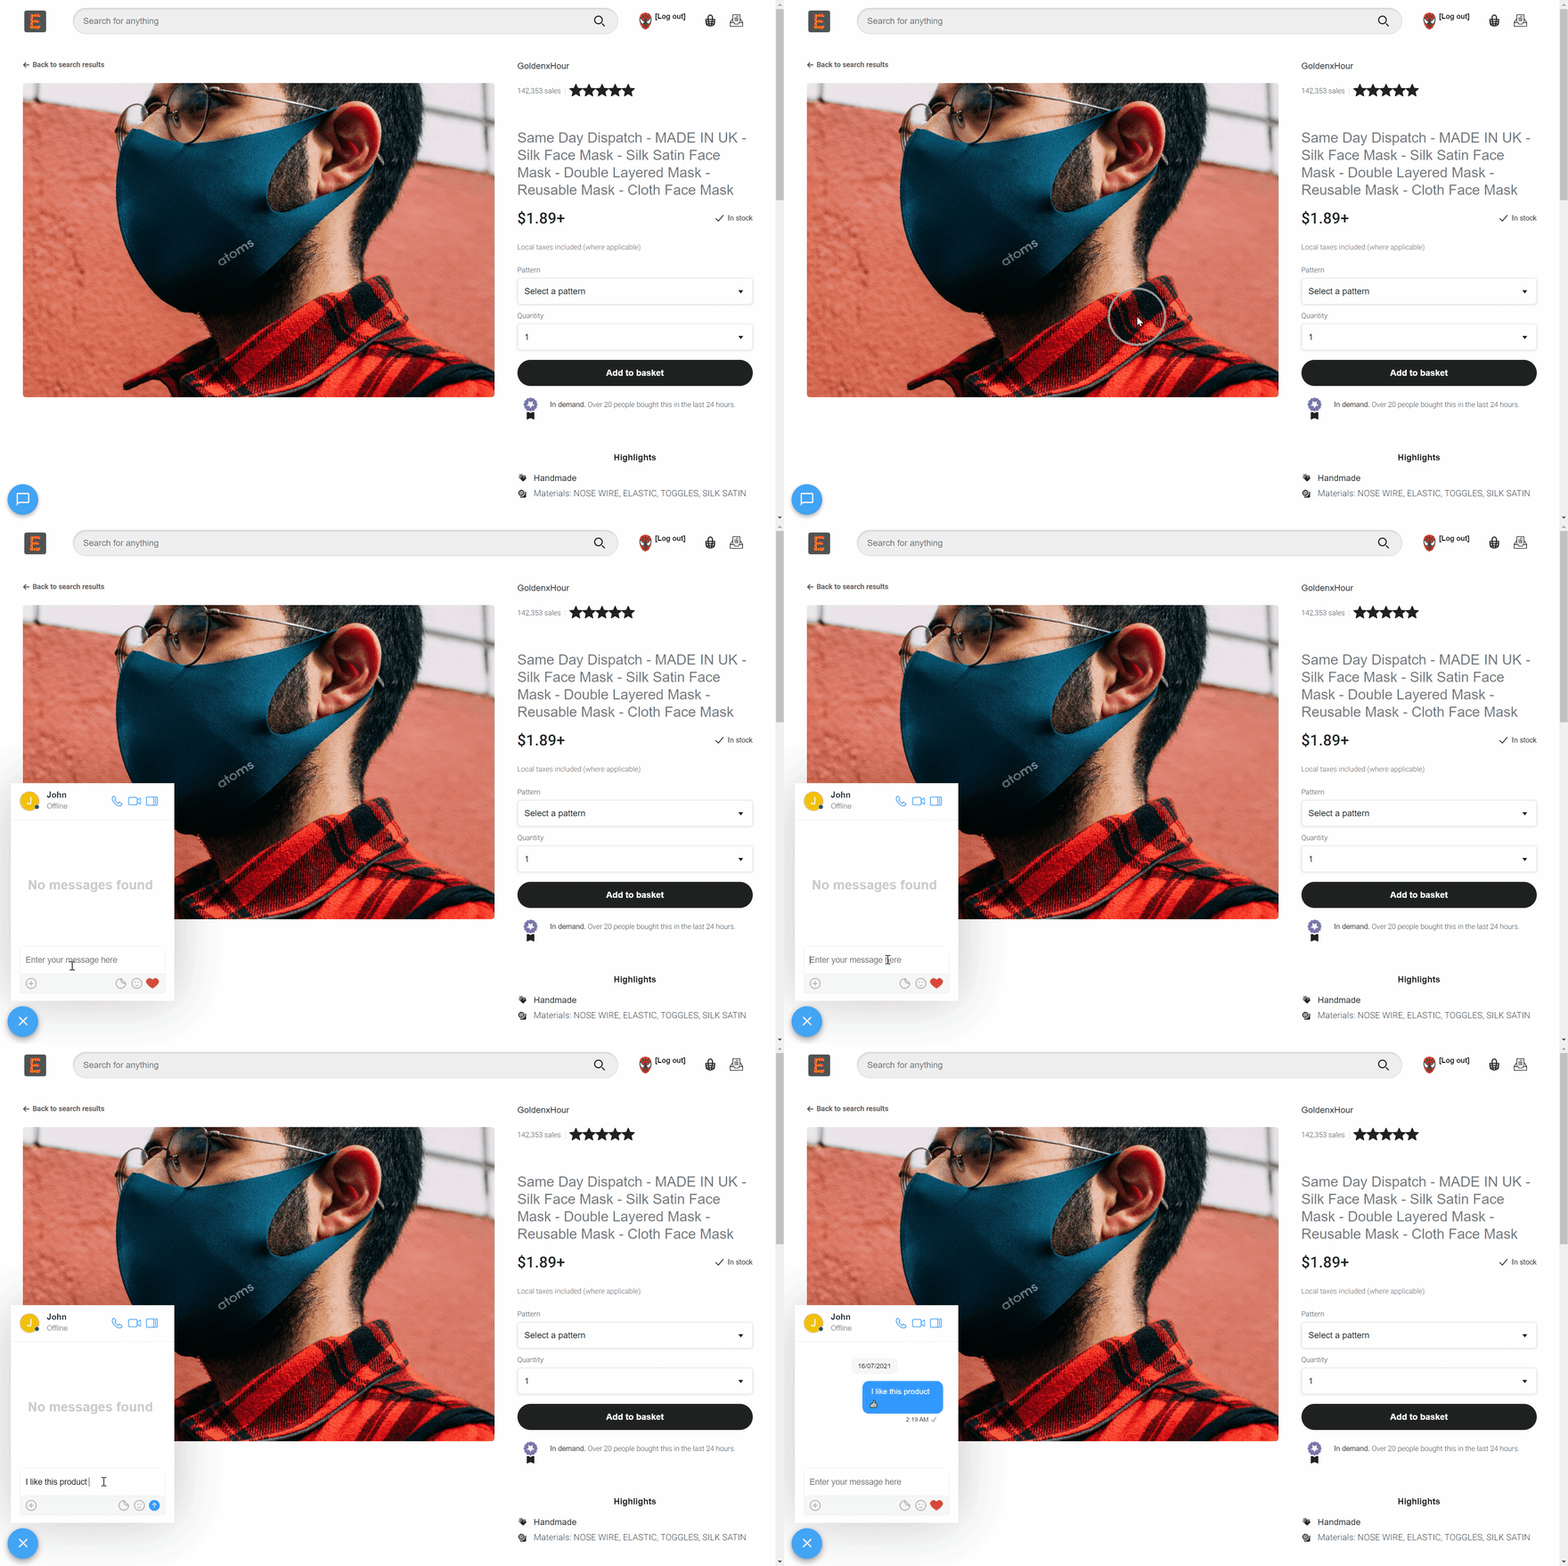
CometChatConversationListWithMessagescomponent that we used for our Inbox feature. - To get a nice floating bubble chat widget for our chat with seller feature, we will have to do slightly 🤏 more work by using another Angular UI Kit component - CometChatMessages.
-
Firstly, go to src/app/product/product.module.ts and modify the code as shown below to import the requirement component from
ChatModule.
// ... import { FormsModule } from '@angular/forms'; import { ChatModule } from "../chat/chat.module"; // <--- new code // ... // ... @NgModule({ // ... imports: [ // ... FormsModule, ChatModule, // <--- new code ], // ... }) export class ProductModule {} -
After that, add the following code into the end of src/app/product/product-detail.component.html. This will add the Angular UI Kit
CometChatMessagescomponent into our product detail page.
<!-- ...  -->
<div *ngIf="authService.isLoggedIn()">
  <app-user-message [uid]="sellerUid"></app-user-message>
</div>
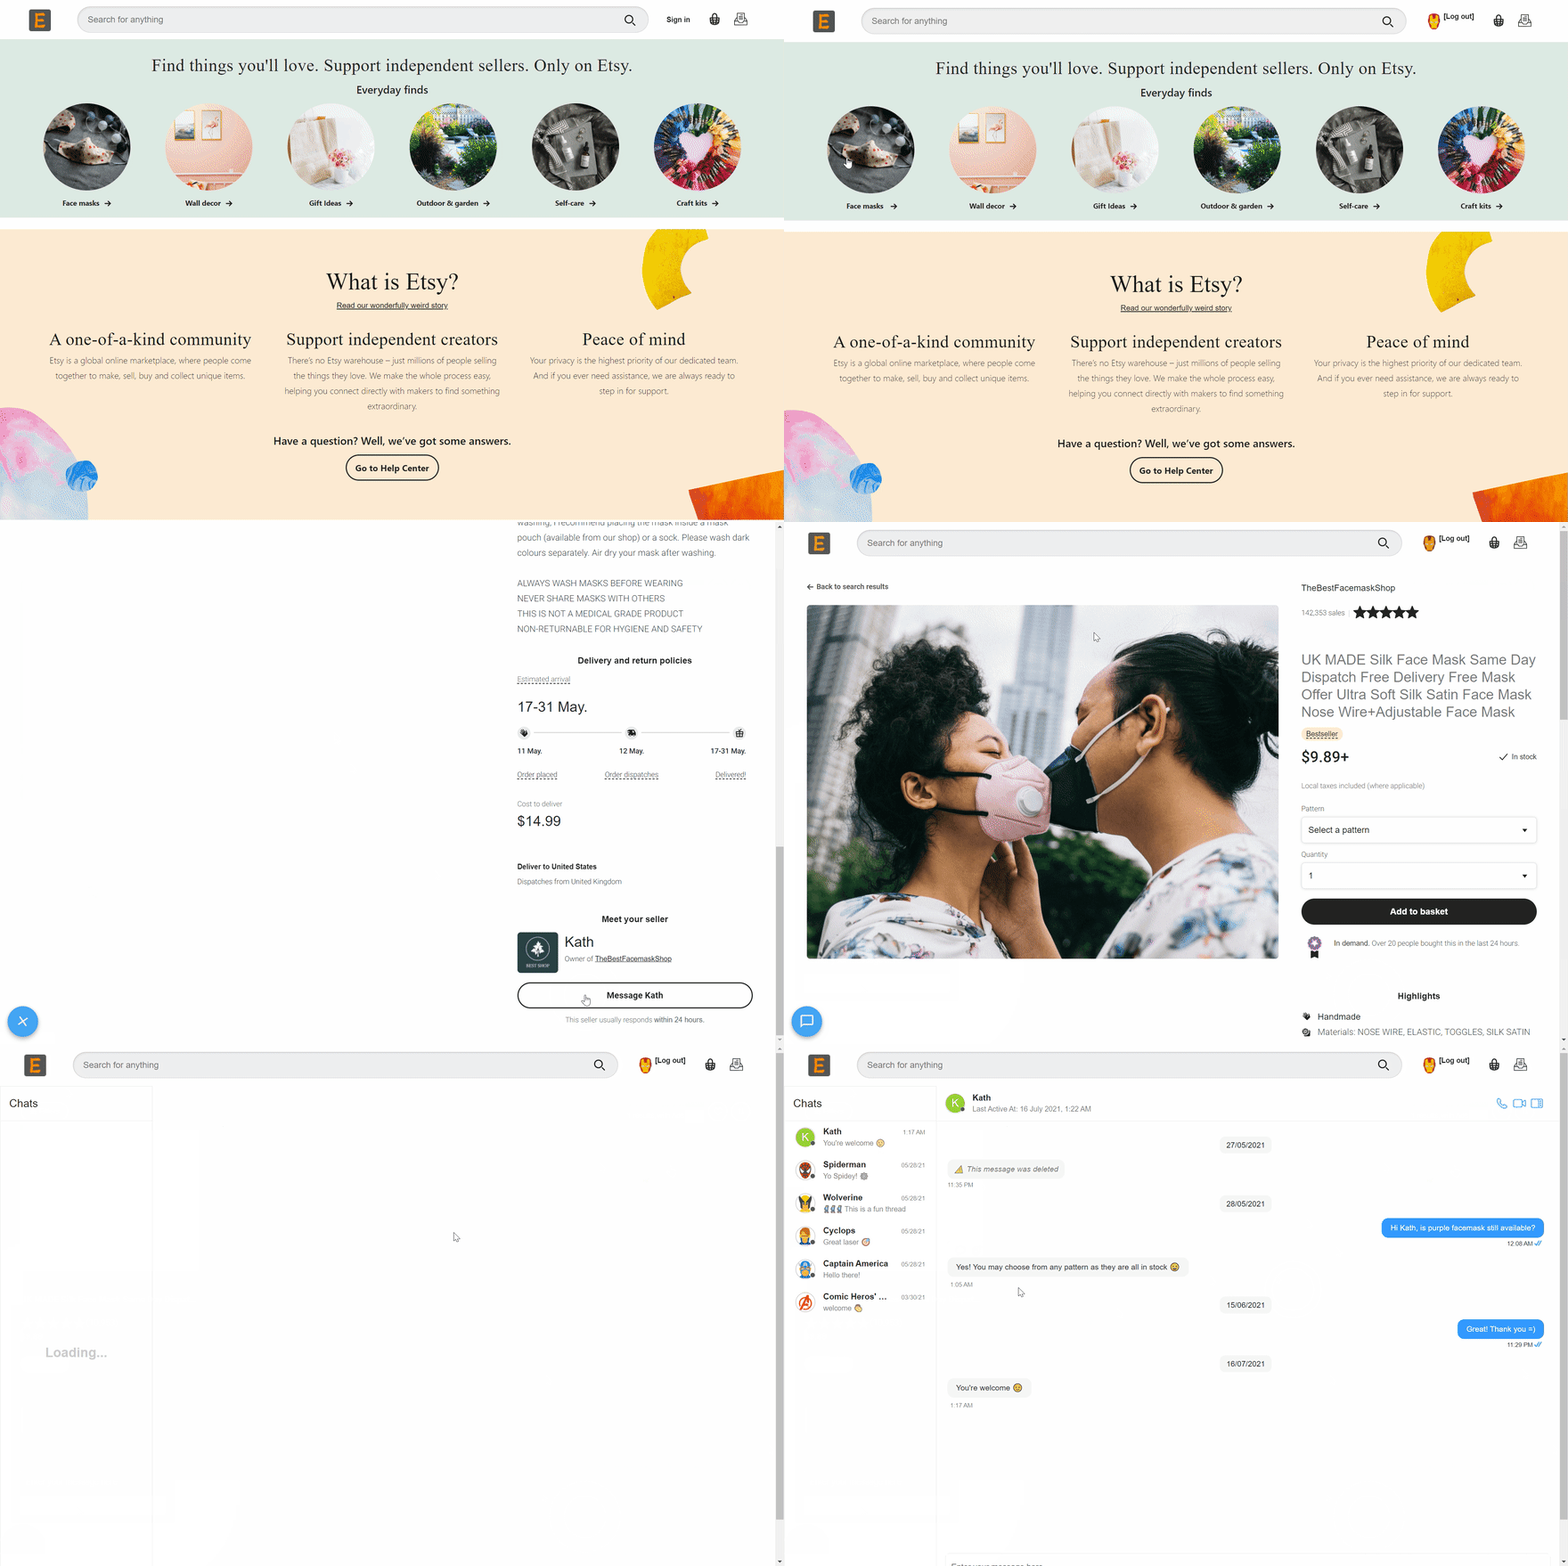
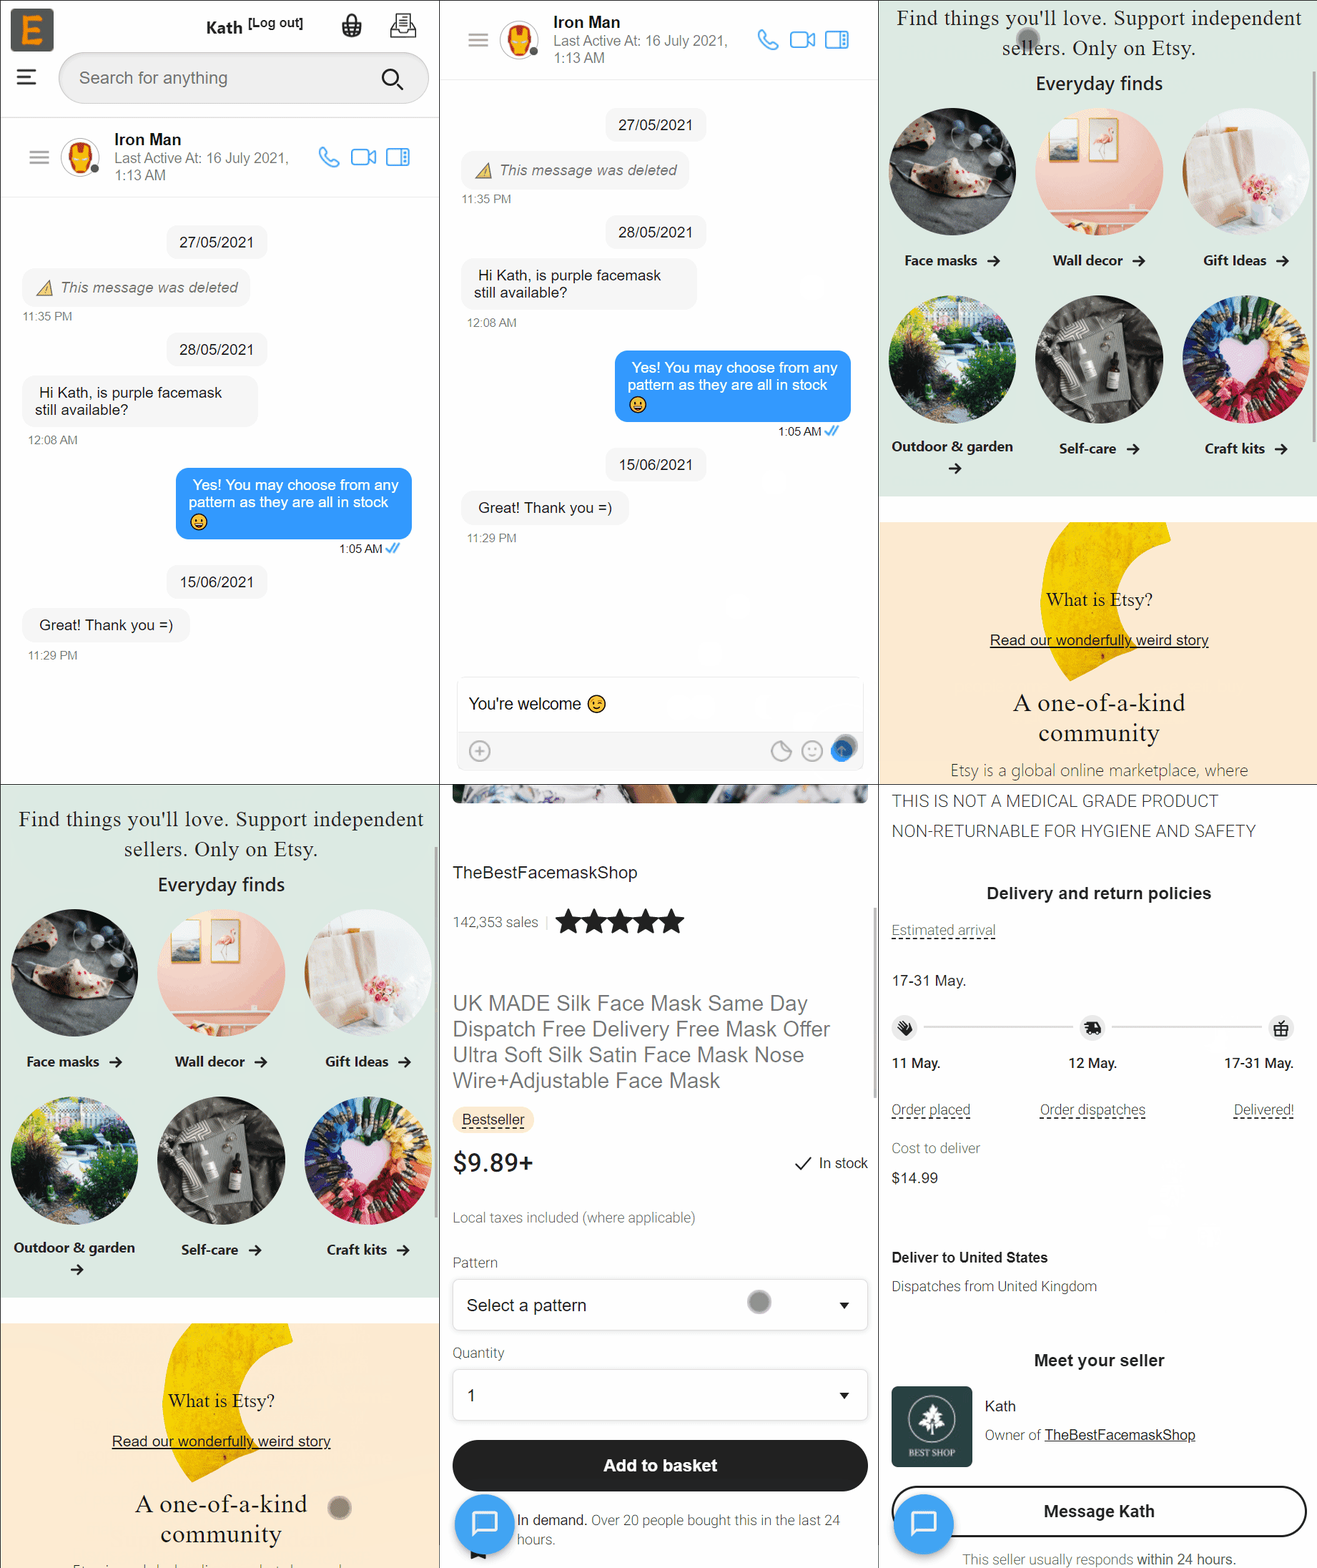
After your Angular App reloads, you will be able to chat with the seller of any goods that you added.
-
Wait, wait, wait 🛑! Some of you who took extra time to follow all the steps closely will figure out that there’s at least one step being left out. Kudos 👏 to you for your diligence! Read on if you want to get the whole picture.
- To be fair, it’s not some black magic 🧙♂️. The
CometChatMessagescomponent is wrapped inside our customUserMessageComponent. Its template and its stylesheet (HTLM & CSS files) design theCometChatMessagesto be a floating 🎈 bubble chat UI. - This
UserMessageComponentis imported into theProductModuleduring importing of theChatModule. TheopenOrClose()function is called by the parent components so that clicking on the blue bubble will show open📤/hide📥 the seller chat.
// src/app/chat/user-message.component.ts

import { Component, Input, OnInit } from '@angular/core';
import { CometChat } from "@cometchat-pro/chat";
@Component({
  selector: "app-user-message",
  templateUrl: "./user-message.component.html",  // <--- HTML for this component
  styleUrls: ["./user-message.component.css"], // <--- CSS for this component
})
export class UserMessageComponent implements OnInit {
  cometChatUser: any;
  isInitSuccess: boolean;
  isOpen: boolean;
  constructor() {}
  ngOnInit(): void {
    this.isInitSuccess = false;
    this.isOpen = false;
  }
  @Input()
  public set uid(uid: string) {
    CometChat.getUser(uid).then(
      (user) => {
        console.log("User details fetched for UID:", uid);
        this.cometChatUser = user;
        this.isInitSuccess = true;
      },
      (error) => {
        console.error("User details fetching failed with error:", error);
      }
    );
  }
  openOrClose(): void {
    if (this.isInitSuccess) {
      this.isOpen = !this.isOpen;
    }
  }
}
- To be fair, it’s not some black magic 🧙♂️. The
- Another detail here is about the goods sellers. Recall that your CometChat Angular Marketplace app is newly created, when and how the sellers’ accounts get registered?
    - For learning purposes, the registration of sellers’ accounts is automated to keep things focus and simple. However, hopefully by bringing up 👆 and answering this question will help you to understand the benefits why some code is structured in specific ways.
    - The main action happens in one function of the `Login` component (**src/app/account/login.component.ts**).
```
private preRegisterExistingSellers() {
  if (this.authService.isLoggedIn()) {
    for (let i = 0; i < this.productService.getFacemaskCount(); i++) {
      const product = this.productService.getFacemaskDetail(i);
      const shopName: string = product.shop;
      const sellerName: string = product.seller;
      CometChat.getUser(shopName).then(
        (user) => {
          console.log(`Seller: ${user.getName()} already registered:`);
        },
        (_) => {
          console.log(
            `Registering for Seller: ${sellerName}, Shop Name: ${shopName}`
          );
          this.registerCometChatUser(shopName, sellerName);
        }
      );
    }
  }
}
```
    - We segment our code into modules with their own distinct features, and write code as a Angular service for code that needs to be access ‘globally’ in all modules.
    - Because of that, we are able to pre-register all existing sellers in the `Login` component of  `Account` module by using the `ProductService`.
Conclusion
That’s a wrap 💯! By the end of this tutorial, we have in our hands 🤲 a marketplace website with a production-grade seller chat integration! It is my conscious choice to not use a database to store the goods and their information. The reason is none other than to provide the most streamline learning experience for you.
This is not necessarily the end of the journey, especially if you choose to continue. From here, there are a few challenges in place for you to further 🚀 your learning:
- Replace the Angular UI Kit component used for Inbox with another component from the UI kit.
- If you are interested in learning more about Angular routing, try adding route guards 👮♂️ to prevent user to directly access goods that haven’t been ‘added’. Currently, you will be able to access any products defined in **facemasks.json** despite not being shown on the web page if you know the URLs.
- Use a ‘real’ backend to serve the goods instead of **facemasks.json**. The sky 🌋 is the limit for this third and final suggestion. You can use Heroku, Firebase, AWS, GCP, Azure or any backend that suits your needs and have a decent free price tier.
- Among the three suggestions, this requires the most work even if you are just replacing the existing functionality of the ‘fake’ backend. However, this is also the most rewarding ✨ because you will be able to learn the most.



Oldest comments (0)