In this post, we are going to learn how to implement customer support capabilities using a minimal code approach and relying on third party services. There are a lot of situations in which you might need to implement some customer support capabilities. Maybe you are developing your own product, or maybe you are working for a company that needs to improve their operations.
With the arrival of COVID-19, e-commerce has become a major concern for most businesses. Having a good customer support strategy in place is a must these days. Online consumers demand features like online live chat or multi-channel communication and expect high responsiveness from online businesses.
The pandemic has generated unprecedented levels of uncertainty for business and they need to be able to adapt in the shortest time possible. For this reason, we are going to really on third party services and use a minimal code approach. This allows us to dramatically reduce the time to market and development cost. Operational cost is also highly flexible because both Zendesk and Azure can adapt their offerings and prices to our business scale and needs.
Zendesk
The first thing we are going to do is to visit https://www.zendesk.com/ and create an account. I will not document how to do this because Zendesk is very intuitive and it has very good documentation.
After creating the account, you can visit the settings page and visit the channels section to find out your support email:
The format of this email address should be support@yourcompany.zendesk.com. You will need to remember this address because we are going to need it later.
We can then visit the widget section under the channels section to enable the contact form and the web chat features:
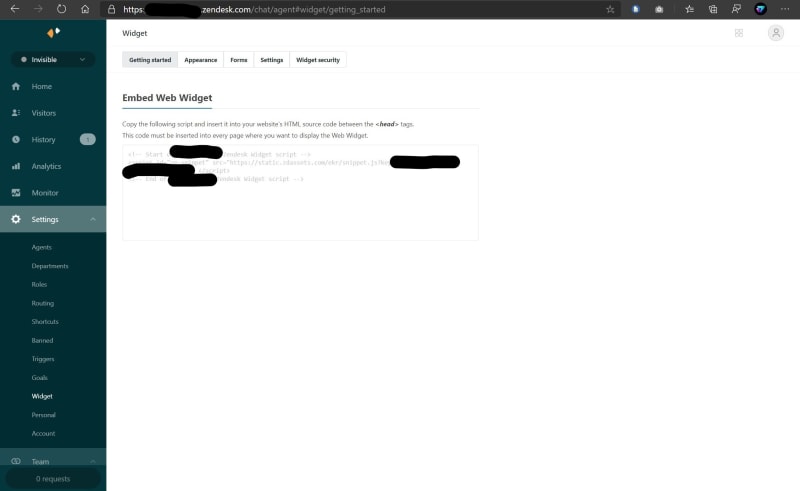
If you visit the settings you will be able to find the installation guide:
All you need to do is to add a script tag to your website's source code:
<script id="ze-snippet" src="https://static.zdassets.com/ekr/snippet.js?key=xxxxxxxx-xxxx-xxxx-xxxx-xxxxxxxxxxxx"></script>
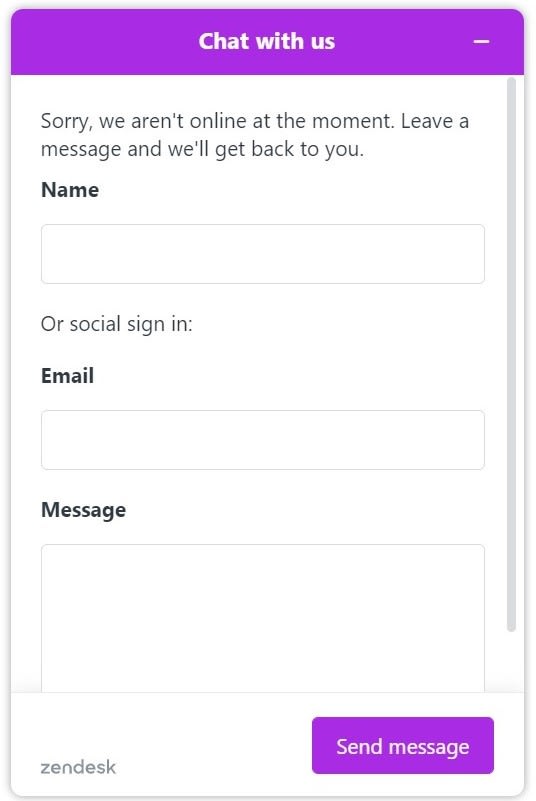
We have enabled the contact form widget which is displayed when there are no customer support agents online:
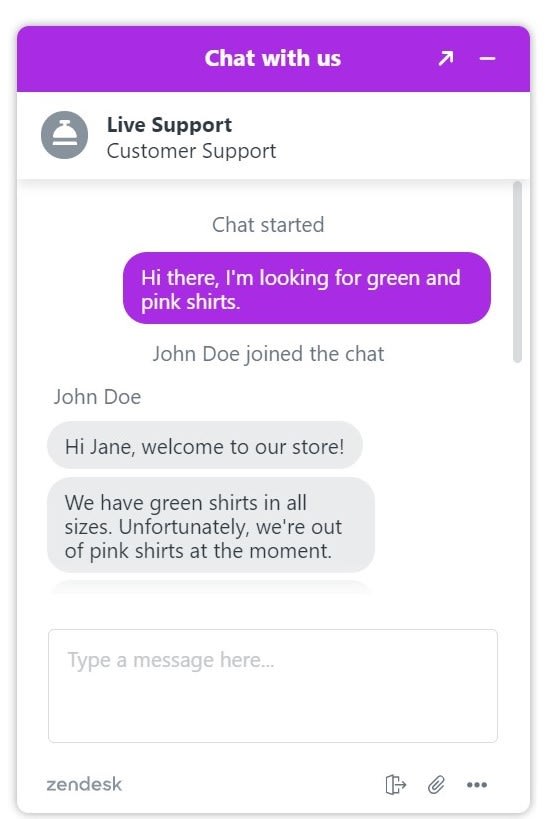
We have also enabled the live chat widget which is displayed when customer support agents are online:
A little icon will be then displayed on the bottom right of your webpage. When a user clicks on the icon, the contact form or the live chat form will be displayed.
Ideally, we want to have a single point to manage all our customer request. The request may have originated in our website, our email or social media:
Web: We are now ready to manage requests that originated on our website.
Email: Managing email requests can be achieved by enabling email forwarding from one of your company email addresses to your Zendesk email address.
Social media: You can visit the channel settings in Zendesk to connect your social media accounts with Zendesk.
Phone calls. Zendesk also allows you to manage phone calls as customer requests tickets. You can learn more using the Zendesk documentation.
Azure Logic Apps
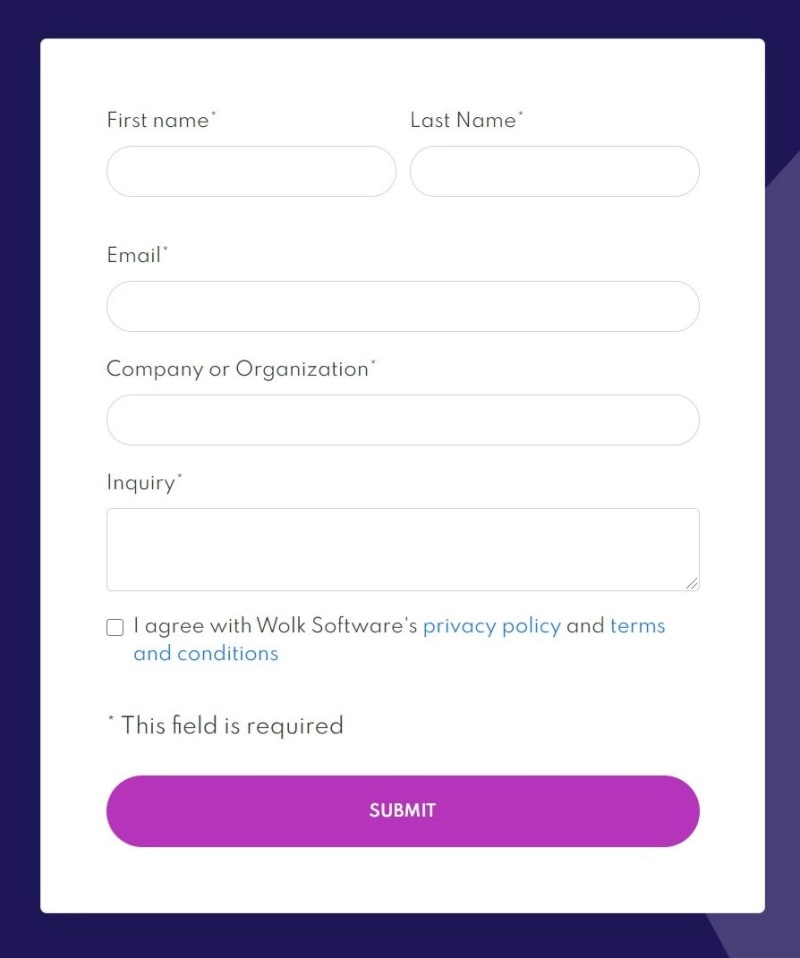
In most cases, the default Zendesk implementation would be enough to get started. However, in my case, I needed an additional custom contact form:
I needed this form to be highly visible and the bottom right "help" button didn't have enough visibility for me. The webform was implemented using React and Formik.
I wanted to send the request that originated using this form to Zendesk. The easiest solution would be to send an email to the Zendesk support email address. We need to implement an HTTP POST endpoint that takes the form details as JSON and send an email to the Zendesk support email address. I wanted to implement this with as little code as possible and the first thing that came so my mind was to use an Azure function.
Using an Azure function would require us to define an HTTP trigger and the code that sends the email. We would need to manage the permissions so our email server allows us to send an email. This wasn't a massive job but it required me to save the code in a repository, deploy it, etc. It was too much work for something so simple. I wanted to find a better way and that is how I ended up using Azure Logic Apps.
We can visit the Azure portal and create a new Azure Logic App, then use the designer to create the logic rules of our app. The first thing that we need to do is to define an HTTP trigger for our HTTP POST request:
You can paste an example of the body of your request and the Logic App designer will automatically translate it into the request schema.
When you save your logic, Azure will generate an URL that you can invoke from your app.
The second thing that we need to do is to add a step:
We need to add a step that will return an HTTP response:
We then need to add a parallel step to send an email. In my case I use Gmail but there are other integrations available.
We need to extract the data from the original HTTP request to add it to the email contents. We can do this using an expression:
We can use triggerBody() to access the request body and json(triggerBody()) to transform it into JSON. We can then access the properties in the request body as follows json(triggerBody()).company.
We can then save everything and two resources should have been created:
We can then invoke the HTTP trigger in our logic app by sending an HTTP request from the web app:
const response = await fetch(`INSERT_THE_TRIGGER_URL_HERE`, {
    method: "POST",
    body: JSON.stringify(values),
});
const json = response.json();
You can then use the browser developer tools to see if the request was successful:
And finally, head to the Azure Logic App monitoring section to see if all the steps worked as expected. The monitoring tools with providing you with some details if something fails:
If everything worked you should now have a new ticket in your Zendesk customer support dashboard:
The operational cost of running this logic app is almost zero and we can get started with Zendesk for just $60 a year. We can now deliver a professional customer support experience on a budget and in just a few hours!
As we can see Azure Logic apps can help us to solve real-business needs with almost no code. This allows us to move faster and adapt faster in a time of unprecedented uncertainty.


Top comments (0)