
This tutorial is the first part of our implementation of the React Native eCommerce app. In the previous part, we successfully set up react-native 0.61 for the initial project. This part is the continuation of the same tutorial series where we are going to implement a Splash Screen for the iOS platform. So, for the implementation of Splash Screen in the Android platform it is highly recommended to go through the second part of this tutorial series.
As mentioned in the previous part, this tutorial series was inspired by the React Native Eccomerce template which enables us to develop powerful ready to deploy eCommerce applications that anyone can use to build eCommerce startups or sell the application templates. This part follows the coding implementations and designs from the Youtube video tutorial by Handlebar Labs for Splash Screen in iOS. The video tutorial uses the old version of React Native and the required plugins. Here, we are going to use the same design and coding implementation for the splash screen but with the latest version of React Native and required plugins.
Overview
In this part, we are going to implement the Splash Screen for the iOS platform using the latest version of React Native and plugins. Most of the phases in this tutorial are going to take place in Xcode as we need to configure the iOS part of the app for displaying the Splash Screen. The idea is to add the required splash screen icons and configure the native iOS app directory in the Xcode. We are going to make use of the react-native-splash-screen package in the React Native part as well as the iOS part to display the splash screen accurately. Most of the work takes place in Xcode for configuring the splash screen and only some minor part is for the react-native side.
If we realize properly, there is already a default splash screen from react native project. But we are going to implement our own splash screen with an icon for our React Native eCommerce app.

Downloading Required Logo
For this tutorial series, we have the basket logo which we are going to place in the splash screen. The download link for the logo is provided below:
Imgur
Post with 1 views.
Note that developers can use any logo if they do not completely follow this tutorial series.
Installing Splash Screen package
Here, we are going to install the react-native-splash-screen package into our project. The react-native-splash-screen package provides us with a splash screen API for react-native which can programmatically hide and show the splash screen. This package works both on iOS as well as Android. All the configuration for the React Native part as well as the native part is provided in the documentation. Now, to install the package, we need to use the following command:
yarn add react-native-splash-screen
Now, we need to link this package if it is not linked automatically. If the installation does not work, we can check the documentation for manual configuration.
Now, we need to update the pod. For that, we need to go to the iOS folder and run the following command:
cd ios ; pod update
Configuring Splash Screen in Xcode
In this step, we are going to configure the app in Xcode to implement the splash screen. First, we need to open our project on Xcode as shown in the screenshot below:

Next, we need to add our app logo to the ‘Images.xcassets’ folder. For that, we need to navigation to ‘Images.xcassets’ folder and create New Image Set as shown in the screenshot below:

Then, we need to rename the new image set as SplashScreen. Next, we need to add our app logo images to the SplashScreen image set as shown in the screenshot below:

Now, we need to open ‘LaunchScreen.xib’ file where we can find our default splash screen as shown in the screenshot below:

As we can see, all the default setups are shown in the right configuration panel of Xcode.
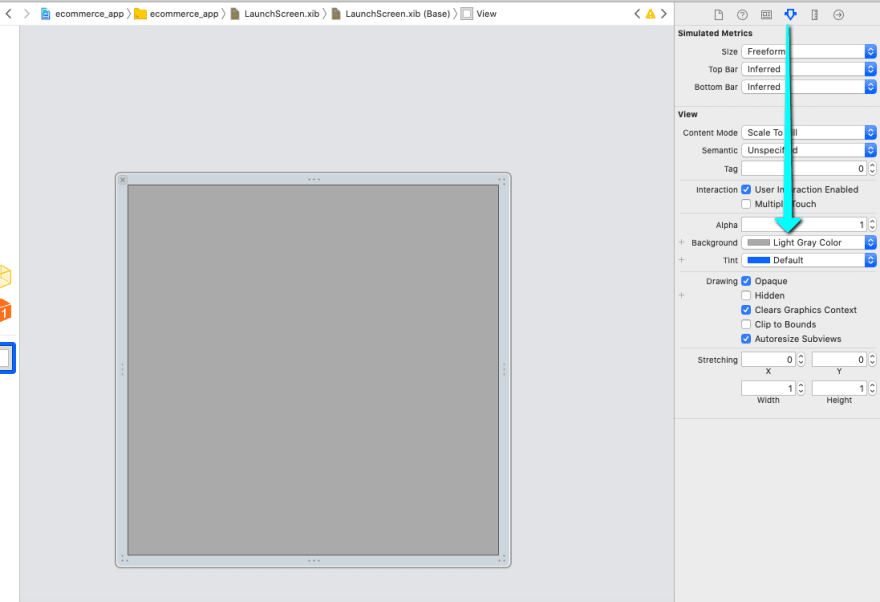
Now, we need to remove the default text and navigate to the ‘View” tab of the panel. Here, we are going to change the background color to light grey as shown in the screenshot below:
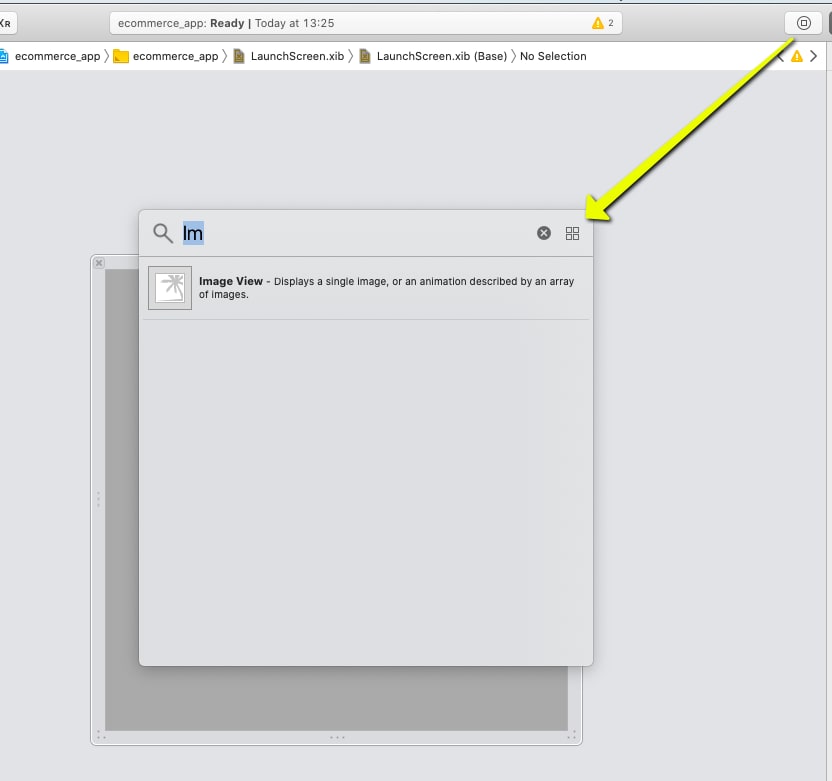
Next, we need to add our app logo by clicking on a button in the image as shown in the screenshot below:
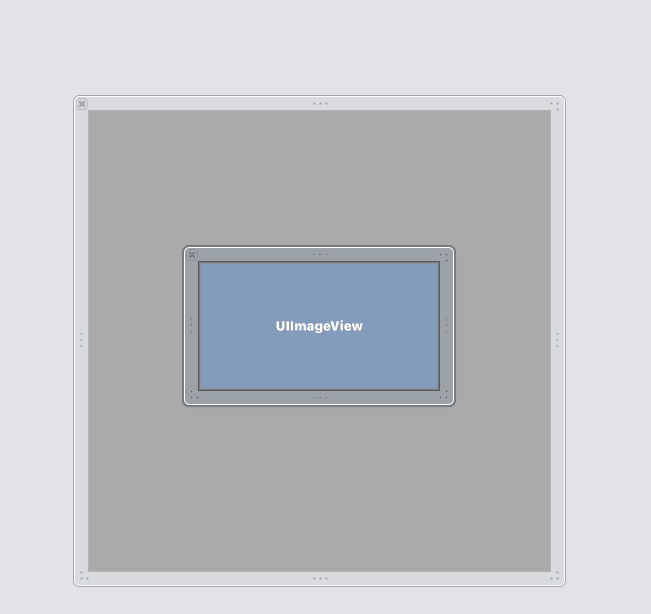
Now, we will have the UIImageView as shown in the screenshot below:
Next, we need to add the SplashScreen image set to the Image View tab of the right panel. The SplashScreen image is to be added to the Image field as shown in the screenshot below:

Hence, we will get our app logo into our UIImageView. Now, we have successfully completed the styling of the splash screen.
Next, we need to add the react-native-splash-screen package to the Xcode.
Activating splash screen for iOS in Xcode
Here, we are going to integrate the react-native-splash-screen into our Xcode ios project. For that, we need to go to:
node_modules ➜ react-native-splash-screen ➜ ios
Then, we need to add SplashScreen.xcodeprojfile to it as shown in the screenshot below:

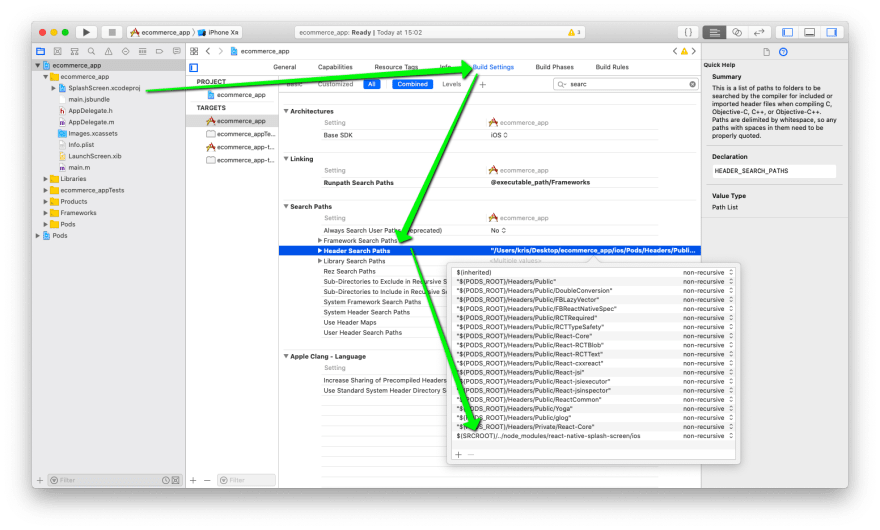
Next, we need to go to: Build Settings → Search Paths → Header Search Paths of the Xcode and add the following path:
$(SRCROOT)/../node_modules/react-native-splash-screen/ios
The visual representation of this step is shown in the screenshot below with arrows. We can following the arrow diagrams to find the exact place to enter the above path.
Lastly, we need to import the react-native-splash-screen package into the Appdelegate.m file and activate the splash screen. Here, the package is imported as “RNSplashScreen.h“. Now, to trigger the splash screen, we need to add [RNSplashScreen show] at the position as shown in the code snippet screenshot below:

Now, if we re-run the project in our iOS emulator, we will get the following result:

As we can see, the splash screen appears when we launch the app. But, it stays there and does not hide automatically to display the app screen. So, our next step is to hide the splash screen when the react native app screen is mounted.
Hiding the Splash Screen
In this step, we are going to hide the splash screen after the react native app screen successfully mounts. For that, we need to go back to the App.js file of our React Native project and make use of the react-native-splash-screen package. First, we need to import the react-native-splash-screen package as a SplashScreen module in our App.js file as shown in the code snippet below:
import SplashScreen from 'react-native-splash-screen';
Then, we need to call the hide() function provided by SplashScreen module inside the componentDidMount function as shown in the code snippet below:
export default class App extends React.Component {
  componentDidMount() {
    // do stuff while splash screen is shown
    // After having done stuff (such as async tasks) hide the splash screen
    SplashScreen.hide();
  }
This will help to hide the splash screen as soon as the app screen mounts.
Now, if we re-run our project in the emulator, we will get the following result:

Animated GIF – Find & Share on GIPHY
Discover & share this Animated GIF with everyone you know. GIPHY is how you search, share, discover, and create GIFs.
As we can see, the splash screen appears when we launch the app and then successfully hides after the component is mounted.
Finally, we have successfully completed the implementation of the Splash Screen for the iOS platform in our building of React Native eCommerce app.
Conclusion
This tutorial is the first part of the React Native Ecommerce app development tutorial series. In this part, we continued from where we left off in the pilot part of this tutorial series but it may not concern the development of the previous part. Here, we learned how to add the icons as an image set to the required folder in the Xcode in order to implement the splash screen. Then, we got the step by step guide on how to configure the iOS part in the Xcode in order to display the splash screen. Lastly, we also learned how to make use of the react-native-splash-screen package in both the React Native part as well as the native iOS part in XCode for showing and hiding the splash screen.
The tutorial for the configuration of the splash screen in the Android platform is available in part two of this tutorial series.
_ Note that, the next tutorial part may not have any connection with this part of the tutorial. The main essence of the next part is to implement only the Splash Screen for the Android platform. _
Moreover, in the upcoming parts, we will build some cool walkthrough screens that introduce our app to the users.
The post Build React Native E-commerce App #1 | Splash Screen in iOS appeared first on Kriss.
Disclosure
This post includes affiliate links; I may receive compensation if you purchase
products or services from different links provided in this article.

Top comments (0)