Whenever I've tried to learn a particular service or functionality within AWS, I find the best way is to do the ClickOps approach (i.e. Good Old Point and Click in the Console). Once I've figured out how to get it working via that method, I then go through the process of trying to automate it through Infrastructure as Code and in my case thats using AWS CloudFormation.
One particular example of this was getting a bit more familiar with AWS CodePipeline so that I could try to automate the delivery of CloudFormation Templates across multiple AWS Accounts in a similar manner as to how you would deploy solutions in a Software Delivery Lifecycle (SDLC). When I was learning how to do this through the management console, I found out that its not possible to do it all within the console and therefore you have to also leverage the AWS CLI for specific parts.
This blog post aims to walkthrough the steps that you'd need to take to create a relatively simple CI/CD pipeline using the AWS CodeCommit, AWS CodeBuild and AWS CodePipeline so that we can deploy a simple CloudFormation template into multiple AWS Accounts via an automated manner.
The flow of the CI/CD pipeline will be as follows:
- A CloudFormation template gets committed to a CodeCommit repository.
- Upon the detection of changes in that repository the CodePipeline will trigger a deployment run.
- CodeBuild will run a linting check against the CloudFormation Template using cfn-lint and will then run cfn-nag to check for patterns that indicate insecure resources within the CloudFormation template.
- The CloudFormation template will then be deployed into the same AWS Account as where the CI/CD pipeline is.
- Finally the CloudFormation template will then be deployed into a different AWS Account.
For the purpose of this blog post I'm going to use 3 AWS Accounts - Tooling, Development & Production. I'll be configuring the pipeline within the Tooling Account that will then deploy the CloudFormation Template into Development and then once an approval has been granted will then deploy to Production.
Create the CodeCommit Repository
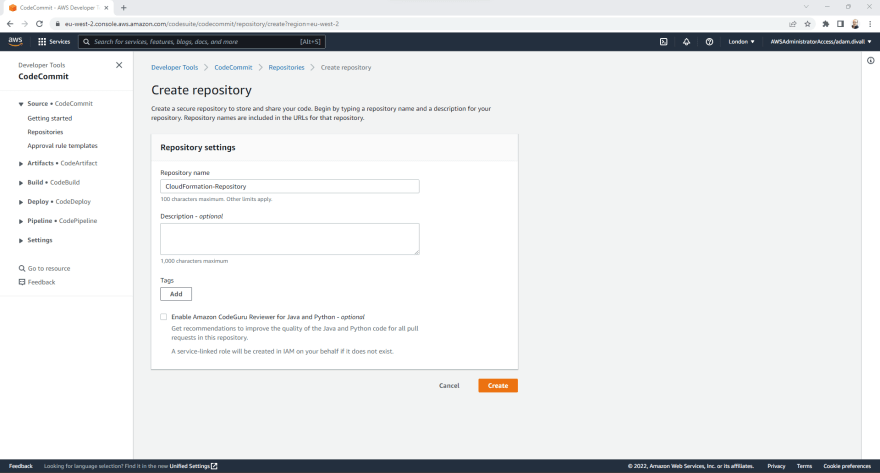
- In the Tooling Account, Login to the AWS Management Console using an Account with administrative permissions and navigate to the CodeCommit Service.
- Click Create repository.

- On the Create repository page, Enter a CloudFormation-Repository and Click Create.
Configure an AWS CLI Profile to the Tooling Account
- Establish an AWS CLI Profile to the Management Account with administrative credentials via the AWS CLI using either a Command Prompt or from Powershell:
aws configure sso
- In the SSO start URL, type the URL of the SSO Login page. For example., https://d-1234567890.awsapps.com/start This can be found by logging into the IAM Identity Center Console and looking for the AWS access portal URL in the Settings.
- In the SSO Region, type the AWS Region that was used for the Home Region when deploying Control Tower. For example., eu-west-2
A Web Browser will then Open prompting for Login Credentials if you're not already logged in.
- Login with your Username and Password.
- Click Allow.
- Select the Tooling Account using the cursor keys.
- Press Return for the default client Region and the default output format.
- For the Profile name use something memorable as this can be anything. For example., tooling
Clone the CodeCommit Repository
- Install the git-remote-codecommit module via either a Command Prompt or Powershell.
pip install git-remote-codecommit
- Clone the CodeCommit repository via either a Command Prompt or Powershell.
git clone codecommit://tooling@CloudFormation-Repository CloudFormation-Repository
Note: You'll need to ensure that you use the name of you AWS CLI profile prior to the @ as shown in the example above.
Create the CloudFormation Template and Push to CodeCommit
- Create a file named cloudformation.yaml with the below content in CloudFormation-Repository folder, where you cloned the repository to.
AWSTemplateFormatVersion: 2010-09-09
Resources:
  S3Bucket:
    Type: AWS::S3::Bucket
    Properties:
      BucketName: automated-deployment-${AWS::Region}-${AWS::AccountId}
      BucketEncryption:
        ServerSideEncryptionConfiguration:
          - ServerSideEncryptionByDefault:
              SSEAlgorithm: 'AES256'
      PublicAccessBlockConfiguration:
          BlockPublicAcls: true
          BlockPublicPolicy: true
          IgnorePublicAcls: true
          RestrictPublicBuckets: true
- Commit the Code to the CodeCommit Repository via either a Command Prompt or Powershell.
git add .
git commit -m "Initial Commit"
git push
Create the CloudFormation Service Role
- For both the Development and Production AWS Accounts follow the below steps.
- Login to the AWS Management Console using an Account with administrative permissions and navigate to the IAM Service.
- Click Roles.
- Click Create Role.

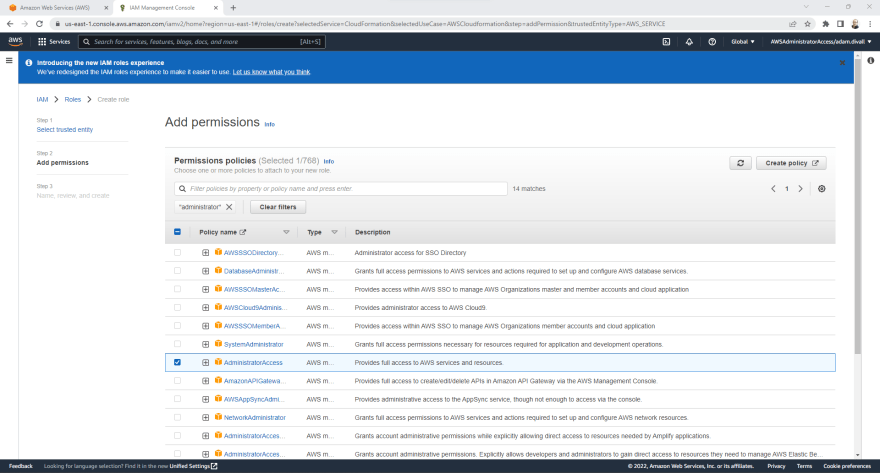
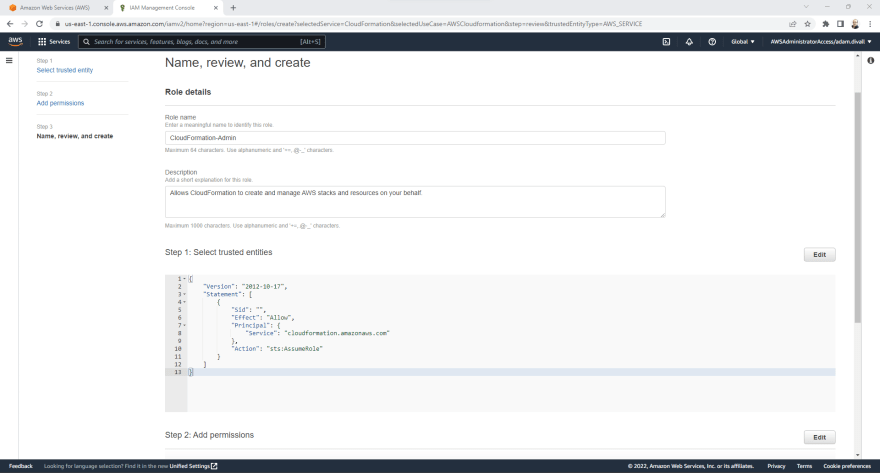
- On the Select trusted entity page, Ensure that the trusted entity is set to AWS service and then under Use cases for other AWS services, Select CloudFormation from the dropdown list and then Click Next.

- On the Add permission page, Select the AdministratorAccess from the Permissions policies and then Click Next.
- On the Name, review and create page, In the Role Name type CloudFormation-Admin and then Click Create role.
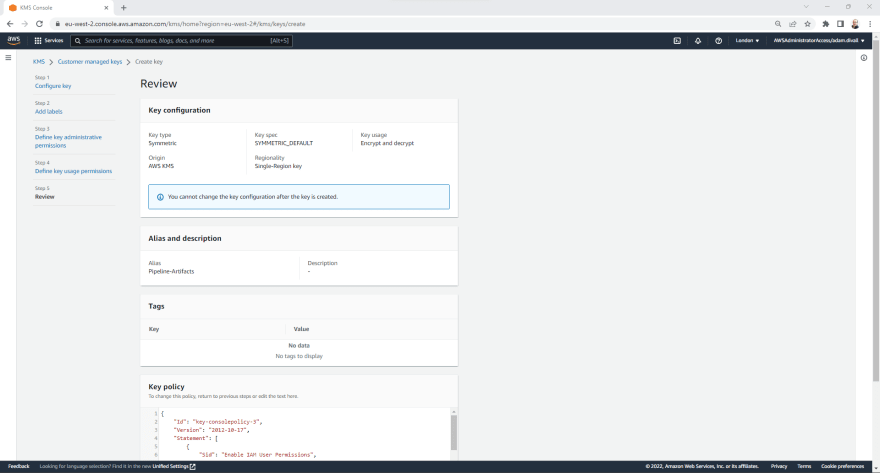
Create the KMS Key for Pipeline Artifacts
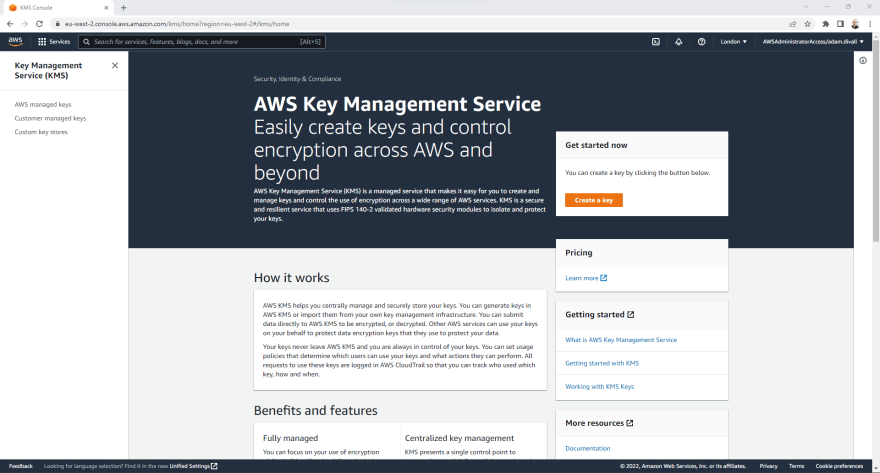
- In the Tooling Account, Login to the AWS Management Console using an Account with administrative permissions and navigate to the KMS Service.
- Click Create a key.
- On the Configure key page, Leave the default options and Click Next.

- On the Alias page, Create an Alias named Pipeline-Artifacts and Click Next.

- On the Define key administrative permissions page, Select the Role that begins with the prefix of AWSReservedSSO_AdministratorAccess.
- Ensure that the Checkbox for Allow key administrators to delete this key is Selected and Click Next.

- On the Define key usage permissions page, Click Add another AWS Account.
- Enter the 12 Digit Account ID of the Development Account and then Click Add another AWS Account.
- Enter the 12 Digit Account ID of the Production Account and then Click Next.
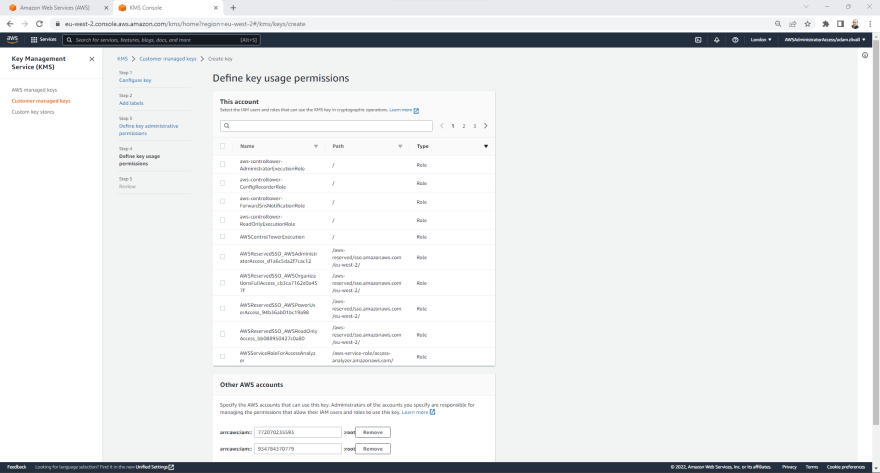
- On the Review page, Click Finish.
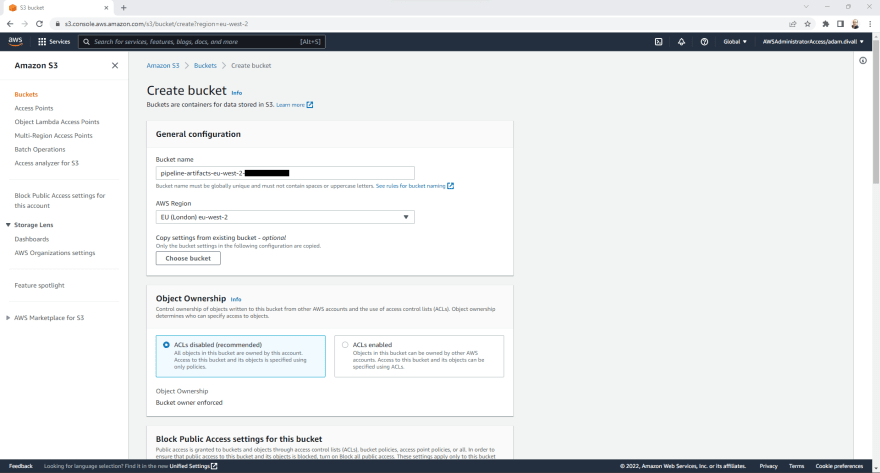
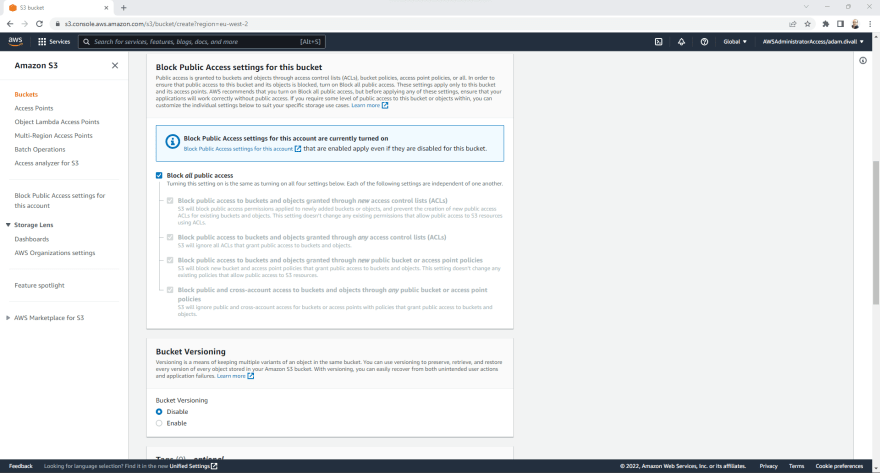
Create the S3 Bucket for Pipeline Artifacts
- In the Tooling Account, Login to the AWS Management Console using an Account with administrative permissions and navigate to the S3 Service.
- Click Create bucket.
- On the Create bucket pagec, Enter a globall unique Bucket name. In this example, I've suffixed the name pipeline-artifacts with the region and the AWS Account ID.
- Set the Bucket Versioning to Enable.
- Set the Default encryption to Enable, Select AWS Key Management Service key (SSE-KMS), Select Choose from your AWS KMS keys and then Choose the KMS Key that we previously created.
- Click Create bucket.

- In the S3 Service Console, Click Buckets.
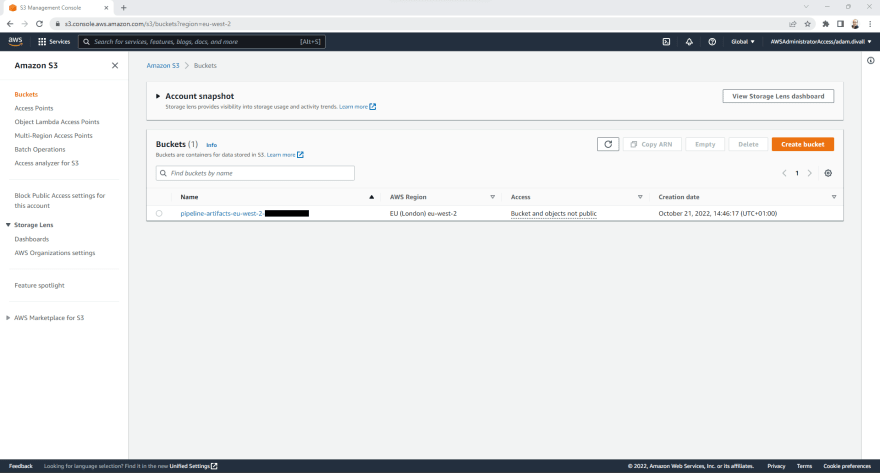
- Click the pipeline-artifacts Bucket that we previously created.
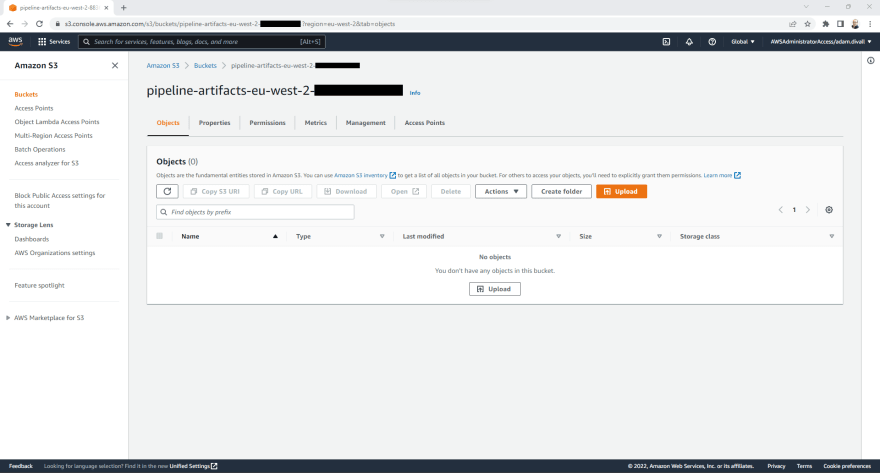
- Click the Permissions Tab.

- Under the Bucket policy section, Click Edit.
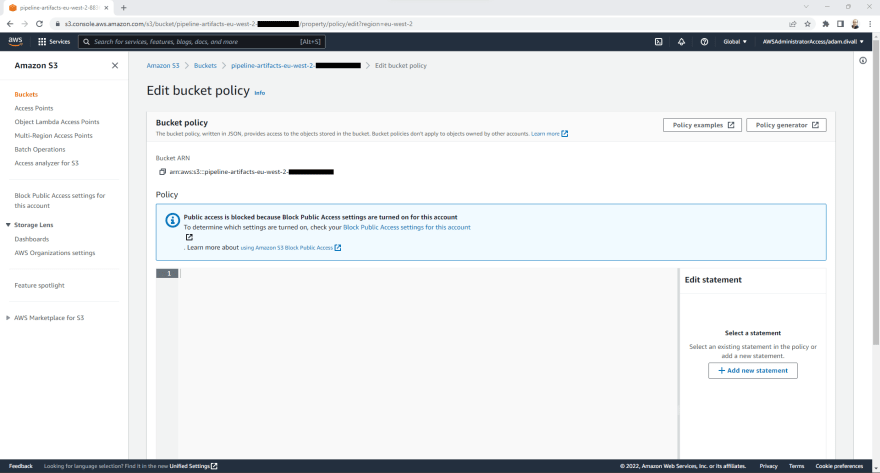
- Enter the below JSON Policy.
{
        "Version": "2012-10-17",
        "Statement": [
          {
            "Effect": "Deny",
            "Principal": "*",
            "Action": [
              "s3:PutObject"
            ],
            "Resource": [
              "arn:aws:s3:::pipeline-artifacts-eu-west-2-<Tooling-Account-ID>/*"
            ],
            "Condition": {
              "StringNotEquals": {
                "s3:x-amz-server-side-encryption": "aws:kms"
              }
            }
          },
          {
            "Action": "s3:*",
            "Effect": "Deny",
            "Principal": "*",
            "Resource": [
              "arn:aws:s3:::pipeline-artifacts-eu-west-2-<Tooling-Account-ID>",
              "arn:aws:s3:::pipeline-artifacts-eu-west-2-<Tooling-Account-ID>/*"
            ],
            "Condition": {
              "Bool": {
                "aws:SecureTransport": false
              }
            }
          },
          {
            "Effect": "Allow",
            "Principal": {
              "AWS": [
                "arn:aws:iam::<Development-Account-ID>:root",
                "arn:aws:iam::<Production-Account-ID>:root"
              ],
              "Service": "codebuild.amazonaws.com"
            },
            "Action": [
              "s3:Get*",
              "s3:Put*"
            ],
            "Resource": [
              "arn:aws:s3:::pipeline-artifacts-eu-west-2-<Tooling-Account-ID>/*"
            ]
          },
          {
            "Effect": "Allow",
            "Principal": {
              "AWS": [
                "arn:aws:iam::<Development-Account-ID>:root",
                "arn:aws:iam::<Production-Account-ID>:root"
              ],
              "Service": "codebuild.amazonaws.com"
            },
            "Action": [
              "s3:ListBucket"
            ],
            "Resource": [
              "arn:aws:s3:::pipeline-artifacts-eu-west-2-<Tooling-Account-ID>"
            ]
          }
        ]
      }
Note: In the above IAM Policy, replace <Tooling-Account-ID> with the Account ID of your own Tooling Account, replace <Development-Account-ID> with the Account ID of your own Development Account, and replace <Production-Account-ID> with the Account ID of your own Production Account.
- Click Save changes.
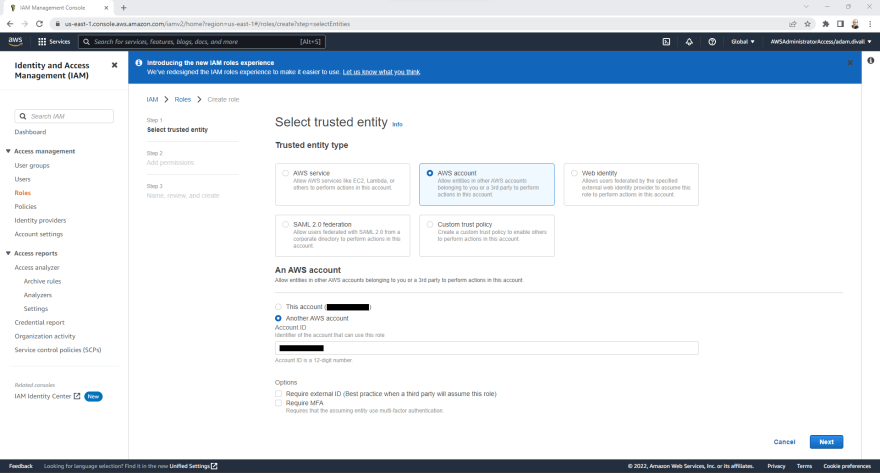
Create the IAM Role for Cross-Account Access
- For both the Development and Production AWS Accounts follow the below steps.
- Login to the AWS Management Console using an Account with administrative permissions and navigate to the IAM Service.
- Click Roles.
- Click Create Role.

- On the Select trusted entity page, Ensure that the trusted entity is set to AWS account and then under Another AWS account enter the 12 Digit Account ID for the Tooling Account and then Click Next.
- On the Add permission page, Click Create policy.

- On the Create policy page, Click the JSON Tab.
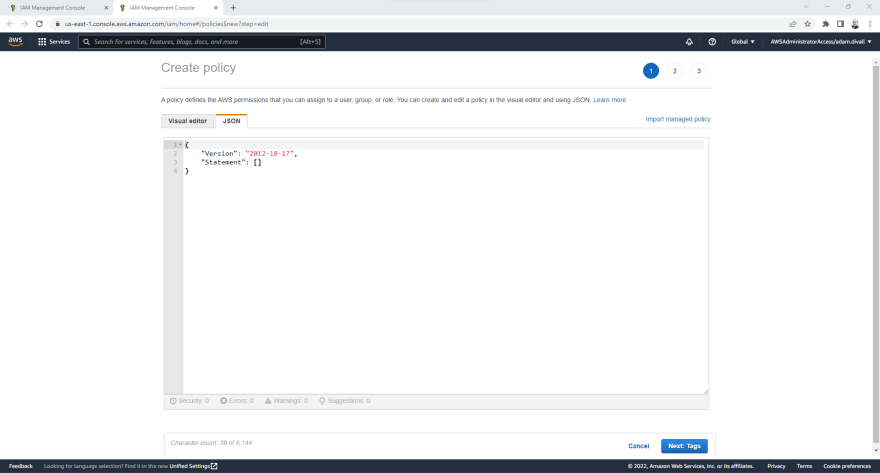
- Replace everything in the existing JSON Policy with the below.
{
    "Version": "2012-10-17",
    "Statement": [
        {
            "Action": [
                "kms:DescribeKey",
                "kms:GenerateDataKey*",
                "kms:Encrypt",
                "kms:ReEncrypt*",
                "kms:Decrypt"
            ],
            "Resource": [
                "arn:aws:kms:eu-west-2:<Tooling-Account-ID>:key/*"
            ],
            "Effect": "Allow"
        },
        {
            "Action": [
                "cloudformation:*",
                "iam:PassRole"
            ],
            "Resource": [
                "*"
            ],
            "Effect": "Allow"
        },
        {
            "Action": [
                "s3:Get*",
                "s3:Put*",
                "s3:ListBucket"
            ],
            "Resource": [
                "arn:aws:s3:::pipeline-artifacts-eu-west-2-<Tooling-Account-ID>/*",
                "arn:aws:s3:::pipeline-artifacts-eu-west-2-<Tooling-Account-ID>"
            ],
            "Effect": "Allow"
        }
    ]
}
Note: In the above IAM Policy, replace <Tooling-Account-ID> with the Account ID of your own Tooling Account.
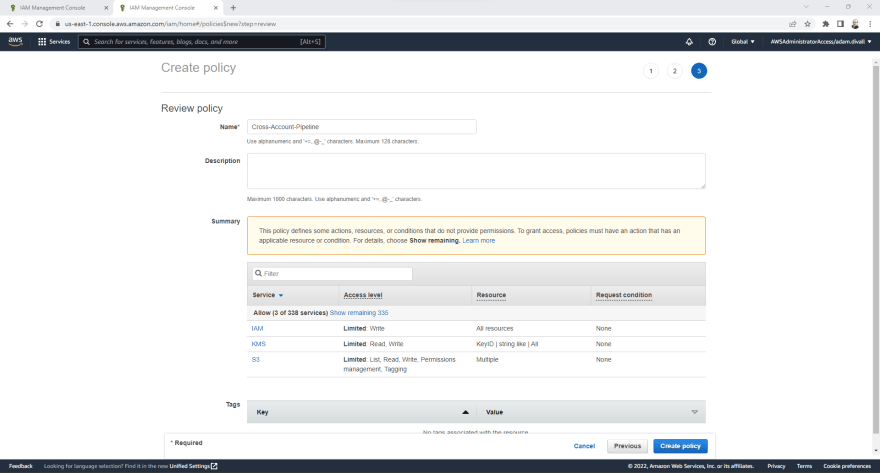
- Click Next: Tags.
- Click Next: Review.
- On the Review policy page, In the Policy name type Pipeline-Cross-Account-Access and Click Create policy.
Return to the Browser Tab for the Creation of the IAM Role and Click the Refresh Button. The button with 2 Arrows on and then the IAM Policy that was just created will be visible.
- Select the Pipeline-Cross-Account-Access permissions policies and then Click Next.

- On the Name, review, and create page, In the role name type Cross-Account-Role and Click Create role.

Create the CloudFormation Tests Build Project in CodeBuild
- In the Tooling Account, Login to the AWS Management Console using an Account with administrative permissions and navigate to the CodeBuild Service.
- Click Create build project.

- On the Create build project page under the Project configuration section, In the Project name type CloudFormation-Tests.
- Under the Source section, In the Source provider select AWS CodeCommit.
- In the Repository select CloudFormation-Repository.
- In the Branch select main.

- Under the Environment section, Select Managed image.
- In the Operating system, Select Ubuntu.
- In the Runtimes, Select Standard.
- In the Image, Select aws/codebuild/standard:6.0.
- In the Image version, Select Always use the latest image for this runtime version.
- In the Environment type, Select Linux.
- In the Service role, Select New service role.
- In the Role name, Type CodeBuild-CloudFormation-Tests.

- Under the BuildSpec section, Select Insert build commands.
- Click Switch to editor.
- In the Build commands, replace everything in there with the below.
version: 0.2
phases:
  install:
    runtime-versions:
      ruby: 3.1
      # name: version
    on-failure: ABORT
    commands:
      - pip3 install cfn-lint --quiet
      - apt-get install jq git -y -q
      - gem install cfn-nag
  build:
    on-failure: ABORT
    commands:
      - cd ./
      - cfn-lint cloudformation.yaml
      - cfn_nag_scan -i cloudformation.yaml
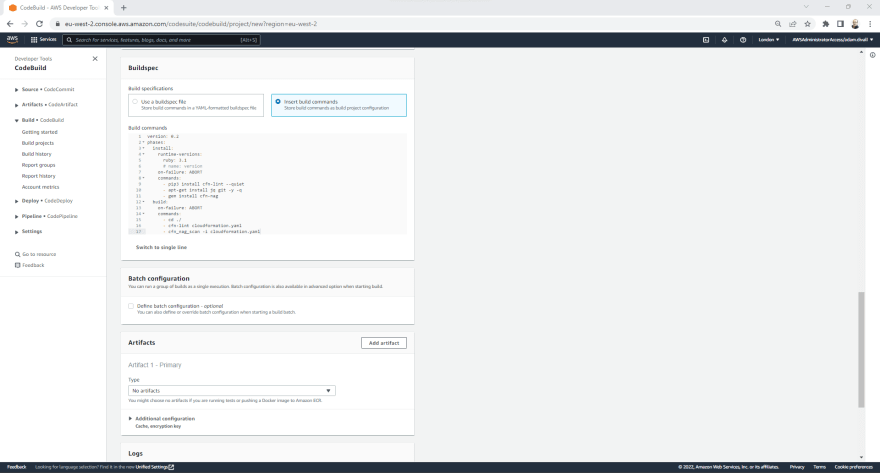
- Click Create build project.
Update the KMS Key Policy to Allow the CodeBuild Service Permissions
- In the Tooling Account, Login to the AWS Management Console using an Account with administrative permissions and navigate to the KMS Service.
- Click Customer managed keys.
- Click Pipeline-Artifacts.
- Click Switch to policy view
- Click Edit.
- Replace everything in the existing JSON Policy with the below.
{
    "Version": "2012-10-17",
    "Statement": [
        {
            "Sid": "Enable IAM User Permissions",
            "Effect": "Allow",
            "Principal": {
                "AWS": "arn:aws:iam::<Tooling-Account-ID>:root"
            },
            "Action": "kms:*",
            "Resource": "*"
        },
        {
            "Sid": "Allow access for Key Administrators",
            "Effect": "Allow",
            "Principal": {
                "AWS": "<ARN-of-AWSReservedSSO_AdministratorAccess-IAM-Role>"
            },
            "Action": [
                "kms:Create*",
                "kms:Describe*",
                "kms:Enable*",
                "kms:List*",
                "kms:Put*",
                "kms:Update*",
                "kms:Revoke*",
                "kms:Disable*",
                "kms:Get*",
                "kms:Delete*",
                "kms:TagResource",
                "kms:UntagResource",
                "kms:ScheduleKeyDeletion",
                "kms:CancelKeyDeletion"
            ],
            "Resource": "*"
        },
        {
            "Sid": "Allow use of the key",
            "Effect": "Allow",
            "Principal": {
                "AWS": [
                    "arn:aws:iam::<Development-Account-ID>:root",
                    "arn:aws:iam::<Production-Account-ID>:root"
                ],
                "Service": "codebuild.amazonaws.com"
            },
            "Action": [
                "kms:Encrypt",
                "kms:Decrypt",
                "kms:ReEncrypt*",
                "kms:GenerateDataKey",
                "kms:DescribeKey"
            ],
            "Resource": "*"
        }
    ]
}
Note: In the above IAM Policy, replace <Tooling-Account-ID> with the Account ID of your own Tooling Account, replace <Development-Account-ID> with the Account ID of your own Development Account, replace <Production-Account-ID> with the Account ID of your own Production Account and replace <ARN-of-AWSReservedSSO_AdministratorAccess-IAM-Role> wih the ARN of the AWSReservedSSO_AdministratorAccess IAM Role that can be obtained from the IAM Console within the Tooling Account.
- Click Save changes.
Update the CodeBuildBasePolicy-CloudFormation-Tests-eu-west-2 IAM Policy
- In the Tooling Account, Login to the AWS Management Console using an Account with administrative permissions and navigate to the IAM Service.
- Click Policies.

- Click the CodeBuildBasePolicy-CloudFormation-Tests-eu-west-2 IAM Policy.
- Click Edit policy.
- Click the JSON Tab.
- Replace everything in the existing JSON Policy with the below.
{
    "Version": "2012-10-17",
    "Statement": [
        {
            "Effect": "Allow",
            "Resource": [
                "arn:aws:logs:eu-west-2:<Tooling-Account-ID>:log-group:/aws/codebuild/CloudFormation-Tests",
                "arn:aws:logs:eu-west-2:<Tooling-Account-ID>:log-group:/aws/codebuild/CloudFormation-Tests:*"
            ],
            "Action": [
                "logs:CreateLogGroup",
                "logs:CreateLogStream",
                "logs:PutLogEvents"
            ]
        },
        {
            "Effect": "Allow",
            "Resource": [
                "arn:aws:s3:::pipeline-artifacts-eu-west-2-<Tooling-Account-ID>/*"
            ],
            "Action": [
                "s3:PutObject",
                "s3:GetObject",
                "s3:GetObjectVersion",
                "s3:GetBucketAcl",
                "s3:GetBucketLocation"
            ]
        },
        {
            "Effect": "Allow",
            "Resource": [
                "arn:aws:codecommit:eu-west-2:<Tooling-Account-ID>:CloudFormation-Repository"
            ],
            "Action": [
                "codecommit:GitPull"
            ]
        },
        {
            "Effect": "Allow",
            "Action": [
                "codebuild:CreateReportGroup",
                "codebuild:CreateReport",
                "codebuild:UpdateReport",
                "codebuild:BatchPutTestCases",
                "codebuild:BatchPutCodeCoverages"
            ],
            "Resource": [
                "arn:aws:codebuild:eu-west-2:<Tooling-Account-ID>:report-group/CloudFormation-Tests-*"
            ]
        },
        {
            "Effect": "Allow",
            "Action": [
                "kms:DescribeKey",
                "kms:GenerateDataKey",
                "kms:Encrypt",
                "kms:ReEncrypt*",
                "kms:Decrypt"
            ],
            "Resource": [
                "<ARN-of-Pipeline-Artifacts-KMS-Key>"
            ]
        }
    ]
}
Note: In the above IAM Policy, replace <Tooling-Account-ID> with the Account ID of your own Tooling Account, replace <Development-Account-ID> with the Account ID of your own Development Account, replace <Production-Account-ID> with the Account ID of your own Production Account and replace <ARN-of-Pipeline-Artifacts-KMS-Key> wih the ARN of the Pipeline-Artifacts KMS Key that can be obtained from the KMS Console within the Tooling Account.
- Click Review policy.
- Click Save changes.
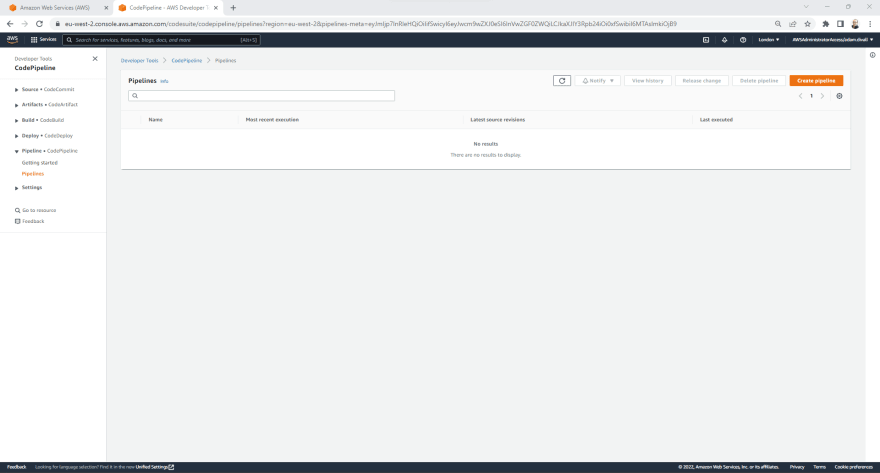
Create the Deployment Pipeline in CodePipeline
- In the Tooling Account, Login to the AWS Management Console using an Account with administrative permissions and navigate to the CodePipeline Service.
- Click Create pipeline.
- On the Choose pipeline settings page under the Pipeline settings section, In the Pipeline name type CloudFormation-Pipeline.
- In the Service role, Select New service role.
- In the Role name, Type CloudFormation-Pipeline.
- Ensure that Allow AWS CodePipeline to create a service role so it can be used with this new pipeline is selected.
- Expand the Advanced settings, Select Custom location for the Artifact Store.
- In the Bucket, Select the pipeline-artifacts bucket that we previously created.
- Select Customer Managed Key for the Encryption key.
- In the KMS customer master key, Select the Pipeline-Artifacts KMS Key that we previously created.

- Click Next.
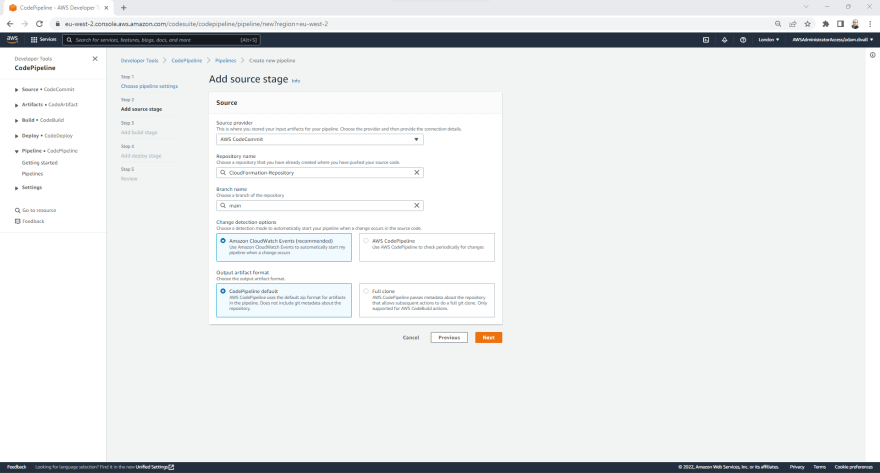
- On the Add source stage page, In the Source provider select AWS CodeCommit.
- In the Repository name, Select CloudFormation-Repository.
- In the Branch name, Select main.
- Leave all other settings as the defaults and Click Next.
- On the Add build stage page, In the Build provider select AWS CodeBuild.
- In the Project name, Select CloudFormation-Tests and Click Next.

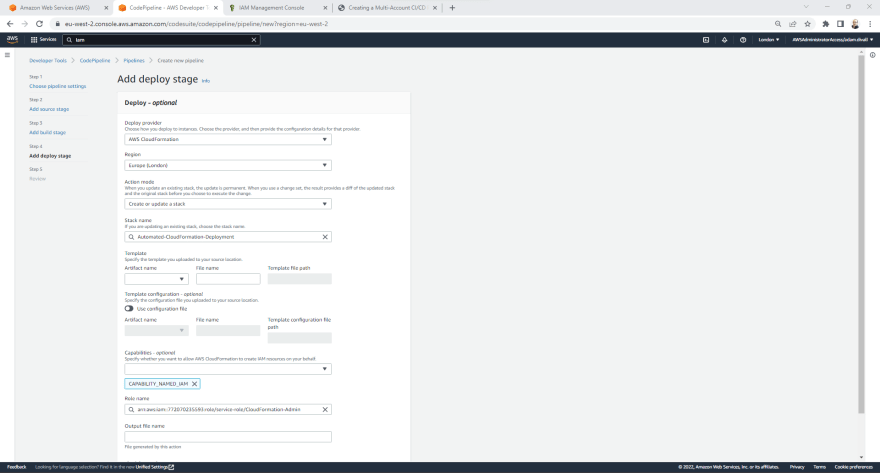
- On the Add deploy stage page, In the Deploy provider select AWS CloudFormation.
- In the Action mode, Select Create or update a stack.
- In the Stack name, Type Automated-CloudFormation-Deployment. Note: This can be named anything you'd like.
- In the Artifact name, Select BuildArtifact and in the File name type cloudformation.yaml.
- In the Capabilities - optional select CAPABILITY_NAMED_IAM.
- In the Role name, Enter the ARN of the Development Accounts CloudFormation-Admin IAM Role and then Click Next.
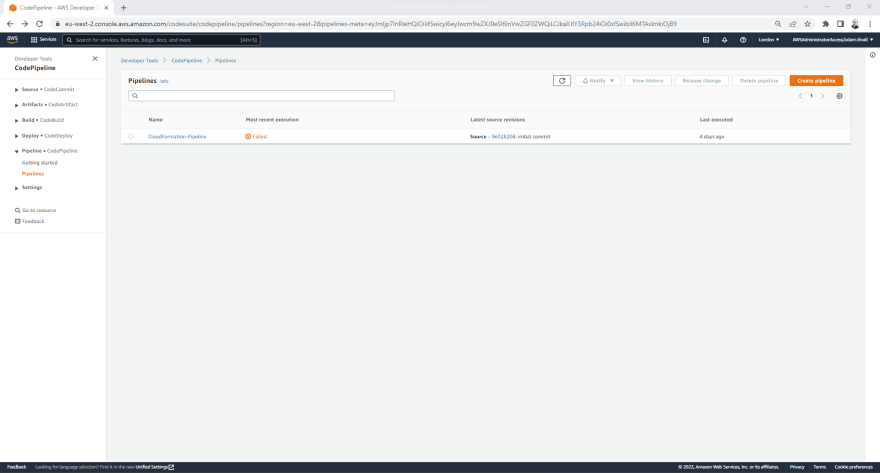
- On the Review page, Click Create Pipeline.
Update the KMS Key Policy to Allow the CloudFormation-Pipeline IAM Role Permissions
- In the Tooling Account, Login to the AWS Management Console using an Account with administrative permissions and navigate to the KMS Service.
- Click Customer managed keys.
- Click Pipeline-Artifacts.
- Click Switch to policy view
- Click Edit.
- Replace everything in the existing JSON Policy with the below.
{
    "Version": "2012-10-17",
    "Statement": [
        {
            "Sid": "Enable IAM User Permissions",
            "Effect": "Allow",
            "Principal": {
                "AWS": "arn:aws:iam::<Tooling-Account-ID>:root"
            },
            "Action": "kms:*",
            "Resource": "*"
        },
        {
            "Sid": "Allow access for Key Administrators",
            "Effect": "Allow",
            "Principal": {
                "AWS": "<ARN-of-AWSReservedSSO_AdministratorAccess-IAM-Role>"
            },
            "Action": [
                "kms:Create*",
                "kms:Describe*",
                "kms:Enable*",
                "kms:List*",
                "kms:Put*",
                "kms:Update*",
                "kms:Revoke*",
                "kms:Disable*",
                "kms:Get*",
                "kms:Delete*",
                "kms:TagResource",
                "kms:UntagResource",
                "kms:ScheduleKeyDeletion",
                "kms:CancelKeyDeletion"
            ],
            "Resource": "*"
        },
        {
            "Sid": "Allow use of the key",
            "Effect": "Allow",
            "Principal": {
                "AWS": [
                    "arn:aws:iam::<Development-Account-ID>:root",
                    "arn:aws:iam::<Production-Account-ID>:root",
                    "arn:aws:iam::<Tooling-Account-ID>:role/CloudFormation-Pipeline"
                ],
                "Service": "codebuild.amazonaws.com"
            },
            "Action": [
                "kms:Encrypt",
                "kms:Decrypt",
                "kms:ReEncrypt*",
                "kms:GenerateDataKey",
                "kms:DescribeKey"
            ],
            "Resource": "*"
        }
    ]
}
Note: In the above IAM Policy, replace <Tooling-Account-ID> with the Account ID of your own Tooling Account, replace <Development-Account-ID> with the Account ID of your own Development Account, replace <Production-Account-ID> with the Account ID of your own Production Account and replace <ARN-of-AWSReservedSSO_AdministratorAccess-IAM-Role> wih the ARN of the AWSReservedSSO_AdministratorAccess IAM Role that can be obtained from the IAM Console within the Tooling Account.
- Click Save changes.
Update the CloudFormation-Pipeline IAM Role Permissions
- In the Tooling Account, Login to the AWS Management Console using an Account with administrative permissions and navigate to the IAM Service.
- Click Policies.
- Click AWSCodePipelineServiceRole-eu-west-2-CloudFormation-Pipeline.
- Click Edit policy.
- Click the JSON Tab.
- Replace everything in the existing JSON Policy with the below.
{
    "Version": "2012-10-17",
    "Statement": [
        {
            "Action": [
                "sts:AssumeRole"
            ],
            "Resource": [
                "arn:aws:iam::<Development-Account-ID>:role/*",
                "arn:aws:iam::<Production-Account-ID>:role/*"
            ],
            "Effect": "Allow"
        },
        {
            "Condition": {
                "StringEqualsIfExists": {
                    "iam:PassedToService": [
                        "cloudformation.amazonaws.com"
                    ]
                }
            },
            "Action": [
                "iam:PassRole"
            ],
            "Resource": [
                "*"
            ],
            "Effect": "Allow"
        },
        {
            "Action": [
                "codecommit:CancelUploadArchive",
                "codecommit:GetBranch",
                "codecommit:GetCommit",
                "codecommit:GetRepository",
                "codecommit:GetUploadArchiveStatus",
                "codecommit:UploadArchive"
            ],
            "Resource": [
                "*"
            ],
            "Effect": "Allow"
        },
        {
            "Action": [
                "cloudwatch:*",
                "s3:*",
                "sns:*",
                "cloudformation:*"
            ],
            "Resource": [
                "*"
            ],
            "Effect": "Allow"
        },
        {
            "Action": [
                "cloudformation:CreateStack",
                "cloudformation:DeleteStack",
                "cloudformation:DescribeStacks",
                "cloudformation:UpdateStack",
                "cloudformation:CreateChangeSet",
                "cloudformation:DeleteChangeSet",
                "cloudformation:DescribeChangeSet",
                "cloudformation:ExecuteChangeSet",
                "cloudformation:SetStackPolicy",
                "cloudformation:ValidateTemplate"
            ],
            "Resource": [
                "*"
            ],
            "Effect": "Allow"
        },
        {
            "Action": [
                "codebuild:BatchGetBuildBatches",
                "codebuild:StartBuild",
                "codebuild:BatchGetBuilds",
                "codebuild:StartBuildBatch"
            ],
            "Resource": [
                "*"
            ],
            "Effect": "Allow"
        }
    ]
}
Note: In the above IAM Policy, replace <Development-Account-ID> with the Account ID of your own Development Account and replace <Production-Account-ID> with the Account ID of your own Production Account
- Click Review policy.
- Click Save changes.
Update the Deployment Pipeline in CodePipeline to Add the Production Stage
- In the Tooling Account, Login to the AWS Management Console using an Account with administrative permissions and navigate to the CodePipeline Service.
- Click on CloudFormation-Pipeline.

- Click Edit.
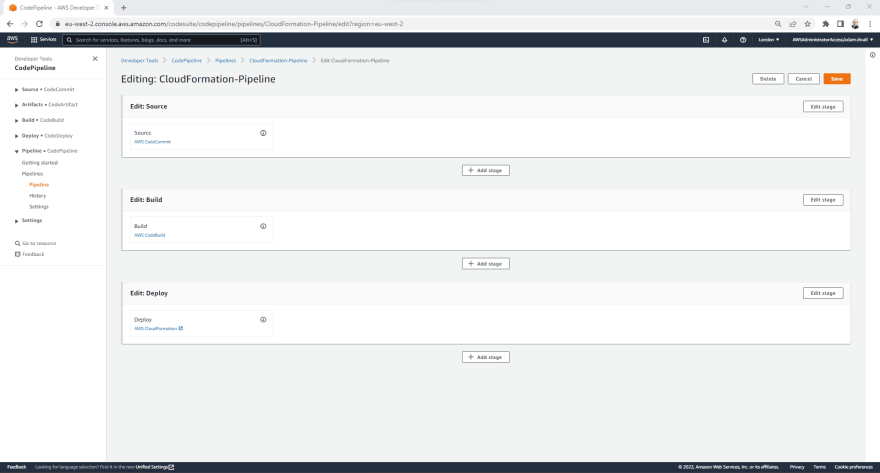
- Click on Add stage after the Deploy stage.
- In the Stage name, Type Production and Click Add stage.

- Under the Production stage, Click Add action group.
- On the Edit action page, In Action name type Production.
- In the Action provider, Select AWS CloudFormation.
- In the Input artifacts, Select BuildArtifact.
- In the Action mode, Select Create or update a stack.
- In the Stack name, Type Automated-CloudFormation-Deployment.
- In the Artifact name, Select BuildArtifact.
- In the File name, Type cloudformation.yaml.
- In Capabilities - optional, Select CAPABILITY_NAMED_IAM.
- In the Role name, Enter the ARN of the Production Accounts CloudFormation-Admin IAM Role and then Click Done.

- Click Save.
Edit the Deployment Pipeline for Cross-Account Access
- Execute a Get-Pipeline API Call using a Tooling Account profile via the AWS CLI using either a Command Prompt or from Powershell:
aws codepipeline get-pipeline --name CloudFormation-Pipeline --profile tooling >> pipeline.json
- Edit pipeline.json in a Code Editor to look something like the below:
{
    "pipeline": {
        "name": "CloudFormation-Pipeline",
        "roleArn": "arn:aws:iam::<Tooling-Account-ID>:role/service-role/CloudFormation-Pipeline",
        "artifactStore": {
            "type": "S3",
            "location": "pipeline-artifacts-eu-west-2-<Tooling-Account-ID>",
            "encryptionKey": {
                "id": "arn:aws:kms:eu-west-2:<Tooling-Account-ID>:alias/Pipeline-Artifacts",
                "type": "KMS"
            }
        },
        "stages": [
            {
                "name": "Source",
                "actions": [
                    {
                        "name": "Source",
                        "actionTypeId": {
                            "category": "Source",
                            "owner": "AWS",
                            "provider": "CodeCommit",
                            "version": "1"
                        },
                        "runOrder": 1,
                        "configuration": {
                            "BranchName": "main",
                            "OutputArtifactFormat": "CODE_ZIP",
                            "PollForSourceChanges": "false",
                            "RepositoryName": "CloudFormation-Repository"
                        },
                        "outputArtifacts": [
                            {
                                "name": "SourceArtifact"
                            }
                        ],
                        "inputArtifacts": [],
                        "region": "eu-west-2",
                        "namespace": "SourceVariables"
                    }
                ]
            },
            {
                "name": "Build",
                "actions": [
                    {
                        "name": "Build",
                        "actionTypeId": {
                            "category": "Build",
                            "owner": "AWS",
                            "provider": "CodeBuild",
                            "version": "1"
                        },
                        "runOrder": 1,
                        "configuration": {
                            "ProjectName": "CloudFormation-Tests"
                        },
                        "outputArtifacts": [
                            {
                                "name": "BuildArtifact"
                            }
                        ],
                        "inputArtifacts": [
                            {
                                "name": "SourceArtifact"
                            }
                        ],
                        "region": "eu-west-2",
                        "namespace": "BuildVariables"
                    }
                ]
            },
            {
                "name": "Development-Environment",
                "actions": [
                    {
                        "name": "Deploy-to-Development",
                        "actionTypeId": {
                            "category": "Deploy",
                            "owner": "AWS",
                            "provider": "CloudFormation",
                            "version": "1"
                        },
                        "runOrder": 1,
                        "configuration": {
                            "ActionMode": "CREATE_UPDATE",
                            "Capabilities": "CAPABILITY_NAMED_IAM",
                            "RoleArn": "arn:aws:iam::<Development-Account-ID>:role/CloudFormation-Admin",
                            "StackName": "Automated-CloudFormation-Deployment",
                            "TemplatePath": "SourceArtifact::cloudformation.yaml"
                        },
                        "outputArtifacts": [],
                        "inputArtifacts": [
                            {
                                "name": "SourceArtifact"
                            }
                        ],
                        "roleArn": "arn:aws:iam::<Development-Account-ID>:role/Cross-Account-Role",
                        "region": "eu-west-2"
                    }
                ]
            },
            {
                "name": "Production-Environment",
                "actions": [
                    {
                        "name": "Deploy-to-Production",
                        "actionTypeId": {
                            "category": "Deploy",
                            "owner": "AWS",
                            "provider": "CloudFormation",
                            "version": "1"
                        },
                        "runOrder": 2,
                        "configuration": {
                            "ActionMode": "CREATE_UPDATE",
                            "Capabilities": "CAPABILITY_NAMED_IAM",
                            "RoleArn": "arn:aws:iam::<Production-Account-ID>:role/CloudFormation-Admin",
                            "StackName": "Automated-CloudFormation-Deployment",
                            "TemplatePath": "SourceArtifact::cloudformation.yaml"
                        },
                        "outputArtifacts": [],
                        "inputArtifacts": [
                            {
                                "name": "SourceArtifact"
                            }
                        ],
                        "roleArn": "arn:aws:iam::<Production-Account-ID>:role/Cross-Account-Role",
                        "region": "eu-west-2"
                    }
                ]
            }
        ],
        "version": 1
    }
}
Note: In the above JSON, replace <Tooling-Account-ID> with the Account ID of your own Tooling Account, <Development-Account-ID> with the Account ID of your own Development Account and <Production-Account-ID> with the Account ID of your own Production Account. We have also renamed the Stage that was originally displayed as Deploy to Development and we have also added the variable roleArn to both the Development and Production stages with the ARN of the Cross-Account-Role.
- Execute a Get-Pipeline API Call using a Tooling Account profile via the AWS CLI using either a Command Prompt or from Powershell:
aws codepipeline update-pipeline --cli-input-json file://pipeline.json --profile tooling
If you then go into the CodePipeline Console and Click Release change, the pipeline will then trigger successfully.

Hope this helps.

Top comments (1)
Hey Adam, is there a way to add Automated integration tests as part of the pipeline.