Intro
This article is another part of my containerization series, if you haven't yet, you can check out the previous parts here
In the previous part, we reviewed the steps required to containerize an application by creating a docker file and a container image. This article will explain the steps and resources needed to deploy the container image to Azure.
What are the components we need?
Let's go over the components needed to deploy a container to Azure before we go through the steps of deploying the container
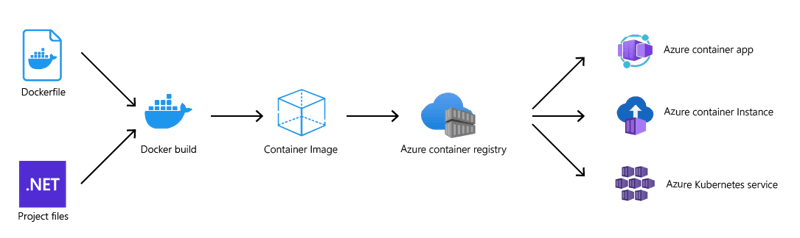
Dockerfile: As explained in the previous part of the series, a dockerfile holds the instructions needed for docker to build a docker image that later allows a container runtime to pull the image and run it.
Docker build: Docker build is the process we will be using to interpret the dockerfile and copy the project files into a container image.
Container image: A container image is the executable package that contains everything our app needs to run, including the app executables and their dependencies.
Azure container registry: In any container deployment model, a container registry is a required component that allows you to store and distribute your container images. Since we are exploring the deployment option of Azure, then Azure container registry would be the most convenient option for us to use as it's integrated with the other Azure services we will be using. However, it's important to note that the Azure container registry is not the only option, and other options include:
- Docker hub (Default docker repository)
- Amazon Elastic Container Registry (AWS offering)
- Google Artifact Registry (Google Cloud offering)
- Harbor (Self-hosted and opensource option)
Azure container app: That will be the service that will eventually host and execute our container, there are many options provided by Azure to deploy your containers, although I won't be providing a full comparison between these services, I will give a brief explanation of the differences
Azure container instance: This is the simplest container service available on Azure. It is considered a low-level option since it doesn't offer any sort of orchestration or scaling capabilities. You provision a standalone container, and you pay for the instance you provision.
Azure container app: This service provides more capabilities than a container instance. It's built on top of Kubernetes and provides auto-scaling capabilities and service-to-service communication. It is much more suitable for microservices architecture. With this service, you pay for the execution time and resource consumption.
Azure Kubernetes Service: A fully fledged managed Kubernetes cluster with all the Kubernetes goodness you expect. Auto-scaling, Service-to-service communication, configurations, and secrets management as well as all the standard Kubernetes features. The option is more suited for larger and more complex systems and it requires Kubernetes experience from the teams utilizing it. With this option, you will pay per node VM, which will most likely be the most expensive option out of the three I mentioned.
If you're interested, a more comprehensive comparison is available here
Let's get to work!
The first thing we will be doing is creating a new Azure container registry, to do so, you can navigate to your Azure portal and search for container registry then click create.
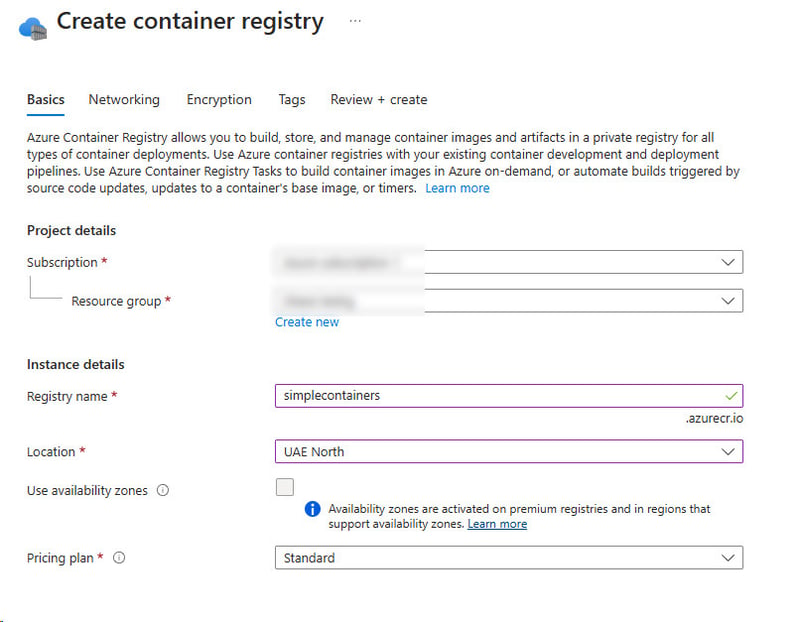
You can choose the region that suits you but you should mind the registry name you enter since we will be using this name to tag the image later.
Once the container registry is created, we can go ahead and build our
image. To do so, we will navigate to our project directory (Source code available here) and execute the following command
docker build -t awesome-hr-app -f Dockerfile .
This will build our image and give it the tag "awesome-hr-app"
we can confirm that the image is created by running
docker image ls
![]()
now that we have the container image ready, we can push it to our container registry.
To do so, we first need to tag the image with a new tag that matches the name of our container registry. Usually, the image tag for the Azure container
registry should follow the following format
<Registry name>.azurecr.io/<Namespace>/<Image name>:<Version>
To tag our new image, we will execute
docker tag awesome-hr-app simplecontainers.azurecr.io/example/awesome-hr-app:latest
We can again confirm that the new tag is available by running
docker image ls

Now that we have our image tagged and ready, we can proceed to push it to our container registry.
First, make sure that you have the Azure CLI installed on your machine and you're logged in to your container registry
az login
az acr login --name simplecontainers
Once that's done, you can go ahead and push the image
docker push simplecontainers.azurecr.io/example/awesome-hr-app:latest
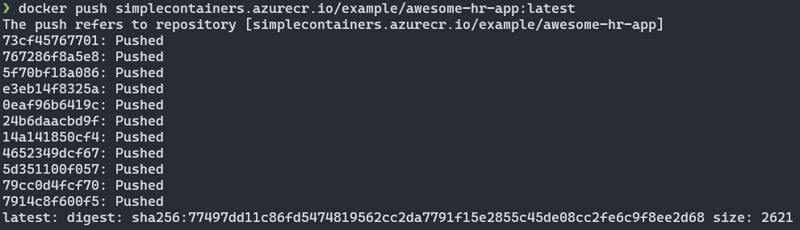
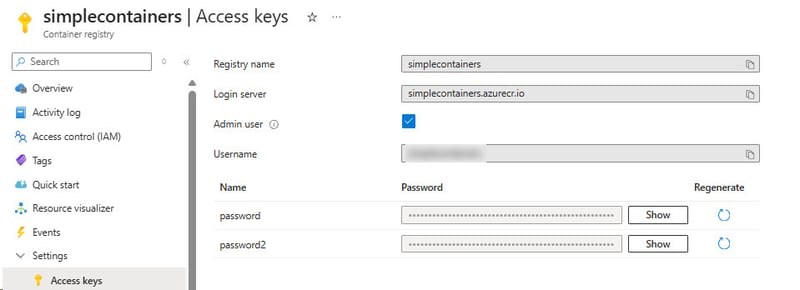
After the push operation is done, you will be able to see your container image in the container registry under the repository tab.

For demo purposes, we will update once last thing in the registry and that's to enable admin user access to the registry so we can deploy the container instance through the UI.
Deploying the container
As mentioned before, we have many options when it comes to deploying the containers, and for simplicity, I will be using the Azure container instance service to demonstrate this step.
So, let's head to Azure container instances and create a new one
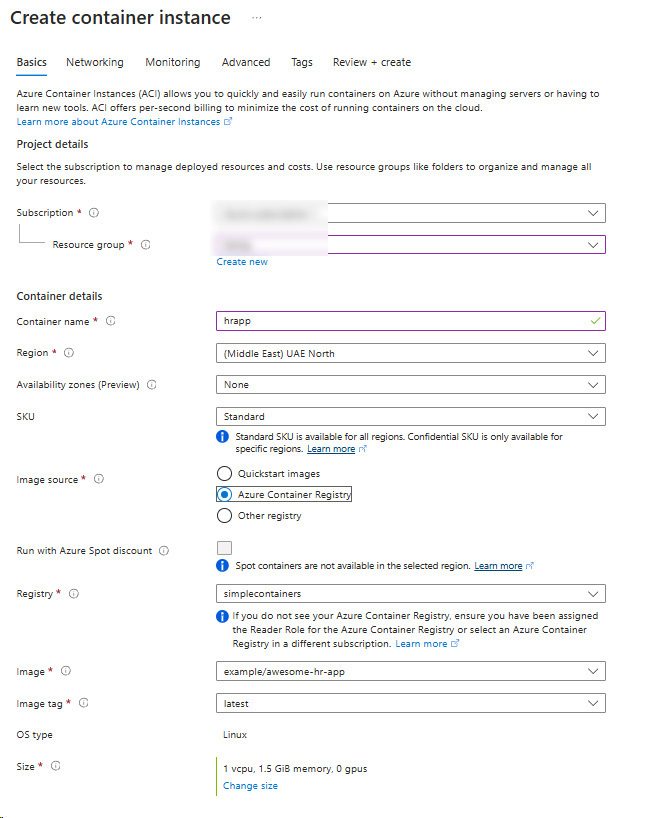
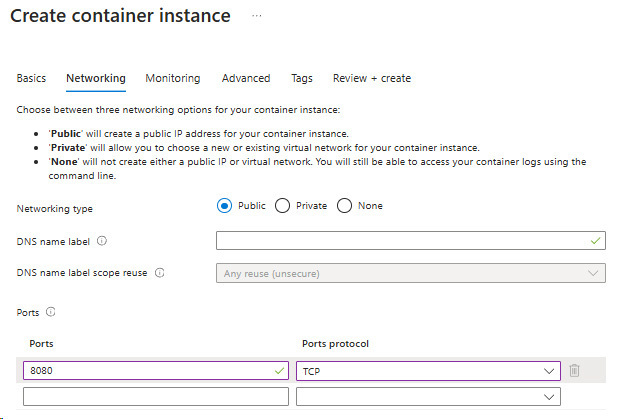
I will leave all the default parameters, except for the image source, which will be an Azure container registry and the registry will be our newly created registry and image, as well as the port number under the networking tab which I will be changing to 8080 since that's the port our container is exposing.
After the resource creation has been completed, you should be able to see the new container instance and find the public IP address assigned to it
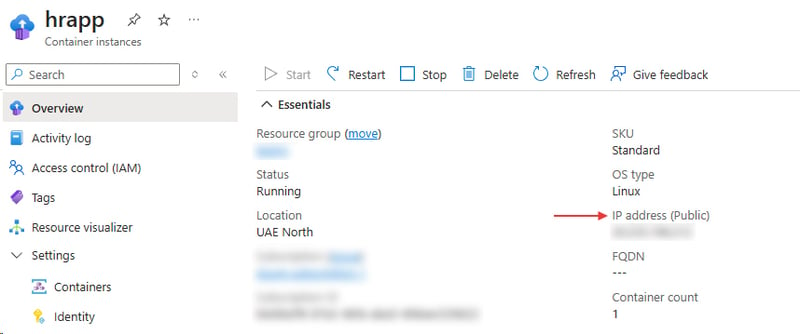
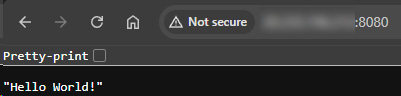
If you navigate to that IP address using your web browser, you should get the default response coming from your container!
And that's it! These are all the steps needed to deploy a container to Azure. The resources and configurations might be a little different from other cloud providers, however, the main idea and steps will remain the same. You will need to build an image, push it to a registry, and finally deploy it using a container runtime.
I will be exploring other cloud providers in the next parts such as Google Cloud and AWS as well as other Container services, so make sure you follow for more guides on containerization!

Top comments (0)