
Hello All The Future Developers !!
Are you an iOS user? And you're not very good at coding? But would you like to create your own apps? And maybe you want to publish it to app store for getting people's attention?
If you want it, join me in creating an escape game. I'll give you a brief explanation so that anyone can create it easily. We'll use the latest verson swiftUI, so you'll be exposed to the new Apple technology. Even if you don't know how it works, I keep the source code available for download on my github, so you can make it your own app only to change the images. I would not take any royalties from your products, even if you make a profit from that game.
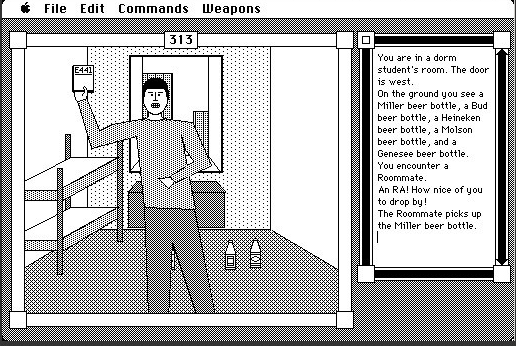
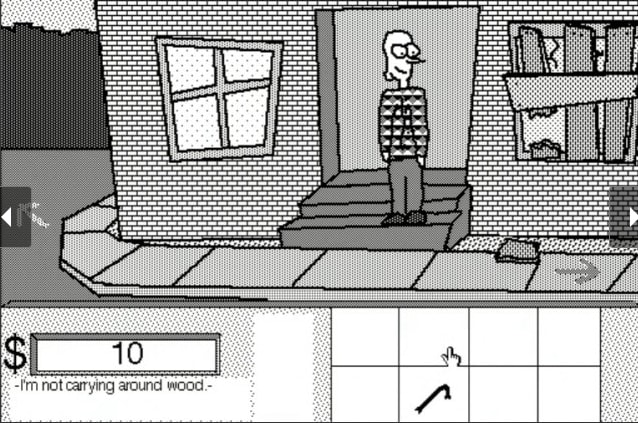
First of all, do you know exactly what an escape game or a point & click game is? It is a popular game genre that has known since the era of Apple's HyperCard, and has been created especially by individual developers. Because it does not require high level coding skills according to complex physics algorithms like intuitive action games such as Angry Birds, making it easy for even novice coders to work on. The most important part is a puzzle-solving. For example, finding keys hidden in a room, opening a safe by using that key, or unraveling a mystery from a cryptic document... at end, we can breaking out of a deadlock situation. It would cause a kind of catharsis to the player.


I am creating this in swiftUI. Because it is Apple's official UI framework API and more and more popular, and also it allows us to create apps with smaller byte. You know some game engine platforms such as Unity, but these engine tend to increase the size of the application for its flexibility. Who would want to spend over 300MB download effort on an anonymous developed game app?
In this article, we don't care about a few bugs, we will just keep going, though many detours and bugs may occur again and again. Let's work on it with the attitude that we're going to make that bug a trap in the game story. Please read with a more open mind, not as if you were reading another article on this site.
Draw the whole picture
The first step is to draw out the overall design.
We make a minimum functions and add them when they become necessary in the operation of our game.
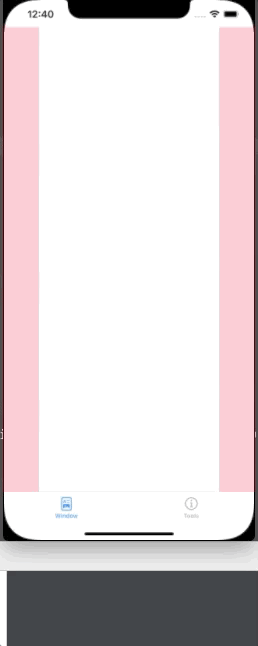
There are two tabs: mainTab(CanvasUI) and toolsTab. ToolsTab is the tab where you can see the descriptions of the tools you have acquired.

The code looks like this:
ContentView.swift

import SwiftUI

struct ContentView: View {
        @ObservedObject var selectWindow = WindowSelect()
        var body: some View {
            TabView(selection: $selectWindow.selectTabView) {
                CanvasUI(selectTabView: WindowSelect())
                    .tabItem {
                        Image(systemName: "doc.richtext")
                        Text("Window")
                    }.tag(0)
                ToolsTab()
                    .tabItem {
                        Image(systemName: "info.circle")
                        Text("Tools")
                    }.tag(1)
            }
        }
    }
ToolsTab.swift

import SwiftUI

struct ToolsTab: View {
    var body: some View {
        Text("Hello, World!")
    }
}
WindowSelect.swift

import Foundation

class WindowSelect: ObservableObject {
    @Published var selectTabView = 0
}
CanvasUI.swift

import SwiftUI

struct CanvasUI: View {
    // @ObservedObject variable can only use this view
    @ObservedObject var selectTabView = WindowSelect()
    var body: some View {
        Text("Hello World!")
    }
}
ContentView.swift is a so-called template view. This view is created by default when you start a swiftUI project. Since the "struct" can't hold the changes of its members value, we must insert a "class" in the middle. That is the role of WindowSelect.swift. The third file, CanvasUI.swift, is the one that will play a central role in the game later on. This is basic creating tabs method you can find in any basic swiftUI book.
Now we have a main tab and a tools tab. We now turn attention to the mainTab(CanvasUI).
The buttons on the left and right sides of the screen to switch the view from east to west, north to south, in one room are called window button (see the rough sketch). It is treated as a one component. In the main tab, CanvasUI, write it like this.
WindowButton.swift

import SwiftUI

struct WindowButton: View {
    @State var isShowSub : Int = 0
    var body: some View {
        ZStack {
            if isShowSub == -1 {
                // empty
            }
            if isShowSub == 0 {
                // empty
            }
            if isShowSub == 1 {
                // empty
            }
            if isShowSub == 2 {
                // empty
            }
            HStack {
                Button(action: {
                    print("click Left!")
                    withAnimation() {
                        self.isShowSub -= 1
                        print(isShowSub)
                        // for window loop
                        if isShowSub == -2 {
                            self.isShowSub = 2
                        }
                    }
                })
                {
                    Rectangle()
                        .fill(Color.pink.opacity(0.3))
                        .frame(minWidth: 30, maxWidth: 60, minHeight: 50, maxHeight: .infinity)
                }
                Spacer()
                Button(action: {
                    print("click Right!")
                    withAnimation() {
                        self.isShowSub += 1
                        print(isShowSub)
                        // for window loop
                        if isShowSub == 3 {
                            self.isShowSub = -1
                        }
                    }
                })
                {
                    Rectangle()
                        .fill(Color.pink.opacity(0.3))
                        .frame(minWidth: 30, maxWidth: 60, minHeight: 50, maxHeight: .infinity)
                }
            }
        }
    }
}
The return value of windowButton is "AnyView".
It doesn't care what data type it is, but it returns other view. In this case, it returns the four direction of the room, N, E, W and S.
Then add it to canvasUI.
CanvasUI.swift

import SwiftUI

struct CanvasUI: View {
    // add @EnvironmentObject
    @EnvironmentObject var selectTabView : WindowSelect
    var body: some View {
        WindowButton() // add View Conponent
    }
}
For now, let's just test that the button works as a button. Notice the text printed on the terminal.
It's working fine. However, this printing text behavior does not make any sense. The only way to know if these buttons are capable of transitioning the real window is to create the window itself. We will create a Window Model for the Window Object with the background image and window id, not only for this WindowButtonView but other view we would create later on.
Data flow starting with @
Before we create the WindowModel, we will briefly explain the important things about data binding in swiftUI.
There are three ways to use variables, as follows
- @Binding a @State variable.
- Passing an @ObservableObject to each View
- Using @EnvironmentObject
In all of these cases, by using @Binding and @Published, data changes will be reflected in all Views.
I create an object for each destination screens called just "Window". All view in the app will reference variable and methods in Window, and all data these object have will maintain until the end of the game. The WindowModel is shown below.
WindowObject.swift

import Foundation

struct WindowModel {
    var id : Int
    var image: String
}

class WindowObject : ObservableObject {
    @Published var window = WindowModel(id: 1, image: "window1")
    @Published var window1 = WindowModel(id: 2, image: "window2")
    @Published var window2 = WindowModel(id: 3, image: "window1doordark")
    @Published var window3 = WindowModel(id: 4, image: "window2door")
}
YourAppName.swift

import Foundation
import SwiftUI

@main
struct YourAppNAme: App {

    var body: some Scene {
        WindowGroup {
             // attached to ContentView()
            ContentView().environment(WindowObject())
            }
    }
}
There are various methods for exchanging data on view. Apple has several methods, but I won't explain them in detail here. I've chosen a method called environmentObject because we need to reuse the WindowObject.
I also create four separate windowViews. These are just Window objects that hold different images with different attributes in the four directions of east, west, south, and north.
Before test drive, don't forget to add some new code to the file we created before.
The code for each of them is as follows.
WindowButton.swift

import SwiftUI

struct WindowButton: View {
    @State var isShowSub : Int = 0
    // add some @State variable
    @State var WWindow : AnyView
    @State var NWindow : AnyView
    @State var EWindow : AnyView
    @State var SWindow : AnyView

    var body: some View {
        ZStack {
        // add AnyView to each if statements
            if isShowSub == -1 {
                AnyView(WWindow)
            }
            if isShowSub == 0 {
                AnyView(NWindow)
            }
            if isShowSub == 1 {
                AnyView(EWindow)
            }
            if isShowSub == 2 {
                AnyView(SWindow)
            }
            HStack {
                Button(action: {
                    print("click Left!")
                    withAnimation() {
                        self.isShowSub -= 1
                        print(isShowSub)
                        // for window loop
                        if isShowSub == -2 {
                            self.isShowSub = 2
                        }
                    }
                })
                {
                    Rectangle()
                        .fill(Color.pink.opacity(0.3))
                        .frame(minWidth: 30, maxWidth: 60, minHeight: 50, maxHeight: .infinity)
                }
                Spacer()
                Button(action: {
                    print("click Right!")
                    withAnimation() {
                        self.isShowSub += 1
                        print(isShowSub)
                        // for window loop
                        if isShowSub == 3 {
                            self.isShowSub = -1
                        }
                    }
                })
                {
                    Rectangle()
                        .fill(Color.pink.opacity(0.3))
                        .frame(minWidth: 30, maxWidth: 60, minHeight: 50, maxHeight: .infinity)
                }
            }
        }
    }
}
Write the arguments to the windowButton method in body of CanvasUI View.
CanvasUI.swift

import SwiftUI

struct CanvasUI: View {
    @EnvironmentObject var selectTabView : WindowSelect
    var body: some View {
        WindowButton(WWindow: AnyView(W_Window()), NWindow: AnyView(N_Window()), EWindow:  AnyView(E_Window()), SWindow: AnyView(S_Window()))
    }
}
Also write a method chain in the root view to make an instance of environmentObject.
YourAppName.swift

import Foundation
import SwiftUI

@main
struct YourAppName: App {

    var body: some Scene {
        WindowGroup {
             // attached to ContentView()
            ContentView().environment(WindowObject())
            }
    }
}
Now, here's the four Window.swift file.
N_Window.swift

import SwiftUI

struct N_Window : View {
    @EnvironmentObject var windowObject : WindowObject
    var body: some View {
        Image("windowObject.window1.image")
    }
}
I don't want to hard coding in body variable for future dev. So, I created BackGroundPicture.swift.
BackGroundPicture.view

import SwiftUI

struct BackGroundPicture: View { var imageFilename: String
    var body: some View {
        Image(imageFilename).resizable()
    }
}
Rewrite the body in N_Window.swift, adding ZStack.
N_Window.swift

import SwiftUI

struct N_Window : View {
    @EnvironmentObject var windowObject : WindowObject
    var body: some View {
        ZStack {
            BackGroundPicture(imageFilename: windowObject.window.image)
        }
    }
}
Other three window views is almost same as N_Window.
Please prepare your own background images, but now I use samples I've made.
As a result, screen transition is shown below.

It works beautifully.
Well, that's the end of part 1 of this article.
You can find this project's repository in my github account. I plan to create a branch for each part.
Also, I'll take questions if you don't mind me asking as long as I know what I'm doing. It's always free.
The game is a long way from completion, but I will be writing the rest of the part in a BIG HURRY, come back soon.

Top comments (1)
Diamond indeed. I find similar type of information at softpeo.