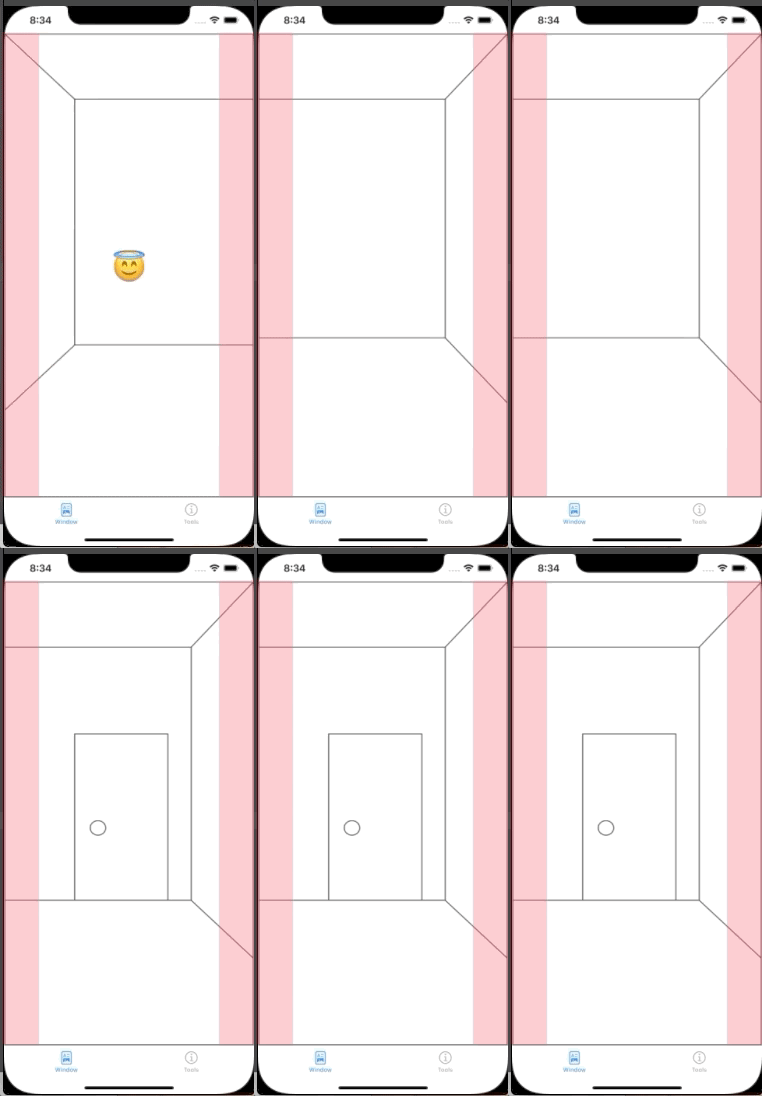
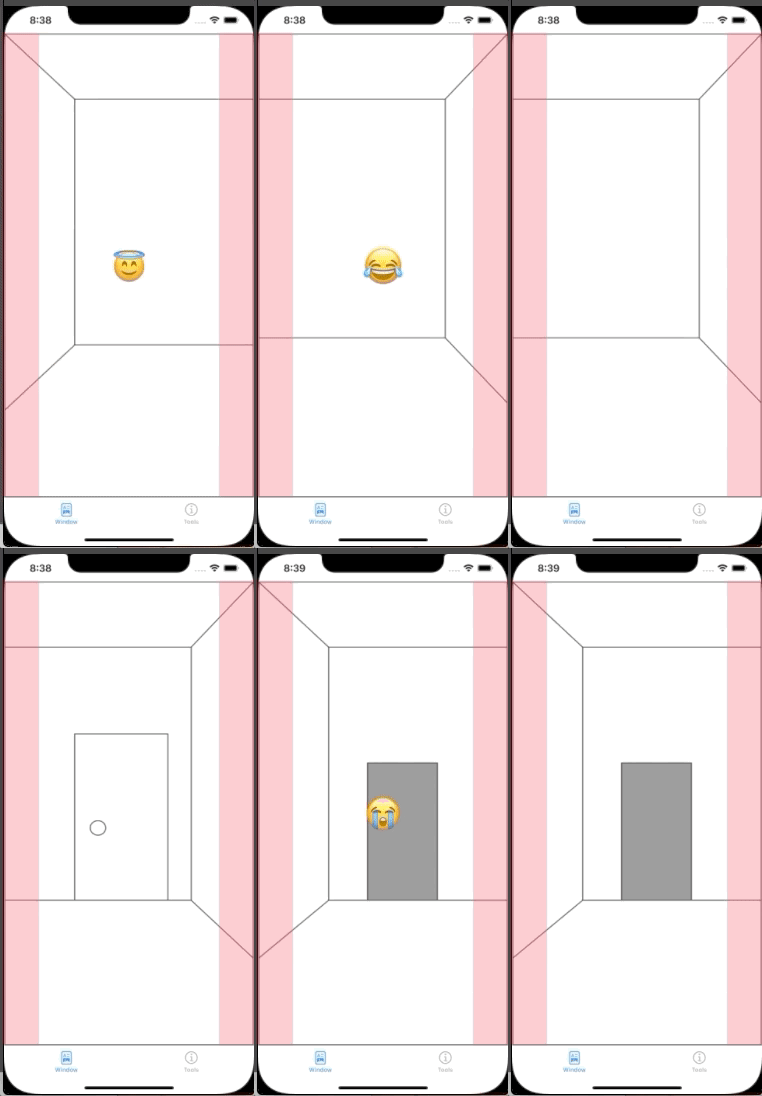
Items in the Window
Next, we're thinking of the life-cycle of items in a game. It is a standard one. Let's refer to the Get rich Quick introduced at part1 of this article.
When you tap on an item that exists in the window, the item disappears from the window and enters the item dock, which is a separate component.
When you want to use that item elsewhere, you can tap the item in the dock to select it.
Next, we need a View to call the instance to place the items that exist on the screen. That is WindowTool.swift
WindowTool.swift

import SwiftUI

struct WindowTool: View {

    @State var putItem : Tool
    @State var Width : CGFloat
    @State var Height : CGFloat
    @State var X : CGFloat
    @State var Y : CGFloat

    var body: some View {
        if !itemData.itemArray.contains(putItem) && !putItem.isTaken {
            {
                Image(putItem.image).resizable()
            }()
            .frame(minWidth: 0 ,maxWidth: Width, minHeight: 0 ,maxHeight: Height)
            .offset(x: X, y: Y)
            .onTapGesture {
                putItem.isTaken = true
                addItem(item: putItem)
                print(itemData.itemArray)
            }
        } else {

        }
    }
    // to add an item
    func addItem(item: Tool) {
        itemData.itemArray.append(item)
    }

}
We will consider the continuation of the life cycle. What should we do after an item is clicked?
Here we want to create an item dock and code a scene where the item enters the dock after it is clicked.
We will not put any restrictions on the order in which the items are retrieved for now. Let's use a basic array here. We have created an empty Tool type array at the end of the item's object.
Here is the code. The code on the dock side uses the ForEach syntax.
itemDock.swift

import SwiftUI

struct ItemDock: View {


    var body: some View {
        ZStack{
            Rectangle()
                .fill(Color.blue.opacity(0.3))
                .frame(minWidth: 0, maxWidth: .infinity, minHeight: 50, maxHeight: 70)
            HStack(spacing: 5){
                ForEach(0 ..< itemData.itemArray.count, id: \.self) { index in
                    {
                        Image(itemData.itemArray[index].image).resizable()
                            .frame(minWidth: 0 ,maxWidth: 50, minHeight: 0 ,maxHeight: 50, alignment: /*@START_MENU_TOKEN@*/.center/*@END_MENU_TOKEN@*/)
                            .background(Color.white)
                            .overlay(
                                Rectangle()
                                    .stroke(itemData.itemArray[index].isSelected ?  Color.red : Color.clear, lineWidth: 5)
                            )
                    }().onTapGesture {
                        itemData.itemArray[index].isSelected.toggle()
                        itemData.itemArray[index].isTaken = true

                    }
                }
            }
        }
    }
}
The item object doesn't exist yet, so I can't test it, but I'll try to figure out how to continue.
When clicked, the isTaken flag of the item will be checked and the item will disappear from the window and be placed in the dock at hand.
When you click on an item in the dock, the isSelected flag of each item is checked and the frame turns red.
Create an object for the item here.
ItemObject.swift

import Foundation


struct Tool : Equatable, Identifiable {
    let id : Int
    var text: String
    var image: String
    var isTaken: Bool
    var isSelected: Bool
}


class ItemObject: ObservableObject {
    // for singleton
    static let shared = ItemObject()
    private init(){}

    @Published var item1 = Tool(id: 1, text: "This is item 1", image: "item1.png", isTaken: false, isSelected: false)
    @Published var item2 = Tool(id: 2, text: "This is item 2", image: "item2.png", isTaken: false, isSelected: false)
    @Published var item3 = Tool(id: 3, text: "This is item 3", image: "item3.png", isTaken: false, isSelected: false)
    @Published var item4 = Tool(id: 4, text: "This is item 4", image: "item4.png", isTaken: false, isSelected: false)
    @Published var item5 = Tool(id: 5, text: "This is item 5", image: "item5.png", isTaken: false, isSelected: false)
    @Published var item6 = Tool(id: 6, text: "This is item 6", image: "item6.png", isTaken: false, isSelected: false)
    @Published var item7 = Tool(id: 7, text: "This is item 7", image: "item7.png", isTaken: false, isSelected: false)
    @Published var item8 = Tool(id: 8, text: "This is item 8", image: "item8.png", isTaken: false, isSelected: false)
    @Published var item9 = Tool(id: 9, text: "This is item 9", image: "item9.png", isTaken: false, isSelected: false)

    // empty arrays
    @Published var itemArray: [Tool] = []


}
We need to add this to the WindowTool we just created.
WindowTool.swift

import SwiftUI

struct WindowTool: View {

    @EnvironmentObject var itemData : ItemObject
    @State var putItem : Tool
    @State var Width : CGFloat
    @State var Height : CGFloat
    @State var X : CGFloat
    @State var Y : CGFloat

    var body: some View {
        if !itemData.itemArray.contains(putItem) && !putItem.isTaken {
            {
                Image(putItem.image).resizable()
            }()
            .frame(minWidth: 0 ,maxWidth: Width, minHeight: 0 ,maxHeight: Height)
            .offset(x: X, y: Y)
            .onTapGesture {
                putItem.isTaken = true
                addItem(item: putItem)
                print(itemData.itemArray)
            }
        } else {

        }
    }
    // to add an item
    func addItem(item: Tool) {
        itemData.itemArray.append(item)
    }

}
Now, let's shift our attention to the Tools tab. Check the rough sketch in the Tools tab again.
The image of the acquired item will be displayed here in a grid format.
To create a 3*3 grid of items like the sketch, let's use lazyVGrid, which has been added in the latest version.
ToolsTab.swift

import SwiftUI

struct ToolsTab: View {

    @EnvironmentObject var itemData : ItemObject


    var cols = Array(repeating: GridItem(.flexible(), spacing:0), count:3)
    public var body: some View {
        VStack {
            LazyVGrid(columns: cols) {
                ForEach(0 ..< itemData.itemArray.count, id: \.self) { index in
                    {
                        Image(itemData.itemArray[index].image).resizable()
                    }()
                    .frame(minWidth: 100 ,maxWidth: 100, minHeight: 100 ,maxHeight: 100, alignment: /*@START_MENU_TOKEN@*/.center/*@END_MENU_TOKEN@*/)
                    .background(Color.white)
                    .overlay(
                        Rectangle()
                            .stroke(itemData.itemArray[index].isSelected ?  Color.red : Color.blue, lineWidth: 5)
                    ).onTapGesture {
                        itemData.itemArray[index].isSelected.toggle()
                        itemData.itemArray[index].isTaken = true
                    }
                }
            }
            Spacer()
            ToolTextPlate()
        }
    }

}
When an item is selected, its description will appear in the dotted palette at the bottom of the screen. These descriptions contain important hints to help you solve the game's puzzles. The selected items refer to the same array as the main item dock, so naturally their flags, etc. are synchronized.
One thing that bothers me here is that when multiple items are selected, the descriptions are displayed overlapping each other. Because of this, I can't read the description of each one.
To solve this problem, we should use an ingenious process such as single selection in the list view, but since it is quite possible to use multiple items at the same time depending on the game settings, and it does not adversely affect the game functionality, we will leave it as it is. No one cares about such things.
about Instance
Next, we will go on to create the items that exist on the screen. We will use the same technique as when we created the window object. The only difference is that we will set a variable as @State to determine the absolute position of the item. This should be easy to understand. There are three ways to use variables.
The code on the window side looks like this. It's well organized and easy to tweak.
import SwiftUI

struct N_Window: View {

    @ObservedObject var windowObject = WindowObject.shared
    @ObservedObject var itemData = ItemObject.shared
    @ObservedObject var scriptData = ScriptObject.shared
    @ObservedObject var cycle = CycleChain.shared


    var body: some View {
        ZStack{
            BackGroundPicture(imageFilename: windowObject.window.image)
            WindowTool(putItem: $itemData.item1, Width: 100, Height: 100, X: 0, Y: 0)
            ZoomInButton(nextWindow: AnyView(N_Zoom_Window()), thisWindow: $windowObject.window, Width: 100, Height: 100, X: 0, Y: 100)
        }

    }

}
It is now complete. You can see the items are displayed beautifully. Now let's test it by tapping on it.
What's going on? Every time I come back to the screen, items that I thought I took are being reproduced over and over again. This glitch is a problem. If this were a blockchain game app that could be redeemed for cash, it would wreak havoc on the company. Why is this happening? I have a hypothesis.
Whenever the screen is redrawn, a new instance is created and overwritten. swiftUI's function is to redraw the view containing the observed variable when it is changed, but thanks to the overwriting of the instance, the changed variable, Bool, etc. are not maintained. The same is true for the view. The same thing happens to the window object, only less noticeably. The same thing happens to window objects, only less conspicuously, but the window can be recreated many times and still be completely invisible to the eye. This kind of instantiation trouble is a basic problem for people with general object-oriented programming experience.
To deal with this problem, we will use the design pattern Singleton. This is a method to limit the number of times an instance can be created. Rewrite all the objects that have created the Model so far.
The code will look like this.
ToolModel.swift

import Foundation


struct Tool : Equatable, Identifiable {
    let id : Int
    var text: String
    var image: String
    var isTaken: Bool
    var isSelected: Bool
}


class ItemObject: ObservableObject {
    //add this
    static let shared = ItemObject()
    private init(){}

    @Published var item1 = Tool(id: 1, text: "This is item 1", image: "item1.png", isTaken: false, isSelected: false)
    @Published var item2 = Tool(id: 2, text: "This is item 2", image: "item2.png", isTaken: false, isSelected: false)
    @Published var item3 = Tool(id: 3, text: "This is item 3", image: "item3.png", isTaken: false, isSelected: false)
    @Published var item4 = Tool(id: 4, text: "This is item 4", image: "item4.png", isTaken: false, isSelected: false)
    @Published var item5 = Tool(id: 5, text: "This is item 5", image: "item5.png", isTaken: false, isSelected: false)
    @Published var item6 = Tool(id: 6, text: "This is item 6", image: "item6.png", isTaken: false, isSelected: false)
    @Published var item7 = Tool(id: 7, text: "This is item 7", image: "item7.png", isTaken: false, isSelected: false)
    @Published var item8 = Tool(id: 8, text: "This is item 8", image: "item8.png", isTaken: false, isSelected: false)
    @Published var item9 = Tool(id: 9, text: "This is item 9", image: "item9.png", isTaken: false, isSelected: false)

    // empty arrays
    @Published var itemArray: [Tool] = []


}
WindowModel.swift

import Foundation


struct WindowModel {
    var id : Int
    var image: String
    var isZoom : Bool
}

class WindowObject : ObservableObject {
    //add this
    static let shared = WindowObject()
    private init(){}

    @Published var window = WindowModel(id: 1, image: "window1", isZoom: false)
    @Published var window1 = WindowModel(id: 2, image: "window2", isZoom: false)
    @Published var window2 = WindowModel(id: 3, image: "window1doordark", isZoom: false)
    @Published var window3 = WindowModel(id: 4, image: "window2door", isZoom: false)
    @Published var window4 = WindowModel(id: 5, image: "window1dark", isZoom: false)
    @Published var window5 = WindowModel(id: 6, image: "window2dark", isZoom: false)
}
And...
import SwiftUI

struct WindowTool: View {

    @ObservedObject var itemData = ItemObject.shared
    @ObservedObject var cycle = CycleChain.shared
    // changed State to Binding
    @Binding var putItem : Tool
    @State var Width : CGFloat
    @State var Height : CGFloat
    @State var X : CGFloat
    @State var Y : CGFloat

    var body: some View {
        if !itemData.itemArray.contains(putItem) && !putItem.isTaken {
            {
                Image(putItem.image).resizable()
            }()
            .frame(minWidth: 0 ,maxWidth: Width, minHeight: 0 ,maxHeight: Height)
            .offset(x: X, y: Y)
            .onTapGesture {
                putItem.isTaken = true
                addItem(item: putItem)
                print(itemData.itemArray)
            }
        } else {

        }
    }
    // to add an item
    func addItem(item: Tool) {
        itemData.itemArray.append(item)
    }

}
Then we test drive it again.
However, things do not improve. This is actually because with @State, the structure is copied as is, so it can't hold changes in the variable. So we will rewrite @Binding and put a $ mark here. The $ mark is used in situations like this. Then, the situation is settled. By using @Binding and @Published, the data change was reflected in all the views, but I needed to know more about it.
We confirmed that modifying each code as follows would solve this problem. Data flow is a central idea of swiftUI and it is deep. On the contrary, once you understand this idea, you will have nothing to fear from swiftUI.


Top comments (0)