If you've found this article useful, consider donating.
An updated version of this article can be found on my blog.
So, you want to learn how to use the Terminal. Great! As a developer, sooner or later, you’ll want to learn how to use the Terminal. Not only is this a handy tool to have under your belt, but it will also boost your productivity.
Before Starting
Before actually getting started learning commands, it’s useful to think of the directories (folders) as a hierarchical tree.
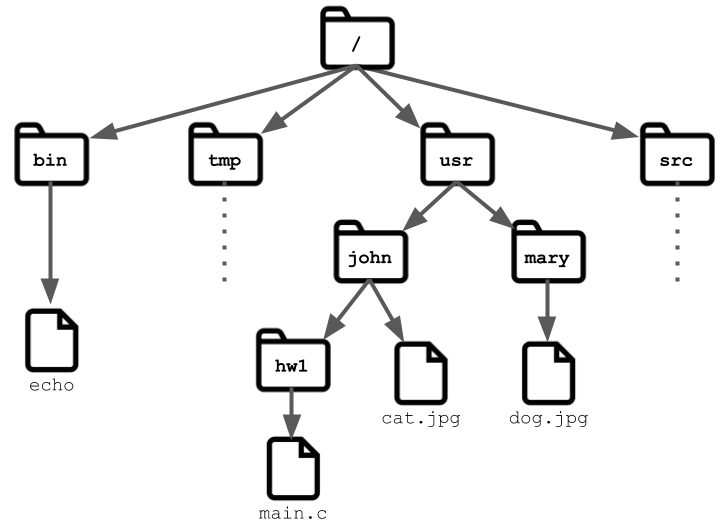
In the illustration above, you can see that the first directory, often referred to as the “root” directory, is named “/”. That directory (folder) contains other directories such as bin, tmp, usr, and src. Those directories can have other directories or files and those child directories can have even more directories or files and so on.
Of course, the illustration above is just an example, it doesn’t actually reflect the folders and files that reside in your computer.
Now, what the terminal allows us to do is to traverse and manage the directory tree. This is why the terminal is so powerful, it allows us to quickly sift through folders and files in an efficient manner as well as being able to create, delete, or update a file or directory.
Opening Your Terminal
To open your terminal, use the following shortcut: “⌘ + Spacebar.” Now type in “Terminal” and then press the “Enter” key.
Now, you should have something on your screen that looks like

For the most part, you should be staring at a black window with white text and a cursor itching for your next command.
Important Note
It’s important to note that every directory on Mac/UNIX/LINUX has two hidden directories, namely “.” and “..”
The “.” means the current directory and “..” means previous or parent directory. Keep this in mind, it will be useful later.
Commands
Now that we have a terminal window in front of us, it’s finally time to get to the commands.
The first command you should type into the terminal should be the pwd (print working directory) command.
pwd — print working directory
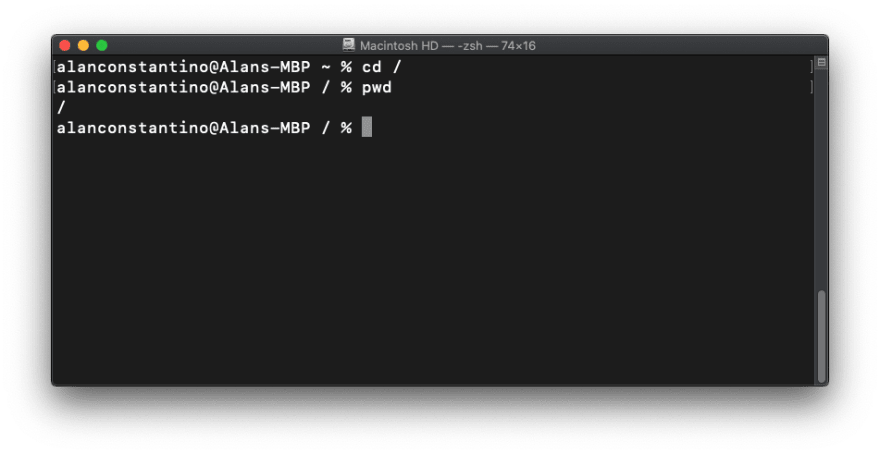
pwd
This command prints the current directory you’re in onto the terminal.
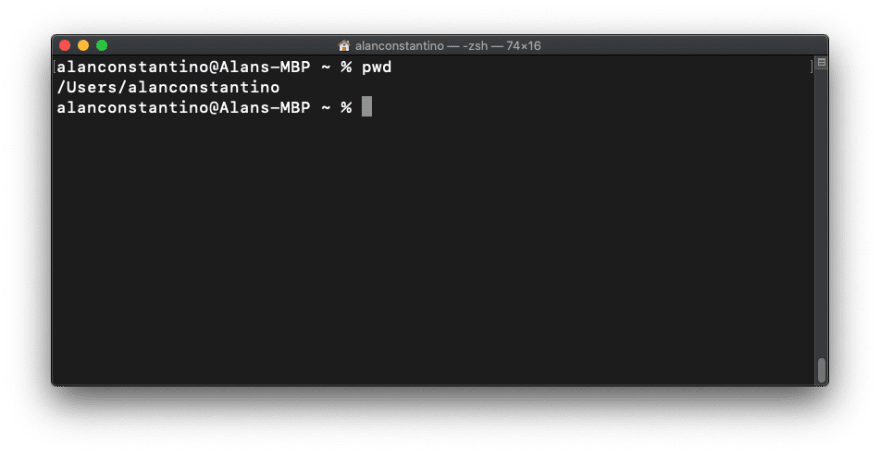
Congratulations, you just ran your first command on the terminal!
This command is useful for knowing where you currently are within the directory tree.
The next command we should try is ls or list.
ls — list
ls
This command lists all the directories and files from your current directory.
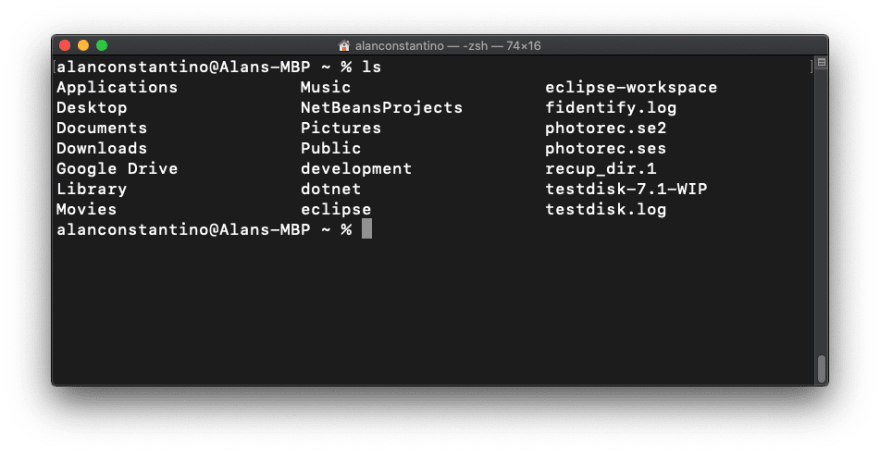
Cool, now we can list all of the files and directories from our current directory.
But what if we want to list all the contents from another directory?
Simple, just type the following command:
ls [directory name]
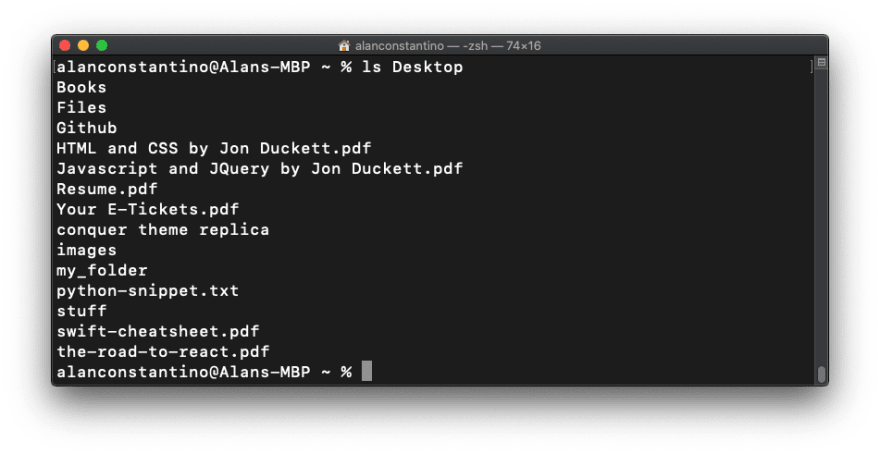
Now we can list files and folders from our current directory or other directories.
But what if we want to change our current directory? That’s where the cd or change directory command comes into play.
cd — change directory
cd [directory name]
The cd command allows you to change your directory to another directory. This is how you’ll actually traverse the directory tree.
Example:
cd /
The command above changes your current working directory to your root directory.
Now, how do we back out of a directory or go to the previous/parent directory?
We have to use the following command:
cd ..
As I mentioned earlier, the “..” means the parent directory or previous directory. Effectively, the command above is telling the terminal “Hey, take me back to the previous directory.”
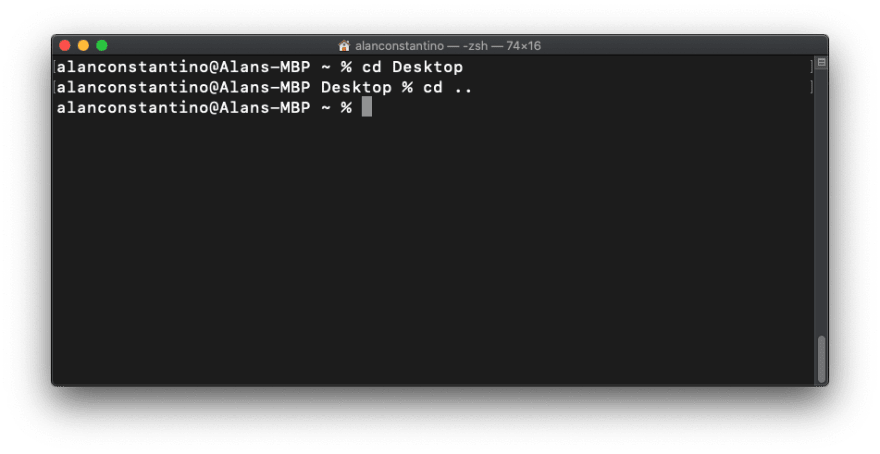
Also, if you use this command in the root directory, nothing happens because there isn’t a previous or parent directory to go back to, hence the name root.
But what if you want to go back more than one directory?
No problem, the following command is just what you need.
cd ../../
The command above tells the terminal “Hey, I want to go back two directories and make it snappy.” Okay, maybe not so much the snappy part, but it does take you back two directories.
Essentially, every “../” you add takes you back one directory.
So the following example will take you back three directories:
cd ../../../
Now that we know how to traverse the directory tree and list its contents, we should move onto more useful commands.
Before that though, we should probably clear our terminal screen because by now it may be a little tough to read.
clear
By typing in the following command into the terminal, you are able to clear what’s on screen.
clear
Now that our screen has been cleared, we can move onto more useful commands, like the mv (move) command.
mv — move
mv [source] [destination]
The mv (move) command simply moves a file or directory to another place.
From the skeleton command above, the “source” is what you want to move while the “destination” is where you want the file to end up.
For example, if I have something like the following:
one
├── myfile.txt
└── two
Where “one” and “two” are folders, and I want to move, “myfile.txt” to folder “two” I would simply do the following assuming I was already in the “one” folder location:
mv myfile.txt two
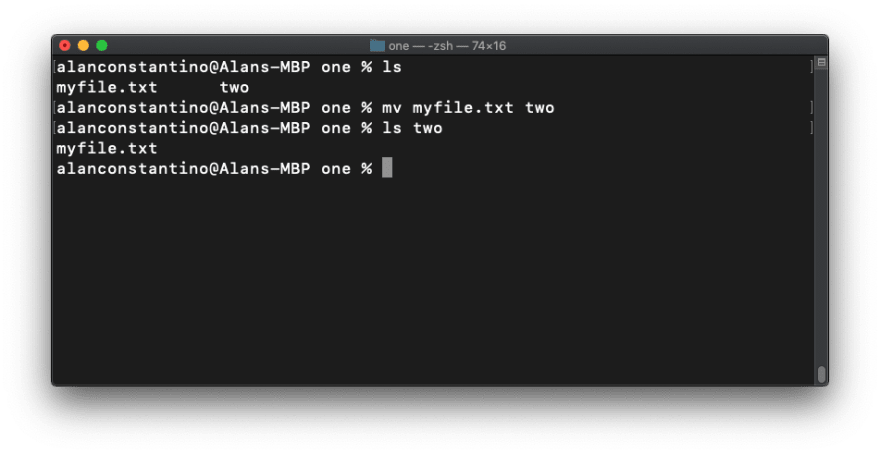
Of course, you could be anywhere in the directory tree to execute this command — and pretty much any command for that matter — but you just have to make sure you enter the full location path of the file you want to move and its destination.
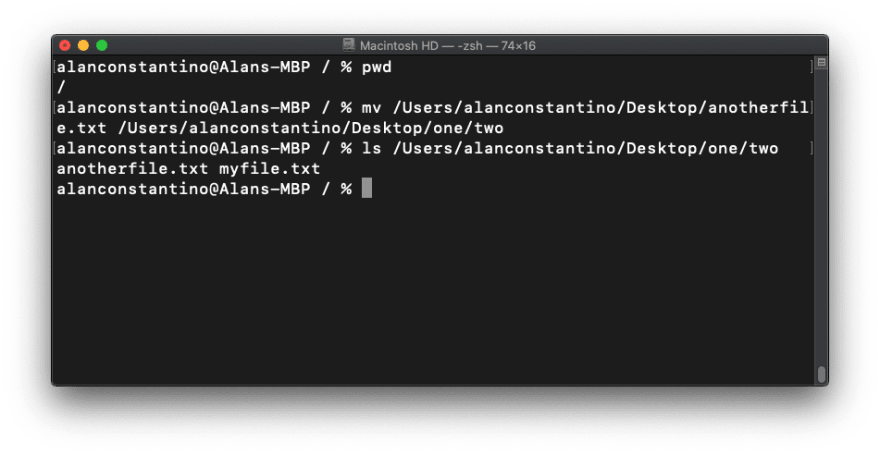
For example, in the following screenshot, I’m in my root directory but I’m still able to move a file from my Desktop to the “two” folder from the previous example:
Now, what if we wanted to move a file or folder from wherever it is to our current location in the directory tree.
Well, remember earlier how I talked about the “.” being our current directory, we would have to use “.”
For example:
mv /somelocation/myfile.txt .
The example above moves “myfile.txt” to wherever we currently are in the directory tree.
Another command that’s similar to mv (move) is cp (copy).
cp — copy
cp [source] [destination]
The copy command is just like the move command except instead of moving a file or folder, it makes a copy of it leaving the original file unharmed.
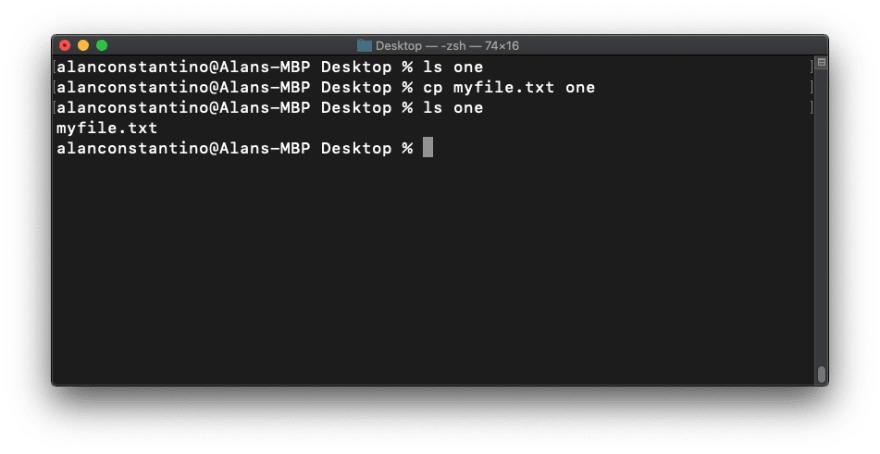
To copy a file you would do the following:
cp myfile.txt /one
Now to copy a directory you have to add the “-r” option like so:
cp -r one two
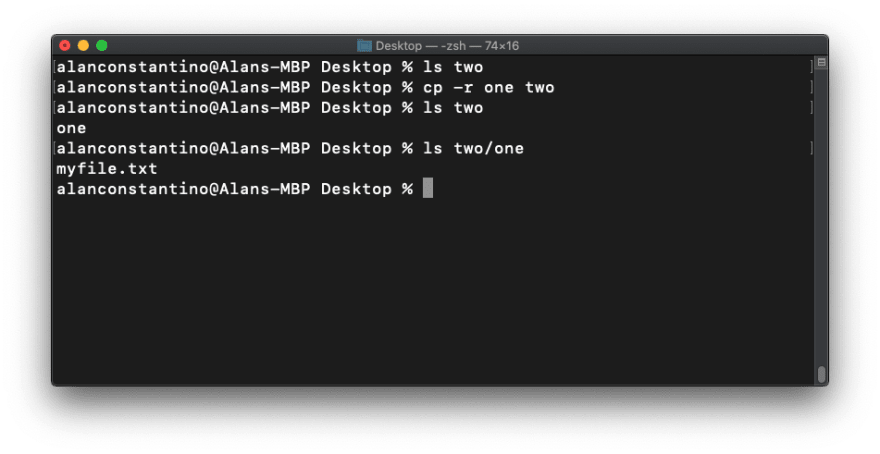
All the “-r” option means is that it tells the terminal to copy the files recursively which is a fancy way of saying everything.
So by using the “-r” option, we tell the terminal “Please copy all the contents, including folders and files to our destination.”
It’s also important to keep in mind that most, if not all, commands can have options and there are different options for every command. You can also have more than one option.
Now, what if we wanted to open a file or folder from our terminal?
We would need to utilize the open command.
open
open [file/folder]
This command lets us open a file with its associated program.
For example, if we have a “.txt” file and we do the following command:
open myfile.txt

this opens “myfile.txt” with your default text editor like so:

Here’s another example.
If you do the following command, it will open the finder window in the root directory.
open /
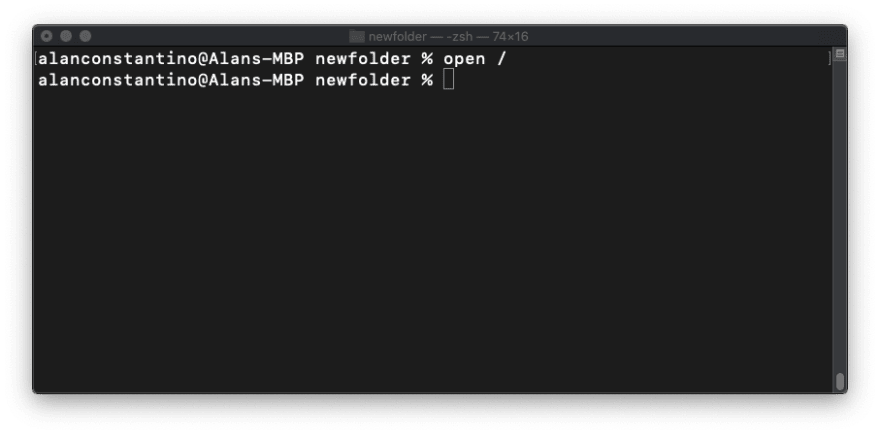
The finder window will look something like the following:
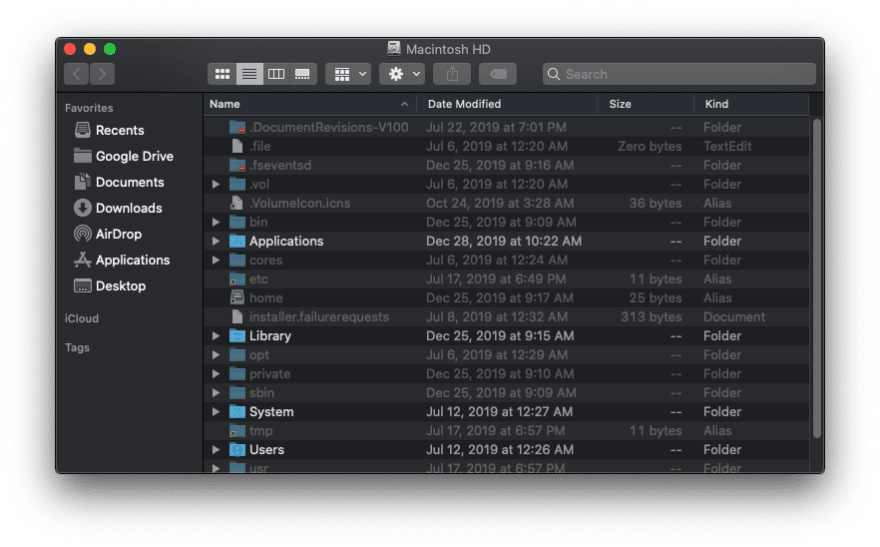
It opens the finder window because that’s the program that is associated with the file or in this case the folder you’re trying to open.
So if we did the following command:
open .
it would open a new finder window from our current location because remember, the “.” means our current directory.
Now, let’s move onto actually making a directory from the terminal.
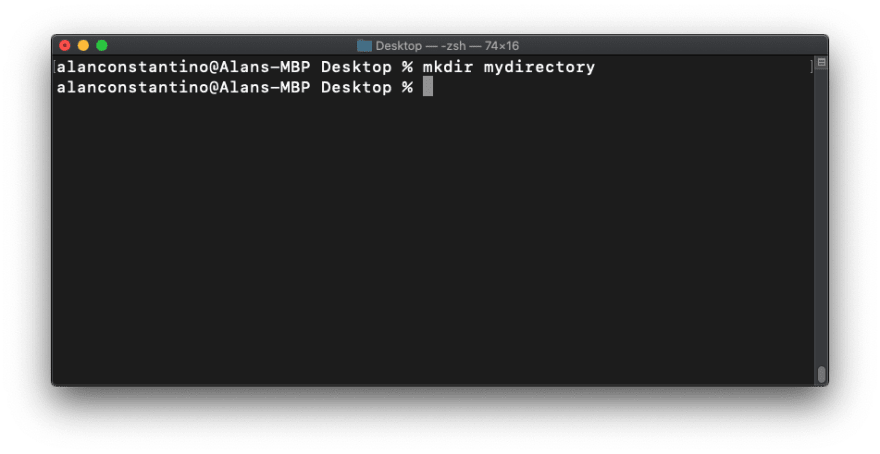
mkdir — make directory
mkdir [directory name]
To make a directory, you simply type the command above and give it a name like so:
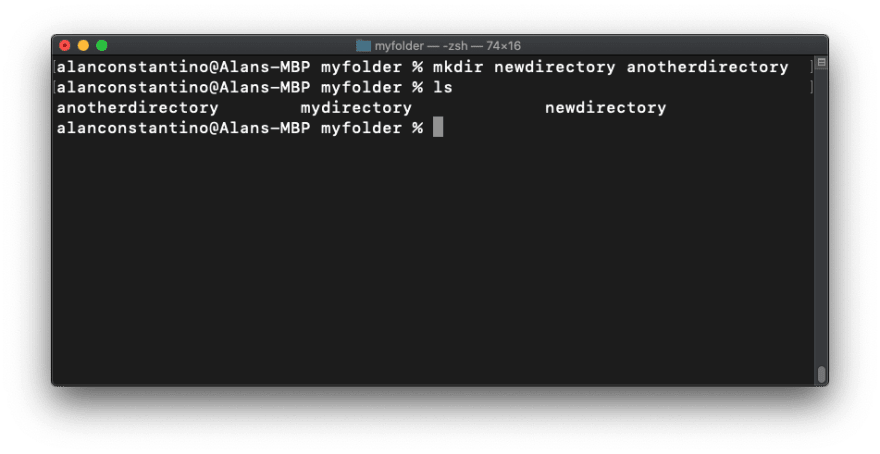
We can also create multiple directories like so:
What if we wanted to make a file instead of a directory?
We would use the touch command.
touch
touch [file name]
This command simply creates an empty file.
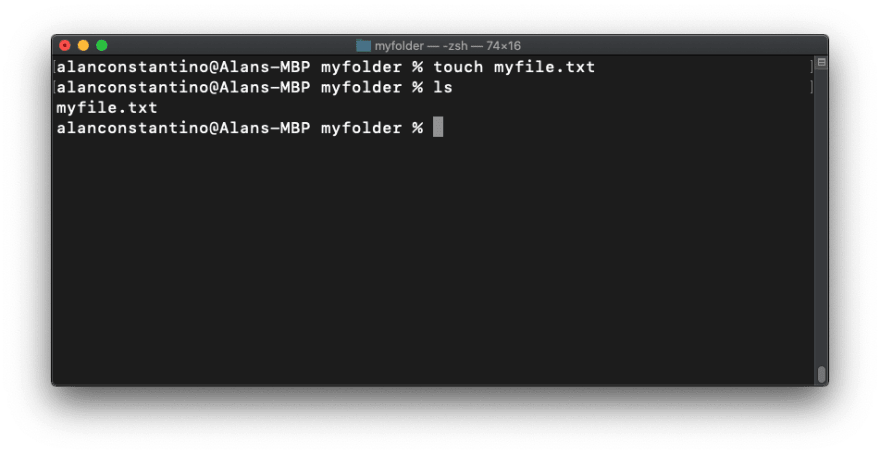
For example, if we do the following:
touch myfile.txt
This creates a file named “myfile.txt” in our current directory.
And similar to mkdir, you can create multiple files in one command like so:
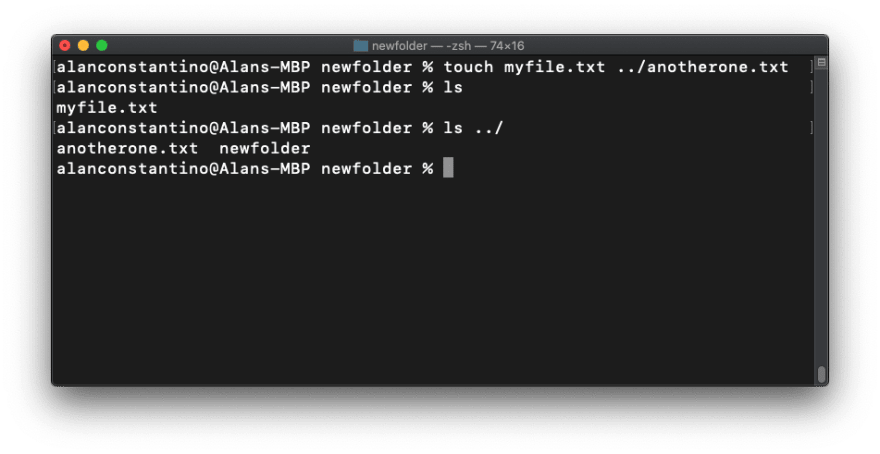
In the screenshot above, we create two files, “myfile.txt” and “anotherone.txt.”
The “myfile.txt” file is created in the current directory while the “anotherone.txt” file is created in the previous directory.
Let’s move on to deleting a directory.
rmdir — remove directory
rmdir [directory name]
The rmdir command is self-explanatory, it just deletes a directory.
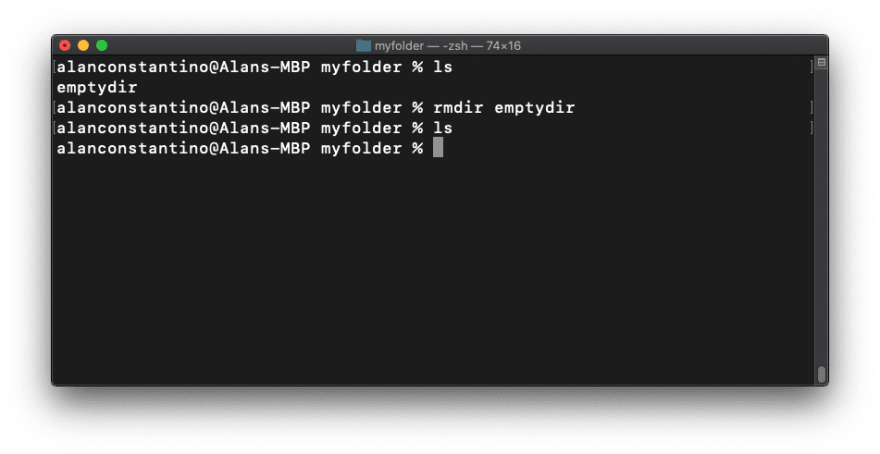
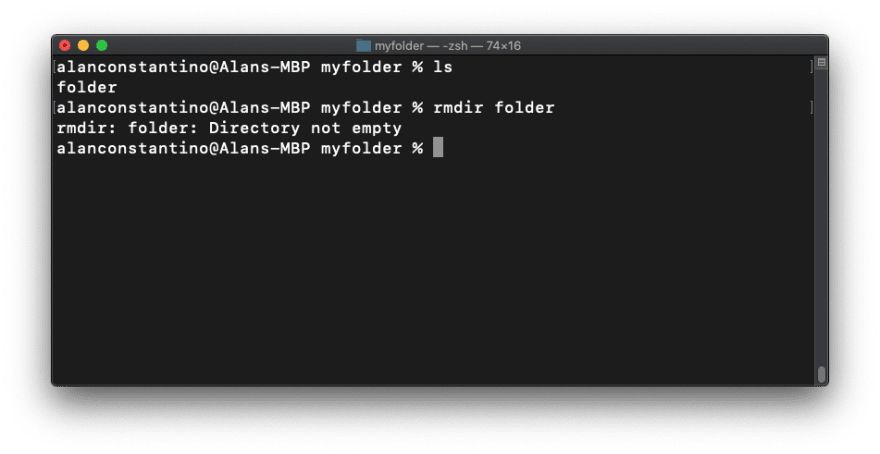
However, it’s important to note that when using this command, you can only remove an empty directory.
If your directory is not empty and you try to use the rmdir command, you’ll get something like the following:
Now how do we remove the contents of a directory you may be asking?
We would have to use the rm (remove) command.
rm — remove
rm [file name]
This command is probably the most powerful and yet the most dangerous one on this list which is why I saved it for last.
Once you use this command and delete something, it’s gone forever.
It doesn’t get put into your Trash for you to empty out later. No! Once you type in this command and hit enter, poof… it’s gone… forever…
This also applies to rmdir, once you remove a directory, it’s gone forever.
But unlike rmdir, the rm command has the ability to remove both a directory as well as a file.
With this in mind, let’s see it in action.
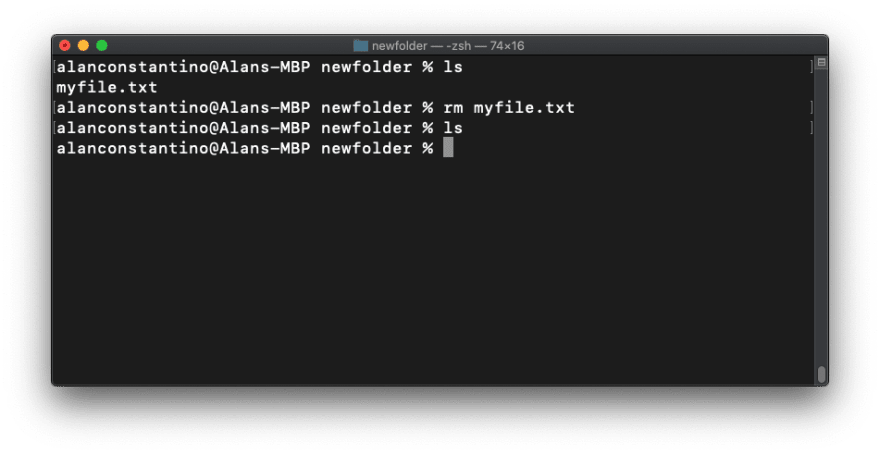
To remove a file, simply do the following:
rm myfile.txt
And just like some of the previous commands, we can delete multiple things at once by using the following format:
rm [file1] [file2] [etc]
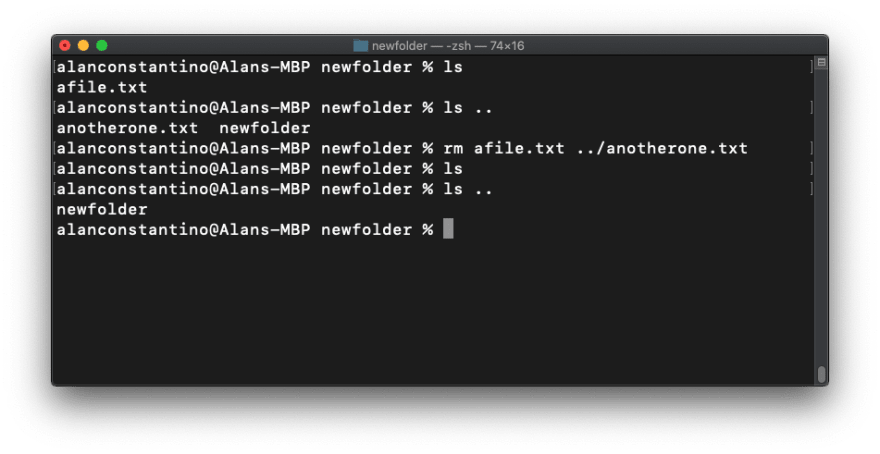
In the example above, we delete “afile.txt” from the current directory and subsequently delete “anotherone.txt” from the previous or parent directory.
If we wanted to delete only certain files that end in specific extensions (i.e. .txt, .png, .exe, etc) we would use the asterisk or “*” symbol. This symbol is often referred to as a wildcard.
For example, if we were in a directory and we only wanted to delete .txt files, we would do the following:
rm *.txt

As you can see, we deleted all the files that end with the “.txt” extension. If we had other files such as .png, .gif, etc, those files would be unscathed by the rm command.
So by using the “*” symbol we effectively tell the terminal to disregard the name of the file and only look at the extension of the file.
Now let’s get into the danger zone.
Earlier I said that most if not all commands have something called options. These options are added right after the command like so:
[command] [options] [other paramters]
Well, the rm command has two options that I’m going to show you which are dangerous if used without precaution and quite lethal in combination.
rm -r
The first is the “-r” option. As you may recall, I said that the “-r” option means do it recursively, which is just another way of saying all or targeting everything.
If you do the following command:
rm -r [directory]
it will delete everything inside of a directory including the folder itself.
So if I have the following directory:
newfolder
├── folder1
│      └── text1.txt
├── folder2
│      └── text2.txt
└── folder3
         └── text3.txt
and then I input the following command:
rm -r newfolder
It will delete everything within the “newfolder” directory as well as the folder itself.
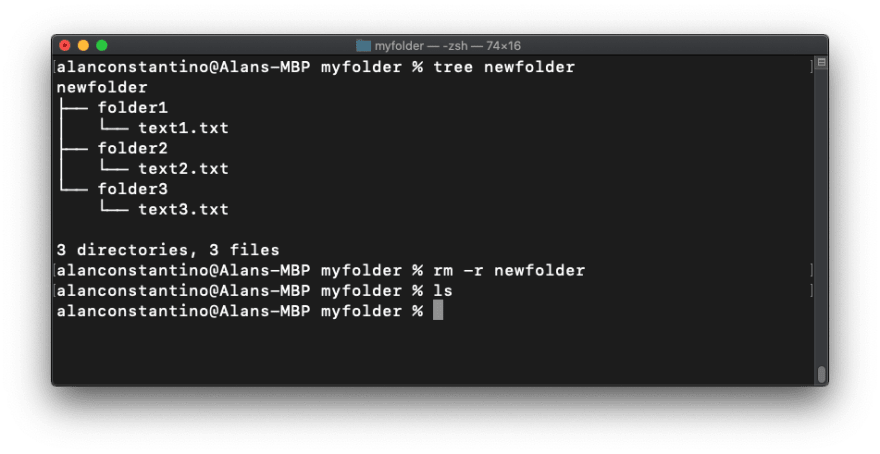
As a side note, the ‘tree’ command isn’t available by default on Mac, you have to download and install it seperately.
Now we move onto the other option, “-f.”
rm -f
rm -f [file/directory]
Sometimes, when you use the rm command, you may get a prompt. This prompt may just be something like “Are you sure you want to delete the following file or directory?”
By using this option, you avoid having the prompt show up in the first place.
Essentially, this just tells the terminal, “Delete the following file/directory and don’t give me a prompt.”
Now we move onto the most lethal combination, “-rf.”
rm -rf
rm -rf [directory]
When you combine both the “r” and the “f” options, you’re telling the terminal “Delete all of the contents of the directory and don’t show me a prompt, capeesh.”
As you can probably guess, this is quite dangerous.
No need to fret though, as long as you’re cautious and don’t use this command on let’s say, you’re root directory, you should — for the most part — be fine.
So now that we know what the “r” and “f” options do, let’s run through an example.
Here I have a directory which looks something like this:
anotherfolder
└── myfolder
        ├── folder1
        │      └── file1.txt
        ├── folder2
        │      └── file2.txt
        ├── folder3
        │      └── file3.txt
        └── folder4
                 └── file4.txt
Now if I run the following command (assuming I’m already at the “anotherfolder” location):
rm -rf myfolder
It should delete all the contents inside the “myfolder” directory including the folder itself and I shouldn’t see any prompts.
All right, let’s give it a shot.
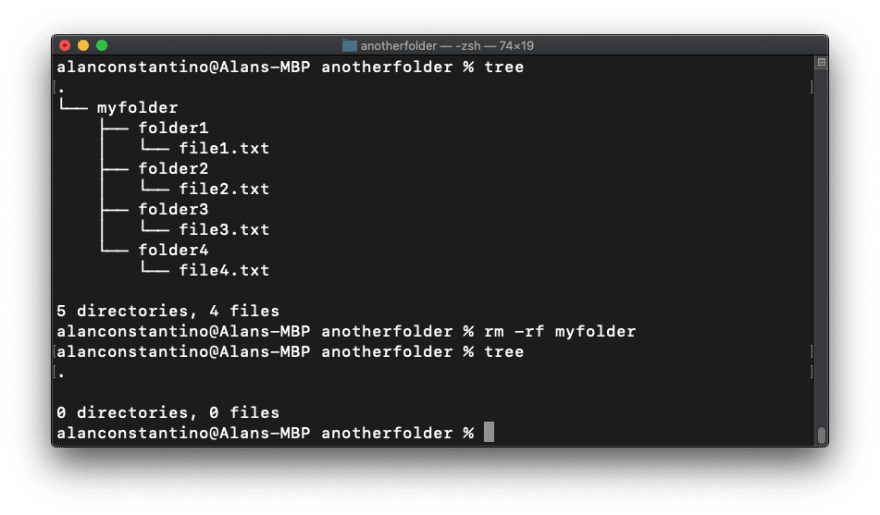
Sure enough, it worked.
Now let’s recap what we learned.
Recap
It’s useful to think of directories as a hierarchical tree with the topmost directory being the root directory.
The “.” means current directory while “..” means previous or parent directory.
We also took a look at the following commands:
- pwd — prints the current working directory
pwd
- ls — lists all the contents of the current directory
ls
- cd — changes directory
cd [directory name]
- clear — clears the terminal screen
clear
- mv — moves files or folders from one place to another
mv [source] [destination]
- cp — copies files or folders from one place to another
cp [source] [destination]
- open — opens the file or folder with the associated program
open [file/directory]
- mkdir — makes a new empty directory
mkdir [directory name]
- touch — creates a new empty file with the name of your choice
touch [file name]
- rmdir — removes an empty directory
rmdir [empty directory]
- rm — removes a file
rm [file name]
- rm -rf — removes the folder and its contents without showing any prompts
rm -rf [directory name]
And this is only scratching the surface of the terminal.
There are many more useful commands but these are just the basics to get you up and running.

Top comments (0)