
In one of my previous blogposts I discussed why we made our own SFMC Forms extension module based on Salesforce open APIs, a module to make moving data from Sitecore forms to Salesforce Marketing Cloud easier. Feel free to read the blogpost, if you haven’t already.
At this instant, we are also very happy to announce that the module is released to the public for free and can be downloaded from the git repository. In this blogpost we would like to talk about the many features of the module. During this writing, we’ll be using the terms developer and content editor. The developer is the person that develops the Sitecore website and therefor also needs to install the module. On the other hand, the content editor denotes either somebody for marketing or the person that is creating content on the Sitecore instance.
The easy setup
In order to get your data from Sitecore forms to Salesforce Marketing Cloud, both the developer and content editor need to do several things.
First of all, the developer needs to download and install the module on the Sitecore instance. After that (s)he needs add some configuration to the web.config. This is the configuration required by FuelSDK and consists of api endpoints and keys. It looks something like this:
<?xml version="1.0"?>
<configuration>
  <configSections>
    <section name="fuelSDK" type="FuelSDK.FuelSDKConfigurationSection, FuelSDK" />
  </configSections>
  <fuelSDK
    appSignature="none"
    clientId="YOUR_CLIENT_ID"
    clientSecret="YOUR_CLIENT_SECRET"
    authEndPoint="YOUR_AUTH_TSE"
    restEndPoint="YOUR_REST_TSE"
    useOAuth2Authentication="true"
    applicationType="server"||"public"||"web" //if you are using oauth2 for public or web app. By default, this will be "server"
    authorizationCode="AUTHORIZATION_CODE"
    redirectURI="REDIRECT_URI_FOR_PUBLIC/WEB_APP"
    accountId="TARGET_ACCOUNT_ID"
    scope="DATA_ACCESS_PERMISSIONS" />
</configuration>
Whenever this configuration is added to the web.config, the module is ready to use. This is the moment where the developer’s job is done (yes for real!) and (s)he can continue working on other exciting stuff.
This is also the moment that the content editor’s work begins. First of all (s)he needs to add the ”Send to SFMC” to the form that needs to send its data to SFMC. The next step is to create a binding between a form and a data extension to then publish it. This can be done by the handcrafted SFMC save actions dashboard application.
A Sitecore integrated UI
When a content editor wants to create or edit an SFMC binding, (s)he can open the dashboard application in Sitecore. When the application is opened it will display a UI showing a list of configured bindings. This looks like this:
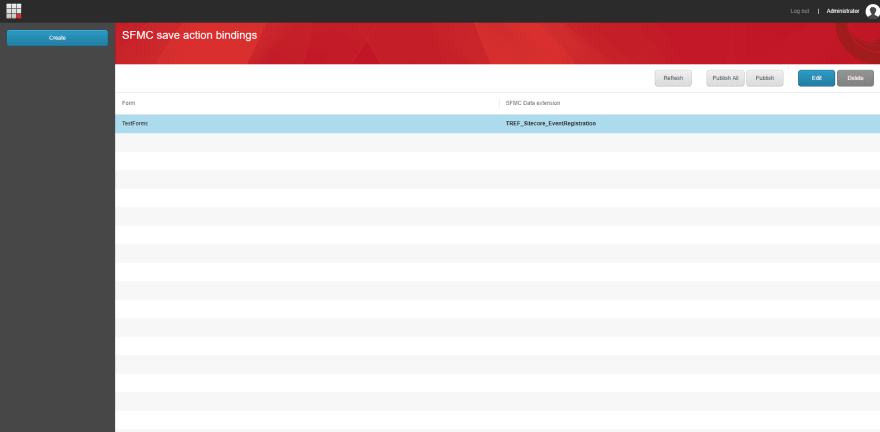
As you can clearly see, this is a very intuitive UI fully integrated inside Sitecore and therefor the content editor will use the same UX experience as other standard Sitecore modules.
This page has several buttons, to create, update, publish or delete a binding. If a CE (content editor) creates or updates a binding, a page like this will be displayed:
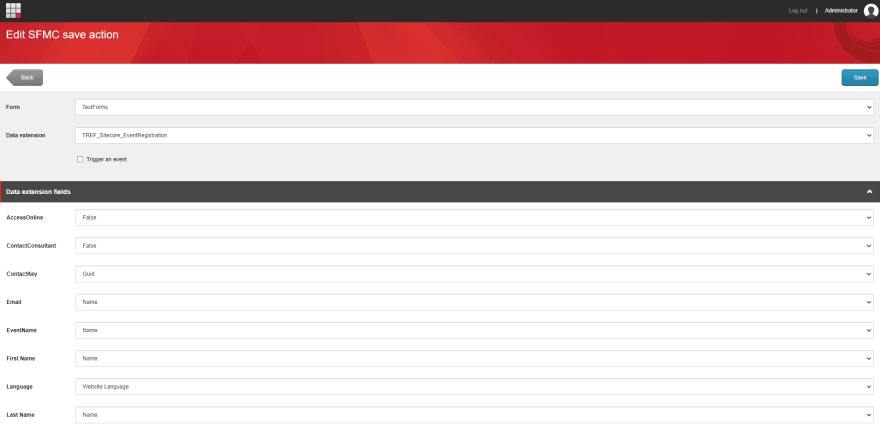
Again, this UI is very intuitive and has a full Sitecore look and feel.
Fully fetched data
When creating or editing a binding, you’ll see just as in the image above, that all the data that needs to be used is fetched either from Sitecore or Salesforce. That data is then displayed in a drop down. This serves several purposes, firstly no names and ids need to be remembered and therefor mistakes and typos can’t be made. This also greatly increases speed.
There are several things a CE needs to choose for each binding, firstly the form the data is coming from as well as the data extension the data is going to. This can be done with the beforementioned dropdowns. When those two are chosen, a CE can choose to trigger an event in SFMC.
As soon as a form and a DE (data extension) are chosen, the UI will fetch respectively the form fields as well as the data extension columns. Those will be displayed in the UI as well. For each DE column, a row will be shown with the name as well as a dropdown with different fields to choose from (including the fetched form fields).
Lots of fields to choose from
As soon as the UI is loaded with the DE columns and form fields a CE can choose for each DE column a field. Those so-called fields are displayed in a dropdown. There are many fields to choose from and because there are so many, we’ve grouped them in different categories.:
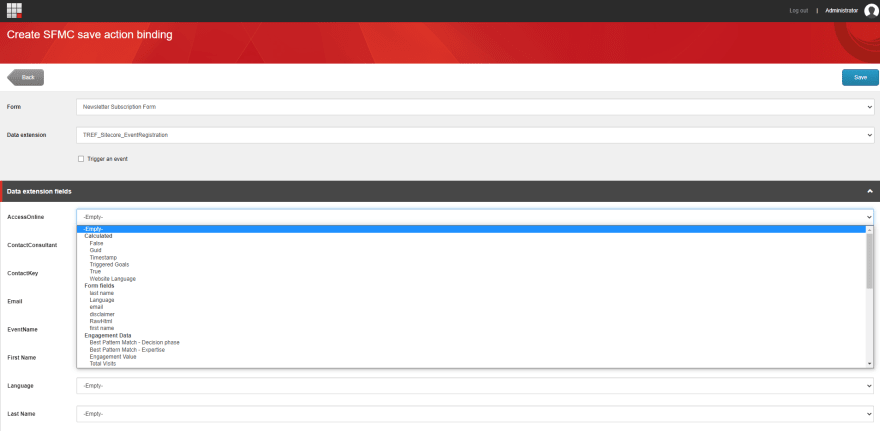
The first group, “form fields” consist of all the fields from the form. When such a field is picked, the value that the website user provided for that field will be send to SFMC. Another group is the “calculated fields” group. This group consist of different values that do not originate from a form such as the website language, a random GUID or timestamp and many more. The last two groups are groups for xdb related data.
Migrating configuration
As soon as you save a new binding an item will be created in the master database in Sitecore. Whenever you are ready to go live with the binding, you can publish either the item in the Sitecore tree or use the publish button in the dashboard application.
Since all the bindings are Sitecore items, you can migrate bindings between different environments by simply packaging those items and installing them on the desired environment. This also means that you do not need to recycle, nor do you need to redeploy anything when migrating data.
Conclusion
As you can clearly see, this module is easy to install and to use. It was such a cool experience to develop this module using Sitecore and Salesforce APIs that we made it available to the community. So feel free to use it!


Top comments (0)