![Cover image for IP Camera NVR for Home surveillance with [Docker 🐋️ + Raspberry 🍓️ + S3] in just 5min🚀️!](https://media2.dev.to/dynamic/image/width=1000,height=420,fit=cover,gravity=auto,format=auto/https%3A%2F%2Fdev-to-uploads.s3.amazonaws.com%2Fi%2Fpnblb5mngf964vwwjcfc.png)
In this article we're going to configure a NVR server for saving home IP Camera video on Raspberry PI 4 and keep a copy of them on AWS S3 Storage.
1. Install Docker on RaspberryPi
sudo su -
curl -fsSL https://get.docker.com -o get-docker.sh
sh get-docker.sh
usermod -aG docker pi
systemctl status docker
● docker.service - Docker Application Container Engine
2. Download Kerberos.io container and run them
docker pull kerberos/kerberos
docker run --name camera1 -p 80:80 -p 8889:8889 -d kerberos/kerberos
Double check, container is running correctly?
docker ps

CONTAINER ID        IMAGE                 COMMAND             CREATED             STATUS              PORTS                                            NAMES
aef03c9d804a        kerberos/kerberos     "sh /run.sh"        10 days ago         Up 10 days          0.0.0.0:80->80/tcp, 0.0.0.0:8889->8889/tcp       camera1
3. Kerberos.io configuration
- Go to http://your_raspberry_ip/ follow the configuration step and set admin user/password. (Currentrly this app support only 1 user)
- Login
- Go to Configuration
- Set the RTSP camera URL, resolution and frame rate. (Most common camera rstp URL)
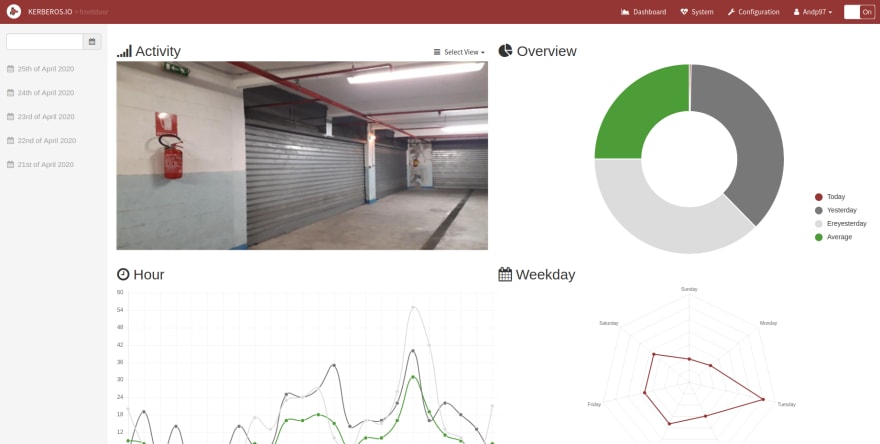
- Open the Dashboard and see the Live Stream from your camera and the lastest records activities
- Go to Configuration > Advanced > S3 and set Bucket, folder, publicKey and privateKey
Do you like Kubernetes?
You can deploy Kerberos on Kubernetes

Latest comments (0)