1. Why Use Google’s SMTP Server for Spring Boot Applications?
Google’s SMTP server offers high reliability, security, and ease of use. It is perfect for small to medium-sized applications that require email functionality without the complexity of setting up a dedicated mail server.

Google is known for its high email deliverability rates. By using their SMTP service, you can ensure your emails are less likely to end up in spam folders. Google enforces strict security and anti-spam policies, making it ideal for secure mail transmissions.
If your application sends fewer than 500 emails per day, Google’s free tier is more than sufficient. This allows small applications to leverage the power of Google’s infrastructure without any upfront cost.
Spring Boot makes integrating with Google SMTP simple, thanks to its support for JavaMailSender. Google’s documentation is also well-structured, guiding developers through the configuration.
2. Setting Up Gmail SMTP for Spring Boot
Before you can send emails, you need to configure your Spring Boot application to connect to Gmail’s SMTP server. This section covers the steps to set up the SMTP server and authenticate your application.
To enable your application to send emails via Gmail’s SMTP server, you first need to configure Gmail for SMTP access:
Go to your Gmail account’s Google Account Security page.
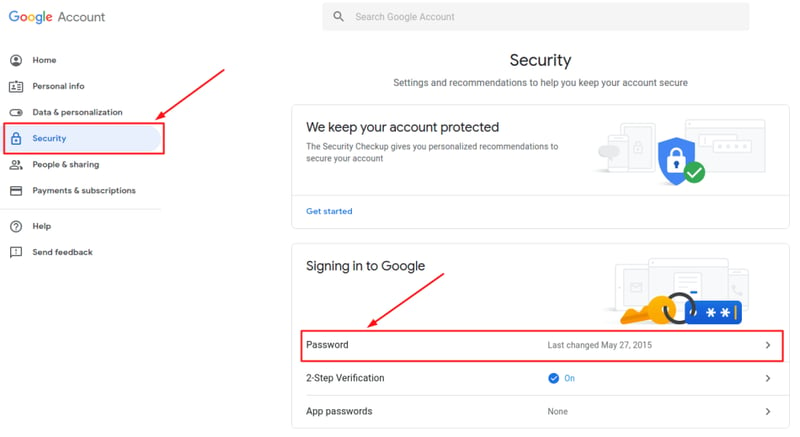
Under "Signing in to Google," turn on 2-Step Verification if you haven't done so already.
Once 2-Step Verification is enabled, generate an App Password for your Spring Boot application.
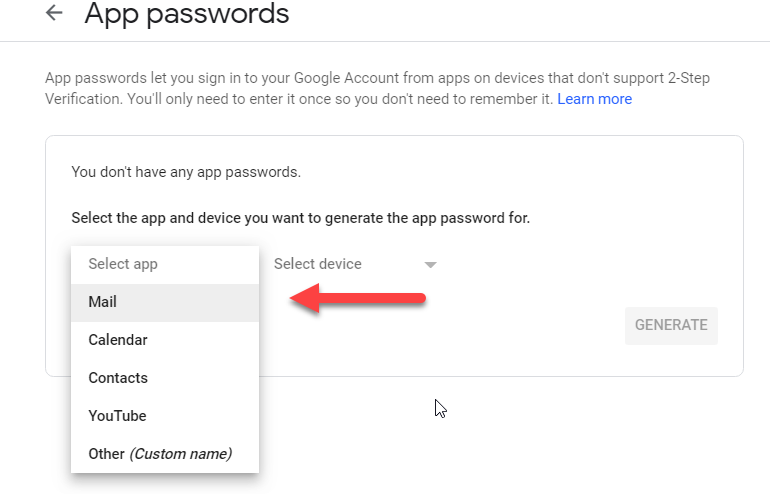
This is a special password that your app will use instead of your normal account password to access Google’s SMTP server.
2.2 Adding SMTP Properties in Spring Boot Application
In your application.properties (or application.yml ), you need to configure the SMTP settings. Use the following properties for Gmail SMTP:
spring.mail.host=smtp.gmail.com
spring.mail.port=587
spring.mail.username=your-email@gmail.com
spring.mail.password=your-app-password
spring.mail.properties.mail.smtp.auth=true
spring.mail.properties.mail.smtp.starttls.enable=true
spring.mail.properties.mail.smtp.starttls.required=true
spring.mail.properties.mail.smtp.ssl.trust=smtp.gmail.com
- spring.mail.host : Gmail’s SMTP server.
- spring.mail.port : Port 587 is used for TLS/STARTTLS.
- spring.mail.username : Your Gmail account.
- starttls.enable : This property ensures that the email transmission is encrypted.
- spring.mail.password : The generated App Password from Google.
2.3 Creating a Simple Email Service
Now that your SMTP server is set up, it’s time to write the Java service to send emails. Here’s a simple example of an EmailService using JavaMailSender:
import org.springframework.beans.factory.annotation.Autowired;
import org.springframework.mail.SimpleMailMessage;
import org.springframework.mail.javamail.JavaMailSender;
import org.springframework.stereotype.Service;

@Service
public class EmailService {

    @Autowired
    private JavaMailSender javaMailSender;

    public void sendSimpleEmail(String to, String subject, String body) {
        SimpleMailMessage message = new SimpleMailMessage();
        message.setTo(to);
        message.setSubject(subject);
        message.setText(body);

        javaMailSender.send(message);
    }
}
This service creates and sends a simple text email. You can extend this to send HTML emails or attachments by using MimeMessage instead of SimpleMailMessage.
2.4 Sending the Email from a Controller
Let’s add a controller method to trigger the email. This will help you test sending emails via an HTTP request.
import org.springframework.beans.factory.annotation.Autowired;
import org.springframework.web.bind.annotation.GetMapping;
import org.springframework.web.bind.annotation.RequestParam;
import org.springframework.web.bind.annotation.RestController;

@RestController
public class EmailController {

    @Autowired
    private EmailService emailService;

    @GetMapping("/sendEmail")
    public String sendEmail(@RequestParam String to, @RequestParam String subject, @RequestParam String body) {
        emailService.sendSimpleEmail(to, subject, body);
        return "Email sent successfully!";
    }
}
This controller accepts to, subject, and body as query parameters in the URL and sends the email.
3. Testing the Email Sending Functionality
At this point, you should have everything configured and ready. Now let’s test the email sending functionality.
Run your Spring Boot application and make sure it starts without any errors. If there are any issues, double-check the configuration properties and ensure you’re using the correct App Password.
You can test the email functionality by sending an HTTP request to the /sendEmail endpoint. For example:
http://localhost:8080/sendEmail?to=recipient@example.com&subject=Test+Subject&body=Test+Body
When you hit this endpoint, your application will send an email to the specified recipient. You should see the message "Email sent successfully!" in the browser.
After sending the email, check the recipient’s inbox to confirm that the email was delivered. If the email doesn’t appear, check the spam or promotions folder, as it may have been filtered.
4. Handling Common Issues
4.1 Authentication Failures
If you encounter authentication issues, double-check that you’ve enabled 2-Step Verification and used the correct App Password in your application.properties.
4.2 Emails Going to Spam
To improve email deliverability and prevent emails from going to spam, make sure your subject line and body content follow email best practices. Avoid using phrases that might trigger spam filters, and consider adding SPF/DKIM authentication for your domain.
4.3 Timeouts or Connection Issues
If you experience timeouts or connection issues, verify that your network allows outgoing connections on port 587 and that Gmail’s SMTP server is reachable from your environment.
5. Conclusion
Integrating Gmail’s SMTP server with a Spring Boot application is straightforward but requires careful attention to security settings and configuration details. By following the steps outlined above, you’ll have a working email system for your application that’s both reliable and secure.
Do you have any questions about setting up Gmail SMTP with Spring Boot or did you run into any issues? Feel free to leave a comment below, and I’d be happy to help you troubleshoot or answer your questions!
Read posts more at : Tips for Sending Mail from a Spring Boot Application Using Google as Mail Server

Top comments (0)