
This article will be focussed on understanding what Kafka Connect is, what it does and how to run this in any environment. Inspiration for this article was my struggle to identify how to run the Kafka Connect with out using the Confluent Cloud as most of the articles on the web either uses Confluent Cloud or a shell script to start the connector. I wanted to create a Java application which can use the open source Kafka Connect jar and can be hosted like any other FAT jar.
Source Code
If you would like to try it by yourself or you want to go through my source code, you can clone my GitHub repository and go through the readme file. So, Let's begin.
Prerequisites
We will be using Java as primary Language and Maven as the dependency management solution. So, to run this you'll need atleast Java 17 and Maven 3.9 installed in your system. In case you don't have Java or maven installed, you can download and install it by using below links.
I'll running Kafka locally in my system. If you want to know how to setup Kafka Locally, please use this link to set it up. Also, I am using Kafdrop to view Kafka brokers, topics, messages, consumer groups, and ACLs.
Introduction
Kafka Connect is a tool that helps move data between Apache Kafka and other systems in a reliable and scalable way. It makes it easy to set up connectors that transfer large amounts of data in and out of Kafka. You can use it to bring in data from entire databases or collect metrics from servers into Kafka topics for real-time processing. It also allows exporting data from Kafka to storage, query systems, or batch processing for offline analysis. Kafka Connect stores different types of information regarding the connector i.e. configuration of the connector, working status of the connector and last committed offset of the connector.
Kafka Connect currently supports two modes of execution:
- Standalone(single process)
- Distributed
In Standalone mode, all work is performed in a single process and the details related to configuration, offset and status is maintained in a file. This configuration is simpler to setup and get started with and may be useful in situations where only one worker makes sense (e.g. collecting log files), but it does not benefit from some of the features of Kafka Connect such as fault tolerance.
In Distributed mode, Kafka Connect stores the offsets, configs and task statuses in Kafka topics. It is recommended to manually create the topics for offset, configs and statuses in order to achieve the desired the number of partitions and replication factors.
Implementation
For the purpose of this exercise, we will just be running our Kafka Connect in distributed mode. Hence, we will create our offset, config and status topics in advance. We will use script given below to create these.
- connect-offsets: Topic is used for storing offsets. This topic should have many partitions and be replicated and compacted.
# offset.storage.topic
bin/kafka-topics.sh --create --bootstrap-server localhost:9092 --topic connect-offsets --replication-factor 3 --partitions 1 --config cleanup.policy=compact
- connect-configs: Topic is used for storing connector and task configurations; note that this should be a single partition, highly replicated, and compacted topic.
# config.storage.topic
bin/kafka-topics.sh --create --bootstrap-server localhost:9092 --topic connect-configs --replication-factor 1 --partitions 1 --config cleanup.policy=compact
- connect-status: Topic to use for storing statuses. This topic can have multiple partitions and should be replicated and compacted.
# status.storage.topic
bin/kafka-topics.sh --create --bootstrap-server localhost:9092 --topic connect-status --replication-factor 1 --partitions 10 --config cleanup.policy=compact
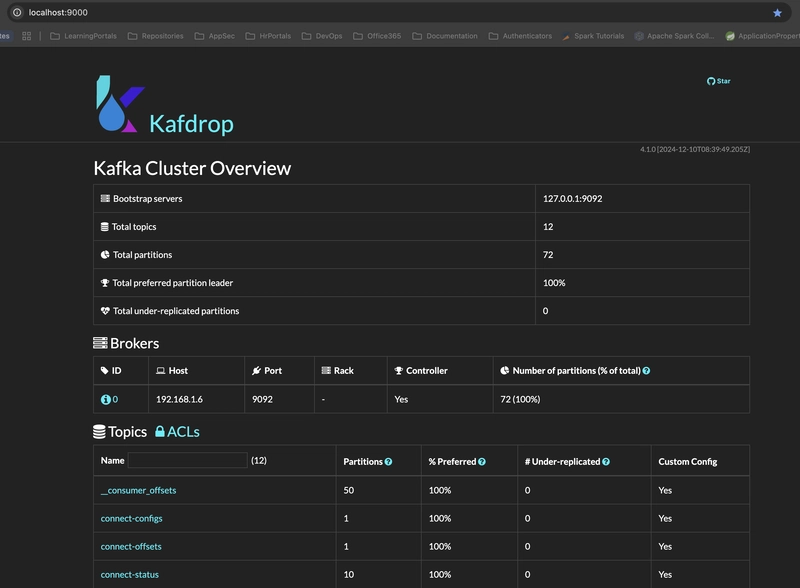
We can see in the above screenshot that the required topics are created. Next step would be to create a sample java project. I'll be using my InteliJ to create it but you can use any other IDE or CLI as well.
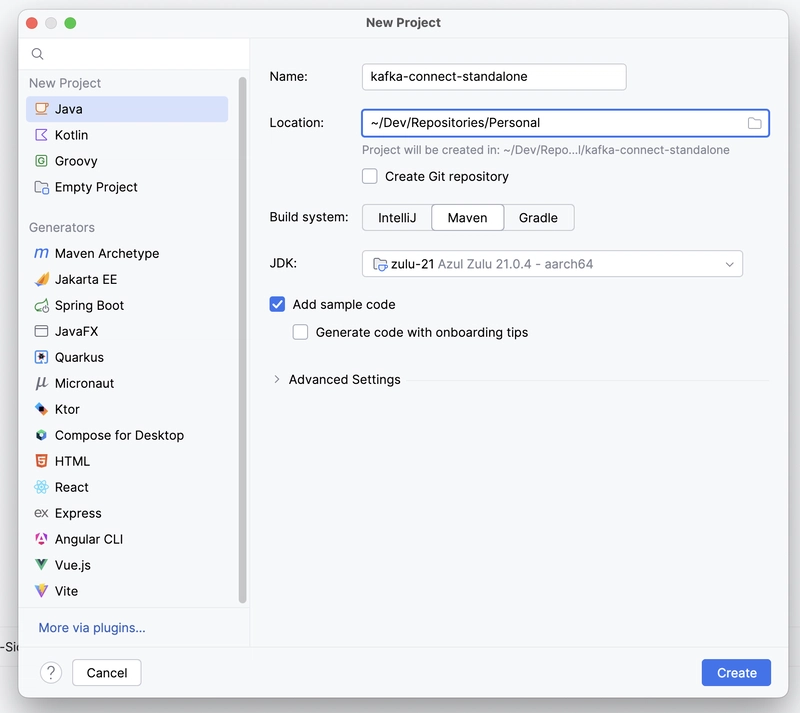
After the project is successfully, created we need to add the following dependencies into our pom.xml.
<!-- Logging related dependencies starts -->
        <dependency>
            <groupId>org.apache.logging.log4j</groupId>
            <artifactId>log4j-api</artifactId>
            <version>${log4j2.version}</version>
        </dependency>
        <dependency>
            <groupId>org.apache.logging.log4j</groupId>
            <artifactId>log4j-core</artifactId>
            <version>${log4j2.version}</version>
        </dependency>
        <dependency>
            <groupId>org.apache.logging.log4j</groupId>
            <artifactId>log4j-slf4j-impl</artifactId>
            <version>${log4j2.version}</version>
        </dependency>
        <!-- Logging related dependencies ends -->
        <dependency>
            <groupId>org.projectlombok</groupId>
            <artifactId>lombok</artifactId>
            <scope>provided</scope>
            <version>1.18.30</version>
        </dependency>
        <!-- Apache Kafka Connect dependencies starts -->
        <dependency>
            <groupId>org.apache.kafka</groupId>
            <artifactId>connect-runtime</artifactId>
            <version>3.7.2</version>
        </dependency>
        <!-- Apache Kafka Connect dependencies ends -->
The dependencies "log4j-api", "log4j-core" and "log4j-slf4j-impl" are used for logging purposes. We also need to add log4j2.xml to our classpath in order to specify the format of our logs.
One more thing to note here is "connect-runtime" dependency. We only need to add only this dependency and it brings libraries like "connect-api", "connect-json" & "connect-transforms" transitively. Since, all these libraries are also part of our classpath, our Kafka Connect Application will work as a server and we should be able to interact with it using the REST endpoints.
We also need to add the "spring-boot-maven-plugin" to our pom.xml under build section. This will allow us to generate the fat jar and provide the class which has the main method. This method is called on the startup of the jar.
<plugins>
    <plugin>
        <groupId>org.springframework.boot</groupId>
        <artifactId>spring-boot-maven-plugin</artifactId>
        <executions>
            <execution>
                <configuration>
                    <mainClass>dev.ankis.KafkaConnectApplication</mainClass>
                </configuration>
                <goals>
                    <goal>repackage</goal>
                </goals>
            </execution>
        </executions>
        <version>3.4.2</version>
    </plugin>
</plugins>
As a last step, we need to add a configuration file with the name "distributed-config.properties" under the src/main/resources.This will store all the configuration properties.
bootstrap.servers=localhost:9092
group.id=connect-cluster
key.converter=org.apache.kafka.connect.json.JsonConverter
value.converter=org.apache.kafka.connect.json.JsonConverter
key.converter.schemas.enable=true
value.converter.schemas.enable=true
offset.storage.topic=connect-offsets
offset.storage.replication.factor=1
status.storage.topic=connect-status
status.storage.replication.factor=1
offset.flush.interval.ms=10000
listeners=HTTP://:8083
Post these configurations, we can go ahead and run the application.

To see if our kafka connector server is up and running, we can run the following cURL
curl --request GET \
  --url http://localhost:8083/connector-plugins


Top comments (0)