
Do you have a Node.js project that you want to put into production but don't know how?
In this tutorial, you'll learn how to deploy a Node.js and MongoDB application to Heroku.
Before we get started, let's take a very quick look at Heroku and MongoDB.
What is Heroku?
Heroku is a cloud platform as a service (PaaS) that enables businesses to create, deliver, monitor, and scale applications.
Heroku was created to alleviate infrastructure concerns and eliminate the need for you to learn about network administration, server configuration, or database tuning.
Essentially, Heroku removes barriers so developers can concentrate on creating excellent apps.
Note: Heroku will pull their free plans on November 28th. Keep in mind that you’ll have to pay to use Heroku from this date onwards.
What is MongoDB Atlas?
MongoDB Atlas is a global cloud database that handles the complexities of deploying, managing, and healing your deployments on the cloud service provider of your choice (AWS, Azure, GCP). It lets you deploy, manage, and scale MongoDB in the cloud.
Prerequisites
Before you proceed, ensure you have the following set up:
Create a New MongoDB Cluster
Let's start by creating a MongoDB cluster for this project. Log in to Atlas and from your Atlas dashboard, follow these steps to create a new cluster:
Click on the 'Build a Database' button.

Choose your cluster type. We'll use the 'Shared' cluster.
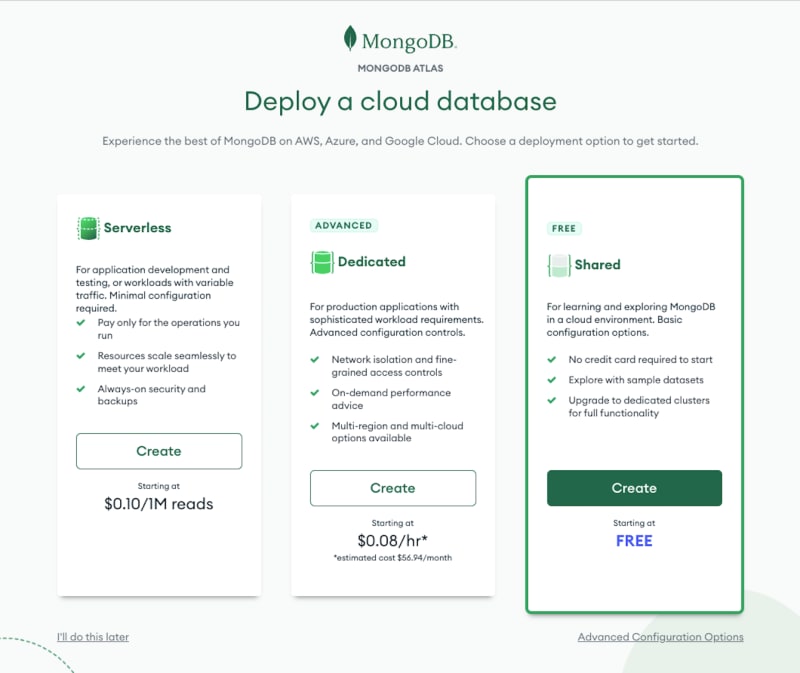
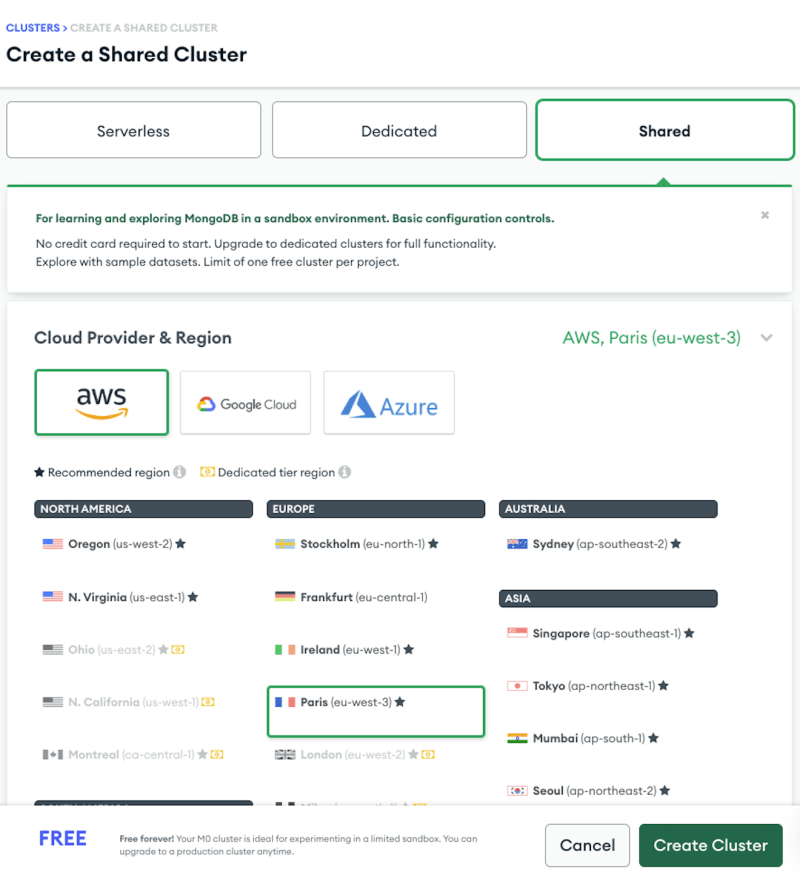
Customize your cluster. Select 'Shared' > 'AWS' and click the 'Create Cluster' button.
To change the default cluster name, click on the 'Cluster Name' tab and enter your preferred name in the input field.
Select the Authentication for your cluster. We'll use Username and Password. Enter Username and Password > Click 'Create User'.
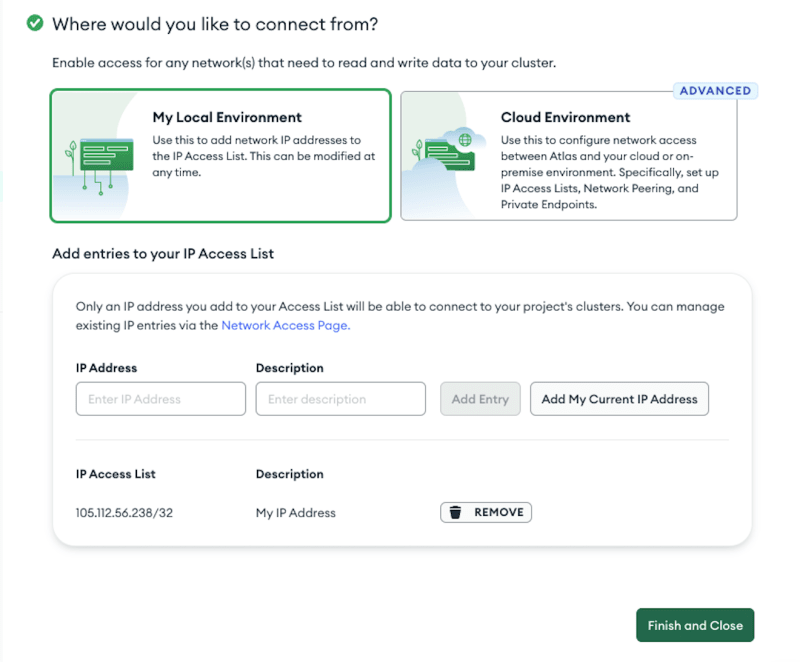
Select where you want to connect from and click the 'Finish and Close' button.
Get Connection String
Now that your MongoDB Cluster has been created, let's get the connection string.
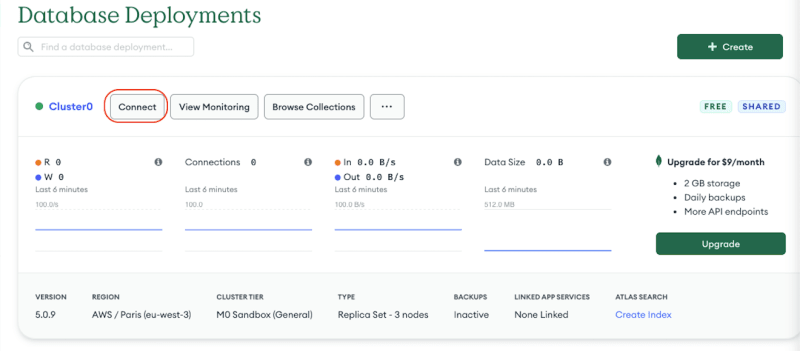
Click on the 'Connect' button.
Select the 'Connect your application' tab.
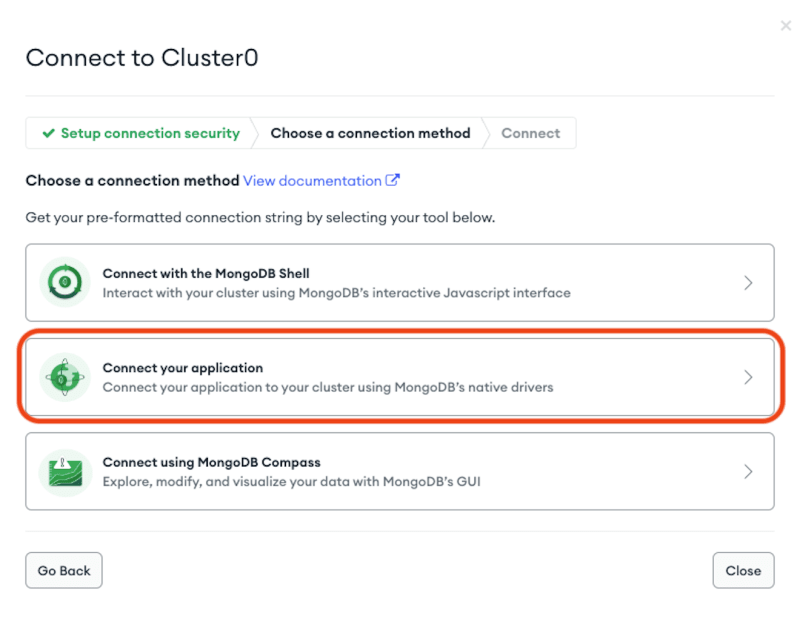
Copy the connection string.
Add Connection String
Now create a .env file in your project and add the connection string as shown below.
Note: It is always good practice to add your .env file to a .gitignore file, so as not to commit it to git.
MONGODB_URI = "YOUR CONNECTION STRING"
This way, you won't accidentally expose your credentials to the public.
To access the environment variables, we'll use the dotenv package. Install it with the command below:
npm install --save-dev dotenv
Once the installation is complete, update app.js with the code snippet below.
if (process.env.NODE_ENV !== "production") {
  require("dotenv").config();
}
This code snippet loads the environment variables in the .env file if the environment isn't set to production. On Heroku process.env.NODE_ENV is set to production by default, so different environment variables will be used there. You can use this check to include code that should only run in production (or exclude code that shouldn't).
Now, if you run the application with the command npm start, the application will connect to the remote MongoDB Cluster.
Install Heroku CLI
Let's set up Heroku for the app deployment. First, install the Heroku CLI with the command below.
npm install -g heroku
Once that's done, update the package.json to specify your start script.
"scripts": {
  "start": "node app.js",
},
Then specify the Node.js version that you'll use to run your application.
...
"engines": {
  "node": "14.x"
}
Lastly, update your app listening port to listen to Heroku by default on production.
const PORT = process.env.PORT || 3001;
app.listen(PORT, () => {
  console.log(`Server is running on port ${PORT}`);
});
Run Your Node.js and MongoDB App Locally
To test if everything works as expected, run the application locally before deploying it.
heroku local web
For this demo application, you should see: Server is running on port 5000 and Connected to MongoDB.
Deploy Your Node.js and MongoDB App
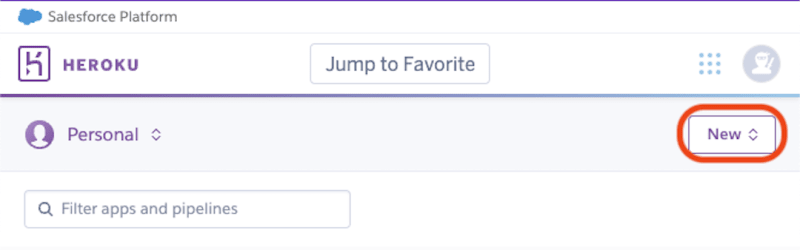
Before we deploy our app, we need to create a Heroku app and add the environment variables that will be used in production. To do that, log into the Heroku dashboard and click on the 'New' button.
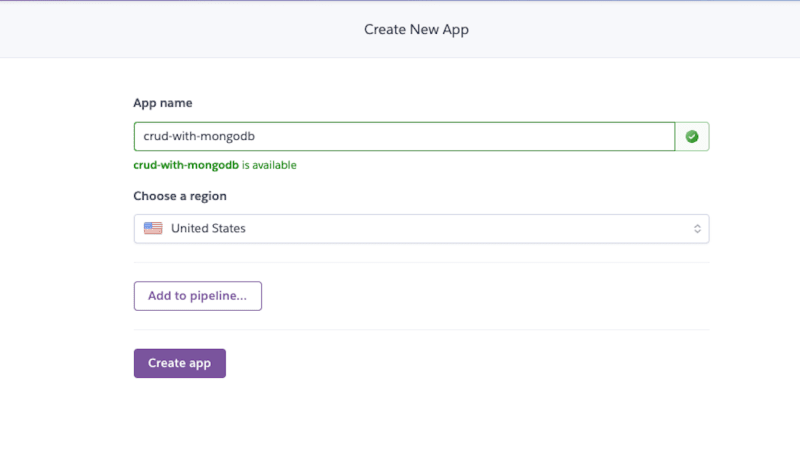
Select 'Create new app', enter the app name, select your region, and click the 'Create app' button.
Next, log in to the Heroku CLI with the command below.
heroku login
The above command will prompt you for your credentials, and log you in.
Then initialize a git repository in a new or existing directory.
git init
heroku git:remote -a crud-with-mongodb
Next, commit your code to the repository and deploy it to Heroku using Git.
git add .
git commit -am "ready to deploy"
git push heroku main
Wait some time for the application to deploy. Once the deployment is complete, the Heroku CLI will provide a remote URL for the application.
Now, back to your Heroku app! Click on 'Settings' > 'Reveal Config Vars', and add your MONGODB_URI.

Lastly, head over to MongoDB Cluster ('Network Access' > 'IP Access List' > 'ADD IP ADDRESS') and add your Host IP address to your Network Permission List. This gives your Host access to your cluster.
For this tutorial, we'll enable access from anywhere with the IP address 0.0.0.0/0.

Now you've deployed your Node.js application to Heroku!
Wrap Up
In this post, we went through the stages of deploying a Node.js and MongoDB app to Heroku. We first created a MongoDB cluster, then added the database connection string to an environment variable, before installing the Heroku CLI and finally deploying our application to Heroku.
You can learn more in MongoDB's official Atlas docs and Heroku's official docs.
Happy coding!
P.S. If you liked this post, subscribe to our JavaScript Sorcery list for a monthly deep dive into more magical JavaScript tips and tricks.
P.P.S. If you need an APM for your Node.js app, go and check out the AppSignal APM for Node.js.

Top comments (0)