Ever since Microsoft came up with the Power Virtual Agent for Customr Service, it was well received by the organizations and community as potential tool for enhancing customer experience and resolving issues effectively any time of the day, any day of the week.
The main goal to introduce Virtual Agent was to empower your customer support specialists and subject matter experts—the people closest to the customer—to build and update your bot. This approach can significantly reduce costs by automating common questions, and free up agent (human) time to focus on more complex cases.
Virtual Agent is a complete No-Code tool which can only be extended through Microsoft Flow to call external services and achieve business goals. Therefore, there's a limit on what you can customize such as customer outreach on different / multiple channels, designing for speech, integrating LUIS or QnAMaker etc.
Last week, after my talk at AI Happy Hour, I was asked by if there's a
possibility to extend Virtual Agent with existing Microsoft Bot
Framework. My short answer to that person was 'Yes, it is possible'
and I gave him a few pointers there.Later on, I decided to come up with a guide so that everyone who wants to extend their bot solutions can take an advantage from it.
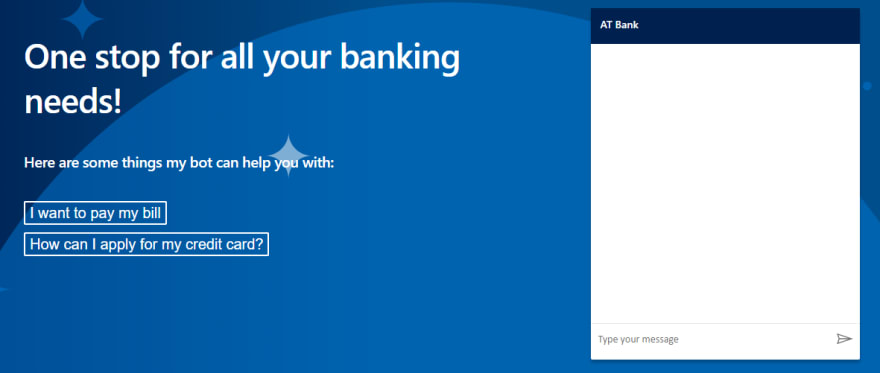
Let's suppose you work for a digital bank and you've got a Virtual Agent with usual queries setup and you also have a custom Bot built with Microsoft Bot Framework. The goal is to extend/combine your Power Virtual Agent with your existing (or new) custom bot. So, in this post, we will discuss the possibilities and pre-requisites to achieve that.
Being on this platform, it's 100% safe to assume that you are seasonal / professional developer who has a good knowledge of IDE, tools and other developer utilities.
We will be using one of the Bot Builder tools aka Dispatch tool to create and evaluate language models which are used to dispatch intent across multiple bot modules such as LUIS models, QnA knowledge bases and others (such as Virtual Agent source which will be converted to LUIS model).
**Disclaimer:* This post is not a 101 for Bot Framework therefore, if you're looking for how to create a bot with Bot Framework / Azure Bot Service, we've got plenty of samples available on GitHub with amazing docs for you to follow.*
Pre-Requisites
- Power Virtual Agent for Customer Service
- Visual Studio 2019 (.NET Core 2.2)
- Microsoft Bot Framework v4 (4.53)
- Bot Builder LUIS NuGet Package
- Bot Builder Tools
- Dispatch Tool
- LUDown
- LUIS
Credentials for Virtual Agent
First and foremost step is to get the necessary credentials for Virtual Agent. Let's start off with this;
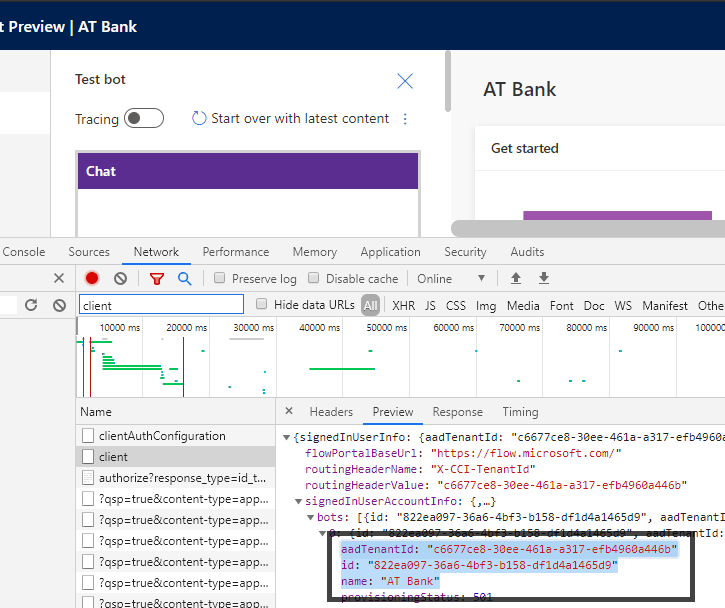
- Open developer tools console for the browser (F12)
- Log in to your Virtual Agent tenant using your Azure AD credentials
- Go to Network Tab and locate client requests
- Copy and save the information highlighted in the screenshot as you will need this in upcoming steps
Data Export for Virtual Agent
Log into Power Apps Portal and go to Data -> Entities and click on Export.
Select BotContent and Note as these entities keep your Virtual Agent's content and try to export them. Once they're downloaded, you can then extract those .csv files.
Now, since Dispatch tool only understands .json, .tsv or .txt files hence we have to convert our .csv files to JSON (with a LUIS-able schema). In order to achieve this, we have two step process;
- Convert .csv files to .lu file format (much thanks to the Virtual Agent Product team for this) -
- Use another bot builder tool aka LUDown tool to generate LUIS files from .lu file format
Just download the ContentConverter project from GitHub, place it to your favorite location. Use any command line tool / terminal (I use Windows Terminal) to locate the ContentConverter project. It's always better to have all of your files in one project so I have placed the .csv files in one of the folders within my Bot Framework's project.
Now execute this command and this will generate Content.lu file in ContentConverter project.
dotnet run -p ContentConverter.csproj -c Release -- -i <path to msdynce_botcontents.csv> -c <path to annotations.csv> -b <your bot id you saved earlier>
After this, you will have to create .json file from this LU so that it can be added to Dispatch.
ludown parse ToLuis --in Content.lu
Now it has created the Content.json file (basically, a LUIS file).

I have placed these files to my Bot's project for better accessibility but you can keep where ever you want.
The Dispatch Tool
Now let's talk about the magical utility, the Dispatch tool.
Dispatch is used to create and evaluate LUIS model that can be used to route incoming user utterance to a specific bot components
such LUIS model(s), QnA knowledge base and others.
You will need following credentials to use this tool.
- Your existing LUIS or QnA Maker credentials
- Your Virtual Agent credentials
On Windows Terminal, you will first initialize the dispatch as below;
dispatch init -n vabotframework.dispatch --luisAuthoringKey "<your LUIS authoring key>" --luisAuthoringRegion westus
Then, add your existing LUIS (or QnA) if you have any;
dispatch add -t luis -i "<your LUIS app id>" -n "<your LUIS app name>" -v 1.0 -k "<your LUIS authoring key>" --intentName l_ATBankLUIS
Example

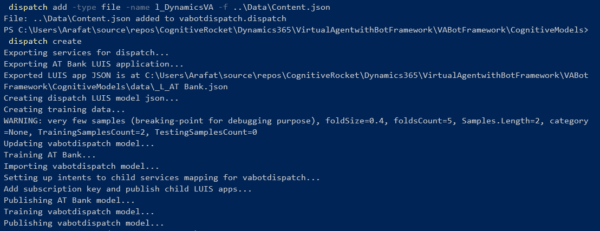
Now, add Virtual Agent file to your dispatch;
dispatch add -type file -name l_DynamicsVA -f ..\Data\Content.json
Finally, create dispatch
dispatch create
Example
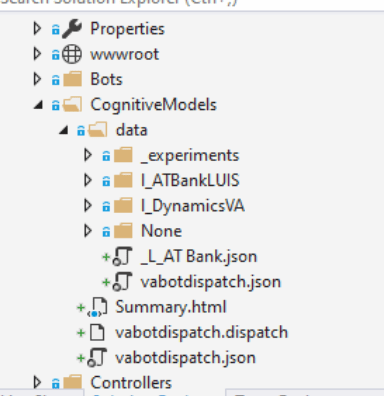
Your Bot
So your bot should be looking like this now. vabotdispatch.dispatch is basically the main file that keeps the pointers of all of your LUIS, QnA Maker and other resources (in our case, VA agent's LUIS model)
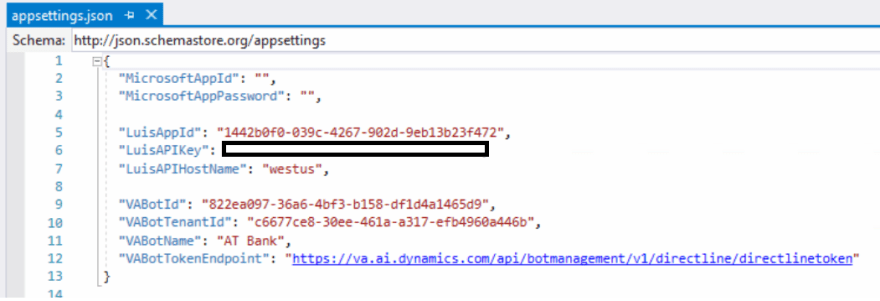
Next, it's time for you to define endpoint in your appsettings.json file to work with Dispatch tool;
Then you can add these classes that'd be used whenever a user's utterance matches intent of your Virtual Agent;
So if the intent of your incoming message is recognized as l_DynamicsVA as shown in below image, then you can pass the turnContext to the subsequent method;

Now! You must be all set to go with your bot to respond according to your recognized intent by the dispatch tool. I'm sure now you can expose your Virtual Agent to tons of different channels now with all the customizations.
As usual, the full bot code is up and running at my repo. Please feel free to contribute or take help from that!
Until next time.

Top comments (1)
am I right to say you did not really extend your Virtual Agent with Bot Framework
But you made a connection from your Bot Framework to the Virtual Agent?