
DevOps & CI/CD are buzz words for a while now and they have really proven their value in today's fast moving world and Agile development process. One understands the true value only when they have actually been a process of it and see for themselves the immense amount of time and headache it saves.
At Royale Cheese initially we had setup CI/CD for Android via Microsoft’s Visual Studio App Center (an upgrade of Hockey App), but last year they declared the retirement of MBaas which got us worried about the overall future of VS App Center. That was one of the reasons we wanted to switch away from it. Secondly, the free tier provided around 400 minutes of build time per month per account which would had been sufficient for other technologies, but Android takes around 15 minutes to create a single build and deploy. We all know what gradle is capable of 😉. So having multiple apps (both iOS and Android) in the same account didn’t fare well.
We were already using Azure DevOps for CI/CD for other technologies and it seemed promising. It’s future plan had no issues of shutting down and it provided around 1800 minutes of free build time. We decided to give it a try and so far don’t have any complaints. We have started loving and adoring Azure DevOps and hope it stays this way.
Alright! Enough with the issues, let’s see how we can get the build & deployment going. In this tutorial we are going to make the newer ** Android App Bundle (.aab)** and not .apk to upload to the Google Play Console.
Prerequisites
- Paid Google developer account, an app added to the Play Console.
- Azure DevOps account with an Android repository created
- A jks file to sign the build
Continuous Integration
Continuous Integration is the process of running a build & a test suite every time a change has been pushed on to the repository. Since the Android build do take a substantial amount of time and usually cloud CI/CD tools gets costly with more build time it is better to schedule a the CI pipeline once a week. I will be using a demo project named Android created in my devops account to create ci cd pipelines. The project has a blank activity and support Lollipop 5.0 and above.
Open your project and navigate to Pipelines section on the left panel as in the screenshot below.
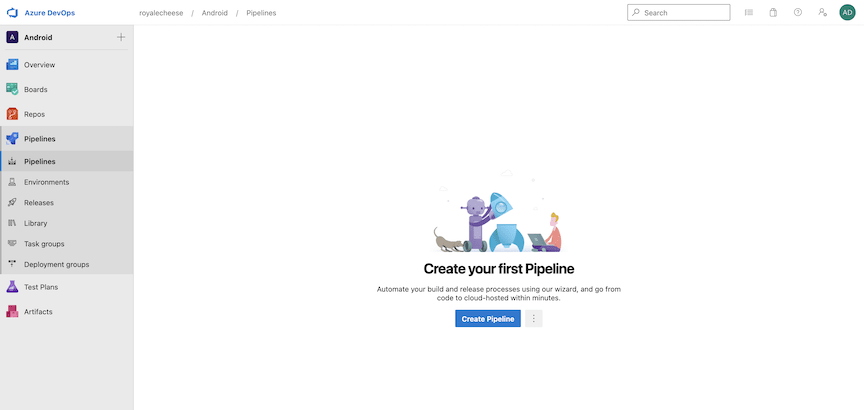
Click on Create Pipeline which will open the below page.

Here we are going to select Use the classic editor which is easier than the other options. The other options will eventually lead to writing yaml files for configuring your pipelines.
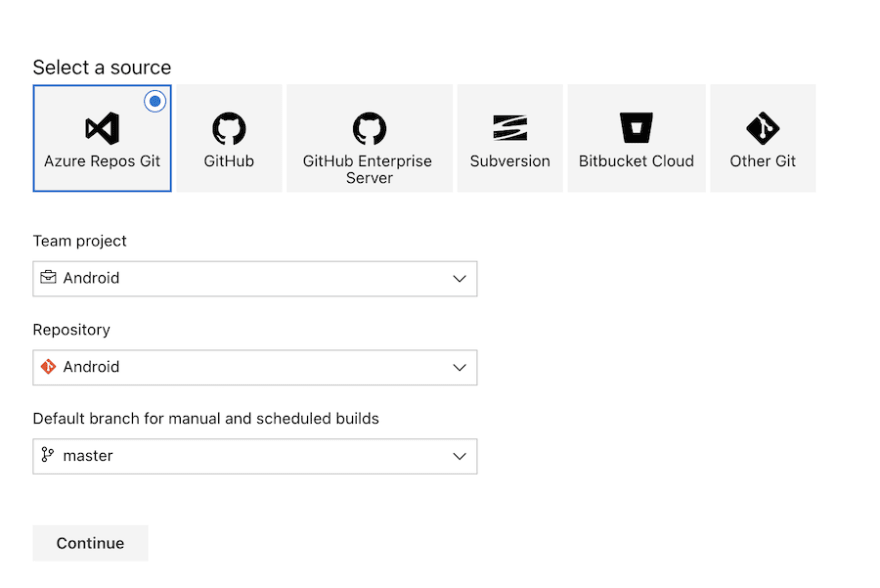
Usually you might have dev, qa and/or uat branches to upload to the internal or beta channels on Google Play Console and you would only want to promote the app to production from your Google Play Console. So select your branch from which you want to run the build and click Continue. For me everything is on the master branch.
Ideally we would be tempted to select the Android template and get on with our life; Don't Do It. Since the Android template doesn't provide a way to generate an .aab file we are not going to use it. Instead select an empty job.

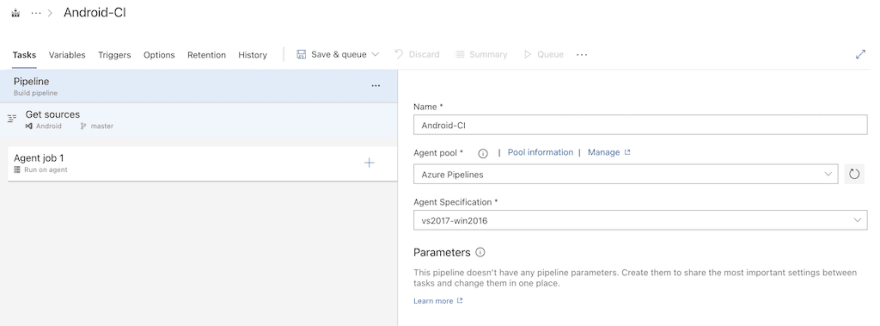
We will now have an empty Agent Job 1 to which we will be adding tasks.
We are going to have to do the following tasks to create our CI pipeline:
- Setting up a jks file
- Unsigned build via gradle
- Generate .aab file
- Create an Artifact
Let's start step-by-step.
Setting up a jks file
If you have uploaded an apk or aab in the past to the play store you must have used a jks file to sign the build. You should the use the same jks file in this step. If you haven't generated a file yet here is a good documentation.
Get a hold of your jks file since we are going to upload it now. Click on + sign besides Agent Job 1 which will open a list of tasks to add. Search for Download secure file.

Click on the Add button to add the task. It will give an error saying Some settings need attention. It is asking for a secure file to be uploaded. Click on the gear/settings icon besides the Secure file field and upload your jks.

We will now provide a name to this file so that it can be referenced from the sign task. Click on the Output Variables drop down and enter KeyStoreFile in the Reference name. This will update the Variables list to reflect the variable name.

Unsigned gradle file
Click on + sign besides Agent Job 1 which will open a list of tasks to add. Search for gradle.

Click on the Add button to add the task. We are going to turn off Publish to Azure Pipeline under JUnit Test Results section. You can keep it on as per the requirement. Secondly we are going to update the task name. Since we are going to make a release build update your task name to buildRelease. If you want to build using a particular flavour you can update your task name accordingly. e.g. if you are using dev as a flavour name update your task name as buildDevRelease.

Generate .aab file
Click on + sign besides Agent Job 1 which will open a list of tasks to add. Search for Command line.

In the Script section clear the field and set the below text.
jarsigner -verbose -sigalg SHA256withRSA -digestalg SHA-256 -keystore $(KeyStoreFile.secureFilePath) -storepass $(StorePassword) -keypass $(KeyPassword) $(system.defaultworkingdirectory)/app/build/outputs/bundle/release/*.aab $(KeyStoreAlias)
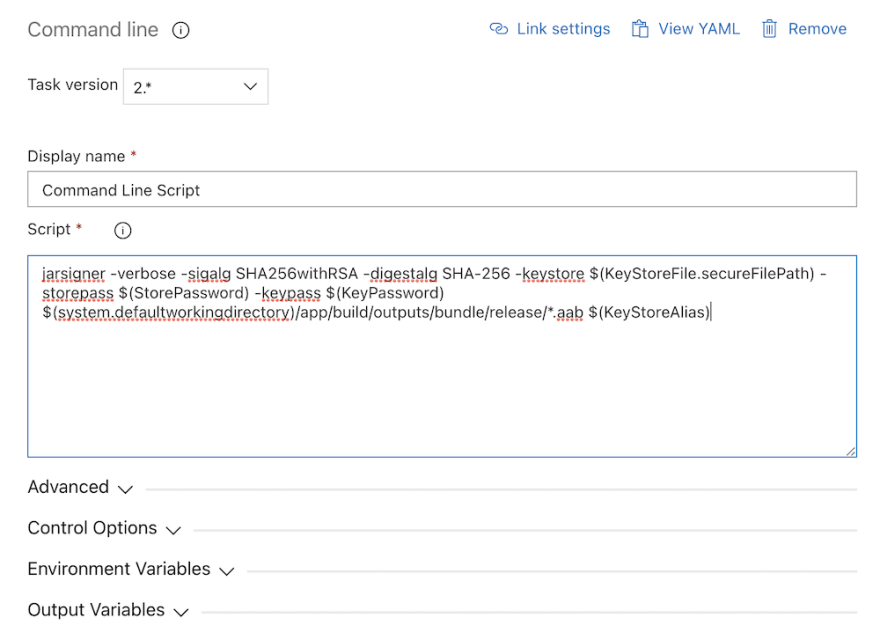
There are 4 variables in the script out of which we have already set KeyStoreFile.secureFilePath. Time to set other 3 variables StorePassword, KeyPassword and KeyStoreAlias. Navigate to the Variables tab on the tap and add the variables and their values as shown in the screenshot below. Once you are sure that the values are correct you can click on the lock icon to secure it. Once you lock and save no one will be able to view it including you, so make sure you still have a backup of the details in case you want to use it somewhere else.

Create an Artifact
The above step creates an .aab file but still needs to be converted in to an artifact so that it is available to the CD pipeline for release.
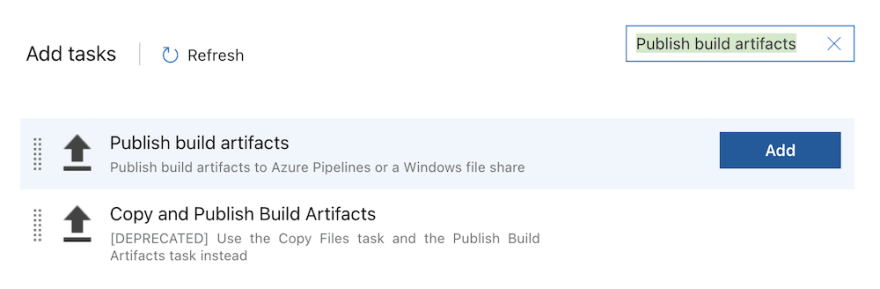
By now you are a pro at adding tasks to Agent Job 1. Add the following two tasks to Agent Job 1: Copy Files & Publish build artifacts. To avoid confusion of which tasks to select I have added the screenshots below.

Now select the Copy Files task and set $(system.defaultworkingdirectory) in the Source Folder field, **/.aab* in the Contents and $(build.artifactstagingdirectory) in the Target Folder.

Click on Save & queue and click Save to save our CI pipeline.
That is it for the Continuous Integration. We will now head on to the Continuous Deployment to find out how to release the generated artifact to the Internal Testing channel on Play Console.
Continuous Deployment
While Continuous Integration deals with creating a build on the machine itself, Continuous Deployment is all about how will you publish that build to the Play Store, App Store, Self-Hosted or Cloud server. In order to deploy to the Play Store you will need a Google Play Console account and an app created in Play Console with the same bundle id.
Next, we will go back to our Azure DevOps project and select Releases under the pipeline section.

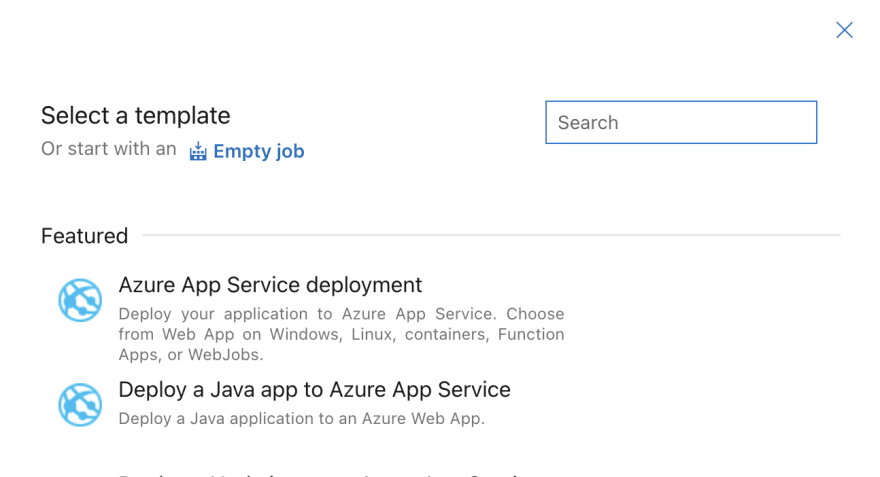
Since there is no pre-defined template for uploading a build to the Play Store, we are going to select an empty job.
We will now enter a stage name for our deployment. You can name it whatever you want. I have kept it as Play Store Deployment

Let's connect the CI artifact with our current CD pipeline. Select Add an artifiact from the artifacts. This will open a dialog on the right to which we will select our artifact. Click the drop down for Source (build pipeline) and you will see Android-CI as one and only option (unless you have added more CI pipelines or altered the CI name).

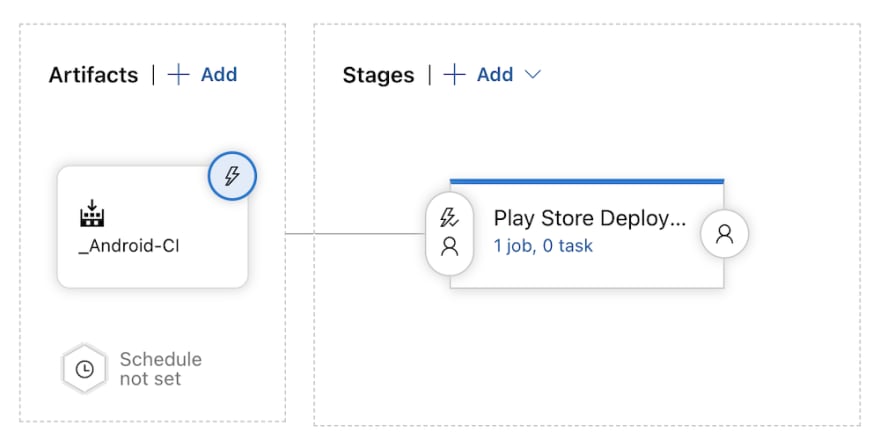
Select the Android-CI and click Add. After adding the artifact our release pipeline will look something like below.
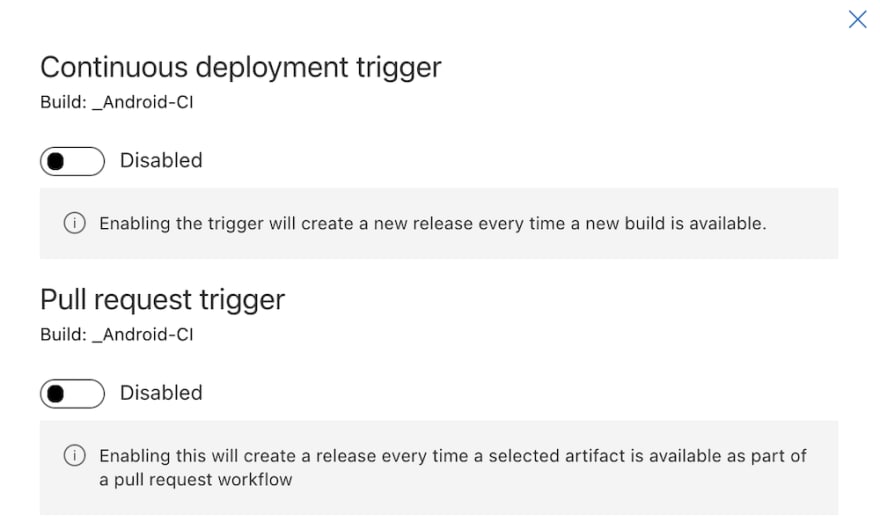
Since the CI & CD pipelines are separate we should setup a way to automatically trigger the CD pipeline when the CI is successful. To achieve that select the lightning icon for the artifact we just added. This will open a dialog on the right which will have a setting to enable/disable the Continuous Deployment trigger. When the build trigger is enabled our release pipeline will automatically start when a new build is completed by our build (CI) pipeline. We are not going to enable the Pull Request trigger.
So far we have setup the pipeline to start automatically when a new build is available in our build pipeline. We have also setup a Play Store Deployment stage to which we will add tasks for the actual deployment in the next section.
Deployment task
Select 1 job 0 task hyperlink which will switch to the Tasks tab. Select the + plus besides the Agent Job to open a list of new tasks. When you search for Google Play. you will see Google Play by Microsoft. Install the item if not already installed. Once installed and when you search for Google App again you will see a few new tasks as below.

Select the task that says Google Play - Release Bundle and click the Add button (Don't select Google Play - Release). Some settings will need attention which we will take care of one-by-one.

Adding a service connection
Firstly we need to create a new service connection. Click on New button besides the Service Connection field. It will upon up a dialog which primarily asks for a Service Account E-mail and a Private Key. We are going to create a service account on Google Play Console to upload the build. This account will also have a private key attached to it for authentication purposes.
To create the account visit Google Play Console and select API Access under Developer Account under Settings.

Click Create new service account button which will pop open a dialog as below.

Click on the link in step 1 which will redirect you to a new tab of Google Cloud Console.
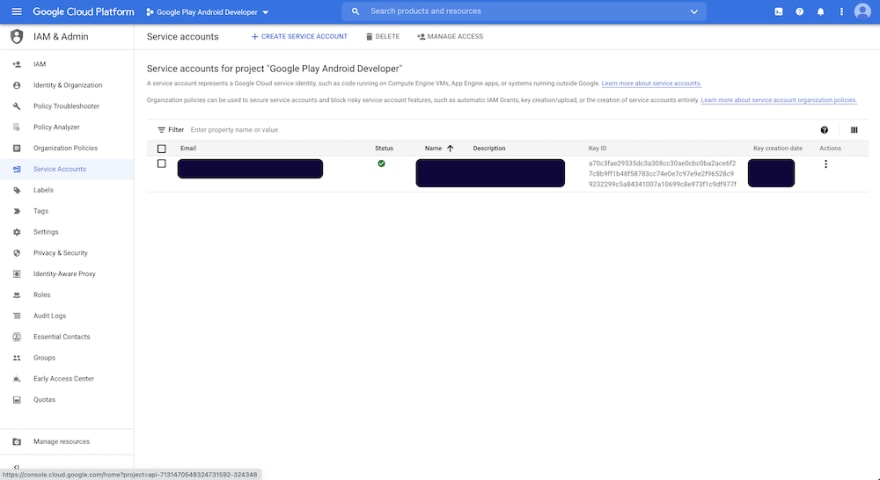
Click + CREATE SERVICE ACCOUNT on the top to start creating a new account. In the newly opened page I have entered Google Play Console in the service account name but it can be whatever you want. Enter the service account description if needed.

Click CREATE to continue. It will then ask for what permissions do you want to allocate for the user. Click the Role drop down and search for Owner. Select the Owner with Full access to all resources.

Click the Continue button and select Done in step 3 since we don't want to add any users or groups who can perform actions as this service account. You will be redirected to the list of keys page. Now select the newly created account and go to the Keys tab. Here we are going to add a new Private Key for our service connection.
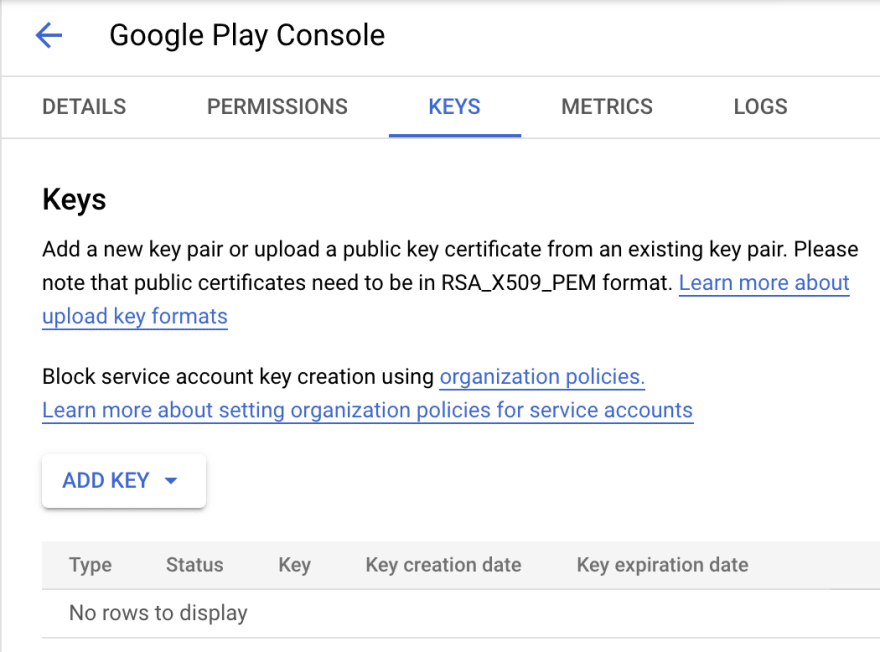
Select Add Key and from the drop down select Create new key. It will show a pop up of which type of key you want to create.

Select the JSON option and click CREATE button. This will ask you to download the file. Store it some place secure we are not going to use the whole file as it is, rather if you open the file it will have a key called private_key.
Before we use this value head back to our google play console's API Access page and click on Done button. It will refresh the list of service accounts with your service account added to the list.

For the newly created service account there will be Grant access button for that row. Click on the button which will open a page to invite the user. Don't get confused with the term invite since Google has probably reused a page to display the same information for the service account.

Click on the Invite User on the bottom right and in the pop up dialog that comes up click on Send Invite. This action will redirect you to Users and Permissions page with the service account added as a new user.
We will now setup the Service Email and the Private key in Azure DevOps. First, copy the email of the newly created service account into the Service Account E-mail in the Azure DevOps tab. Next open the private key json file and copy the value of private_key to Private Key field. Here is what it looks like.
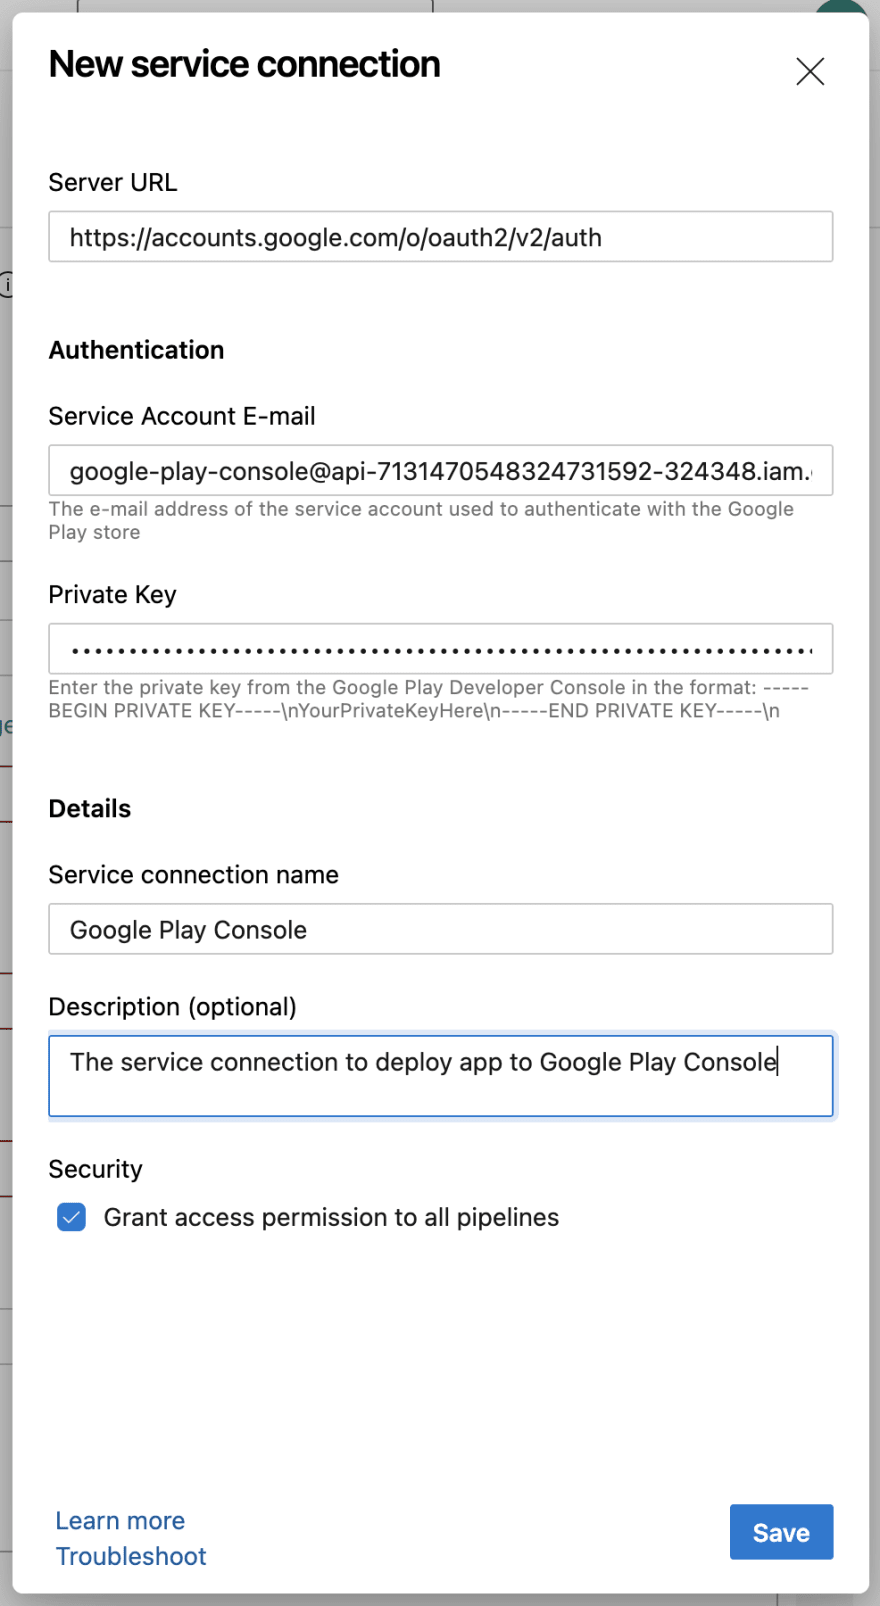
Click on Save which will add the service connection to the Service connection field. Next enter your bundle id in the Application id (com.google.MyApp) field. Finally in the Bundle path you can browse to select the .aab file by clicking the 3 dots on the right. Usually the aab will at location
<your CI name>/drop/app/build/outputs/bundle/release/*.aab
If you haven't run a CI pipeline yet you can set the path as
$(System.DefaultWorkingDirectory)/_Android-CI/drop/app/build/outputs/bundle/release/*.aab
If you are using a flavour prefix release with your flavour name in the path. e.g. the path should be
$(System.DefaultWorkingDirectory)/_Android-CI/drop/app/build/outputs/bundle/devRelease/*.aab
You can select which track you want to launch to from the drop down.

That is all the settings you need. You can now Save the pipeline and run the CI pipeline to build an aab and upload it to the Play Console.
Conclusion
This seems to be a long tutorial but once you are successful in setting up the CI/CD pipelines it would be a huge time saver for your developers. Secondly, it will run on the cloud so there is no need for a physical machine. You can trigger the build from your phone by logging in to Azure DevOps. Hope you have enjoyed this article and hope it helps others in your team.
To learn how to setup CI CD pipeline for iOS you can visit this tutorial.
For any queries you can leave a comment below. Please do follow my page for many more upcoming tutorials.

Top comments (0)