Hey everyone,
I hope you all are fine. Sorry, I was busy writing my book. That's why I was unable to write some posts for my AWS community. But now I am free, and it's time to calibrate my free time with my AWS community. Oh, oops, if you are curious about my book, then just type "Arduino IoT Cloud for Developers" at Amazon and you will find the details.
So coming to the point, on the coming Sunday, which will be the 10th of December 2023, I have my talk at WordCamp Lahore, where I am going to demonstrate how to use AWS for WordPress websites and e-commerce stores. That's why I made plans to write these articles that will help the event audience and lame excuse to talk to my community.
Are you guys ready?
So let's get started with the journey. OK, I have divided the content into three different posts to make the articles easier and more flexible for everyone.
Part 1: In this post (current), we will set up Route 53 for our domain.
Part 2: In the second part, we will setup the AWS Lightsail instance for WordPress.
Part 3: In the third part, we will setup the AWS Lightsail Distribution/Cloud Front and configure the routing records at Route 53.
Before starting the tutorial here, you need to understand why we need Route 53. Actually, Route 53 is a managed DNS service for domain names. You can directly use Lightsail with your custom DNS service provider, but I will recommend you use Route 53 as it will help you in the future if you want to add more AWS services for your organization under the same domain. which will make it easy for everyone to manage all the stuff under one roof.
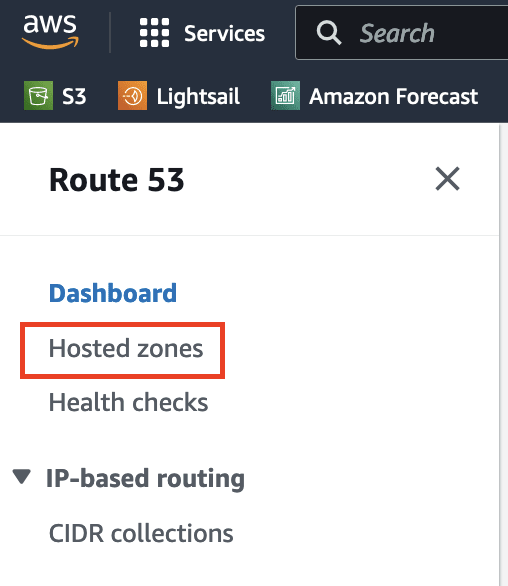
Login to the AWS Console, type Route 53 in the console search, and select the Route 53 service. Now click on the "Hosted Zones," which are marked in the picture and located at the left side bar.
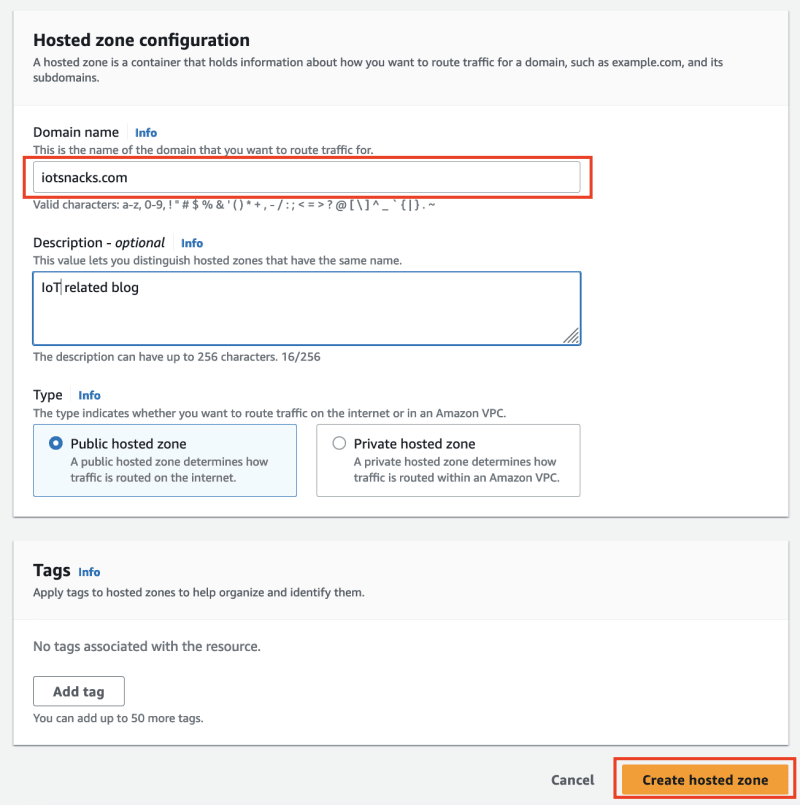
After reaching the Hosted Zones page, click on the "Create hosted zone"

Here you need to provide a domain name, and we are good to go and click on the "Create hosted zone" button.
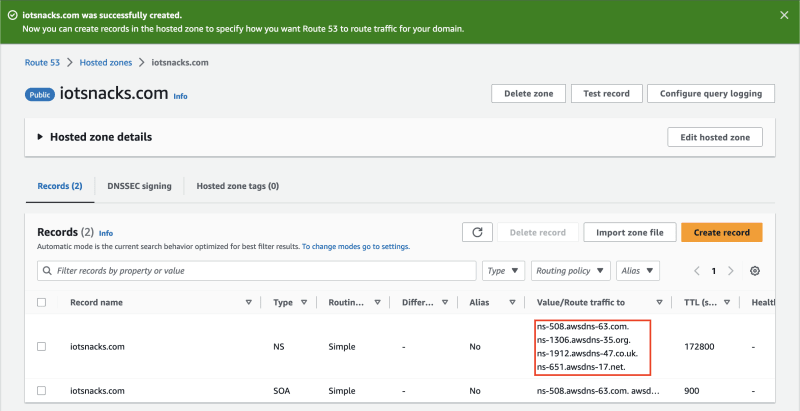
Congratulations! nameservers have been successfully created for your domain, and it is time to point your domain to these nameservers.
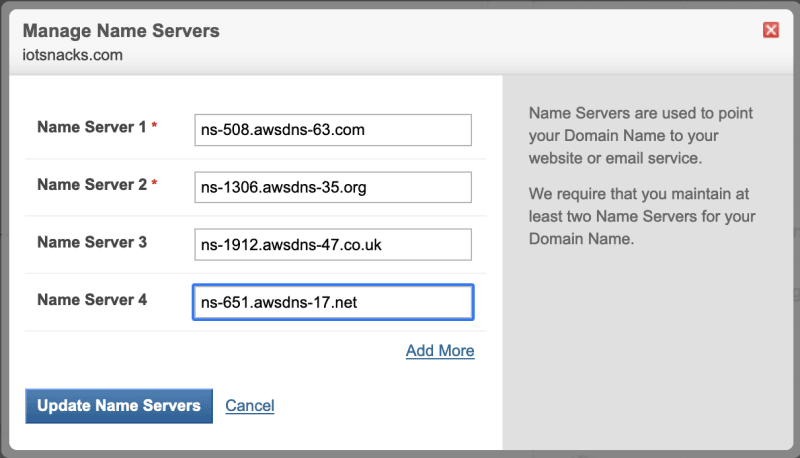
Below, I just updated my domain nameservers to Route 53 nameservers. You guys can update your domain nameservers by logging into your domain registrar panel.
In the next part of the post, we will set up the Lightsail instance for WordPress. Click here to read Part 2.

Top comments (0)