Elastic Compute Cloud is a web service by AWS which provides scalable computing capacity. Here Computing refers to processing power, memory, networking, storage, and other resources. It offers infrastructure as a service(IaaS).
Amazon EC2 eliminates your need to invest in hardware up front, so you can develop and deploy applications faster. It is highly scalable and pay-as-you-go model.
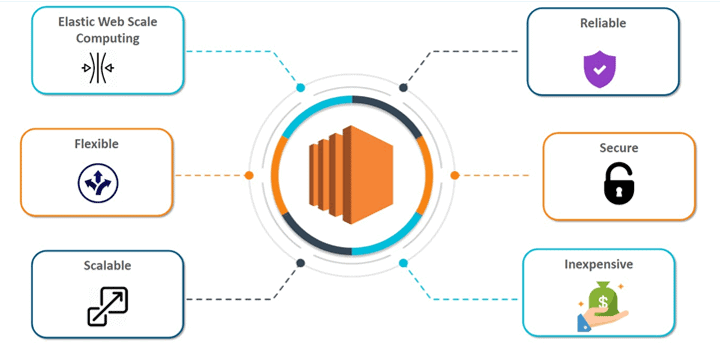
Benefits of EC2 -
Features of EC2 -
Instances - It is a virtual server for running applications on AWS infrastructure.
AMI - Amazon Machine Image is a template that provides information required to launch instances.
Instance types - Amazon EC2 provides a total of 8 instance types which are classified according to their use cases. Instance types comprise varying combinations of CPU, memory, storage and networking capacity to give the client a flexibility to choose the appropriate mix of resources for your applications.
Secure Login - It allow secure login for your instances using key-pairs.
Regions and Availability Zones - It is a physical location around the world where data centers are clustered. Each group of logical data centers are called Availability Zone.
VPCs(Virtual Private Clouds) - It enables you to launch AWS resources into a virtual network that you've defined.
Amazon Machine Image
An Amazon Machine Image (AMI) is a template/prototype that contains a software configuration (for example, an operating system, server, and applications). From an AMI we can launch an instance, which is a copy of the AMI running as a virtual server in the cloud.
It includes EBS, Launch permissions, a block device mapping that specifies the volumes to attach to the instance when it's launched.

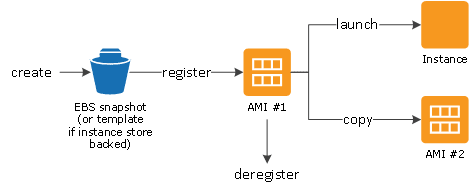
In the below diagram, it shows how we can create and register an AMI which includes EBS snapshot or template that can be used to launch new instance or to create another copy of AMI within same region or different AWS region. If we want any changes then we can deregister AMI and then launch it again.
In simple words AMI is a base image(it can include different OS) using which we can launch instances.
Creating an EC2 Instance - Hands on
Open the Amazon EC2 console at click here
To launch an instance click on ec2

Click on instances to see the instances and their running status

- If there is no instance created you will see this

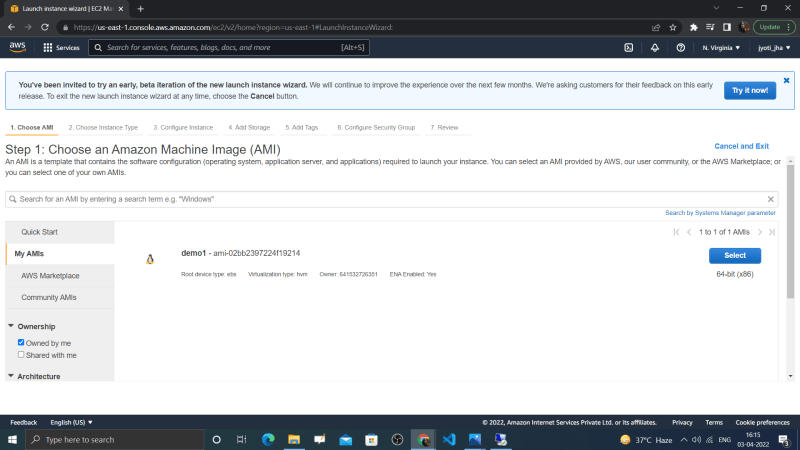
- Click on new Launch instances and then it will show you all the AMIs that are available for different use cases. We will select windows (Microsoft Windows Server 2019 Base - ami-0f9a92942448ac56f) to launch an instance of windows OS.

- On choosing the AMI, you will select the instance type according to your usage of CPU, RAM, Storage, bandwidth, if you are having free tier then only t2.micro is available.

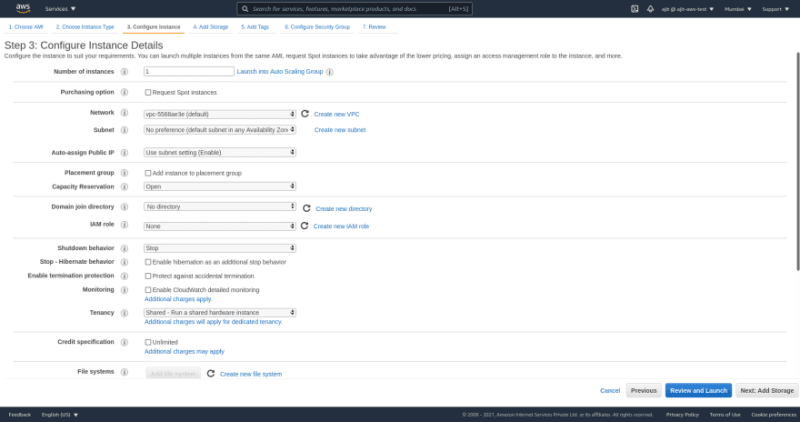
- Then you will choose the number of instances to be created from the AMI which is the configure instance details, this is the part where you can choose if you want to create a VPC.
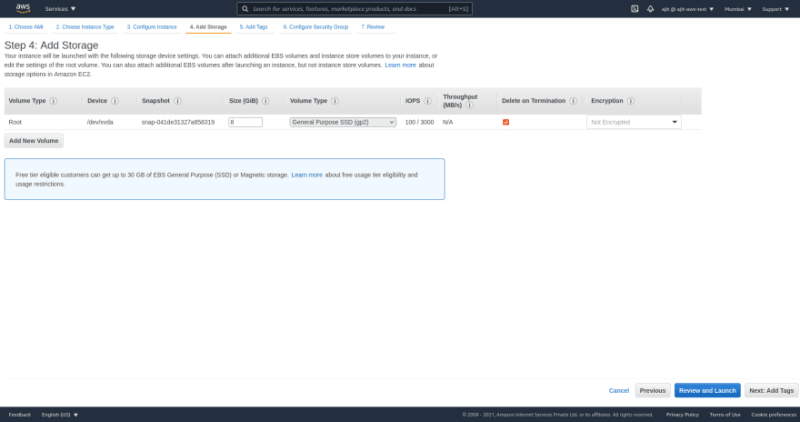
- Add Storage - Here you will decide the size and volume type according to your requirements.
- Add Tags - We can add tags for our convenience it will be easier to identify and manage our instances like name, department, etc.

- Configure Security group - Here we can decide how we want to access our instances, we can choose the protocol type(RDP,HTTP, HTTPS, SSH). RDP stands for Remote Desktop Protocol which will allow us to create remote desktop for windows. We can also decide who can access our instance. As you will see this warning
Warning
Rules with source of 0.0.0.0/0 allow all IP addresses to access your instance. We recommend setting security group rules to allow access from known IP addresses only.

Review and Launch will allow you to check your instance launch details. You can go back to edit changes for each section. Click Launch to assign a key pair to your instance and complete the launch process.
On clicking launch, AWS asks for a key which you download and use to access via RDP download and keep the key safe as it only can be downloaded once. You can also select a previous key if you have a key generated already.

- As you can see your instance is in running state, Select the instance you want to connect and click on connect button

- Download the remote desktop file
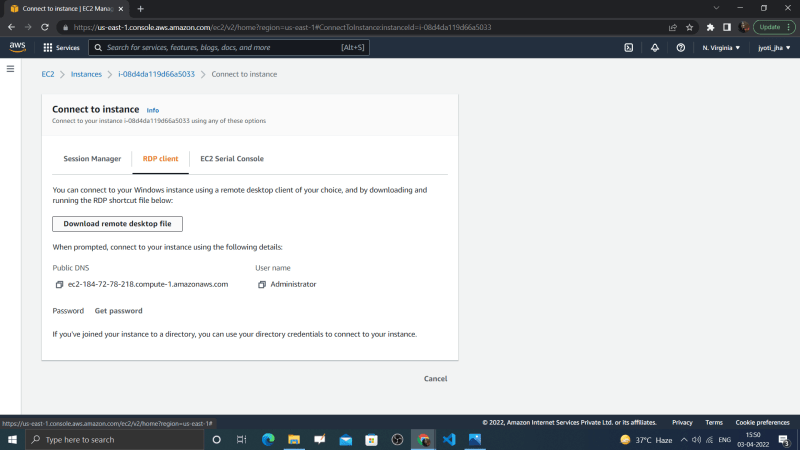
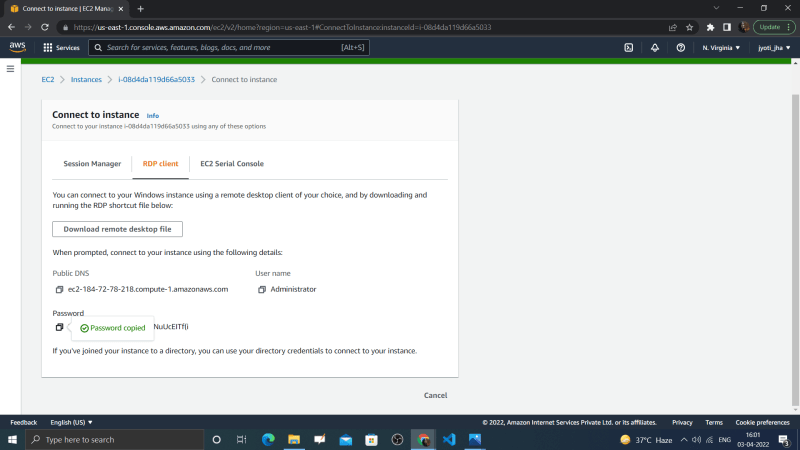
- Click on get password which you will need while login to the Remote desktop. Now upload the download .pem file or the key pair value that you have generated while launching the instance.

- After uploading click on decrypt password and copy the password so that you can use it to login the Remote Desktop Connection.
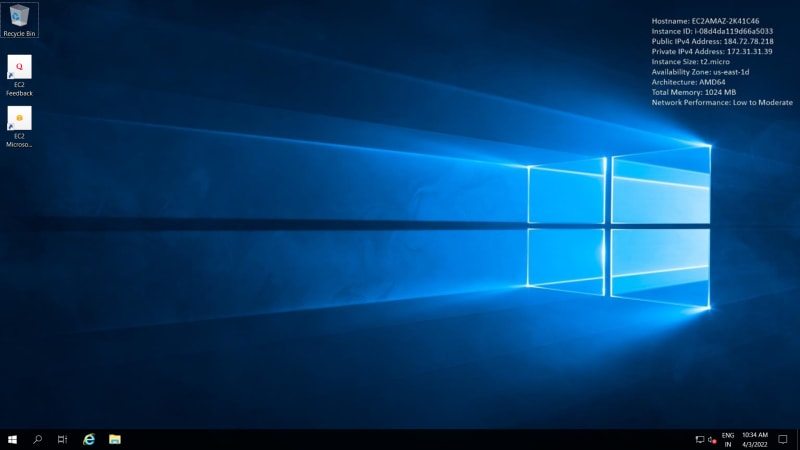
- Go to the downloaded remote desktop file and use the password to login. Here you go with the remote desktop connection, create your application and it is totally independent from your personal computer having it's own property.
Likewise you can create an instance for different AMIs.
- If you want to create a template of your instance then stop the instance from running and then you can create templates of launched instances.
- Likewise, you can create an image of your instance to launch another instance using your saved image(my AMIs) instead of using AMI.
That's all for this blog.
Next I will be creating a blog on Instances and their types.

Latest comments (0)