
Many people are talking about cloud lately. Each one of them has a story or a purpose for why getting into the cloud tech. Mine is pretty clear actually. I should have caught the wind and set a sail to this world. So that I am here with my first real-life project that explains the main logic of cloud technologies.
We have founded a small-scale knowledge platform as a hobby for botanists and nature lovers. It is named as Dijital Botanik, which can be seen on dijitalbotanik.com.
Why to choose AWS Cloud instead of on-premise servers?
As soon as the idea developed itself, we have managed the infrastructure and set everything up on one of the local service provider’s on-premise servers. In the course of time, I have realized that there were more opportunities on cloud side. Also on-prem server costs were getting higher and more. There was no better chance to dive deep into AWS at that moment.
Sure, the opportunities are not the only reasons to learn cloud, but also there are other pros of AWS Cloud. Such as, high-available architecture, flexibility of solutions, cost-effectiveness, native integration with many services and variety of usage. In this blog post, you will notice each side briefly.
AWS Service Costs
The cost of WordPress website on AWS depends on your requirements. If you have a simple website including several static pages, then the hosting cost will be very low. In case of having a website, which has 10K visits per day, then you should calculate the estimation on calculator.aws. You should check the sample prices for hosting per year below. But before that, it should be mentioned that AWS Free Tier benefits are totally useful for the ones who wants to get hands-on experience on cloud. Free Tier is only available from the time you create an AWS account to one year ahead. For more information please check aws.amazon.com/free.
As a simple website owner, my estimated cost for hosting per year is written below. The cost was calculated for the required t2.micro EC2 instance, EBS included.
EC2 Instance = 10.58 USD per month (126.96 USD per year)
S3 Storage (optional) = 0.24 USD per month (2.88 USD per year)
CloudWatch (optional) = 1.50 USD per month (18.00 USD per year)
Route 53 = 0.50 USD per month (6.00 USD per year)
For this scenario, 153.84 USD in total can be applied for 1-year hosting.
Please be informed that the first year cost only contains Route 53 price for the Free Tier users.
Now let’s talk about the business for a bit. This section does not consist of many screenshots for answering “how to” questions, but mostly focuses on “why” questions.
Step 1: Installation, but backup first.
If you migrate your WordPress hosting to AWS Cloud, be sure to backup all necessary files before the change. Otherwise you will probably regret for not to do it.
There is a WordPress plugin, named “All-in-One WP Migration” on the official market. The backup can be downloaded to your local instantly via this plugin. The most important part of the plugin is that there is a file size limit. It means you might delete some unnecessary files if the backup size exceeds the limit.
Configure > Deploy > Review
The main order is like above. First of all, the configuration of the EC2 instance should be done. As already mentioned that t2.micro instances are very suitable for small-scale and Free Tier usage. It is a 1 GB RAM and 1 vCPU server, also including maximum 30GB General Purpose SSD (gp2) EBS service. While launching a virtual machine, you need to select an AMI (Amazon Machine Imagery). And for this blog post, WordPress Certified by Bitnami and Automattic AMI should be chosen. After selecting the required instance type (eg. t2.micro), instance and storage details should be configured respectively. Related sections are shown on the below screenshots.


If there is no need to configure tags or security groups, you can directly Review and Launch the instance after this point.
The system will pop-up a screen for SSH key pair on launching page. It is very important to download and save this particular key pair to directly connect with your instance through SSH later.
Step 2: It is always DNS.
Remember to configure the new DNS settings properly. Otherwise, you will find yourself saying the title at least once.
As soon as the instance launched, there will be an assigned IPv4 address to that instance automatically. You can keep using that IP later, or change it with a static Elastic IP. It would be better to use an Elastic IP in case of an incident.
The changes of DNS-related information can be done on the domain name provider while the system is running on on-premise servers. I have used a local service provider, Turhost, to keep the website up. Therefore the related DNS change should firstly be configured on the provider side where you bought the name server service. Plus it is required to update DNS records according to AWS configuration (NS parameters).

Step 3: Configuration of SSL and first sight.
Each EC2 instance has a unique ID written on the “Instances” section on EC2 page. There are various ways to connect to the instances of course. However, this part covers the SSH option only.
It is supposed to launch the instance with WordPress AMI in the previous step. If so, you can directly connect to your instance with the line of SSH command below.
ssh -i “dijitalbotanik-ssh-key.pem” bitnami@ec2–YourIPv4Address.eu-central-1.compute.amazonaws.com
Sure your instance IP should be written on “YourIPv4Address” parameter. Also the default user is “admin”, but we need to use “bitnami” as a user to connect to WordPress. And remember to use your SSH key pair in the command. There might be a problem with the key pair due to user authorization. The below line of Linux command needs to be run in order to solve that kind of issues. It will change the permissions of this key file.
chmod 600 dijitalbotanik-ssh-key.pem
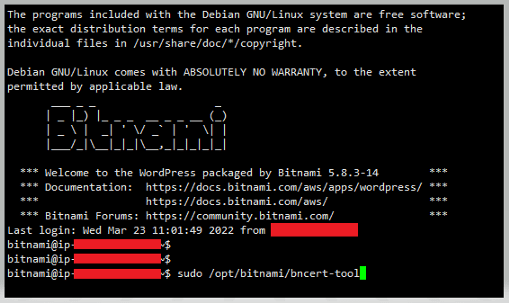
And here it is! You can directly play around your instance with SSH. But first, there is one thing must be configured in the beginning: SSL.
To done it quickly, you need to answer each questions of bncert-tool. This is the point you are setting HTTP/HTTPS and www/non-www redirections.
sudo /opt/bitnami/bncert-tool
Step 4: Importing WordPress backup.
If the previous parts are totally okay, then the last thing to do is importing the WordPress backup again. You can login to WordPress portal with the same URL as before. The users and other settings you stored are the same. So there should not be a login issue.
After logged in to the admin dashboard, All-in-One WP Migration tool required to be installed again. The entire website migrated to another infrastructure, so there is not any old extensions or tools. Afterwards, the backup file should be imported. This will take a while, but be sure that export and import file size limits in case of an unwanted issue.
Final thoughts
As mentioned earlier, there are lots of advantages of cloud. And such migrations are the best way to learn and practice this technology.
Dijital Botanik has been migrated on February 17. There is not any incident or major alarm since then. So far so good. I highly recommend every interested person to step in.
Thanks for reading! You can check out and share Dijital Botanik with your circle!

dijitalbotanik.com
All content is archived on bugrakilic.github.io. You can reach me on Twitter, LinkedIn or via email. Thanks!

Top comments (0)