This project leverages various tools and technologies to optimize Continuous Integration (CI) using AWS Code Build and AWS Code Pipeline:
AWS Code Build: A fully managed build service that compiles source code, runs tests, and generates software packages, automating the entire build process.
AWS Code Pipeline: A CI/CD service that automates software release workflows, managing tasks such as source retrieval, building, testing, and deployment.
GitHub: A version control repository used to store and manage source code, triggering automated builds in AWS Code Build whenever code is committed.
Docker: A containerization platform that packages applications and their dependencies into isolated environments, ensuring consistent performance across different systems.
Docker Hub: A cloud-based repository for storing Docker container images utilized by the application.
AWS Systems Manager: Uses Parameter Store to securely store and manage Docker Hub credentials, ensuring sensitive data remains centralized and protected.
Steps to Get Started:
Fork the GitHub Repository: Clone the repository used for this project. Click here to see GitHub repo to be cloned
Create an IAM Role and Assign Permissions
*Configure AWS Systems Manager Parameter Store *: Aws parameter store offers a robust solution that helps secure our docker credential
Set up AWS Code Build
Setup AWS Code Pipeline
Create IAM Role and Assign Permission
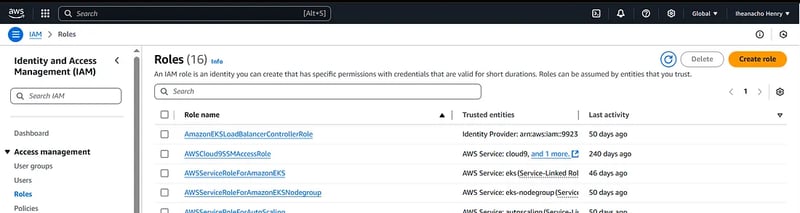
Open the IAM console by searching for “IAM” in the AWS services menu and configuring the necessary permissions.

In the left-hand menu, click on Roles under Access Management.
Click on the Create role button.
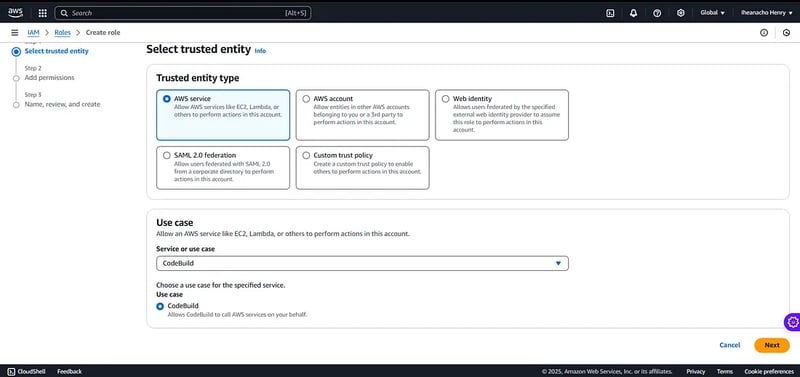
Select the service that will use this role, and choose AWS service. Then under use case, select the drop-down button and select AWS code build and hit next below.
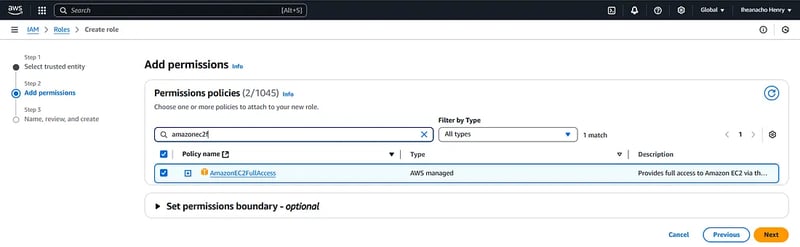
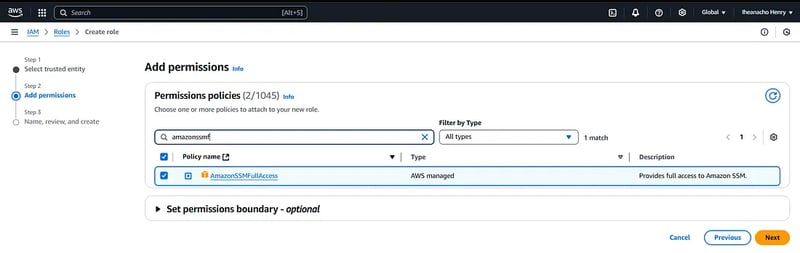
Search for and select the following policies to attach to the role: AmazonEC2FullAccess and AmazonSSMFullAccess. Then click on the next button.
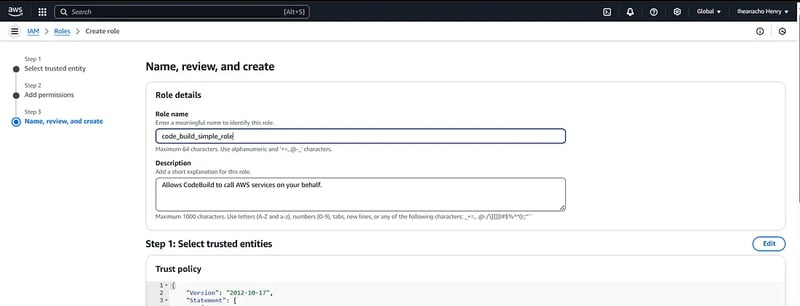
Provide a name and description for the role. Optionally, add tags to your IAM role for better organization and management.
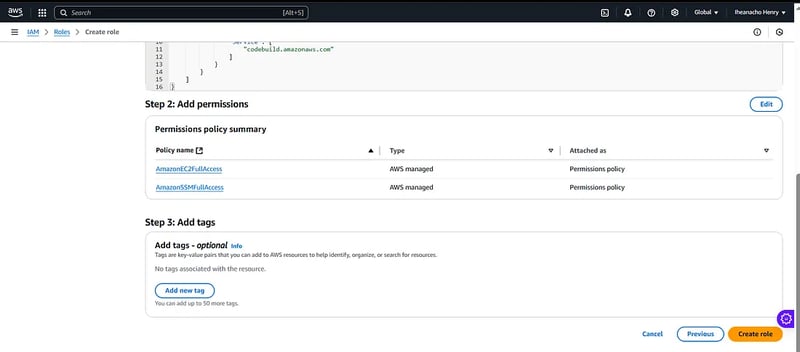
Review everything then click on Create role.
Configure AWS Systems Manager Parameter Store
To securely manage and access Docker credentials (such as username, password, and registry URL) within AWS environments, the AWS Systems Manager Parameter Store offers a robust solution. By storing these sensitive values as Secure String parameters, AWS ensures they are encrypted using AWS Key Management Service (KMS), safeguarding the confidentiality and integrity of your credentials.
This setup is essential for integrating Docker-based workflows with AWS services like CodeBuild and CodePipeline, enabling seamless and secure Continuous Integration and Continuous Delivery (CI/CD) pipelines.
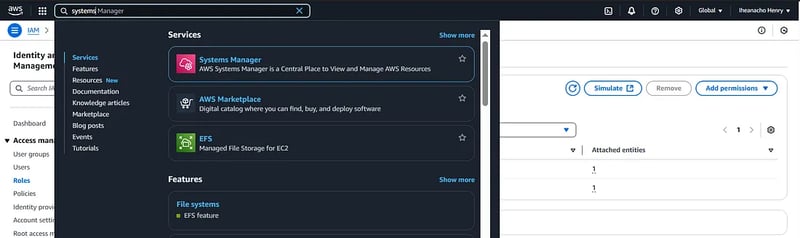
Navigate to the AWS Systems Manager Console.
Click on Parameter Store in the left-hand menu.
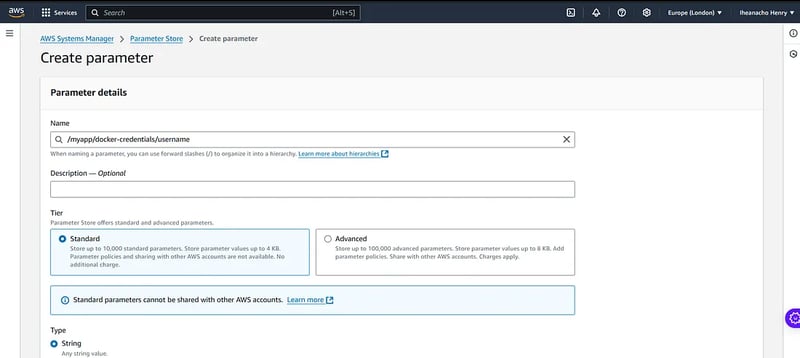
Click on the Create parameter button.

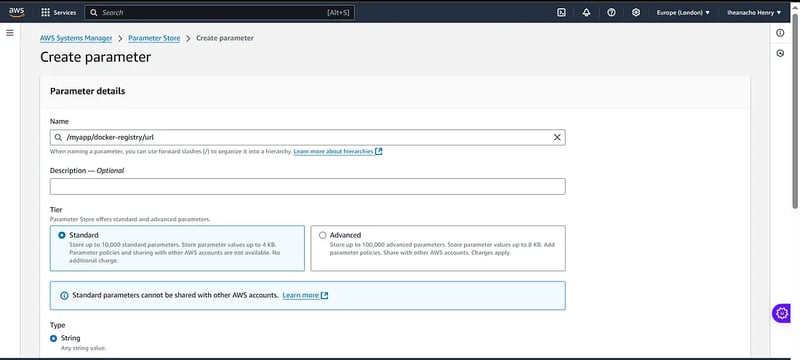
Enter Parameter Details:
Name: Enter a name for your parameter. Let’s start with the Docker registry URL. Use the following name: /myapp/docker-registry/url.
Description (Optional): Optionally, describe to document the purpose of the parameter.
Tier: For the tier, select Standard.
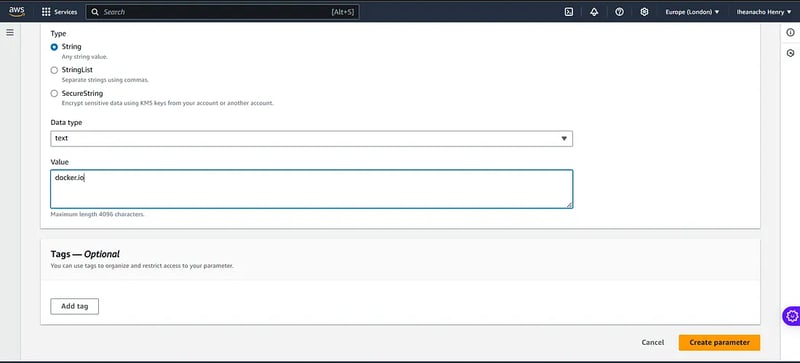
Type: For the type, select String.
Data Type: Under Data Type, select Text.
Value: For the value, enter docker.io. Finally, click Create Parameter.
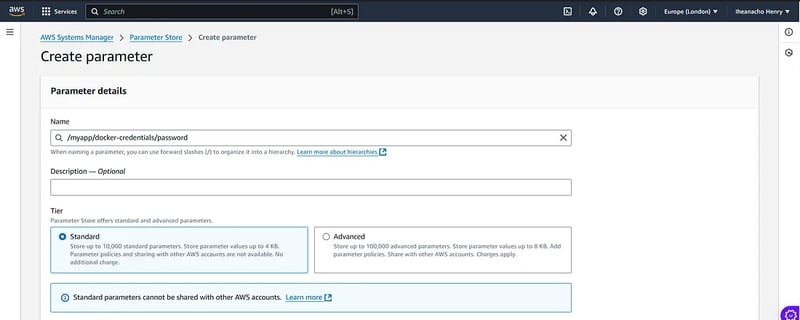
Now, let’s create the parameter for the Docker registry password:
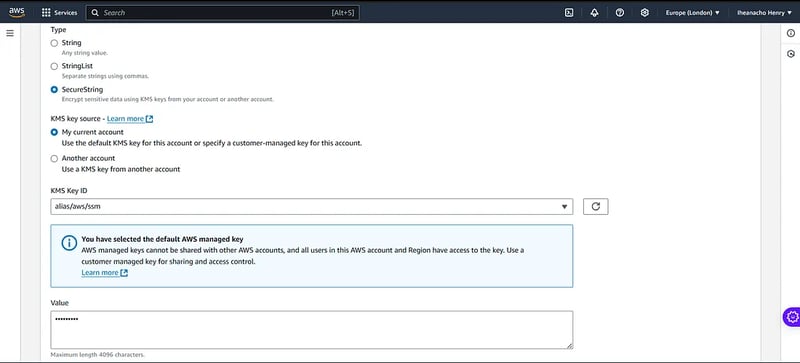
Name: Enter /myapp/docker-credentials/password as the name.
Type: Choose Secure String as the parameter type. This ensures that the parameter value is encrypted using an AWS Key Management Service (KMS) key for secure storage.
KMS Key (Optional): Optionally, you can select a specific AWS KMS key to encrypt the parameter value. If none is specified, AWS will use the default KMS key.
Value: Enter your Docker registry password. Finally, click Create Parameter to save.
Use the same process to create the parameter for the Docker registry username:
Name: Enter /myapp/docker-credentials/username.
Type: For the type, select Text.
Finally, click Create Parameter.
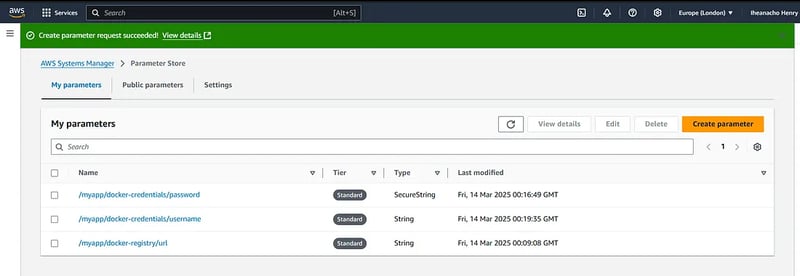
You should now have three parameters in total as shown below
/myapp/docker-registry/url
/myapp/docker-credentials/password
/myapp/docker-credentials/username
These Docker credentials are securely stored in AWS Systems Manager Parameter Store.
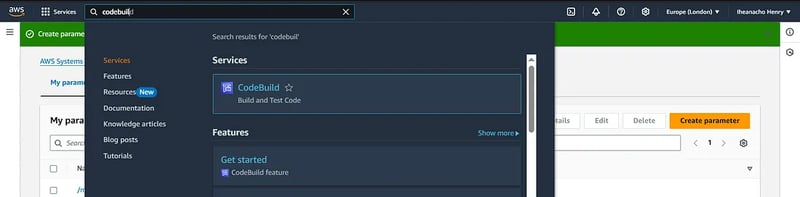
AWS CodeBuild
Navigate to the AWS CodeBuild Console.
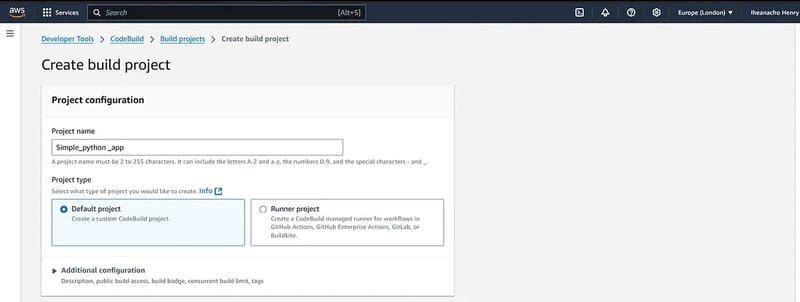
Navigate to build project on the left side of the console and click on Create Project.

Enter a name for your CodeBuild project.
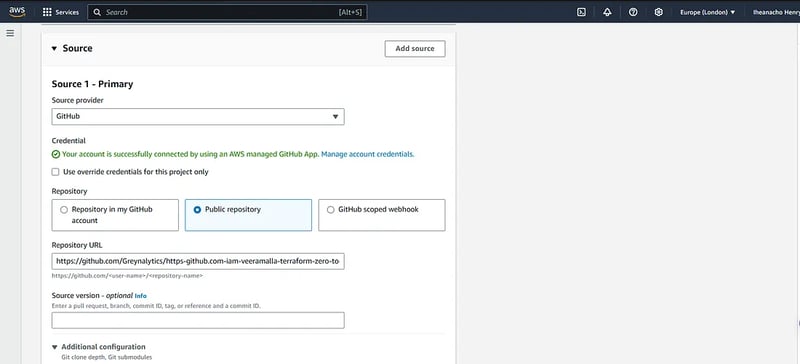
Choose the Source Provider where your build will fetch the code. This could be one of the following:
AWS CodeCommit, GitHub, Bitbucket, and Amazon S3 Next, specify the branch, tag, or revision ID that represents the source code version you want to build.
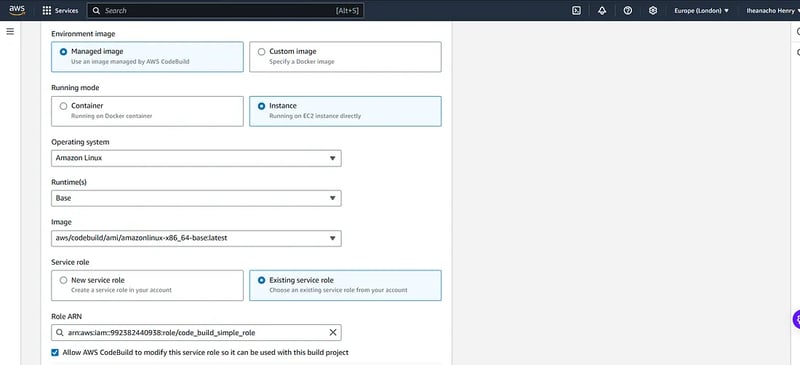
Define the Build Environment by specifying the following details:
Choose the operating system for your build environment (e.g., Amazon Linux, Ubuntu,).Docker Configuration (if applicable): If your build requires Docker, configure it by selecting the appropriate Docker image or enabling Docker in your environment.
Choose an Existing Service Role: From the dropdown menu, select the IAM role you created in the previous steps.
This role should have the necessary permissions, such as SSM Full Access, to access the Docker credentials stored in AWS Systems Manager, as well as any other required resources.
Enable Privileged Mode: Ensure you check the Privileged box to allow the build environment to run Docker commands or perform elevated tasks.
Choose between the following options for your build specification:
Buildspec File in Source Repository: Select this option if your buildspec.yml file is stored within your source code repository. The build process will reference this file directly.
Alternatively, you can provide the buildspec directly in the console by entering the required build
commands and configurations manually.
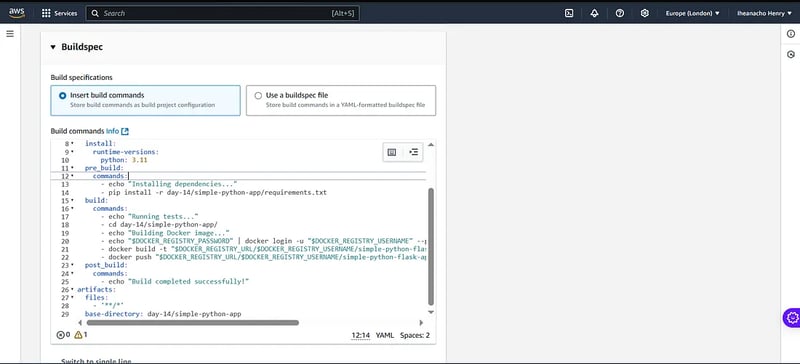
paste in the following build command in the buildspec editor section.
version: 0.2
env:
  parameter-store:
    DOCKER_REGISTRY_USERNAME: /myapp/docker-credentials/username
    DOCKER_REGISTRY_PASSWORD: /myapp/docker-credentials/password
    DOCKER_REGISTRY_URL: /myapp/docker-registry/url
phases:
  install:
    runtime-versions:
      python: 3.11
  pre_build:
    commands:
      - echo "Installing dependencies..."
      - pip install -r day-14/simple-python-app/requirements.txt
  build:
    commands:
      - echo "Running tests..."
      - cd day-14/simple-python-app/
      - echo "Building Docker image..."
      - echo "$DOCKER_REGISTRY_PASSWORD" | docker login -u "$DOCKER_REGISTRY_USERNAME" --password-stdin "$DOCKER_REGISTRY_URL"
      - docker build -t "$DOCKER_REGISTRY_URL/$DOCKER_REGISTRY_USERNAME/simple-python-flask-app:latest" .
      - docker push "$DOCKER_REGISTRY_URL/$DOCKER_REGISTRY_USERNAME/simple-python-flask-app:latest"
  post_build:
    commands:
      - echo "Build completed successfully!"
artifacts:
  files:
    - '**/*'
  base-directory: day-14/simple-python-app
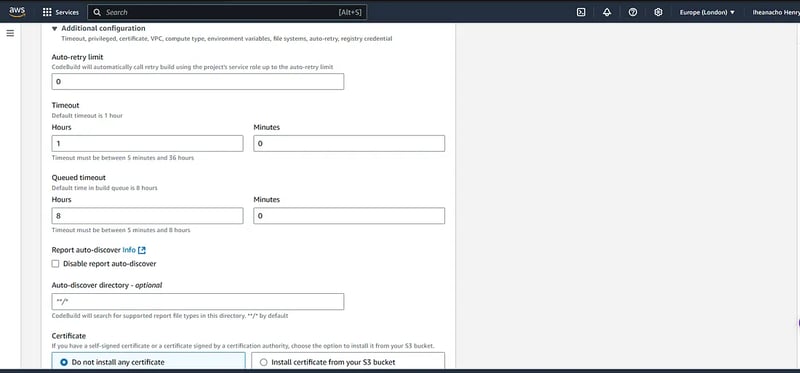
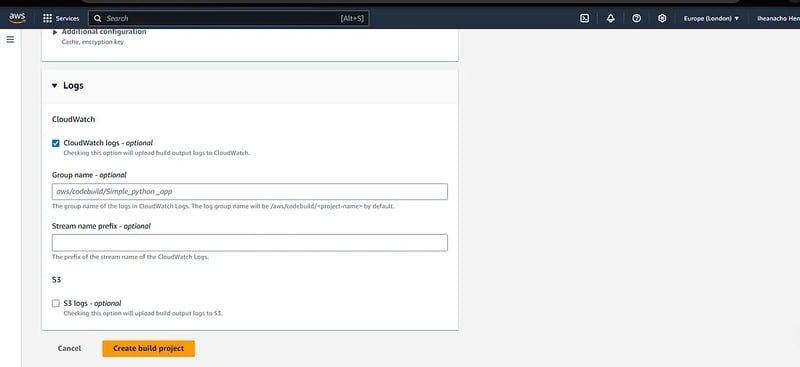
Configure where build logs should be stored for monitoring and troubleshooting.
Specify the build artifacts to be generated and where they should be stored (e.g., S3 bucket).
Review the configuration details to ensure accuracy. Click on Create Build Project to create the CodeBuild project.
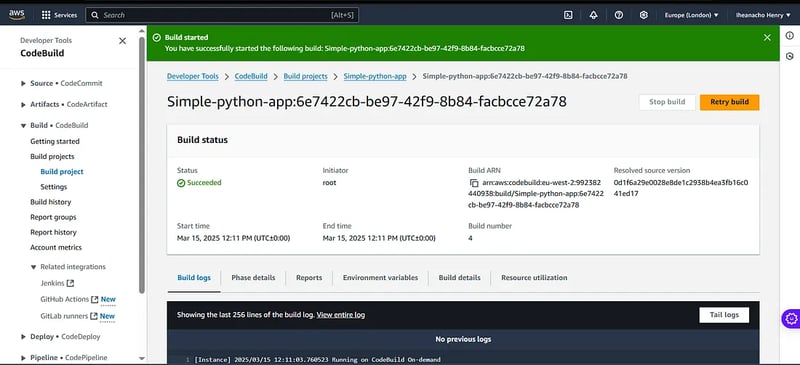
The Code Build project has now been created and is ready to execute builds based on the specified configuration.

Click Start Build to initiate the build process.
Use the Build Details section to monitor the status of the build.
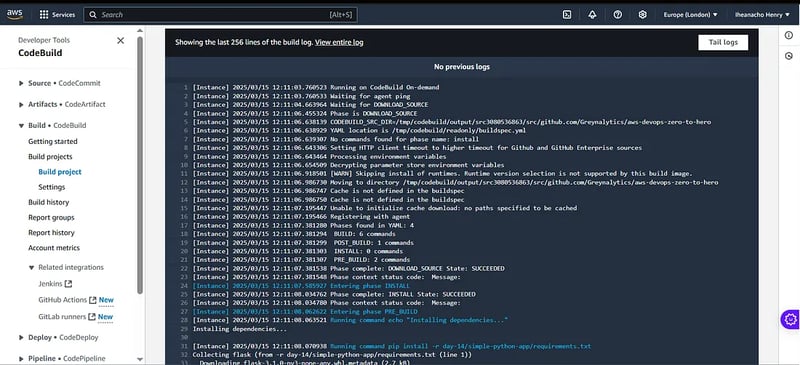
By following these steps, you can create an AWS CodeBuild project that integrates with your source code repository and is configured to build Docker images or execute other build tasks according to your project requirements.
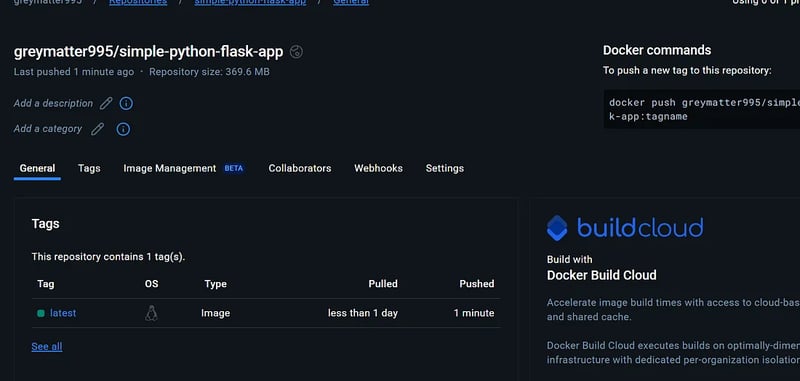
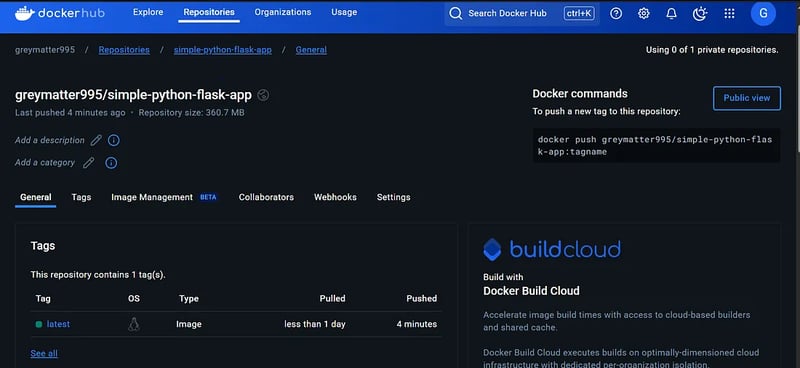
Verify the Image Was Pushed to the Docker Hub
Log in: Sign in to your Docker Hub account.
Navigate to Repository: Go to the repository where you expected the image to be pushed.
Verify Image: Check that the image is present, has the correct tag, and was pushed recently.
By following these steps, you can confirm that your Docker image was successfully pushed to Docker Hub, ensuring that the build process is completed correctly
AWS Code pipeline
In this step, we will set up an AWS CodePipeline to automate the continuous integration (CI) process. AWS CodePipeline is a CI/CD service that automates the steps required to release software changes. It orchestrates various stages, including source retrieval, building, testing, and deployment.
For this article, we will focus on the CI aspect, ensuring that every code change is automatically built and tested.
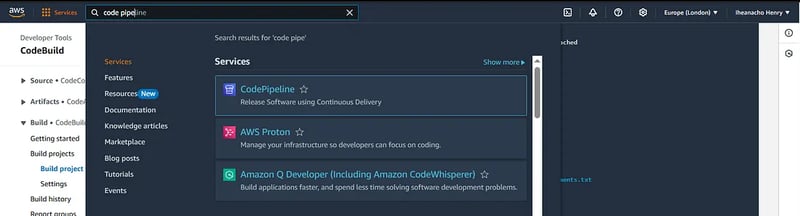
Open the AWS Management Console.
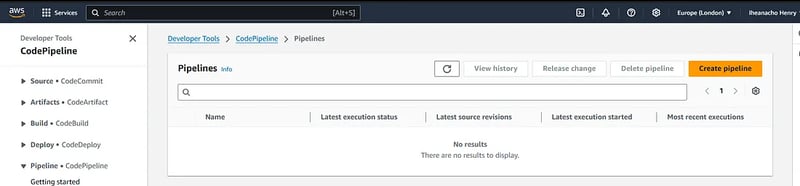
Navigate to the AWS Code Pipeline service.
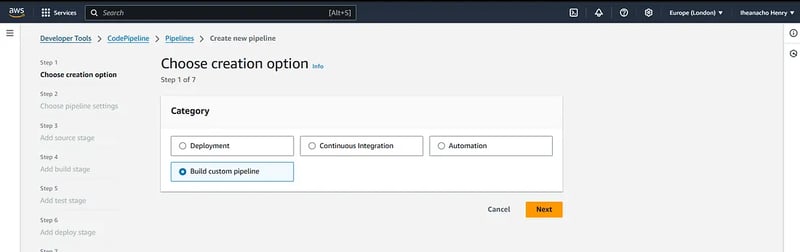
Click on Create Pipeline to start the pipeline creation wizard.
For creation options select Build Custom Pipeline then click the next button.
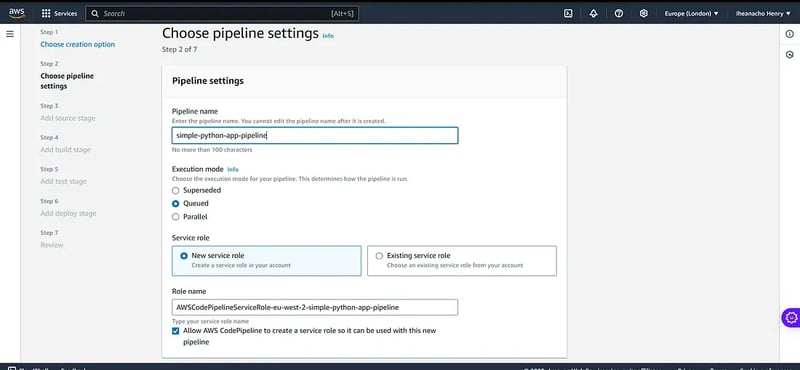
Give your pipeline a name.
New Service Role: Select this option to allow AWS to create a new IAM role for the pipeline.
Existing Service Role: Choose this option if you have a preconfigured IAM role that you want to use for the pipeline
Click Next below
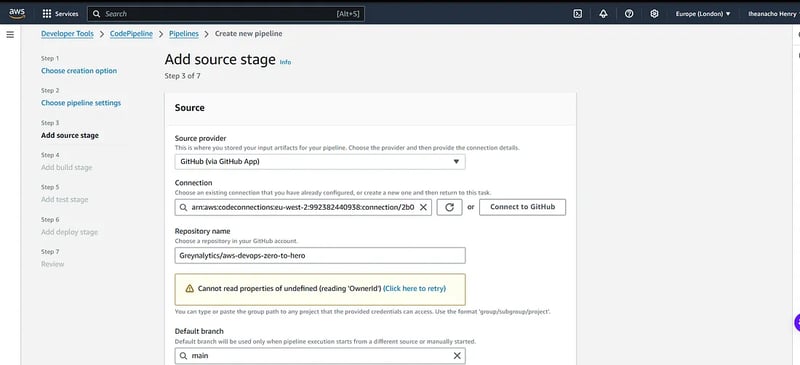
Source Provider: Select the source provider for your code repository (e.g., AWS CodeCommit, GitHub, Bitbucket).
Repository Name: Enter the name of your repository. Specify the branch you want to use (e.g., main or master).
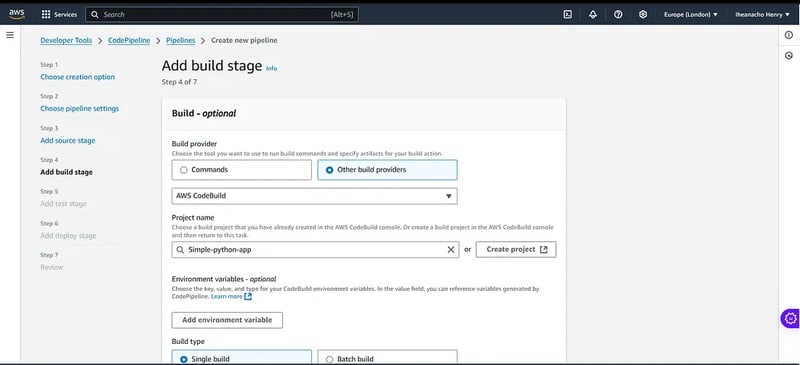
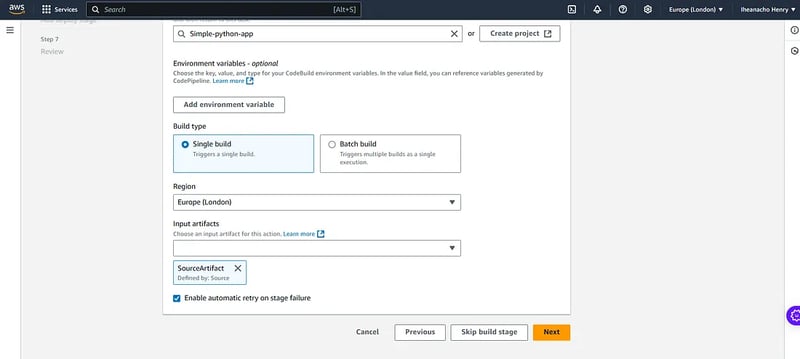
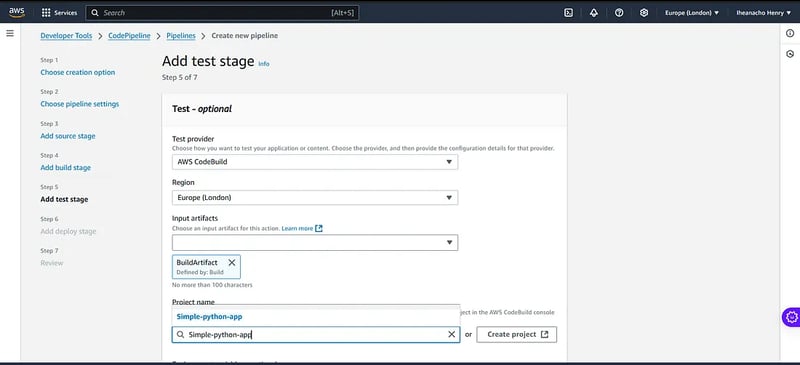
Choose AWS CodeBuild: Select AWS CodeBuild as the build provider.
Choose the region where your CodeBuild project is located.
Select the CodeBuild project you created earlier. Add any necessary environment variables required for the build process.
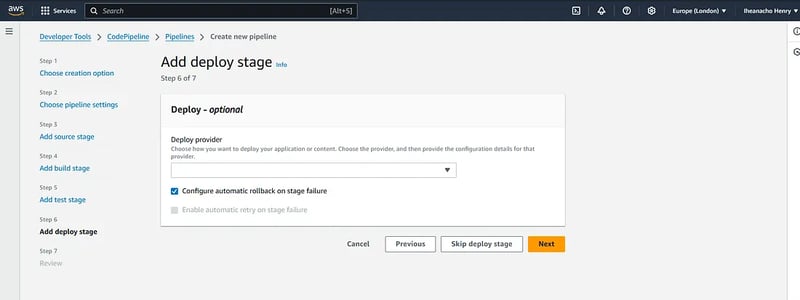
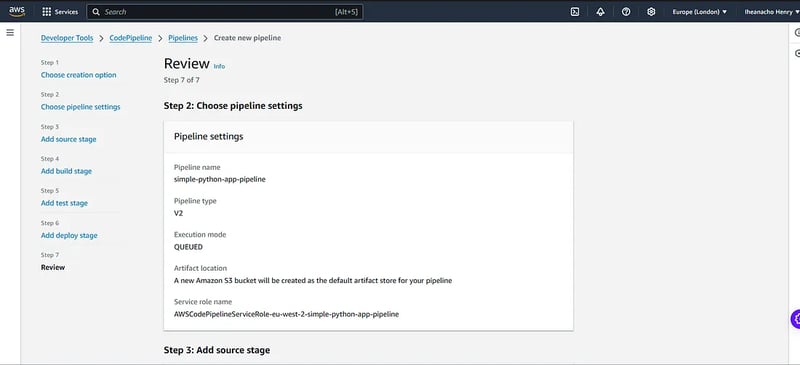
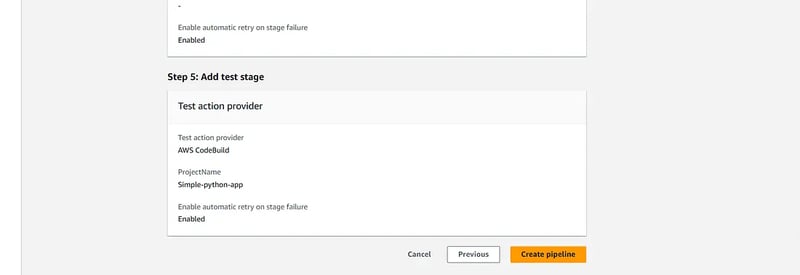
Skip Code Deploy: Since this guide focuses on Continuous Integration (CI), you may not need a deploy stage at this time. Review all the stages and configurations to ensure everything is set up correctly.
Scroll down and click on Create Pipelineto to finalize and create your CodePipeline.
Trigger the Pipeline: Manually trigger the pipeline by clicking Release Change, or make code changes to your GitHub repository to automatically initiate the pipeline. Monitor the progress of the pipeline in the CodePipeline console. Each stage (Source, Build) will display its status.
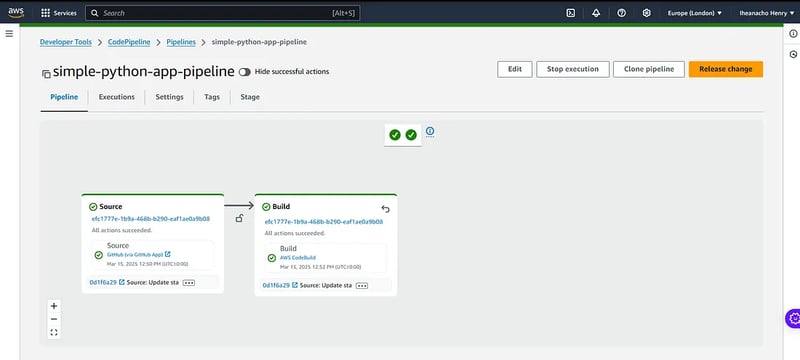
Our CodePipeline has been successfully set up, eliminating the need for manual build triggers. Now, the entire process is orchestrated by CodePipeline, which automatically detects changes in our GitHub repository. Once changes are detected, CodePipeline triggers the CodeBuild service to compile and build the code. Additionally, if you check Docker Hub, you’ll find that the latest image has been automatically pushed to our repository

Conclusion
In this project, we successfully set up a Continuous Integration (CI) pipeline using AWS CodePipeline and AWS CodeBuild, with secure Docker credential management handled through AWS Systems Manager. We leveraged AWS developer tools, including CodeBuild and CodePipeline, to streamline the process.
Stay tuned for the second part of this project.

Top comments (0)