
Follow me on Twitter, happy to take your suggestions on topics or improvements /Chris
It becomes more and more common today to develop as well as deliver your application in one or more containers. One of the most common containerization software’s out there is Docker. It’s a great tool making it very easy to create image as well as containers and also monitor the same. Wouldn’t it be great if we could continue using Docker and bring our app to the cloud
Azure Container Instances enables deployment of Docker containers onto Azure infrastructure without provisioning any virtual machines or adopting a higher-level service.
In this article we will do the following:
- Explain , why we might need the cloud
- Clone application source code from GitHub, let’s focus more on getting an application to the cloud rather than writing it from scratch, so let’s take an existing application
- Create a container image from application source, this is a pre-step we need to do
- Test the image in a local Docker environment, it’s always a good practice to try out your software locally before we push it to the cloud
- Create a container registry, this is a thing on Azure that store Docker images
- Deploy our application, we can create a container instance from one of our images in the Container Registry
Resources
In case you've missed the links we are mentioning in this article. Here they are:
Installing Azure CLI
The Azure CLI is an amazing tool for your terminal
that lets you do almost everything you can do in a Portalaz container command
Theaz containercommand can be called in a lot of different ways. Uncover those ways in the above link.Learn module for Container Registry
This module will teach you all about the Container RegistryDocker tutorial series
This is a 5 part series that takes you through container from the very beginning to learning to master Docker Compose and multiple services. Great if you need to learn Docker or brush up on your knowledge.Docker extension for VS Code
My awesome colleague Shayne Boyer explains how you can use an extension for VS Code and do what I just am about to show you without leaving VS Code
The promise of the cloud
Using container technology allows us to split up our application into many services. On top of that, it offers a secure and reliable option to deliver the application. Now comes the next question, where do we deliver it to, On-premise or maybe to the Cloud?
This article is about delivering your application to the Cloud so of course, we are a little bit biased. Let me explain in a few short points why we think the Cloud is a great place for your app:
- Cost effective , it’s cost-effective in the sense that you only pay for what you actually use. In an On-Premise scenario, you might pay for servers, CPU, memory and so on for what you assume will be an increase in users and usage. That’s a lot of cash expenditure and you need to ask yourself do I want to spend the time to find out what I need and also spend time and money to upgrade it over time?
- Scalable , The Cloud makes it possible to easily scale horizontally and vertically, adding a new worker, not a problem, adding more servers, databases again not a problem and something we can make happen in minutes
- Elastic , imagine you are an e-commerce company with sudden surges of users in the holidays or Black Friday and so on. The Cloud can dynamically add the extra resources you need to cope with that and of course, it can dynamically scale down when the number of users drops to a more normal rate
Prerequisites
You will need the following installed
- Docker, there are different guides here for Linux, Mac, and Windows, Check out the official docs to see how to install Docker for your OS
- Azure CLI install
Clone the application
We said initially we would focus more on how to deploy rather than write an application, so for that reason, we are going to use a pre-made application that you can pull down from here:
git clone https://github.com/Azure-Samples/aci-helloworld.git
Looking at it you can see that it is a very simple Node.js application running Express. There are two files of interest in the Repository for the sake of our demonstration:
- app/index.js, this is the entry point to the application
-
Dockerfile, this is the
Dockerfilethat will help us build our application into an Image and finally will become a Container with the application within it.
Let's have a look at the app/index.js file:
// app.js

const express = require('express');
const morgan = require('morgan');
const app = express();

app.use(morgan('combined'));

app.get('/', (req, res) => { res.sendFile(__dirname + '/index.html') });

var listener = app.listen(process.env.PORT || 80, function() {
 console.log('listening on port ' + listener.address().port);
});
Above we can see that it’s pretty standard Node.js + Express application, no magic here.
Lets now have a look at the Dockerfile:
// Dockerfile

FROM node:8.9.3-alpine

RUN mkdir -p /usr/src/app

COPY ./app/ /usr/src/app/

WORKDIR /usr/src/app

RUN npm install

CMD node /usr/src/app/index.js
It does the following:
-
Selects an OS image , In short, we base the OS on Ubuntu and a release called alpine, that has
Node.jspre-installed. - Creates a directory , with the following command mkdir -p /usr/src/app
- Copies all the files , from ./app/ to /usr/src/app/
- Sets working directory , to /usr/src/app
- Installs our node dependencies , using npm install
- Starts our app , using node /usr/src/app/index.js
All in all, this is a pretty standard looking Dockerfile.
Build the image
Building an image is pre-step we need to do before our application can actually be started. The build step will pull in the OS image we ask for, download dependent library, copy our app code in its place and so on.
We can use the docker build command to build an image. The exact command we will need to use is:
docker build ./aci-helloworld -t aci-tutorial-app
The above command looks for the Dockerfile in the directory /aci-helloworld and creates an image called aci-tutorial-app. Running the command should yield an output looking like this:
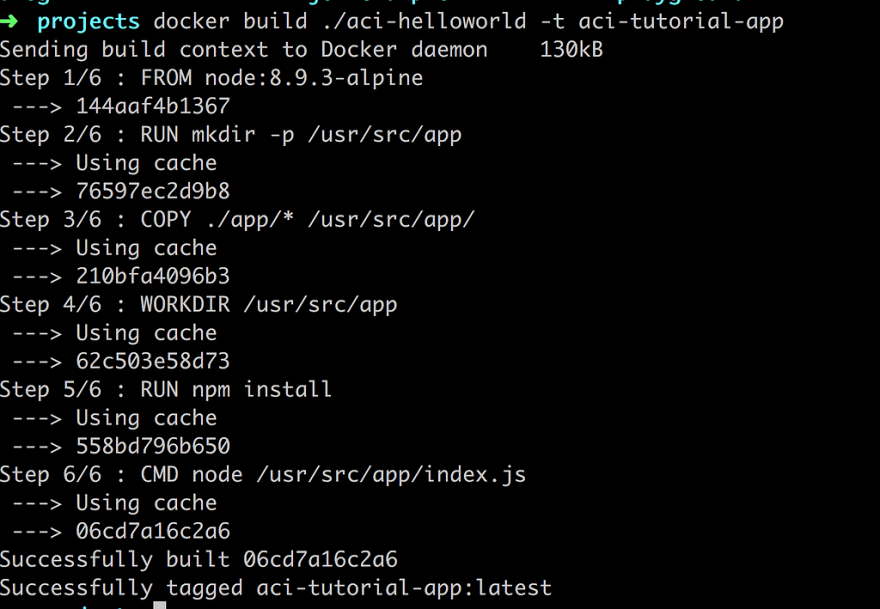
Above it’s showing us all the steps that we set up in the Dockerfile like:
- bringing down the node:8.9.3-alpine OS image, copying our application
- setting a WORKDIR,
- installing the dependencies by running NPM INSTALL,
- starting up the app with CMD node /user/scr/app/index.js
We can see our created image if we run the following command:
docker images

Ok, then, we have an image which means we are ready for our next step; testing it locally.
Test the image, by instantiating a container
Now that we have an image, we can create a container from it, using docker run. The full command looks like the following:
docker run -d -p 8080:80 aci-tutorial-app
Let’s look at the arguments:
- -d, this tells the container to run in the background
- -p, this allows us to map ports, the argument value should be interpreted like this [external port]:[containers internal port]
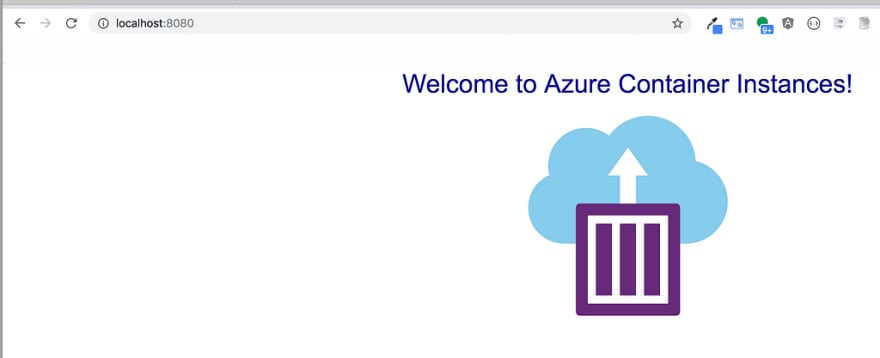
We can see that the external port is 8080, which means we can navigate to
http://localhost:8080 to ensure our application works.
This is the image we get, so I would say our container is working:
With the following command we can list all the running containers:
docker ps It should present the following result:

We don’t want a container running and using up resources so let’s shut it down. We want to run the command docker kill to shut down the container, however, that command needs an argument, it needs the container id. Remember when we run docker ps? The first column was our container id. We don't need the full id though, it suffices with the 4 first characters. So let's kick off our command
docker kill [container id, 4 first characters] docker ps // it should be an empty list That’s it. Here is a screen dump of the commands we just ran:

Create a container registry
Azure Container Registry is your private Docker registry in Azure.
We need Docker, Docker Engine and Azure CLI for this to work. We have already installed Docker at this point so let's see how we can install Azure CLI:
https://docs.microsoft.com/en-us/cli/azure/install-azure-cli?view=azure-cli-latest
Before we can create said registry we will need a Resource Group. A Resource Group is a logical container in which we need to place all our resources like Applications, Databases and now Resource Group. Everything in the same group can easily and securely communicate.
so let’s create that first:
az group create --name [your name for a resource group] --location westeurope
Once this Resource Group is created we can go back to creating our Container Registry.
The command looks like the following:
az acr create --resource-group [your name for your resource group] --name [your name for a registry] --sku Basic --admin-enabled true
Let’s break it down a bit.
az acr create
Is the actual command to create our Container Registry. Then we need some arguments:
- --resource-group , this takes an argument that should be our newly created Resource Group
- --name , this is the name we give our registry, e.g containerregistry for example
- --sku , this is the price plan, we opt for the cheapest one called Basic
You should get an output looking like the following:
{
 "adminUserEnabled": true,
 "creationDate": "2018-03-16T21:54:47.297875+00:00",
 "id": "/subscriptions/<Subscription ID>/resourceGroups/myResourceGroup/providers/Microsoft.ContainerRegistry/registries/mycontainerregistry082",
 "location": "eastus",
**"loginServer": "[your container registry name].azurecr.io"**,
**"name": "containerregistry"** ,
 "provisioningState": "Succeeded",
 "resourceGroup": "myResourceGroup",
 "sku": { "name": "Basic", "tier": "Basic" },
 "status": null,
 "storageAccount": null,
 "tags": {},
 "type": "Microsoft.ContainerRegistry/registries"
}
The important part is getting a provisionState back with value Succeededed.
Log in to our registry
We need to log in to our registry before we can push docker images to it. So let’s log in:
az acr login --name [name of container registry]
That should tell you Login Succeeded if all is well
Your output should look something like this:

Above you can see that I opted to call the registry chriscontainerregistry put you would have to replace that with your chosen name.
Tag container image
To push a container image to a private registry like Azure Container Registry, you must first tag the image with the full name of the registry's login server.
That’s something you can find out by looking at the JSON output when you created your registry. You are looking for a property called "loginServer". It has the format of [your registry name].azurecr.io. In my case, that would be chriscontainerregistry.azurecr.io.
So either you remember the name of loginServer, from when we created our container registry or you can always retrieve the loginServer later by calling this command:
az acr show --name [container registry name] --query loginService --output table
This will give us the loginServer name printed in our terminal. Of course [container registry name] would in our case be the value chriscontainerregistry, so adjust accordingly depending on your chosen name.
Let’s now head back to Docker. We need to Tag the aci-tutorial-app image with the loginServer of your container registry.
We tag it with the following command:
docker tag aci-tutorial-app /aci-tutorial-app:v1
Let’s break it down.
- aci-tutorial-app , this is the name of our image, run docker image if you want to verify that
- /aci-tutorial-app:v1 , this will tag the image in way so it’s possible to push to our container registry. One note though, :v1 this is a version number but we can easily call this LATEST or today's date, the point is to have a system so you know if you want to use a specific image
So the correct command in our case, using the correct values would be:
docker tag aci-tutorial-app [container registry name].azurecr.io/aci-tutorial-app:v1
Run docker images command at this point, to verify it was correctly created. It should look something like this:

Push the image to the repository
Now we can actually push the image to the repository. We do so by executing the following command:
docker push /aci-tutorial-app:v1
and with all the correct values in place, it would be:
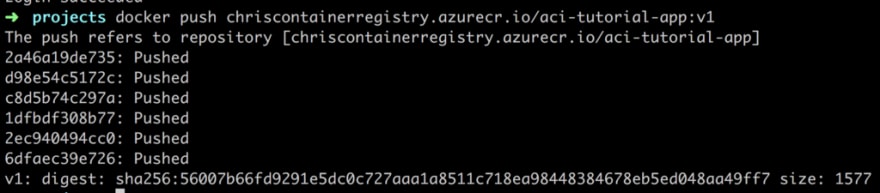
docker push chriscontainerregistry.azurecr.io/aci-tutorial-app:v1
You may need to log in first, in which case you run the following command:
az acr login — name [container registry name]
Carrying out the docker push should render the following result:
List images in the repository
Ok, so now we actually want to see what images we have in there, spoiler there should be the one we just uploaded ;)
We can run the following command:
az acr repository list --name --output table
Using the correct value for acrName it would look like this:
az acr repository list --name [name of container registry] --output table
There it is, our only pushed image :)

Deploy the application
Now that we have our image in the repository, we can tell the repository to create a container from our image and thereby deploy our application.
To run our deploy command we first need a little info, namely the following:
- login server, we can run the following command for that one
az acr show --name --query loginServer
- username and password, for that we run this command:
az acr credential show --name --query "passwords[0].value"
This will return the password
Ok, now we come to the deploy command, that might look a little bit intimidating:
az container create --resource-group myResourceGroup --name aci-tutorial-app --image <acrLoginServer>/aci-tutorial-app:v1 --cpu 1 --memory 1 --registry-login-server <acrLoginServer> --registry-username <acrName> --registry-password <acrPassword> --dns-name-label <aciDnsLabel> --ports 80
There are a ton of ways to create a container, if you are interested in other ways, have a look at this link az container create
Check progress and logs
If it takes a while to deploy you can check status meanwhile, with this command:
az container show --resource-group [name or resource group] --name aci-tutorial-app --query instanceView.state
After a very long JSON response back, look for provisioningState: Succeded, if you have that you are good.
Let’s have a look at our container with the following command:
az container show --resource-group [name of resource group] --name aci-tutorial-app --query ipAddress.fqdn
We can see the logs from the app by running:
az container logs --resource-group [name of resource group] --name aci-tutorial-app
This will tell us running on port 80
Visit the deployed app
Once it’s deployed we can visit the app on the --dns-name-label value, like so:


Summary
We set out to deploy an app. This time we wanted to deploy a docker container. For that, we first needed to create a docker image. So we created one using docker build.
Then we realized we needed an Container Registry, cause it was from there we would deploy our Image, i.e instantiate a docker Container and deploy it.
To make it end up in the Container Registry we first needed to tag it with the loginServer name, after that we pushed the tagged image.
Lastly, we told the Container Registry to create a container from our image and deploy it. Once deployment was done we could go to our browser and verify the app was there, success :))
It wasn’t that many steps really. I mean let’s say our app consisted of 3 other services. We would only need to build an image for each, tag it, push, and create a container.

Oldest comments (0)