In this tutorial, we will create a registration page using UserCreationForm, but first let’s start by creating a Django app named users.
If you already know how to create Django apps, you can skip the posts below. If not, you can learn how to create apps by reading them.
Chapter 1: Django Web App Setup – (Django Takeoff Series)
Chapter 2: Django Basics – (Django Takeoff Series)
After doing this, create the following folders and files:
— Create a folder named templates inside the users folder (folder created when creating the app named users)
— Create a folder named users inside the templates folder.
— Create two HTML files; one named login.html and the other named register.html.
— Create a forms.py file inside the main users app folder (file only used in part 2 of this tutorial)
— Create a superuser (we will use the admin panel towards the end of the tutorial)
This is how the directory tree should look like after creating all folders and files mentioned above.
After you have created all files, open urls.py and add the following code.
urls.py
#path -> users/urls.py

from django.urls import path
from .import views

app_name = 'users'

urlpatterns = [

    path('login/', views.login_page, name='login'),
    path('register/', views.register_page, name='register'),
]

#baltlogs.com
I added paths to the login and register pages, so that they can be found by Django.
The views for both pages have also been specified in the code, yet we still need to create them.
This tutorial will focus on the register page. This is because we need a way for users to register first before logging in.
Open views.py and add the following code.
views.py
#path -> users/views.py

from django.shortcuts import render

def login_page(request):

    return render(request, 'users/login.html')

def register_page(request):

    return render(request, 'users/register.html')

#baltlogs.com
In the code above, the views for the login and register pages are rendering the respective HTML templates for each page as of now.
Next, add some code to the HTML templates that were created earlier on.
Open login.html and register.html and add the following code respectively.
Login.html
<!-- path -> users/templates/users/login.html -->

<h1>Login</h1>

<!-- baltlogs.com -->
-- Title added to login template
Register.html
<!-- path -> users/templates/users/register.html -->

<h1>Register</h1>

<!-- baltlogs.com -->
— Title added to register template
Double check that the HTML templates are being rendered correctly before moving on.
Go to to check that the register page is being displayed. Do the same for the login page.
After verifying the templates are being rendered correctly, open views.py and add the following code.
views.py
#path -> users/views.py

from django.shortcuts import render, redirect
from django.contrib.auth.forms import UserCreationForm

def login_page(request):

    return render(request, 'users/login.html')

def register_page(request):
    if request.method != 'POST':
        form = UserCreationForm()
    else:
        form = UserCreationForm(request.POST)
        if form.is_valid():
            form.save()
            return redirect('users:login')

    context = {'form': form}

    return render(request, 'users/register.html', context)

#batlogs.com
There are a few things happening here, let’s summarize them.
— At the top, we have imported the redirect function in addition to render which we imported earlier.
— The render function takes care of displaying the HTML templates. While the redirect function, as the name suggests, redirects users to different pages of the website, in this case, the login page.
— Login view is kept the same for now.
— For the register view, let’s break down the code in small parts.
if request.method != ‘POST’:
form = UserCreationForm()
Since we are submitting data to be processed, we use a POST request. However, in the snippet of code above, we are saying that if request.method is not equal (!=) to POST, then render an empty form.
The reasoning behind writing it like that is that to access the form in the first place, users will always request data from the server first. When users access the page where the form is located, they are actually requesting the server to show them that page and that is a GET request.
else:
form = UserCreationForm(request.POST)
if form.is_valid():
form.save()
return redirect(‘users:login’)
context = {‘form’: form}
return render(request, ‘users/register.html’, context)
Users will see an empty form on the screen. Once they fill out the form, and submit it, the code above will run.
There is a lot to unpack here, so let’s break it down.
form = UserCreationForm(request.POST)
Creates a variable named form which will hold the data being submitted by the user. We also have request.POST which takes care of the data.
if form.is_valid():
Helps us check if the information in the form is valid by using the is_valid() method. This method checks many things such as that all required fields are filled out, the max length for the fields, data matching field types, and more.
form.save()
If the statement proves to be true, only then use .save() to write the data from the form to the database.
return redirect(‘users:login’)
This one is self-explanatory. After all the information in the form has been checked and submitted, proceed to redirect users to the login page. You can redirect users to any other page if you prefer.
context = {‘form’: form}
return render(request, ‘users/register.html’, context)
Saves the form’s data in a dictionary and passes it to the register template.
Open register.html and add the code below.
Register.html
<!-- path -> users/templates/users/register.html -->

<h1>Register</h1>

<form method="POST" action="">
    {% csrf_token %}
    {{form.as_p}}

    <input type="submit" name="Create User">
</form>

<!-- baltlogs.com -->
— The method is a POST because users will be submitting data.
— The csrf (Cross Site Request Forgeries) token is a security measure which needs to be included for any POST form.
–The built-in template tag form already takes care of displaying the labels and input fields for the form. We have added as_p to the form in order to display the form fields wrapped in paragraph tags.
Save changes and issue the command python manage.py runserver in the terminal window.
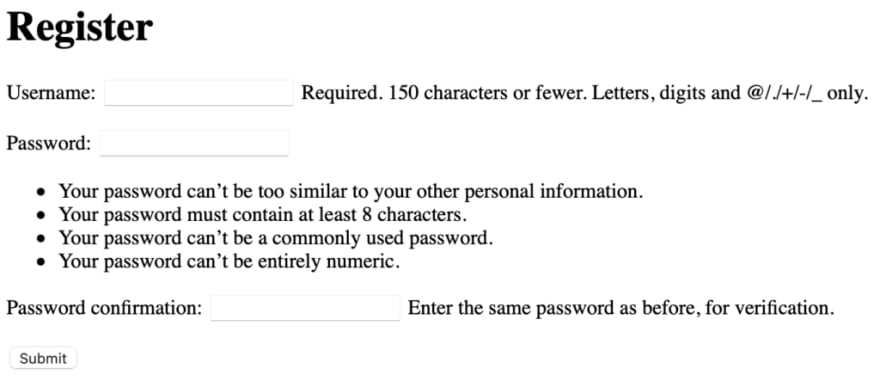
Go to the register page. You should see a form similar to the one shown below.
Try creating some users. After you press the submit button, you should be redirected to the login page.
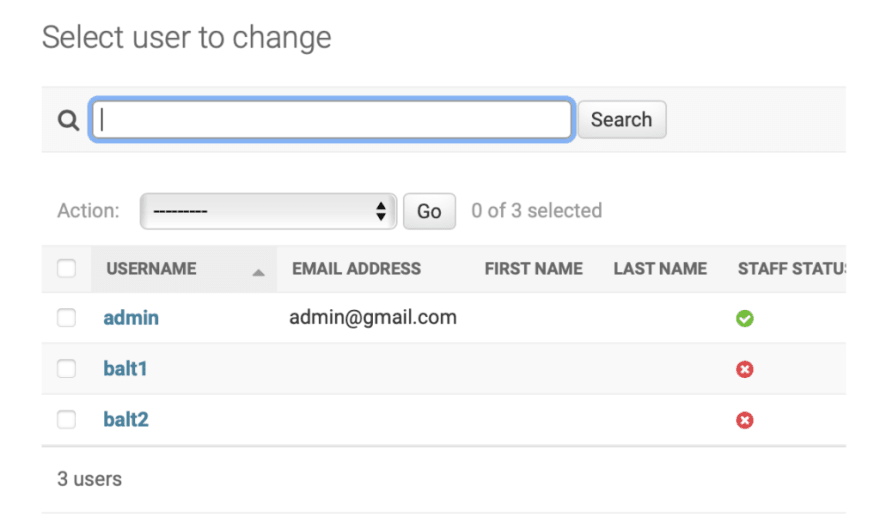
Go to the admin panel at 127.0.0.1:8000/admin/
Click on Users, you should see all users created including the admin.
Right now, the register form is constrained and limited to the fields that Django provides.
Let’s customize the form to add some extra fields such as email, first name, last name and remove the excessive text shown for the password requirements.
Part 2 coming soon…
Learn more about Django:
Login/Registration Page with HTML,CSS,& JS Series - PART I


Top comments (0)