Objective: In this article, you will learn how to create a custom directive.
Pre-requisite Prior to completing this article, you should have already installed all pre-requisite tooling including: Visual Studio Code, Node Package Manager (NPM), Node, Angular CLI.
Setup
On your local machine, open Visual Studio Code.
Go to the File menu and select the Open Folder option.
Create a new project for this exercise and select this folder.
Create a new project command: ng new angular-medium
Create a new project: open terminal by Ctrl + backtic(`) key then run ng new angular-medium command
Bootstrapping Your Environment
- In Visual Studio Code, Ctrl + backtic(`) key press and select the Open in Terminal option.
- Run the angular-medium project using npm:
npm start
Now you can see the project from here. This is default url.
http://localhost:4200/
To add a directive.
ng g d test
installing directive
create src/app/test.directive.spec.ts

create src/app/test.directive.ts

update src/app/app.module.ts
or also you can create a test directive with a folder
ng g d bipon/test
test.directive.ts look like this
import { Directive } from '@angular/core';

@Directive({

  selector: '[appTest]'

})

export class TestDirective {

constructor() { }

}
when run this command ng g d testdirective then update app.module.ts file. Added TestDirective automatically
import { BrowserModule } from '@angular/platform-browser';

import { NgModule } from '@angular/core';

import {FormsModule} from '@angular/forms';

import { AppComponent } from './app.component';

import { SampleService } from './sample.service';

import { TestDirective } from './bipon/test.directive';

@NgModule({

  declarations: [

    AppComponent,

    TestDirective,

  ],

  imports: [

    BrowserModule,

    FormsModule,

  ],

  providers: [SampleService],

  bootstrap: [AppComponent]

})

export class AppModule { }
test.directive.ts
Update the directive file. All logic write here
@Directive({

  selector: '[test-directive]'

})

export class TestDirective {

constructor() { }

@HostListener('window:keydown', ['$event'])

  handleKeyDown(event: KeyboardEvent){

    console.log('event: ', event)

  }

}
Now time to implement this directive. Added input field in app.component.html file
<input type="text" test-directive" />
if any character type into input field then showing output in console log.
Output
( )
)
#Another example
app.component.html
`
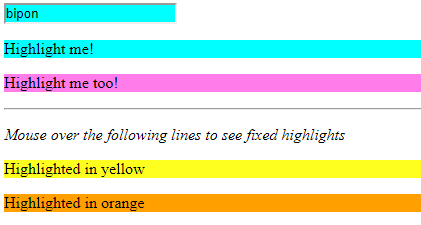
Highlight me!
Highlight me too!
Mouse over the following lines to see fixed highlights
Highlighted in yellow
Highlighted in orange
`test.directive.ts
constructor(private el: ElementRef) { }

  @Input () defaultColor: string;

  @Input('test-directive') hightlightColor: string;

@HostListener('window:keydown', ['$event']) KeyboardEvent(event: any){

    console.log('event: ', event);

    this.highlight(this.hightlightColor || this.defaultColor || 'cyan');

  }

@HostListener('blur') KeyboardEventLeve(){

    this.highlight(null);

  }

public highlight(color: string){

    this.el.nativeElement.style.backgroundColor = color;

}
Reference
Angular CLI
Generating directives
Attribute directives

Top comments (0)