
Written by Michael Okoh✏️
Prerequisites
- Basic knowledge of the command line
- Basic knowledge of Docker
- Basic knowledge of version control
- Latest release of node installed on your local machine
Install Vue on your local machine
First, you will be installing vue-cli. It is a command-line tool that enables you to quickly scaffold a new Vue application. Run the following command to install vue-cli on your local machine:
npm install -g @vue/cli
This will pull all the dependencies required to run vue-cli, you can verify its installation by running:
vue

Create a Vue application
In this step, you will be creating a new app using the vue-cli create command which will help us scaffold our application along with necessary plugins. Run the following to create a new Vue application:
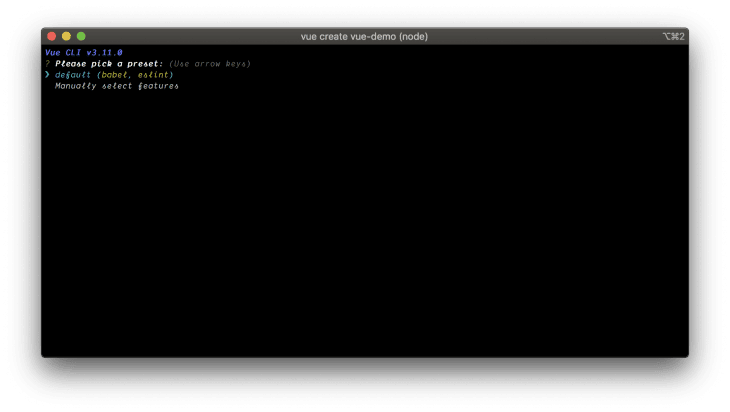
vue create vue-demo
You will be prompted to select a preset, leave it at the default preset, and press enter to continue.
When this is done, change directory into the vue-demo folder created by the vue-cli and run:
npm run serve

This will make your Vue application accessible on localhost via port 8080. Visit http://localhost:8080 to view your application.

Set up GitLab
Now, you will be pushing your Vue application to a GitLab repository. Head over to GitLab’s Website and log into your account or create an account if you do not have one already.

Next, create a new project. At the top right corner of your GitLab dashboard, you will see a green button with the text New project. Click on it.
![]()
A new screen will come up asking you to give a name to the project. Name the project vue-demo, you can leave the project description empty, it can be either a public or private repository. Leave the last checkbox unticked.

You need to associate your vue-demo application locally with the remote repository. To do that, head over to the terminal and make sure you are in the application’s directory and run the following:
git init
git remote add origin git@gitlab.com:<your-gitlab-username>/vue-demo.git
git add .
git commit -m "Initial commit"
git push -u origin master
NOTE : Replace
<your-gitlab-username>with your actual GitLab username.
You will be prompted to input your GitLab password or authenticate via SSH if you have previously configured that in the past. When done, visit vue-demo project dashboard on Gitlab, all your source files should be present.

Configure the pipeline
In this step, we will be configuring our pipeline using Docker and GitLab CI. Using your preferred text editor or IDE, create a new file named Dockerfile without any extension and paste the following:
FROM node:lts-alpine as build-stage
WORKDIR /app
COPY package*.json ./
RUN npm install
COPY . .
RUN npm run build

# production stage
FROM nginx:stable-alpine as production-stage
COPY --from=build-stage /app/dist /usr/share/nginx/html
EXPOSE 80
CMD ["nginx", "-g", "daemon off;"]
This Docker configuration pulls the Node alpine image which will be used to build our application for production and the second stage pulls the Nginx alpine image which will be used to serve our build codebase copied from the first stage.
Next, create a .gitlab-ci.yml. This will allow GitLab to deploy our changes to the server. This config file creates a communication to the server. It contains operations and commands that should be executed on the server on every code push. Copy and save the following into your .gitlab-ci.yml file:
image: docker
services:
  - docker:dind
stages:
  - deploy
step-deploy-prod:
  stage: deploy
  script:
    - docker build -t app/vue-demo .
    - docker run -d -p 80:80 --rm --name todoapp app/vue-demo
Commit and push these files to the remote repository:
git add .
git commit -m "Pipeline Configurations"
git push
In the next step, we will be configuring our server to work with GitLab’s CI/CD.
Configure the server
In this step, you will be needing a server running Ubuntu. You can sign up on DigitalOcean and quickly provision Ubuntu server.
SSH into your server
SSH into your server by running:
ssh username@<server-ip>
NOTE : SSH procedure may be different on windows
Install GitLab Runner
GitLab Runner acts as the interface between GitLab and your remote server. Run the following to install GitLab Runner:
curl -L https://packages.gitlab.com/install/repositories/runner/gitlab-runner/script.deb.sh | sudo bash
sudo apt-get install gitlab-runner
sudo gitlab-runner start
This will install and start GitLab Runner on your server.
Register a pipeline
To register a pipeline, run the following command:
sudo gitlab-runner register
You will be returned a prompt like this:
Please enter the gitlab-ci coordinator URL (e.g. https://gitlab.com/):
Type https://gitlab.com/ and press Enter. The next prompt will be:
Please enter the gitlab-ci token for this runner:
You can get your token from your vue-demo project dashboard by hovering on Settings on the navigator section on the left, another sub-menu will show up with a bunch of options, click on CI / CD.

Next, click on the Expand button on the runner’s option.

You will see your token after the option is expanded, copy it, go back to your server SSH terminal, paste it and press the Enter key.

To skip all these procedures, you can directly visit https://gitlab.com/<username>/vue-demo/-/settings/ci_cd.
NOTE:
<username>should be your gitlab username
Next, you will be asked to enter a description and tags for the runner like this:
Please enter the gitlab-ci description for this runner:
and
Please enter the gitlab-ci tags for this runner (comma separated):
Press the Enter key to skip these. Next, you will be prompted with the following:
Please enter the executor: ssh, virtualbox, kubernetes, docker, docker-ssh, shell, docker+machine, docker-ssh+machine, custom, parallels:
Type in shell and press enter. At this point, you have successfully registered a GitLab Runner on your server.
Install Docker
You can quickly install docker by running:
sudo snap install docker
This will quickly install Docker on your machine. Next, we need to set permissions for Docker by running:
sudo groupadd docker
sudo usermod -aG docker $USER
Reboot your server like this:
reboot
Log back in and run:
sudo usermod -aG docker gitlab-runner
This will add GitLab Runner to the Docker group.
Add GitLab Runner to sudoers
To add GitLab Runner to the list of sudoers, run:
sudo nano /etc/sudoers
Paste the following at the end of the file:
gitlab-runner ALL=(ALL) NOPASSWD: ALL
Save and exit nano.
Verify information
To verify your information run:
sudo nano /etc/gitlab-runner/config.toml
It should contain contents like this:
...
[[runners]]
  url = "https://gitlab.com/"
  token = "XXXXXXXXX"
  executor = "shell"
  [runners.custom_build_dir]
  [runners.ssh]
    user = "<SERVER ACCOUNT USERNAME>"
    host = "<SERVER IP ADDRESS>"
  [runners.cache]
    [runners.cache.s3]
    [runners.cache.gcs]
...
If the user and host attribute details do not match that of your server, you can correct it in this section:
...
[runners.ssh]
  user = "<SERVER ACCOUNT USERNAME>"
  host = "<SERVER IP ADDRESS>"
...
If it’s not present in the file, add it along with the right credentials, save and exit the file. Restart GitLab Runner:
sudo gitlab-runner restart
Test deployment
In this step, you will be running your pipeline to see if your application will deploy on the server.
Head over to the pipeline menu from your project GitLab’s dashboard.

Click on Run Pipeline.

Select a branch to deploy from, by default it will be master. Click on Run Pipeline.

Your application deployment will begin.

Click on the step-deploy-.... button to see the process.

Once deployment succeeds, you will see a Job succeeded message. If it fails, review all the steps to make sure you did not miss anything. Visit your server IP address on your browser, you will see the Vue landing page, which means your application was deployed successfully.

Your application will build and deploy itself on every push made to the master branch automatically.
Conclusion
In this tutorial, you successfully created a Vue project, wrote Docker and GitLab CI configurations, configured a server with Docker, GitLab Runner (along with necessary permissions), and configured a pipeline on GitLab. With this, you are set to configure other projects in the future.
Experience your Vue apps exactly how a user does
Debugging Vue.js applications can be difficult, especially when there are dozens, if not hundreds of mutations during a user session. If you’re interested in monitoring and tracking Vue mutations for all of your users in production, try LogRocket.
LogRocket is like a DVR for web apps, recording literally everything that happens in your Vue apps including network requests, JavaScript errors, performance problems, and much more. Instead of guessing why problems happen, you can aggregate and report on what state your application was in when an issue occurred.
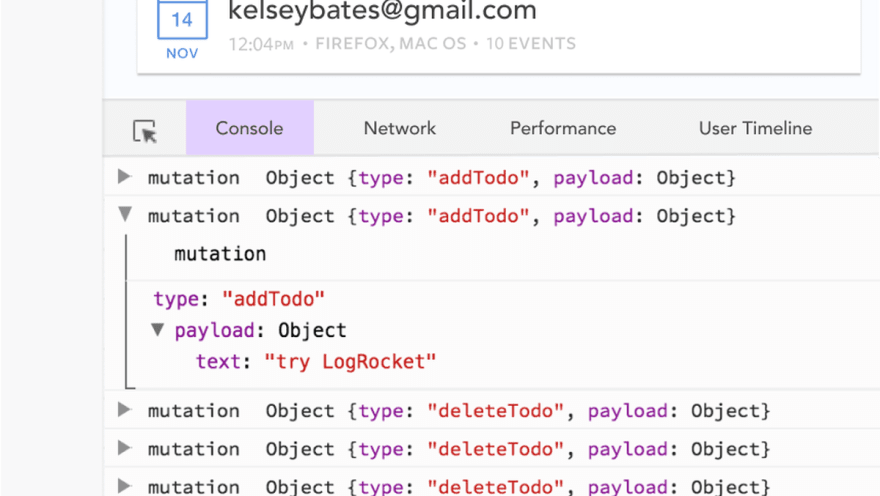
The LogRocket Vuex plugin logs Vuex mutations to the LogRocket console, giving you context around what led to an error, and what state the application was in when an issue occurred.
Modernize how you debug your Vue apps - Start monitoring for free.
The post How to auto deploy a Vue application using GitLab CI/CD on Ubuntu 18.04 appeared first on LogRocket Blog.

Top comments (2)
this is a nice writeup, but one little gem is missing. If that Vue application has a router and subpages. routing doesn't work.
So you have to add a custom nginx.conf with following code in the default block
Nice article.
Any idea how to make it work with React App?