
Written by Nwose Lotanna✏️
Vue.js enables developers to create forms in their Vue applications just as they would in plain HTML5. This means you need little to no additional skills to create forms in Vue. Vue supports all the elements that HTML5 supports, such as input, text area, label, and more.
In this tutorial, you’ll learn how to make Vue forms dynamic. Dynamic forms enable you to give your users enough control to dictate outcomes.
Prerequisites
This tutorial is suited for developers of all skill levels, from beginners to more advanced programmers. Before you start, make sure you do the following.
- Install Node.js version 10.x or above (you can verify whether you already have it by running the following command)
node -v
- Acquire a code editor such as Visual Studio Code
- Install the latest version of Vue globally on your machine
- Install Vue CLI 3.0 (you must first uninstall the old CLI version with the following command)
npm uninstall -g vue-cli
- Then, install the new one:
npm install -g @vue/cli
- Download a Vue starter project here
- Unzip the downloaded project
- Navigate into the unzipped file and run the following command to keep all the dependencies up to date
npm install
Form outcomes
When building a Vue form, it can be difficult to determine the number of outcomes associated with a given field. A good way to address this is to personalize the user experience by giving the user control.
Take LinkedIn, for example: when you fill out your employment details, there is a field labeled “Current Position” and a link to add a new position. Here you are supposed to enter your current role as well as any previous jobs you’d like to list.
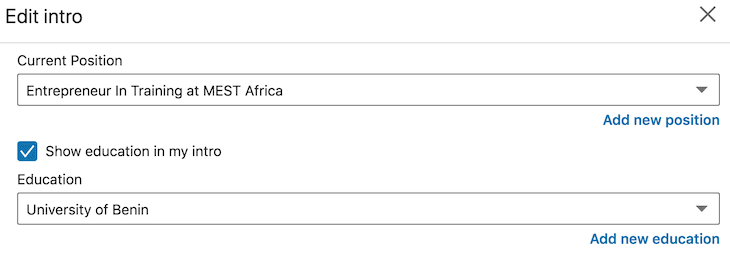
Obviously, LinkedIn doesn’t know your entire employment history right off the bat, but it personalized its form so you can customize your resume depending on the number and type of positions you hold or have held in the past.

Dynamic form elements
Before dynamic forms, form fields were usually just static. Going back to the LinkedIn example, the page would’ve had to display several separate fields, making only the first one required. Needless to say, this is an inefficient approach requiring a large number of form elements and repetition of code, which violates the DRY principle.
Now let’s see how dynamic forms are built in Vue.js.
What we’ll build
To demonstrate, we’ll build a visa application form and add a “previous visa” field to it — many governments check information like this before issuing a visa. We’ll then make the app dynamic because, just as LinkedIn users have varying employment histories, different travelers have varying visas on their passport, leading to an infinite number of possible outcomes per user.
Creating dynamic forms in Vue.js
If you followed this article from the start, you should have already downloaded and unzipped the Vue canvas project from GitHub. You’ll see the root Vue component, app.vue, and a test component file already created in the components folder. Open the project in your integrated development environment (I use VS Code). Your app.vue file should look like this:
<template>
  <div id="app">
    <img alt="Vue logo" src="./assets/logo.png">
    <Test/>
  </div>
</template>
<script>
import Test from './components/Test.vue'
export default {
  name: 'app',
  components: {
    Test
  }
}
</script>
<style>
#app {
  font-family: 'Avenir', Helvetica, Arial, sans-serif;
  -webkit-font-smoothing: antialiased;
  -moz-osx-font-smoothing: grayscale;
  text-align: center;
  color: #2c3e50;
  margin-top: 60px;
}
</style>
Now go inside the component folder, open the test component file, and copy the code block below inside the template section.
<template>
  <div id="visa">
    <h1>Vue Visa Application</h1>
    <form>
      <label for="first name">First Name:</label>
      <input type="text" required>
      <br>
      <label for="last name">Last Name:</label>
      <input type="text" required>
      <br>
      <label for="country">Nationality:</label>
      <input type="text"  required>
      <br>
      <label for="passport number">Passport Number:</label>
      <input type="text"  required>

      <label for="duration">Duration of stay:</label>
      <input type="text"  required>
     <br><br>
      <button>Add another previous visa</button>
      <br>
      <div class="previous">
        <span>x</span>
        <label for="duration">Previous Visa:</label>
        <input type="text" required>
        <label for="duration">Year of expiration:</label>
        <input type="text"required>
      </div>
    </form>
</div>
</template>
This is a template for a fictional Vue visa application form with a button labeled “Add another previous visa,” which enables the user to enter all the valid visas on their passport.
In that same component, scroll down to the scoped style section and add the following rules.
<!-- Add "scoped" attribute to limit CSS to this component only -->
<style scoped>
#visa {
  margin: 20px auto;
  max-width: 700px;
}
label{
  display: block;
  margin: 20px 0 10px;
}
input {
  font-size: 30px;
  border: 1px double rgb(102, 97, 96) ;
  border-radius: 4px;
}
button {
  font-size: 16px;
 background: rgb(64, 179, 140);
  padding: 0.4rem 1.3rem;
  text-align: center;
  border: none;
  cursor: pointer;
  border-radius: 4px;
 margin: 10px;
}
span{
  width: 30px;
  float: right;
  cursor: pointer;
}
span:hover{
  color: brown;
}
.previous{
  border: 1.5px solid;
  padding:5px;
  margin-bottom: 10px;
}
</style>
Run your application in the dev server with the command below.
npm run serve
Your app should look like this in your browser at localhost:8080:

In a real-life scenario, a visa applicant might have more than one visa stamped on their passport, which is why we have the “add another previous visa” option for each applicant to add as many visas as they have. They can also add none if they are traveling for the first time.
Giving the user that power to choose is the best solution to a use case like this. Vue.js allows you to do that easily with a few directives: v-for and v-bind for the v-for key. With the v-for directive, you can make the previous visa block in the template reusable. This means you can duplicate a given code block and push it to the DOM with the click of a button instead of rewriting those lines over and over.
To do this, we have to create two functions: one to add a new section when we click the add button and another to delete a section when the “x” button is clicked.
In your test component, copy the code block below inside the script section.
<script>
export default {
  name: 'Test',
  props: {
    msg: String
  },
  data(){
    return {
       applicants:[
       {
      previous: '',
      expiration:''
       }
     ]
    }
  },
  methods : {
    addVisa(){
      this.applicants.push({
        previous:'',
        expiration: ''
      })
    },
    deleteVisa(counter){
      this.applicants.splice(counter,1);
}
  }
}
</script>
We also created an applicants array since we want to loop through various sections. To use these functions, we have to add them to the click events in the template section.
<template>
  <div id="visa">
    <h1>Vue Visa Application</h1>
    <form>
      <label for="first name">First Name:</label>
      <input type="text" required>
      <br>
      <label for="last name">Last Name:</label>
      <input type="text" required>
      <br>
      <label for="country">Nationality:</label>
      <input type="text"  required>
      <br>
      <label for="passport number">Passport Number:</label>
      <input type="text"  required>

      <label for="duration">Duration of stay:</label>
      <input type="text"  required>
     <br><br>
      <button @click="addVisa">Add another previous visa</button>
      <br>
      <div class="previous"
      v-for="(applicant, counter) in applicants"
      v-bind:key="counter">
        <span @click="deleteVisa(counter)">x</span>
        <label for="duration">{{counter+1}}. Previous Visa:</label>
        <input type="text" v-model="applicant.previous" required>
        <label for="duration">Year of expiration:</label>
        <input type="text" v-model="applicant.expiration" required>
      </div>
    </form>
</div>
</template>
We just added the click events to our template, as well as the v-for directive. We added a counter to keep track of how many previous visas an applicant has recorded, and we bound it so they can see it as they create it.
If you run the application, it should add or remove the section, depending on the user’s action.

As you can see, the applicant has total control and can delete the very first section if traveling for the first time. This would easily lead to a good customer experience.
The complete code to this tutorial is available on GitHub.
Conclusion
Now you should have some creative tricks up your sleeve to make Vue form elements dynamic using directives and a few functions. No matter what you want to build, you should always consider the customer first. This will help you empathize and build valuable products while maximizing efficiency, reusing code, and keeping it DRY.
Experience your Vue apps exactly how a user does
Debugging Vue.js applications can be difficult, especially when there are dozens, if not hundreds of mutations during a user session. If you’re interested in monitoring and tracking Vue mutations for all of your users in production, try LogRocket.
LogRocket is like a DVR for web apps, recording literally everything that happens in your Vue apps including network requests, JavaScript errors, performance problems, and much more. Instead of guessing why problems happen, you can aggregate and report on what state your application was in when an issue occurred.
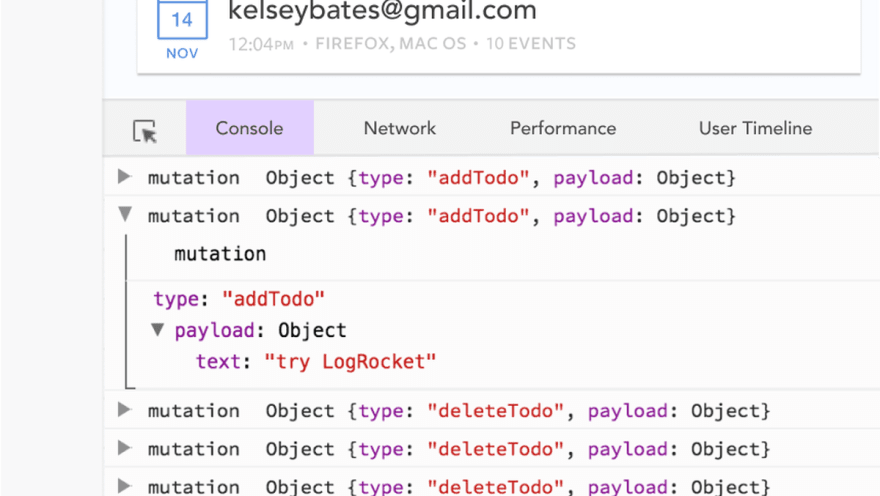
The LogRocket Vuex plugin logs Vuex mutations to the LogRocket console, giving you context around what led to an error, and what state the application was in when an issue occurred.
Modernize how you debug your Vue apps - Start monitoring for free.
The post How to make form elements dynamic in Vue.js appeared first on LogRocket Blog.

Top comments (0)