
Written by Zain Sajjad✏️
Web solutions like WebAssembly, WebGL, and WebGPU exist to leverage the considerable computational power users have at their disposal today.
WebAssembly (Wasm) is a universal, low-level bytecode that runs on the web. Being low-level binary code it has lesser size and better performance than code executed with the JS engine shipped with browsers today.
Wasm allows developers to code with languages like Rust, the TypeScript-like compiler AssemblyScript, and Emscripten (C/C++) and compile down to the Wasm format. Wasm offers a compact binary format, with predictable performance to run alongside JavaScript. It is currently available in all major browsers and has runtimes for servers as well.
If you’re already familiar with WebAssembly, please feel free to skip the next section, where we will learn the basics of using it in browsers.

Warming up: Hello from Wasm!
Execution of the Wasm binary from our JavaScript (and vice versa) requires some boilerplate code. Thankfully, we have the Emscripten compiler, which does all the heavy lifting for us and provides us a JavaScript file.
Setting up Emscripten
We will use C/C++ to write our Wasm code, so we require emsdk, which is Emscripten’s tool to get the compiler and all the other tools you need.

The last command sets up the path so it can find emcc, the Emscripten compiler tool, and everything else we need.
Nostalgic scenes: Writing some C
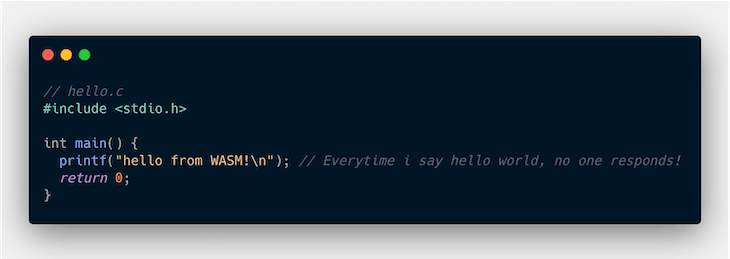
Once the compiler setup is done, let’s start writing our C code and get it compiled to Wasm. Here is a small hello world example of code in C.
emcc will do all the heavy lifting of compilation and transformation for us here. A single emcc command will return Wasm-ready code to use for our web app. Here it is:

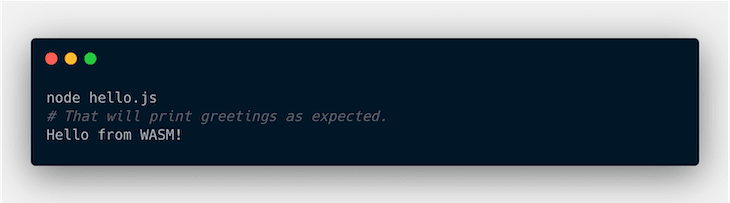
The output file hello.js can be tested by simply invoking it using Node:
Since we are targeting a web platform, let’s get it running in our web app.
Time for action: Executing it in our web app
The C code we wrote was just to check whether our setup was done correctly. Here, for our web app, let’s try to calculate the square root of a given number using Wasm. Here is how our C code will look like:
#include <math.h>
#include <stdlib.h>
#include <stdio.h>

extern "C" {
  float getSqrt (float num) {
    return sqrt(num);
  }

  float getSqr (float num) {
    return num * num;
  }
}
Here, methods defined in the extern "C" block are the ones accessible from JS code. Besides placing these methods in that block, we will mention them in the compiler option as EXPORTED_FUNCTIONS.
We will also add an optimization level to our compilation command. The higher the optimization level, the longer it will take to compile code, but the generated code will be more performant. You can read about these optimizations here.
So our new compile command will look like this:
emcc -o hello.js hello.cpp -Os \
-s WASM=1 \
-s EXPORTED_FUNCTIONS="['_getSqrt','_getSqr']";
Since we will be using a React application built with all modern JS tooling, we will tweak the JS file generated by emcc. We will dispatch a DoneEvent at the end of our JS file to know when both the Wasm and JS files are available for our app. Here is how it will be done:
sed -i .bak 's/else{doRun()}/&window.wasmScript.dispatchEvent(window.wasmDoneEvent);/' hello.js
Notice that we have added the event wasmDoneEvent to wasmScript .
Now that our Wasm and JS wrappers are ready, we can import them into our React app to see it in action. This is what our code to load the Wasm module will look like:
const WASM_URL = "./hello.wasm";
const WASM_JS_URL = "./hello.js";

const getWASMModule = () => {
  return new Promise((resolve, reject) => {
    if (!("WebAssembly" in window)) {
    console.warn("Your Browser doesn't support WASM");
        reject("Your Browser doesn't support WASM");
    }
    fetch(WASM_URL).then(response => {
      return response.arrayBuffer();
    }).then(buffer => {
      const wasmModule = new WebAssembly.Module(buffer);
      const script = document.createElement("script");

        // Adding event listener with callback
        script.addEventListener("wasmDone", buildWam);
       script.src = WASM_JS_URL;


        // Adding global script instance
       window.wasmScript = script;

       // Adding global event
        window.wasmDoneEvent = new Event("wasmDone");
       document.body.appendChild(script);

        function buildWam() {
         Module.wasmBinary = buffer;
        console.log("Emscripten boilerplate loaded.");
        const wasmMethods = {};
        wasmMethods["getSqrt"] = function(number) {
          return _getSqrt(number);
        };
          wasmMethods["getSqr"] = function(number) {
           return _getSqr(number);
         };
         resolve(wasmMethods);
       }
    });
  });
};
As we can see, this function will resolve to an object with a wrapper around Wasm methods. This wraps up our basic introduction of using WebAssembly in our React app. Now let’s dive into the task at hand.
Image filters using WebAssembly
Let’s get to our focus today: applying filters to images using Wasm. We will convert our image to a linear array because Wasm works on linear memory. Since each pixel’s color can be represented in RGB format, we consider each pixel in a four-dimensional RGBA (red, green, blue, and alpha) color space. Each dimension ranges from 0 to 255, assuming 24-bit color.
Starting off with JavaScript: Getting image data
We will extract image data by rendering our image into the HTML canvas. Have a look at the utility function that gets us image data from the URL provided.
function toCanvas(source) {
    if (source instanceof HTMLCanvasElement) {
        return source;
    }
    const canvas = document.createElement("canvas");
    canvas.width = source.videoWidth || source.naturalWidth || source.width;
    canvas.height = source.videoHeight || source.naturalHeight || source.height;
    canvas.getContext("2d").drawImage(source, 0, 0, canvas.width, canvas.height);
    return canvas;
}

export function getImageData({ url, width = 244, height = 224 }) {
    console.assert(url);
    return new Promise((resolve, reject) => {
        const img = new Image();
        img.crossOrigin = "anonymous";
        img.src = url;
        img.width = width;
        img.height = height;
        img.onload = function() {
            var canvas = toCanvas(img);
            resolve(
                canvas.getContext("2d").getImageData(0, 0, canvas.width, canvas.height)
            );
        };
        img.onerror = function(e) {
            reject(e);
        };
    });
}
This method creates a new Image object, and once the image is loaded, it will draw the image on the canvas. From canvas, it returns image data that is a linear array, where every four elements of the array represent the red, green, blue, and alpha channels of a pixel.
The Wasm!
On the Wasm side, we will receive an image as a linear array that we have extracted from canvas. Wasm code will make changes to each pixel of the image to apply different filters. Let’s have a look at the implementation of a grayscale effect.
void grayScale (unsigned char* data, int len) {
  for (int i = 0; i < len; i += 4) {
    int r = data[i];
    int g = data[i+1];
    int b = data[i+2];
    int a = data[i+3];
    data[i] = r;
    data[i+1] = r;
    data[i+2] = r;
    data[i+3] = a;
  }
}
The method above receives the image as an array and its length. It iterates through all pixels and sets their green and blue channels to be the same as red to create the grayscale effect.
Image data to and from Wasm
Sharing memory across WebAssembly and JavaScript is not an easy task. Thankfully, Emscripten does all the heavy lifting for us. It exposes the _mallocand _free methods to allocate and release memory for Wasm. We will convert our JS array into unsigned integer arrays and copy it to memory allocated for Wasm. Here is how our code looks on the JS side:
function(imageData) {
  const { length } = imageData;
  const memory = _malloc(length); // Allocating WASM memory
  HEAPU8.set(imageData, memory); // Copying JS image data to WASM memory
  _grayScale(memory, length); // Calling WASM method
  const filteredImageData = HEAPU8.subarray(memory, memory + length); // Converting WASM data to JS Image data
  _free(memory); // Freeing WASM memory
  return filteredImageData;
};
Rendering image with effect
Bingo! This image data can be used to render the image with the effect. Here’s how it’s done:
function writeImageDataToCanvas(canvas, data, width, height) {
    canvas.width = width;
    canvas.height = height;
    var context = canvas.getContext("2d");
    var imageData = context.createImageData(width, height);
    imageData.data.set(data);
    context.putImageData(imageData, 0, 0);
    return canvas;
}
A few more effects
Here are a few more effects for better context and understanding.
Invert
The invert effect is the same as grayscale on the JS side. It will follow the same steps, but the _grayscale call of the Wasm method will be replaced by _invert. Here’s the Wasm implementation of this effect:
void invert (unsigned char* data, int len) {
  for (int i = 0; i < len; i += 4) {
    data[i] = 255 - data[i]; //r
    data[i+1] = 255 - data[i+1]; //g
    data[i+2] = 255 - data[i+2]; //b
  }
}
Noise
Few image filters require processing of channels as float values, but noise is one of them. For such filters, we will convert our image data array along with other required changes. The JS side of this filter will be:
function(imageData) {
  const { length } = imageData;
  const memory = _malloc(length * Float32Array.BYTES_PER_ELEMENT);
  HEAPF32.set(imageData, memory / Float32Array.BYTES_PER_ELEMENT);
  _noise(memory, length);
  const filtered = HEAPF32.subarray(
    memory / Float32Array.BYTES_PER_ELEMENT,
    memory / Float32Array.BYTES_PER_ELEMENT + length
  );
  _free(memory);
  return filtered;
};
Whereas the Wasm part looks like this:
  void noise (float* data, int len) {
    int random;
    for (int i = 0; i < len; i += 4) {
      random = (rand() % 70) - 35;
      data[i] = data[i] + random; //r
      data[i+1] = data[i+1] + random; //g
      data[i+2] = data[i+2] + random; //b
    }
  }
Brighten
This filter will be similar to invert and grayscale, except it takes an extra parameter of brightness. Here is the Wasm implementation:
void brighten (unsigned char* data, int len, int brightness) {
    for (int i = 0; i < len; i += 4) {
      data[i]   + brightness > 255 ? 255 : data[i]   += brightness;
      data[i+1] + brightness > 255 ? 255 : data[i+1] += brightness;
      data[i+2] + brightness > 255 ? 255 : data[i+2] += brightness;
    }
}
Wrapping it up
If used to its full potential, WebAssembly can without a doubt revolutionize modern frontends. With the usage of linear memory and proper data structures, Wasm can perform CPU-intensive tasks in a way more performant manner than JS.
Though Wasm is still quite immature, it has made some great advances recently. Tools like Emscripten are doing a lot of heavy lifting to make Wasm easier and more accessible to many frontend devs.
We have used C++ here in our use case, though Wasm is available in Go, Rust, and AssemblyScript as well. This variety of options makes it more intuitive for many developers. This decade will see more robust frontends and sophisticated experiences with the help of technologies like Wasm and WebGL that are keeping the web great!
Plug: LogRocket, a DVR for web apps

LogRocket is a frontend logging tool that lets you replay problems as if they happened in your own browser. Instead of guessing why errors happen, or asking users for screenshots and log dumps, LogRocket lets you replay the session to quickly understand what went wrong. It works perfectly with any app, regardless of framework, and has plugins to log additional context from Redux, Vuex, and @ngrx/store.
In addition to logging Redux actions and state, LogRocket records console logs, JavaScript errors, stacktraces, network requests/responses with headers + bodies, browser metadata, and custom logs. It also instruments the DOM to record the HTML and CSS on the page, recreating pixel-perfect videos of even the most complex single-page apps.
Try it for free.
The post Image styling and filters using WebAssembly appeared first on LogRocket Blog.

Latest comments (0)