
Written by Nwose Lotanna✏️
When building forms, it’s important to be able to monitor or control the content users enter into the form fields. This is called validation. For quality assurance, you should conduct validation on both the client and server side of your application.
To help with validation, the HTML input tag has a placeholder option. You can use this to effectively direct users to the exact information you need from them. However, placeholders aren’t enough on their own to alert users when they’ve entered invalid information. That’s why developers often write scripts to prompt the user to avoid entering invalid characters.
Vue JS enables developers to use JavaScript methods to validate form inputs within Vue components. In this walkthrough, we’ll use a Vue instance option called watch to implement form input validation.

Prerequisites
Vue.js enables developers to create forms in Vue applications just as they would with HTML5. That means little to no additional skills are required to build forms in the Vue template section of any component with plain HTML.
This tutorial is suited for developers at all stages, including beginners. Below are a few things you should already have before going through this tutorial.
- Node.js version 10.x and above installed (you can verify whether you have it by running the following command in your terminal/command prompt:
node -v
- A code editor , such as Visual Studio Code
- Vue’s latest version installed globally on your machine
- Vue CLI 3.0 installed on your machine.
- To do this, uninstall the old CLI version first
npm uninstall -g vue-cli
- Then, install the new one
npm install -g @vue/cli
- Download a Vue starter project
- Unzip the downloaded project
- Navigate into the unzipped file and run the command below to keep all the dependencies up to date
npm install
What are watchers in Vue?
Vue.js ships with the watch option just like the computed methods and data option. Watchers offer a great way to respond to data changes in a given element. The watch option is also a very powerful tool for conducting form validation.
Using Vue devtools
Throughout this tutorial, we’ll inspect our code with Vue devtools, a browser extension developers use to debug their Vue projects. You can filter components, select components right inside the UI, inspect the DOM, and filter inspected data. The extension also ships with some cool switching tabs such as switch to Vuex, switch to components, switch to events, routing, performance, and settings. Download Vue devtools for Chrome or Firefox.

What we’ll build
To illustrate how to use the Vue watch option to handle form input validation, we’ll build a “create a new account” form that will contain fields for the user to enter their email and password.
You should have have already downloaded the canvas project. Open the project in your IDE, go into the component folder, and replace the content of your Test.vue file with the code block below.
<template>
  <div id="visa">
    <h1>Create a New Vue Account</h1>
    <form>
      <label for="full name">Full Name:</label>
      <input type="text" v-model="name" required>
      <br>
      <label for="email">Email Address:</label>
      <input type="text" v-model="email" required>
      <br>
      <label for="password">Password:</label>
      <input type="text" v-model="password" required>

      <label for="twitter">Twitter Handle:</label>
      <input type="text" v-model="twitter" required>

    </form>
</div>
</template>
<script>
export default {
  name: 'Test',
  props: {
    msg: String
  },
  data(){
    return {
      name: '',
      password: '',
      email: '',
      twitter: ''
    }
  }
}
</script>
<style scoped>
#visa {
  margin: 20px auto;
  max-width: 700px;
  margin-bottom: 28px;
}
label{
  display: block;
  margin: 20px 0 10px;
}
span {
  padding-top: 0px;
  margin-top: 0px;
  font-size: 12px; color:red;
}
input {
  font-size: 30px;
  border: 1px double rgb(102, 97, 96) ;
  border-radius: 4px;
}
</style>
This creates the form with Vue input binding. You can see it in action in the browser using the Vue devtools extension.

Email validation
For the email input, we only want users to enter valid emails like (e.g., “johnDoe@gmail.com”). Fortunately, there are JavaScript functions that can check for that. We’ll use the watch option to trigger the function for the input to be checked.
Replace your template section with the code block below.
<template>
  <div id="visa">
    <h1>Create a New Vue Account</h1>
    <form>
      <label for="full name">Full Name:</label>
      <input type="text" v-model="name" required>
      <br>
      <label for="email">Email Address:</label>
      <input type="text" v-model="email" required> <br>
      <span v-if="msg.email">{{msg.email}}</span>
<label for="password">Password:</label>
      <input type="text" v-model="password" required><br>
      <span v-if="msg.password">{{msg.password}}</span>
      <br>
      <label for="twitter">Twitter Handle:</label>
      <input type="text" v-model="twitter" required>

    </form>
</div>
</template>
We first added the span element, which will contain the prompts we’ll create later, and then added the msg array to store the values as the user types.
Copy the following code block into the script section.
<script>
export default {
  name: 'Test',
  data(){
    return {
      name: '',
      password: '',
      email: '',
      msg: [],
      twitter: ''
    }
  },
  watch: {
    email(value){
      // binding this to the data value in the email input
      this.email = value;
      this.validateEmail(value);
    }
  },
  methods:{
    validateEmail(value){
      if (/^\w+([\.-]?\w+)*@\w+([\.-]?\w+)*(\.\w{2,3})+$/.test(value))
  {
    this.msg['email'] = '';
  } else{
    this.msg['email'] = 'Invalid Email Address';
  }
    }
  }
}
</script>
Here we created a watcher for the mail and bound it to the email data so that the watcher can execute the validate email function, which we wrote inside the methods, as changes occur in the data.
Run the application in the dev server. It should behave like this:

Password validation
We want to validate that the password is are least eight characters long; if it contains fewer than eight characters, we’ll prompt the user to make it eight.
Replace the script section of the test.vue component with the code block below.
<script>
export default {
  name: 'Test',
  data(){
    return {
      name: '',
      password: '',
      email: '',
      msg: [],
      twitter: ''
    }
  },
  watch: {
    email(value){
      // binding this to the data value in the email input
      this.email = value;
      this.validateEmail(value);
    },
    password(value){
      this.password = value;
      this.validatePassword(value);
    }
  },
  methods:{
    validateEmail(value){
      if (/^\w+([\.-]?\w+)*@\w+([\.-]?\w+)*(\.\w{2,3})+$/.test(value))
  {
    this.msg['email'] = '';
  } else{
    this.msg['email'] = 'Invalid Email Address';
  }
    },
    validatePassword(value){
      let difference = 8 - value.length;
      if (value.length<8) {
        this.msg['password'] = 'Must be 8 characters! '+ difference + ' characters left' ;
      } else {
         this.msg['password'] = '';
      }
    }
  }
}
</script>
Save the changes in your IDE and run the application again. It should behave like this:

You can find the complete code for this tutorial on GitHub.
Conclusion
You should now know how to use the watch option to perform form validation in Vue. Validation is crucial when building forms, and the practical code illustrations in this tutorial should help you learn how to implement form validation in your Vue apps.
Experience your Vue apps exactly how a user does
Debugging Vue.js applications can be difficult, especially when there are dozens, if not hundreds of mutations during a user session. If you’re interested in monitoring and tracking Vue mutations for all of your users in production, try LogRocket.
LogRocket is like a DVR for web apps, recording literally everything that happens in your Vue apps including network requests, JavaScript errors, performance problems, and much more. Instead of guessing why problems happen, you can aggregate and report on what state your application was in when an issue occurred.
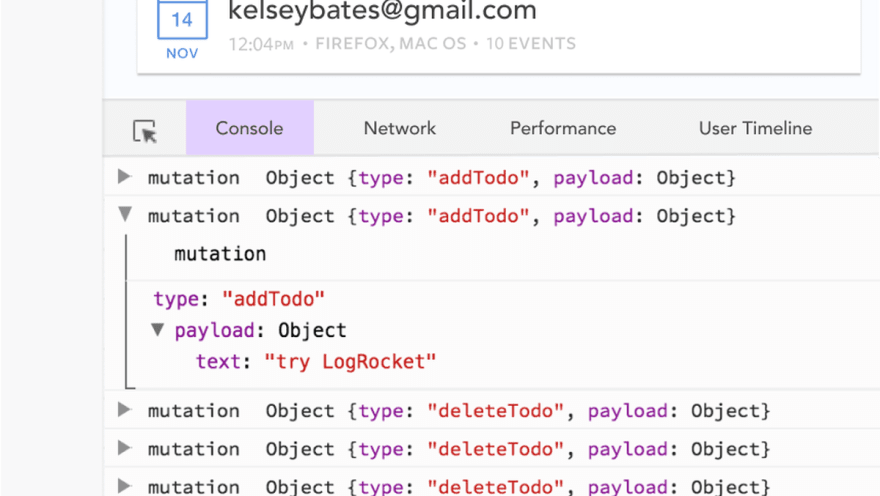
The LogRocket Vuex plugin logs Vuex mutations to the LogRocket console, giving you context around what led to an error, and what state the application was in when an issue occurred.
Modernize how you debug your Vue apps - Start monitoring for free.
The post Using watchers for form input validation in Vue.js appeared first on LogRocket Blog.

Top comments (0)