
I recently wrote two articles about deploying Django applications to AWS serverless environments: one on AWS Fargate (CloudFront, ALB and ECS Fargate containers) and one on AWS Lambda (Lambda + API Gateway, without using Zappa or Serverless Framework). Both projects focused on automating as much of the setup and operation as possible using DevOps patterns: Infrastructure as Code, GitOps, CI/CD and docker containers. I used AWS resources exclusively (with the exception of GitLab) with the help of AWS Cloud Development Kit (CDK), an awesome tool that I have really come to like. In general I really like AWS, and the more I use it I start to think about what I would do without it. Also, a lot of the feedback I got on these projects recommended to "just use a VPS" instead of bothering with AWS because it is complicated, expensive, overkill, etc. This got me thinking about how far I could get in deploying a Django application on a server with little or no external services that AWS has spoiled me with. After a little bit of discomfort and confusion, I was able to check off most of what I was hoping to and came away with a few questions as well. If you are interested to know how I got things setup and and hear some of my thoughts on running Django applications in production, continue reading!
In this article, I'm going to go over my approach to deploying and running Django applications using DigitalOcean Droplets (Linux-based virtual machine that runs on top of virtualized hardware) and block storage volumes (network-based block devices that provide additional data storage for Droplets).
I'll also touch on trade-offs between DigitalOcean and AWS and emphasize aspects of the project that confuse/d me with these block quotes.
Here's a link to my project that I'll be referencing: https://gitlab.com/briancaffey/digital-ocean-docker-swarm-django-traefik.
The project setup is a combination of some of the best practices I have picked up along the way as well as some very helpful guides, repositories and blog posts that I'll do my best to reference throughout this article.
Overview
Here are some of the key parts of the project that I'll go over:
- DigitalOcean and GitLab setup
- Creating an A Record that points to our Droplet IP
- Using a prebuilt VM image that ships with docker and docker-compose
- Setting up the REX-Ray storage driver to automatically provision Digital Ocean block storage volumes
- Setting up a docker swarm cluster
- Setting up a
.gitlab-ci.ymlfile to build images and push them to a private GitLab CI project registry - Writing a docker-compose file to configure the services (containers) that will support the application
- Deploying a stack to the docker swarm cluster on DigitalOcean from our GitLab CI environment over SSH
- Django project settings and management commands for our Postgres database and static files
- Monitoring, logging and debugging
- Destroying the environment + cleanup
Before I dig into all of this, I recommend that you check out this article about Django production architectures by Matt Segal. This is a great primer for a lot of what I'll be talking about and it includes some great visualizations. mattsegal.dev has lots of good content related to Django, I also recommend checking out this article about how NGINX is used with Django. Thanks for the great resources, Matt!
DigitalOcean setup
- Sign up for a new DigitalOcean account if you don't already have one
- Create a DigitalOcean project https://cloud.digitalocean.com/projects/new
- Create a personal access token (we will use this to configure a docker addon that will provision block storage volumes automatically) https://cloud.digitalocean.com/account/api/tokens
- Create and add an SSH key to your account. This is a pretty simple step, but DigitalOcean still has really thorough documentation on how to do this (see this article for more information)
Prebuilt Docker VM image
From the Create Droplets page, select Marketplace and search for docker. Select the Docker 5:19.03.1~3 18.04 image. Note that this VM is Ubuntun 18.04 with Docker Community Edition and docker-compose pre-installed.
Select the basic plan, and then scroll to the left to choose the \$5.00/month option. Select a datacenter region. Most of these regions should be OK, but you should verify that the region you have selected supports volumes (they may all support volumes, but there are some DO features that are not supported accross all regiongs, similar to AWS). Do not select a VPC or any of the additional options.
For Authentication, select the SSH key that you created earlier.
Take note of the Droplet's IP address; we will use this in the next step.
GitLab setup
Create a new GitLab project and clone it locally. You can also clone or fork my project and use that as a starting point. Go to Settings > CI/CD > Variables in your GitLab project and add the following environment variables:
-
SSH_PRIVATE_KEY: the value should start with-----BEGIN RSA PRIVATE KEY-----and end with-----END RSA PRIVATE KEY----- -
DROPLET_IP: the IP address of the droplet you just created -
POSTGRES_PASSWORD: a secure password that we will use for our Postgres database (we will share this with our Django application later on) -
SECRET_KEY: a random secret key to use for our Django application. -
DEBUG: the number0
A Record
By the end of this project you will be able to deploy your Django application to a live domain name provided that you have one. All you need to do is create an A Record that points to the Droplet IP. There are no DNS configuration changes to make inside of DigitalOcean. I'm using a domain that I purchased through Route53. You can get a free .tk domain from freenom. I have used this before and it is a great option for testing things out.
SSH into your DigitalOcean Droplet
You can do this with the following command:
ssh -i ~/.ssh/a1_rsa root@123.45.578.91
a1_rsa is the private key I added to GitHub. You can logout for now, but keep this command handy, because we will be coming back to our Droplet via SSH shortly.
Add the REX-Ray docker plugin
This step is very simple, you can follow along with this short guide: https://www.digitalocean.com/community/questions/how-to-attach-digitalocean-block-storage-to-docker-container.
There is basically one command to run:
docker plugin install rexray/dobs DOBS_TOKEN=YOUR_DIGITALOCEAN_TOKEN DOBS_REGION=nyc1 LINUX_VOLUME_FILEMODE=0775
You will need to make sure that you replace YOUR_DIGITALOCEAN_TOKEN with the personal access token you added earlier. Also, DOBS_REGION should be the region you selected for your Droplet earlier.
Check that the plugin was installed correctly with:
docker plugin ls
Here's a quick intro to REX-Ray from rexray.readthedocs.io:
REX-Ray is an open source, storage management solution designed to support container runtimes such as Docker and Mesos. REX-Ray enables stateful applications, such as databases, to persist and maintain its data after the life cycle of the container has ended. Built-in high availability enables orchestrators such as Docker Swarm, Kubernetes, and Mesos Frameworks like Marathon to automatically orchestrate storage tasks between hosts in a cluster.
In the context of this project, REX-Ray will automate the creation of DigitalOcean Block Storage Volumes. We will talk about volumes and how they are used later on in this article.
.gitlab-ci.yml
.gitlab-ci.yml is a file that configures pipelines when code is pushed to GitLab, similar to how GitHub Actions work with GitHub. This single file is a huge topic, if you are unfamiliar with GitLab CI, you might want to have a look over this page from the GitLab documentation which goes over all of the configuration options with many examples. Also, this documentation page covers the predefined environment variables that are made available to GitLab CI pipelines. I'm using these in a few different places as we will see shortly.
CI/CD pipelines that I define with .gitlab-ci.yml typically contain three stages: test, build and deploy. We will focus on the build and deploy stages for now (reference the article on my Fargate project linked above for reference on setting up unit tests with pytest).
build-backend is the name of a GitLab CI job that builds and tags a docker image from the source code in the backend directory of this project and pushes the tagged container image to a private image registry on gitlab.com that we will use later.
Here's the YAML code for build-backend:
build-backend:
  stage: build
  image: docker:19.03.1
  services:
    - docker:19.03.5-dind
  before_script:
    - docker login -u gitlab-ci-token -p $CI_JOB_TOKEN $CI_REGISTRY
  script:
    - |
      docker build \
        -t $CI_REGISTRY_IMAGE/backend:$CI_COMMIT_SHORT_SHA \
        -f backend/docker/Dockerfile.prod \
        ./backend/
    - docker push $CI_REGISTRY_IMAGE/backend:$CI_COMMIT_SHORT_SHA
build-nginx is almost identical, but the docker build arguments are slightly different. There are three arguments for the docker build command that I'm using here:
-
-t: the tag to tag the built image with -
-f: the Dockerfile to be used for building the image - the
contextthat is sent to the docker daemon when we build the image
-t makes use of two predefined GitLab CI variables: CI_REGISTRY_IMAGE and CI_COMMIT_SHORT_SHA. $CI_REGISTRY_IMAGE is the URL for the private image registry on gitlab.com that we push our images to that is specific to our project: registry.gitlab.com/<gitlab_username>/<project_name>, and CI_COMMIT_SHORT_SHA is an character alphanumeric value that contains the truncated name of the commit hash, this is known as the tag, even though we pass in more than just this value. We combine these two values with / and the name of the image we are building, such as backend, so the full value being passed to -t is:
registry.gitlab.com/gitlab-username/my-project/backend:abcd1234
-f is the path to the Dockerfile we are using relative to the directory where we are running the docker build command, which is the root directory of the project.
The final argument defines the context that we are using to build the image, and this is an important part for understanding how Docker works. This argument defines the directory that is zipped up and sent to the docker daemon via the docker API. When we build an image with docker build, we are essentially using the docker CLI to make a POST request to our docker daemon (server) where the POST data contains all of the files that we will have access to in the steps of the Dockerfile (such as ADD and COPY -- we will get to these soon). There's a key difference between the backend and nginx docker build commands: the context for backend is backend, but the context for nginx is . (the root of the project). This is because we may want access to another top level directory in our project that contains, for example, a Vue.js or React application, that we will build into our NGINX container. In order to be able to access both files in the nginx and the folder containing our frontend app, we need to send a context that contains both of these directories. Sending too many files to to the docker daemon when you run docker build will usually cause the docker build command to hang. The first line of output from a docker build command should be something like this:
Sending build context to Docker daemon 24.58kB
If this number is too high, you should use a .dockerignore file that ignores any files or directories you don't want to send to the docker daemon (similar to how .gitignore works with git).
To be able to pull and push (read and write) images to our private project container image registry, we need login with our docker client using the docker login command in the before_script as well two other predefined GitLab CI variables: CI_JOB_TOKEN and CI_REGISTRY. This all happens using a special service called docker-in-docker which I won't go into too much detail here, but it is a common practice when working with containers in a CI/CD environment that itself which is also based on containers, such as GitLab CI (each job runs in a container -- the key image -- and can define additional containers -- the services key -- to help with the CI job). Once the two images for backend and nginx have been built and pushed, our GitLab CI pipeline moves on to the next stage: deploy. In the deploy stage, we will start these and other containers on our DigitalOcean droplet, so we are getting close, but there is a lot more to explain. Before we deploy our containers, we need to do some one-time setup:
- initialize a single-node docker swarm cluster on our Droplet and
- create a docker network that our cluster's services (containers) will use
Setup a docker swarm cluster
To setup a docker swarm cluster, SSH into the Droplet with the command we introduced above (ssh -i ~/.ssh/a1_rsa root@123.45.578.91 where a1_rsa is the name of the private key file -- you can ignore the -i ~/.ssh/a1_rsa part if you are using an SSH key called id_rsa), and run the following command:
docker swarm init --advertise-addr DROPLET_IP
Replace DROPLET_IP with your Droplet's IP address (e.g. 123.45.578.91). Check out this article for some additional information about using docker swarm on GitLab. It is a little bit outdated, but the main ideas should still hold up. Docker swarm is designed to orchestrate containers running on a group (or swarm) of multiple machines. However, it is perfectly fine to run a single-node cluster as we are doing here.
Docker swarm uses docker-compose files, but using docker swarm is very different from running docker-compose up, a command which you might see people running both locally and in production and which also uses docker-compose files. As a best practice, you should not be using docker-compose (the command) in production. Many people do this, and several official tutorials will often end with "now just run docker-compose up and you are done". The first time I ran containers in the cloud I pulled my git repo into a VM, installed docker and docker-compose and ran docker-compose up. It is pretty easy and it works very similarly in both local and production environments, but this guide will be using docker-compose in production. There is more I could say here, but the main point is that docker swarm is a simplified version of something like Kubernetes, but it comes built-in to docker and is very simple to use.
Defining an overlay network
SSH into your droplet and run the following command:
docker network create --driver=overlay traefik-public
Usually we define networks in our docker-compose file, but this network needs to be defined first and then referenced in our docker-compose file. Here's a thread on SO that goes into a little bit more on why this is necessary, but I still don't have a very clear idea of why this is the case. With another configuration or perhaps docker-compose version, this may not be needed. I'll update this part of the article if I figure anything out.
Let's go over one more docker concept that will helpful in the next few steps. When you run docker ps on your local machine, the docker CLI first looks to see if the DOCKER_HOST environment variable is set. If it is not, then docker defaults to unix:///var/run/docker.sock, a UNIX socket. Check out this SO post titled "Can anyone explain docker.sock?"
We change the docker host that our local docker CLI is talking to by setting this environment variable, and one nice way to set this environment variables uses an SSH connection:
DOCKER_HOST=ssh://root@$DOCKER_IP
See this article for a more in-depth discussion: https://www.digitalocean.com/community/tutorials/how-to-use-a-remote-docker-server-to-speed-up-your-workflow.
You can try this out locally. Run a container locally, check it with docker ps, then export the DOCKER_HOST environment variable with the following command:
export DOCKER_HOST=ssh://root@123.45.678.91
Replacing 123.45.678.91 with your Droplet IP. Run docker ps again and you should see nothing (or any other containers that you started on your Droplet). Finally, run:
unset DOCKER_HOST
Running docker ps again you should see the containers on your machine. We will be using this idea in the next step when we look at the docker stack deploy command.
docker stack deploy
Now that we have done our one-time-setup steps, let's look at the deploy stage of .gitlab-ci.yml, the GitLab CI job that will get our containers running on our Droplet. First, let's break down the deploy-digital-ocean command:
deploy-digital-ocean:
  stage: deploy
  image: docker:19.03.1
  services:
    - docker:19.03.5-dind
  variables:
    DOCKER_HOST: "ssh://root@$DROPLET_IP"
  before_script:
    - apk update && apk add openssh-client bash
    - mkdir -p ~/.ssh
    - echo "$SSH_PRIVATE_KEY" > ~/.ssh/id_rsa
    - chmod 600 ~/.ssh/id_rsa
    - eval "$(ssh-agent -s)"
    - ssh-add ~/.ssh/id_rsa
    - ssh-keyscan -H $DROPLET_IP >> ~/.ssh/known_hosts
    - docker login -u gitlab-ci-token -p $CI_JOB_TOKEN $CI_REGISTRY
  script:
    - docker stack deploy -c stack.yml my-stack --with-registry-auth
This job uses the same image and services that our build stage jobs used. Notice that we set DOCKER_HOST to "ssh://root@$DROPLET_IP", this means that any docker CLI commands in this job will be communicating with the docker daemon on our Droplet. The before_script has a lot going on, but all we are doing is preparing to use the SSH private key that we previously added to our GitLab project's CI/CD environment variables. The base image for this job, docker:19.03.1 is based on Alpine Linus. This version of Linux is super light weight and doesn't come with openssh-client or bash, so our first step is to install these with the Alpine package manager, apk:
apk update && apk add openssh-client bash
Next, we add the SSH_PRIVATE_KEY environment variable into the body of the id_rsa private key file, change the permission of this file and then add the key to our SSH agent. Here's an excerpt from man ssh-agent that provides a little bit more context into why we need to run eval "$(ssh-agent -s)" and ssh-add ~/.ssh/id_rsa:
DESCRIPTION
     ssh-agent is a program to hold private keys used for public key authentication (RSA, DSA, ECDSA, Ed25519)ssh-agent is usually started in the beginning of an X-session or a login session, and all other windows or programs are started as clients to the ssh-agent program.  Through use of environment variables the agent can be located and automatically used for authentication when logging in to other machines using ssh(1).

     The agent initially does not have any private keys.  Keys are added using ssh(1) (see AddKeysToAgent in ssh_config(5) for details) or ssh-add(1).  Multiple identities may be stored in ssh-agent concurrently and ssh(1) will automatically use them if present.  ssh-add(1) is also used to remove keys from ssh-agent and to query the keys that are held in one.
Next, ssh-keyscan -H $DROPLET_IP >> ~/.ssh/known_hosts tells our SSH agent about our Droplet so that it doesn't prompt us with a Do you want to add this server to known hosts? (yes/no), or whatever the equivalent of that is for the docker CLI when it attempts to connect to a remote docker daemon over SSH.
Finally, we login to our our GitLab private registry using the same command from before when we built and pushed images to our private registry on gitlab.com:
docker login -u gitlab-ci-token -p $CI_JOB_TOKEN $CI_REGISTRY
This essentially gives our DigitalOcean Droplet access to the backend and nginx images in our private GitLab CI image registry, even tho we are running this command in a contain, in a container that is probably running in Kubernetes on GCP. Next, we are actually going to use these images.
The last command in the deploy-digital-ocean job is:
docker stack deploy -c stack.yml my-stack --with-registry-auth
Check out this link from the docker docs on docker stacks https://docs.docker.com/engine/swarm/stack-deploy/. --with-registry-auth is important, our command will complete if this is not included, but our application won't start.
stack.yml
Now we are ready to tackle the last big file in our repo: stack.yml. This is a the docker-compose file that we use to deploy our project. The only reason we needed to run docker login above is because stack.yml references the two images we built and pushed to our GitLab private repo. There's a lot going on in this file, let's start with the backend service:
backend
version: "3.4"
services:
  backend:
  image: ${CI_REGISTRY_IMAGE}/backend:${CI_COMMIT_SHORT_SHA}
  networks:
    - main
  environment:
    - POSTGRES_PASSWORD
    - SECRET_KEY
    - DEBUG
  volumes:
    - backendassets:/code/assets
  depends_on:
    - postgres
    - redis
    - web
The image is essentially what we defined in .gitlab-ci.yml, but the syntax is slightly different:
${CI_REGISTRY_IMAGE}/backend:${CI_COMMIT_SHORT_SHA}
We pass environment variables that we defined in GitLab CI via the environment key.
The volume backendassets is used for storing static assets (CSS, JS, etc.) as well as media assets (images, videos, any other file type). We mount this directory at /code/assets and then define our STATIC_ROOT in Django's settings.py to be:
os.path.join(BASE_DIR, "assets", "static")
Later, when we run collectstatic, files are copied to this location in our container, and since this is the location of the volume, the files are actually copied to the volume and will be persisted if we destroy the backend container and restart it. When the container restarts, the volume is mounted again and the static files will still be available to our application.
network and depends_on related to to the other services that this application will communicate with. main is a network defined in the networks part of stack.yml, notice that we reference the traefik-public network here that we created earlier, as well.
Depends on helps with service startup order, but it is a better practice to use
./wait-for-it.sh. However, I have never had any issues related to startup order. I'll try adding this later to make things more robust.
postgres and redis will start before backend. Our Django application will communicate to these services by their hostnames: postgres and redis. The fact that backend, postgres and redis are all on the same network (main) means that they can resolve each other by these names. For example, the connection string to redis will look like: redis://redis:6379. Let's look at the DATABASES configuration in settings.py to see how we connect to Postgres:
DATABASES = {
    "default": {
        "ENGINE": "django.db.backends.postgresql_psycopg2",
        "NAME": os.environ.get("POSTGRES_NAME", "postgres"),
        "USER": os.environ.get("POSTGRES_USERNAME", "postgres"),
        "PASSWORD": os.environ.get("POSTGRES_PASSWORD", "postgres"),
        "HOST": os.environ.get("POSTGRES_SERVICE_HOST", "postgres"),
        "PORT": os.environ.get("POSTGRES_SERVICE_PORT", 5432),
    }
}
I have defined the HOST to be based on the environment variable POSTGRES_HOST, but I have not defined this environment variable, so why didn't I just say "HOST": "postgres"? I could have, but if I want to change the database in the future, the only change will be adding an environment variable; I won't have to worry about hardcoded values.
I'm choosing to run Postgres in a container and not use a managed database (which DigitalOcean does offer) in order to save on costs and also to get more practice managing my own database. I use RDS with AWS and it handles a lot of things that I don't have to worry about, such as backups, and it allows me to quickly restore from a snapshot. I'm interested in learning more about how I can do these tasks with a database that I run myself.
NGINX
The next service we should go over is web, the service that runs the NGINX container that we pushed to our private GitLab image registry. This service has a couple of functions that I'll walk through:
- Reverse proxy
- Serve static files for Django
- Serve a frontend Javascript application
Here's the definition of this service in stack.yml:
services:
  web:
    image: ${CI_REGISTRY_IMAGE}/nginx:${CI_COMMIT_SHORT_SHA}
    networks:
      - traefik-public
      - main
    volumes:
      - backendassets:/usr/src/app/assets
    deploy:
      labels:
        - "traefik.enable=true"
        - "traefik.http.routers.nginx-web.rule=Host(`mysite.com`)"
        - "traefik.http.routers.nginx-web.entrypoints=websecure"
        - "traefik.http.routers.nginx-web.tls.certresolver=letsencryptresolver"
        - "traefik.http.services.nginx-web.loadbalancer.server.port=80"
For now, ignore the contents under the deploy key; we will cover this next when we go over the traefik service.
NGINX acts as a reverse proxy when it sends request starting with /api or /admin to the backend container. Two blocks in prod.conf enable this behavior:
  upstream backend {
    server backend:8000;
  }
This hostname backend is defined as backend:8000. backend:8000 can be resolved by the web service because it is on the same main network that backend is on. If either of the web or backend wasn't on the main network, NGINX would not be able to make sense of backend:8000.
    # backend urls
    location ~ ^/(admin|api) {
      proxy_redirect off;
      proxy_pass http://backend;
      proxy_set_header X-Forwarded-For $proxy_add_x_forwarded_for;
      proxy_set_header Host $http_host;
    }
This block does that actual request forwarding. http://backend references the upstream backend {} block defined above.
The volume backendassets is referenced here and mounts to /usr/src/app/assets. This path is then referenced in prod.conf, the NGINX configuration file that is used in our custom NGINX-based image:
    # static files
    location /static {
      autoindex on;
      alias /usr/src/app/assets/static;
    }
In this block of prod.conf, we tell NGINX to serve files from /usr/src/app/assets/static for requests that start with /static. A request made to https://mysite.com/static/base.css would return a file located at /usr/src/app/assets/static if that file existed. Remember, when we run the collecstatic management command in our Django container, it will collect our static files to backendassets. Since backendassets is mounted to the web service at /usr/src/app/assets, NGINX will have access to these files by way of the volume mount and they will persist across restarts of the web service and its NGINX container.
Finally, NGINX can serve a Javascript SPA or similar if we choose to use one in our project. To understand how this is done, we need to understand multistage Dockerfiles. Here's the Dockerfile used for the nginx container:
# # build stage
# FROM node:10-alpine as build-stage
# WORKDIR /app/
# COPY frontend/package.json /app/
# RUN npm cache verify
# RUN npm install
# COPY frontend /app/
# RUN npm run build

# production stage
# FROM nginx:1.19.1-alpine as production-stage
FROM nginx:1.19.1-alpine
COPY nginx/prod/prod.conf /etc/nginx/nginx.conf
COPY nginx/prod/index.html /dist/
# COPY --from=build-stage /app/dist /dist/
EXPOSE 80
CMD ["nginx", "-g", "daemon off;"]
Currently I don't have a SPA setup, but this is how we could setup one using Vue.js. The important part is this line:
COPY --from=build-stage /app/dist /dist/
This would copy the build files for our Javascript application into the /dist/ folder of our NGINX container. Another few declarations and blocks in prod.conf allow all other requests to be served by the contents of this folder:
    root /dist/;
    index index.html;
This sets the root and the index document for our NGINX webserver.
    # frontend
    location / {
      try_files $uri $uri/ @rewrites;
    }

    location @rewrites {
      rewrite ^(.+)$ /index.html last;
    }
These two blocks route all other requests to the frontend Javascript app's index.html file location in /dist/ (any request that doesn't start with /static, /api or /admin). We may wish to change this behavior if you want Django to serve most of your requests and possibly serve a single page application on another path.
Lastly, the web service's deployment key has some labels defined for Traefik. Let's come back to these after having a look at the traefik service.
Traefik
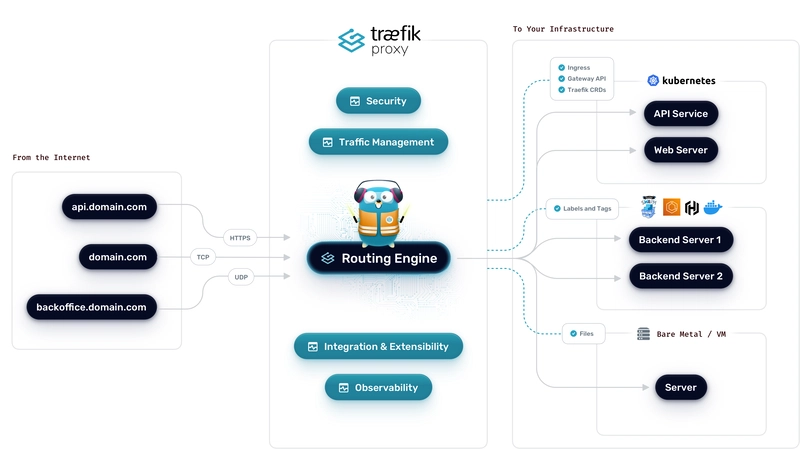
Traefik is an open-source Edge Router that makes publishing your services a fun and easy experience. It receives requests on behalf of your system and finds out which components are responsible for handling them. -- https://docs.traefik.io/
Traefik has three main functions in my application:
- Request TLS certificates from Let's Encrypt that allow us to encrypt our web traffic with HTTPS
- Do TLS termination
- Route all requests to NGINX
The one thing that Traefik cannot do is serve static files; it is not a webserver, unlike NGINX which is a webserver. NGINX is also capable of requesting TLS certs from Let's Encrypt, so we don't technically need Traefik, but it is indeed "fun and easy", especially when it comes to requesting certificates.
I have tried setting up Certbot with NGINX a long time ago but I never go it to work, and I didn't like the idea about how to run a chron job to refresh old certs.
There are two main ways to set up Traefik:
- write a
traefik.tomlfile and build this into your own custom image (similar to what we do with NGINX andprod.conf) - use a base image and specify all configure options through command line arguments.
I started out with the first approach, and I did get it to work, but I have decided that the second way is better. It requires one less image to build in our deployment process and it is easy to parametrize the command line arguments in stack.yml (for now all the values I'm using in the traefik service are hard-coded, this is one more item for my ToDo list on this project).
I had a hard time finding good examples of how to use Traefik version 2 with Docker Swarm in the Traefik docs. Their official example for using docker uses docker-compose up. There is a Swarm example, but it is for an older version of Traefik (1.7). This article titled How to install Traefik 2.x on a Docker Swarm helped me a lot in figuring out how to get everything working. Thank you for the great article, Aloïs!
Here's the code that sets up the traefik service:
services:
  traefik:
    image: traefik:v2.0.2
    ports:
      - "80:80"
      - "443:443"
    command:
      - "--providers.docker.endpoint=unix:///var/run/docker.sock"
      - "--providers.docker.swarmMode=true"
      - "--providers.docker.exposedbydefault=false"
      - "--providers.docker.network=traefik-public"
      - "--entrypoints.web.address=:80"
      - "--entrypoints.websecure.address=:443"
      - "--certificatesresolvers.letsencryptresolver.acme.httpchallenge=true"
      - "--certificatesresolvers.letsencryptresolver.acme.httpchallenge.entrypoint=web"
      - "--certificatesresolvers.letsencryptresolver.acme.email=brian@email.com"
      - "--certificatesresolvers.letsencryptresolver.acme.storage=/letsencrypt/acme.json"
    volumes:
      - letsencrypt:/letsencrypt
      - /var/run/docker.sock:/var/run/docker.sock
    networks:
      - traefik-public
    deploy:
      placement:
        constraints:
          - node.role == manager
The one thing I don't like about this setup is that it uses a 1GB volume to store one small JSON file. I think that 1GB is the smallest block storage volume I can request using REX-Ray. This only adds \$0.10/month to our project costs which is not that bad.
web and websecure refer to values declared on the web service. Let's take a look at those values:
deploy:
  labels:
    - "traefik.enable=true"
    - "traefik.http.routers.nginx-web.rule=Host(`mysite.com`)"
    - "traefik.http.routers.nginx-web.entrypoints=websecure"
    - "traefik.http.routers.nginx-web.tls.certresolver=letsencryptresolver"
    - "traefik.http.services.nginx-web.loadbalancer.server.port=80"
I still need to setup HTTP -> HTTPS redirecting, so for now only websecure is defined, but Aloïs explains this clearly in his article.
For me this is the most complicated part of the setup. I'm still not familiar with exactly how Traefik and Let's Encrypt work. Hopefully I can run through this process a few more times with some variations to better understand the rough edges. Otherwise for this simple way to get TLS certificates. AWS makes this very easy with Amazon Certificate Manager (ACM) which makes the requesting of certificates very simple, especially within CDK.
That wraps up our overview of stack.yml, we left off with the following command:
docker stack deploy -c stack.yml my-stack --with-registry-auth
We can check out the status of our docker stack deployment by running a few different docker CLI commands. You can either SSH into your Droplet or configure the DOCKER_HOST environment variable that I showed you earlier and run these commands from your local terminal:
docker stack ps my-stack --no-trunc
--no-trunc is important because important error messages tend to be cut off. This option will show the full version of each column returned by docker stack ps.
docker service ls
This command shows some the active services on our Droplet.
docker ps
This command is useful for shelling into a container to run commands and poke around for debugging.
You can get the Container ID of a running container and access it with the following command:
docker exec -it 0da8370ab283 bash
This assumes that bash is installed on the container with ID 0da8370ab283.
Management commands
Once the site is deployed we stil need to run a few commands to set up our Djnago application:
- collectstatic
- migrate
- createsuperuser
One other ToDo is to figure out how to run these commands through manual GitLab CI jobs.
That's most of what I wanted to cover on a first pass. This should be a good starting point for working with a Django application in Docker Swarm on DigitalOcean.
Next steps
Here are some ideas about the next steps I could take on this project.
Local environment
I'll probably need to create another docker-compose file to bring up everything locally. It might be a good way to experiment with different Traefik settings.
Infrastructure as Code setup
There might be a good opportunity to learn more about Terreform or Ansible here. There are a number of manual, one time setup steps. Some of these can't be automated, but some of them would probably fit very neatly into one of these tools. Pulumi would also be a good option to explore as it is more analagous to CDK.
Scaling out docker swarm services across multiple machines
I have only scratched the surface of what docker swarm can do. There are lots of other settings that would be helpful to setup for learning purposes, especially around resource limits for services. For simplicity I haven't touch on any of these options yet. I'm curious to know how many containers I can fit onto one small Droplet, and if resource limits could help with compute and memory-intensive workloads.
Kubernetes on DigitalOcean
DigitalOcean now offers simplified Kubernetes solutions. It would be interesting to try this out once I get better with docker swarm. I have used Kubernetes a with minikube and to a limited extent with GCP.
Deploying locally, without using GitLab CI
CDK makes deploying locally very easy, especially with the Lambda project I put together. This project as it stands might be a little bit more difficult to deploy locally. It assumes that the images we want to deploy are private. It might be possible, but for now I am fine with deploying through GitLab CI since the pipeline only takes a few minutes to complete for the build and deploy stages.

Top comments (5)
Hi Brian! Just tried out all of this, and using a self-hosted gitlab-ce solution. It works, but I am just finding some difficulties using the REX-Ray storage plugin volumes.
At first they were not mounted properly, got a "Rexray VolumeDriver.Mount: ControllerPublishVolume failed" error in the
docker stack ps my-stack --no-truncoutput; postgres and rails could not start, due to this, they only started after 30 minutes ... but this is not really reproducible, so I don't really know, I'll try to repeat the whole process and see what happens.Then, once all services were running, executing the
collectstaticmanagement task when connected to thebackendcontainer, fails with aOSError: [Errno 5] Input/output error: '/code/assets/static'error; and as a matter of fact, I get this when trying to fetch the dir content:And it seems the directory was also mounted as readonly
Hi Guglielmo, thanks for trying this out and letting me know that you had issues. I'm glad this works on your self-hosted GitLab. Since it is using docker-in-docker, I think those jobs need to be executed using privileged mode, but it sounds like that is not an issue for you. That's interesting about the collectstatic command and REX-Ray issue. This was my first time using REX-Ray, and I mostly followed along with the DigitalOcean post that I linked to in my article.
I do need to try running through everything else one more time. There may be some differences between how I incrementally deployed things vs deploying everything all at once. If I come across any issues or solutions to those issues I will check back here and let you know!
Thanks!
I had set the privileged mode to True in the docker section of my gitlab runners configuration, but didn't mention it, because I thought it had to do with my particular environment.
Hi, cool&perfect
Thank you!