Secure and Scalable File Sharing with Azure Files: A Step-by-Step Guide
Introduction
In today's fast-paced digital world, businesses rely heavily on secure and efficient file-sharing solutions to collaborate effectively. Whether it's storing project documents, sharing reports with teams, or ensuring critical files are backed up, having a reliable, cloud-based file system is crucial.
Azure File Storage provides a fully managed, highly available, and scalable solution that allows organizations to store and access files from multiple locations. With features like snapshots for file recovery and network security restrictions, Azure Files is an excellent choice for organizations that need enterprise-grade file storage without the complexity of managing physical servers.
This guide will walk you through creating an Azure File Share, configuring snapshots for data protection, and securing access to enhance security and compliance.
Use Case: Cloud-Based Document Management for Remote Teams
Imagine a consulting firm with employees working remotely across different locations. The firm needs a centralized document storage system where consultants can access project files, upload reports, and collaborate in real-time with the following requirements:
- Files should be easily accessible from different devices and locations.
- Snapshots should be enabled to prevent data loss due to accidental deletion.
- Access should be restricted so only authorized users from the corporate network can retrieve sensitive documents.
With Azure Files, the company can set up a secure and scalable document repository that ensures smooth collaboration, high availability, and data protection.
Getting Started
Now that we understand the importance of Azure File Storage and its benefits for remote teams, let's dive into the step-by-step implementation process. We will cover:
- Creating an Azure File Share for centralized document storage.
- Configuring snapshots for file protection and recovery.
- Restricting access to ensure only authorized users can retrieve sensitive files.
Let’s get started!
Step 1: Create and Configure an Azure Storage Account
To use Azure File Storage, we first need to create a Storage Account optimized for file shares.
1.1 Create a Storage Account for File Sharing
Search for "Storage Accounts" in the Azure Portal and select it.

Click + Create on the storage account screen.
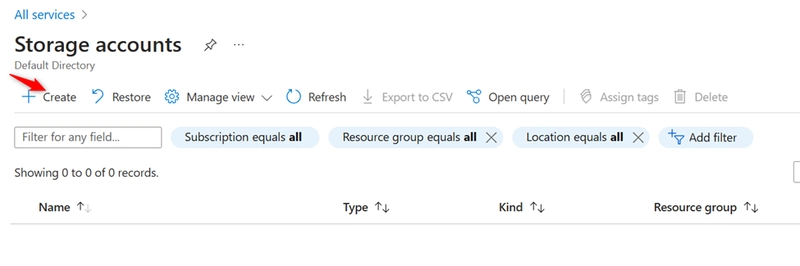
Under Resource group, select Create new, provide a name, and click OK.
Enter a Storage account name (must be globally unique).
Set Performance to Premium for fast and reliable access.
Set Premium account type to File shares.
Set Redundancy to Zone-redundant storage (ZRS) for better data protection.
Click Review + Create and then Create.
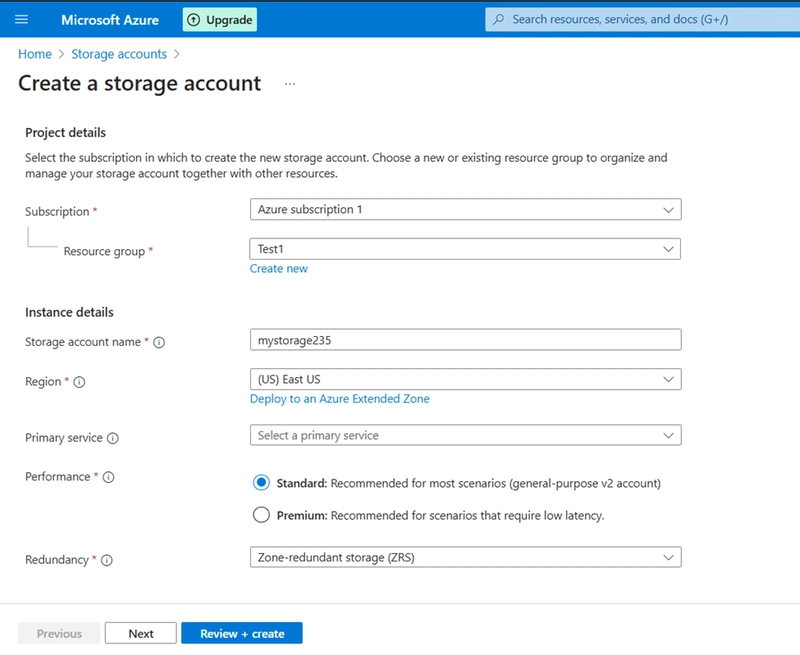
Once deployed, click Go to Resource.
Step 2: Create and Configure an Azure File Share
Now that the storage account is ready, we can create an Azure File Share to store project documents.
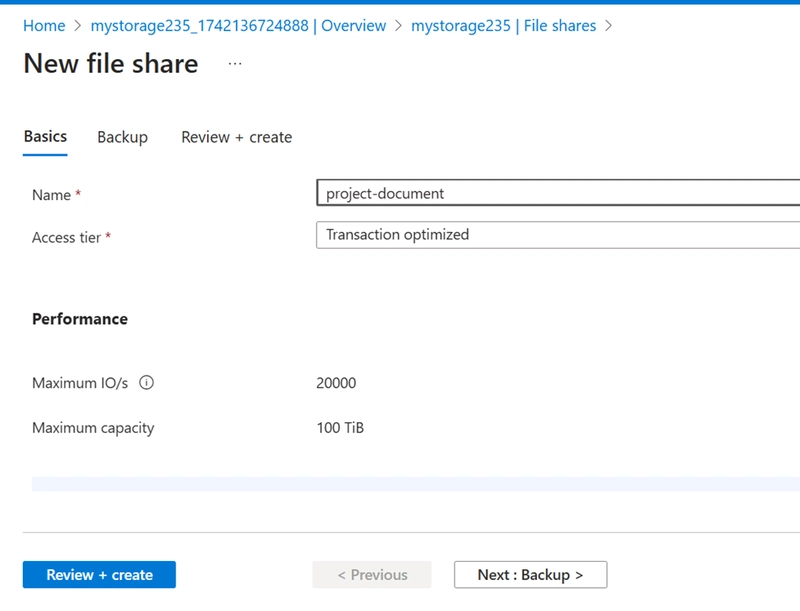
2.1 Create a File Share
- In the Storage Account, go to the File shares section.
Click + File Share.
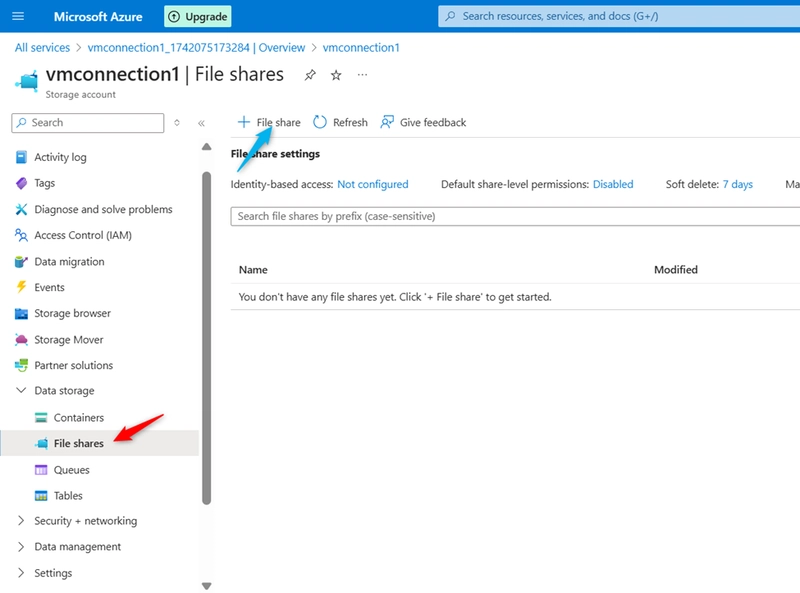
Provide a Name (e.g.,
project-documents).Keep the default settings and click Create.
2.2 Organize Files with Directories
To keep the file share structured, we will create a directory for different types of documents.
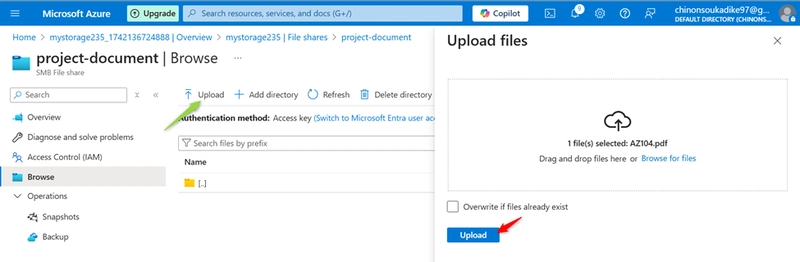
- Open the File Share.
Click + Add Directory and name it
reports.

Click Browse, select the
reportsdirectory, and click Upload to add a sample file for testing.
Step 3: Enable Snapshots for Data Protection
Snapshots help protect files from accidental deletion or corruption by allowing users to restore previous file versions.
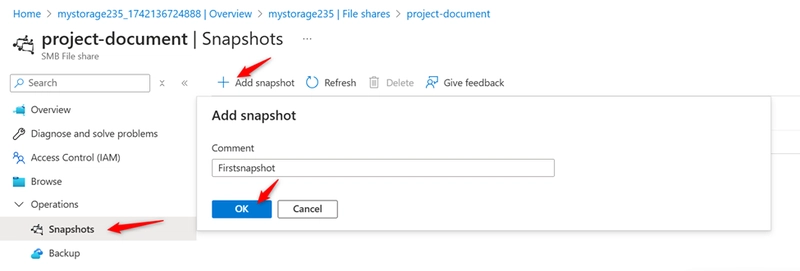
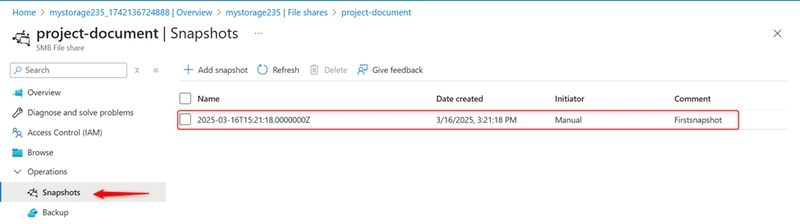
3.1 Creating a Snapshot
- In the File Share, go to the Snapshots section.
- Click + Add Snapshot (optional: add a comment for reference).
- Click OK to create the snapshot.
3.2 Restore a Deleted File from a Snapshot
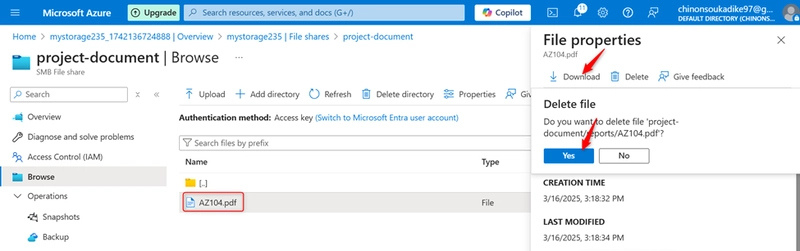
- Open the File Share and navigate to the
reportsdirectory. - Locate the uploaded file, open its Properties, and click Delete.
Confirm the deletion.
Go to the Snapshots section and select the latest snapshot.
Find the deleted file, right-click, and select Restore.
-
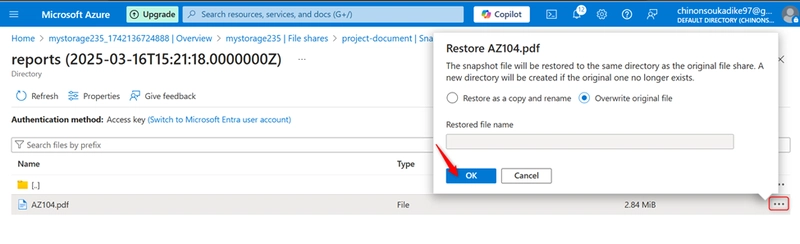
You have two options when restoring the file:
- Restore as a copy: Provide a new name for the file, creating a duplicate while keeping the snapshot intact.
-
Restore to overwrite the original file: If the file still exists in the directory, this option will replace it with the version from the snapshot. However, since the file was deleted, it will be restored as a new file without overwriting anything.
Verify that the file has been successfully restored by going to the
reportsdirectory.
Step 4: Restrict Access to a Corporate Virtual Network
To enhance security, we will restrict access so that only users within a specific corporate network can access the file share.
4.1 Create a Virtual Network
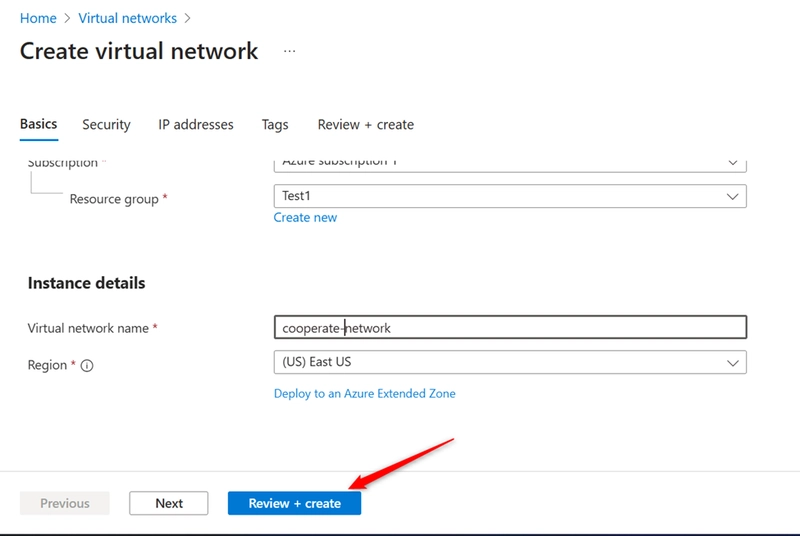
Search for "Virtual Networks" in the Azure Portal and select it.

Click Create, select the resource group, and name the VNet (e.g.,
corporate-network).Click Review + Create, then Create.
Once deployed, click Go to Resource.
In Settings, go to Subnets.
Select the default subnet.
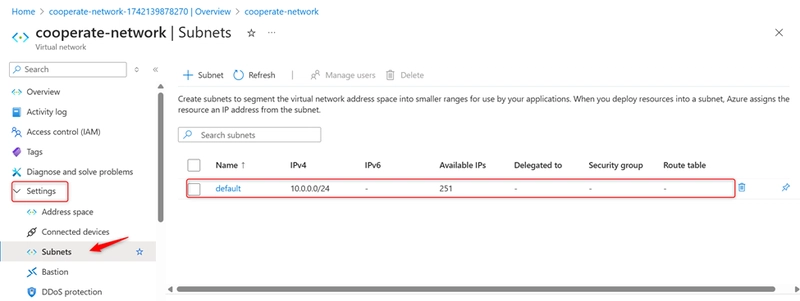
Under Service Endpoints, select Microsoft.Storage.
Click Save.

Why are we selecting Microsoft.Storage?
Service Endpoints improve security by allowing Azure services to communicate privately within Azure’s network instead of going through the public internet. By selecting Microsoft.Storage, we ensure that our Azure Storage Account (which holds the file share) is only accessible from this virtual network. This helps keep the connection secure and private, reducing the chance of unauthorized access while also improving speed.
4.2 Restrict File Storage Access to the Virtual Network
- Go back to the Storage Account.
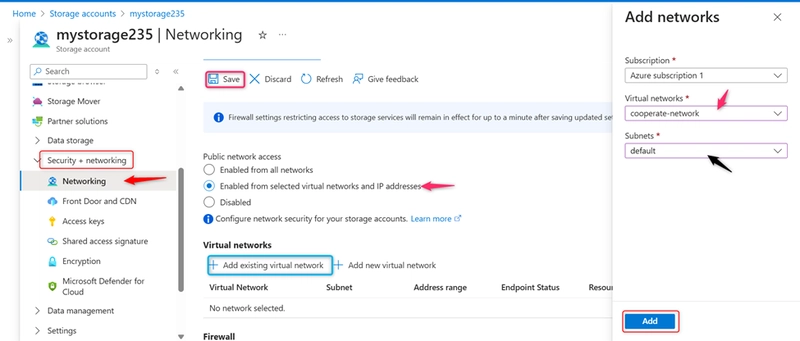
- Under Security + Networking, select Networking.
- Change Public network access to Enabled from selected virtual networks and IP addresses.
- Click Add existing virtual network and select
corporate-networkand its subnet. - Click Save.
4.3 Verify Restricted Access
- Try to access the file share from a different network.
- You should see an unauthorized access message, confirming the restriction.
Conclusion
Through this guide, you've learned how to:
- Set up an Azure Storage Account and File Share to store and organize files efficiently.
- Create directories and upload files for structured data management.
- Enable snapshots for data protection, ensuring quick recovery from accidental deletions.
- Restrict access using Virtual Networks to enhance security and prevent unauthorized users from accessing sensitive information.
With Azure File Storage, organizations can eliminate the challenges of traditional file servers, improve data availability, and ensure business continuity. Whether handling project documentation, financial records, or sensitive reports, Azure Files provides the flexibility, security, and reliability needed for modern file management.
By implementing these best practices, your business can streamline operations, safeguard critical data, and enable seamless collaboration—all while leveraging the power of the cloud.

Top comments (0)