So you want to learn React eh? This guide will walk through everything you need to know when getting started with React. We'll get set up, explain the "hows and whys" behind the basic concepts, and build a small project which pulls data from an API to see everything in action.
This will be a long one, so skip/re-read sections as you need using the "Jump to Section" links below. With that out of the way, grab a drink, buckle up, and let's get started.
Jump to Section
Development Environment
The first thing we're going to do is set up a development environment. If you already setup Node.js and installed Visual Studio Code (or your preferred IDE), you can go ahead and skip to the next section [ADD LINK TO NEXT SECTION HERE]
Node.js
Go here and download the right package for your OS (Mac/windows etc)
When the installation completes, open a terminal and type this command:
node -v
This should show output the version of node you just installed:
This means that the node command works and node has installed successfully - hurray! If you see any errors, try reinstalling Node from the package you downloaded and retry the command again.
Visual Studio Code
Visual studio code is a popular open-source IDE that works well for frontend development. There are a bunch of others you can try - see what your favourite is and download that if you prefer. For now, we'll run with VS Code.
Click here and download the version for your platform:
Follow the installation steps, and you should be good to go. Go ahead and fire up Visual Studio Code.
That's enough development setup for now. There are other nice things you can install (VS Code extensions etc) but we don't need those right now -We're here to learn React!
Creating a React App
The next step is to create a React project. Lucky for us, the fine folk at Facebook have made this really simple. All we have to do is run a command within our terminal:
npx create-react-app my-app
This creates a project for us called "my-app" and sets everything up automatically. Pretty cool.
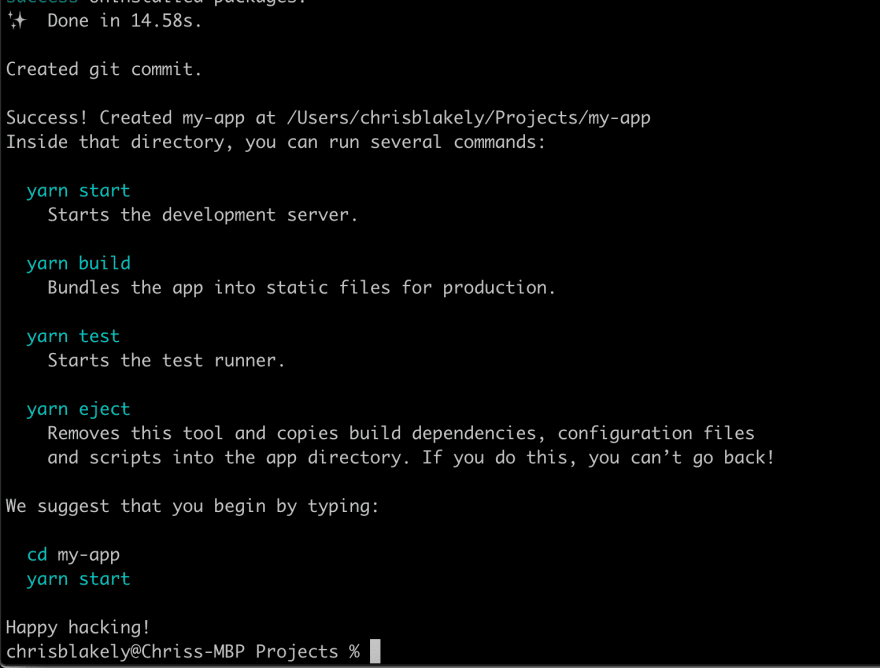
Go ahead and open up a terminal in the directory you want to create your app, e.g a "projects" folder, and run the command. Let the terminal do its thing, and after a while, this will complete and show you some commands:
Notice the create-react-app output has told us what we need to do to start the app. Go ahead and run the commands in your terminal:
cd my-app
yarn start
This will start a development server and open up a web browser for you:
You've just set up your first React App! If you want to learn more about what's going on, (check out the "create-react-app" GitHub:)[https://github.com/facebook/create-react-app]
Lets Build a Contacts List!
Our contacts list will display a number of a contacts, including their name, email, age and avatar (or, profile image).
We’ll build this up gradually, eventually pulling data from an API. How exciting!
Get the styles
Since this is a React tutorial, we’re going to focus on the inner workings of React and not worry about creating nice styles. In your source folder, create a new file styles.css and paste in the following code:
.contact-card {
  display: flex;
  padding: 10px;
  color: #ffffff;
  background-color: rgb(42, 84, 104);
  font-family: "Segoe UI", Tahoma, Geneva, Verdana, sans-serif;
  box-shadow: 10px 10px 25px -16px rgba(0, 0, 0, 0.75);
  border-radius: 10px;
  max-width: 500px;
  max-height: 125px;
  margin-bottom: 10px;
}

.contact-card p {
  margin-left: 10px;
  margin-top: 0;
}

button {
  margin-left: 10px;
  margin-bottom: 10px;
}
Next, go into App.js and import the stylesheet like so:
import "./styles.css";
Creating the Contact Card
While we’re still in App.js, let’s add the basic JSX to get our layout for the contact card in place. Remove everything from the return statement and add the following:
<div className="contact-card">
    <img src="https://via.placeholder.com/150" alt="profile" />
    <div className="user-details">
        <p>Name: Jenny Han</p>
        <p>Email: Jenny.Han@notreal.com</p>
        <p>Age: 25</p>
    </div>
</div>
All we’re doing here is creating a div to “wrap” the contact card details, adding an image (the image will use a placeholder taken from the web for now), and adding a few p tags to hold the details we need in the contact card. Finally we’re adding some CSS classes taken from styles.css;
NOTE: to reference CSS classes, we need to use the className keyword. This is because we are writing JSX, and “class” is a reserved word in JavaScript.
Here’s what we have so far in our App.js file:
import React from "react";
import "./styles.css";

const App = () => {
  return (
    <div className="contact-card">
      <img src="https://via.placeholder.com/150" alt="profile" />
      <div className="user-details">
        <p>Name: Jenny Han</p>
        <p>Email: Jenny.Han@notreal.com</p>
        <p>Age: 25</p>
      </div>
    </div>
  );
}
If you run this in the browser, you should see something similar to the following:
Making our Contact Card Reusable
OK so we have our contact card! However it’s not very reusable. We know that we are going to need to reuse this code if we want to render more than one card, so it makes sense to break this out into it’s own component
NOTE - To make it easier to follow, I am going to a put all the components we make into App.js . In the real world it would be better to split these different components into their own files, and import/export them where appropriate.
Just beneath the App function, create a new function called ContactCard, and copy the JSX from App to ContactCard like so:
const ContactCard = () => {
  return (
    <div className="contact-card">
      <img src="https://via.placeholder.com/150" alt="profile" />
      <div className="user-details">
        <p>Name: Jenny Han</p>
        <p>Email: Jenny.Han@notreal.com</p>
        <p>Age: 25</p>
      </div>
    </div>
  );
};
Again, a component in React is just a function that returns some JSX. Now that we’ve moved our JSX to the ContactCard we can use this component within our main*App component*:
const App = () => {
  return (
    <>
      <ContactCard />
    </>
  );
}
We use our own components like any old HTML/JSX tag. We just put the name of our component in angle brackets. Our App.js file should look like this:
// App.js
import React from "react";
import "./styles.css";

const App = () => {
  return (
    <>
      <ContactCard />
    </>
  );
};

const ContactCard = () => {
  return (
    <div className="contact-card">
      <img src="https://via.placeholder.com/150" alt="profile" />
      <div className="user-details">
        <p>Name: Jenny Han</p>
        <p>Email: Jenny.Han@notreal.com</p>
        <p>Age: 25</p>
      </div>
    </div>
  );
};
Now if you run this in the browser, things will look the same as they did before - which is what we want. We now have a ContactCard component that we can use as many times as we like:
const App = () => {
  return (
    <>
      <ContactCard />
      <ContactCard />
      <ContactCard />
    </>
  );
};
Update the App component to include another 2 ContactCard components. The above example will render 3 contact cards in the browser. Go and check it out!
Think of this like a “stamp” on the page. Every ContactCard component we add is another “stamp” and renders the same markup on the page
Let’s talk about State - the useState Hook
If you’ve been getting started with React already, you may have heard of the term state. State is quite a big deal in React. So what is it?
State is basically an object that represents a part of an app that can change, which the UI “reacts” to. State can be anything; objects, booleans, arrays, strings or integers
Let’s take an example.
Some people who appear in our contact list are shy and do not want their age being displayed until a button is clicked. We can store whether the age should be shown or not in state by using the useState hook within the component. Which looks like this:
const [showAge, setShowAge] = useState(false);
“what the hell is going on here?” Let me explain.
The useState object gives us a variable with the current value, and a function that lets us change that value. When we call useState we can define an initialvalue (in this case, false).
We use destructuring assignment **on the **useState hook to get these. You don’t have to worry about destructuring assignment right now, just remember that the first variable lets us access the state value, the second one lets us change it.
Go ahead and add the above code snippet to the*ContactCard* component like so:
const ContactCard = () => {
  const [showAge, setShowAge] = useState(false);

  return (
    <div className="contact-card">
      <img src="https://via.placeholder.com/150" alt="profile" />
      <div className="user-details">
        <p>Name: Jenny Han</p>
        <p>Email: Jenny.Han@notreal.com</p>
        <p>Age: 25</p>
      </div>
    </div>
  );
};
Now we have a state object, how do we use it? Well, we can reference the showAge variable like any other variable. In this case, we want to _only show the age if the showAge variable is true.
We can do this using the ternary operator :
{showAge === true ? <p>Age: 25</p> : null}
This example reads as if the showAge variable is true, render the age, if not, render nothing.
Go ahead and add this to the ContactCard component, like so:
const ContactCard = () => {
  const [showAge, setShowAge] = useState(false);

  return (
    <div className="contact-card">
      <img src="https://via.placeholder.com/150" alt="profile" />
      <div className="user-details">
        <p>Name: Jenny Han</p>
        <p>Email: Jenny.Han@notreal.com</p>
        {showAge === true ? <p>Age: 25</p> : null}
      </div>
    </div>
  );
};
Now, if you run the app in the browser, you’ll see the age disappears - that’s because our showAge variable has been initialised with false. If we initialise our showAge variable with true:
const [showAge, setShowAge] = useState(true);
The age will appear on the contact card. Nice! Although, its not great — we don’t want to change the code whenever we want to show the age on the contact card!
Before we look at how to dynamically change our showAge variable, lets tidy the code a bit. Go ahead and replace this line:
{showAge === true ? <p>Age: 25</p> : null}
With:
{showAge && <p>Age: 25</p> }
This gives the same result, just in a more concise way.
TIP: Shorten code where it makes sense to, don’t feel like you have to shorten every line of code you write! Readability should come first.
Updating State
Ok back to updating state. If we remember back, the useState() hook gives us a function to update the state. Let’s wire this up to a button, which, when clicked, will toggle showing the age on the contact card.
We can do this with the following:
<button onClick={() => setShowAge(!showAge)}>
    Toggle Age
</button>
What this is doing is calling the setShowAge function (which we get from the useState hook) to change the value of show age to the opposite of what it currently is.
NOTE: I’m using the Arrow Function syntax here to pass a function to the
onClickproperty. If you’re not familiar we this, a quick reminder that you can get my [book where I discuss the important bits of JavaScript to know before React here].
When the state updates, React will re-render the component and since the value of showAge is true, the age will be displayed.
If the user clicks the button again, this will set showAge to false, React will re-render the component, and the age will be hidden:
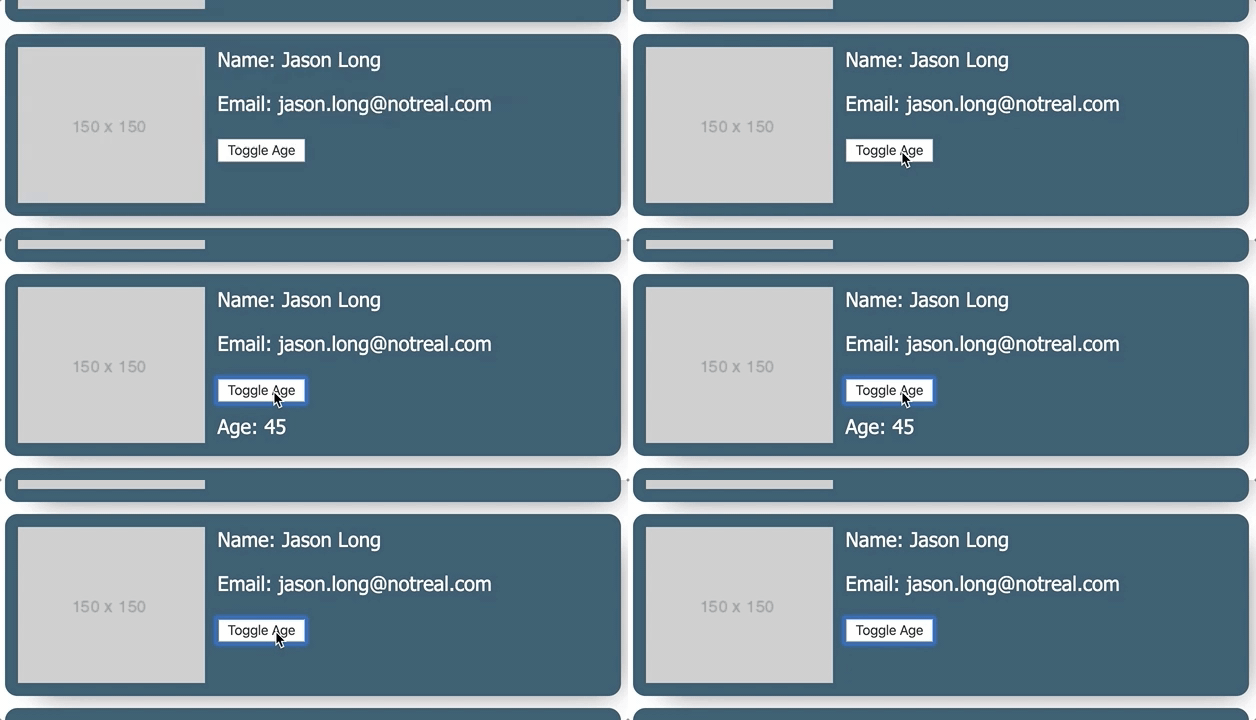
Look at our fancy toggle in action!
TIP: Whenever the components state changes, React will re-render the component with the new state
Notice how even though we have 3 ContactCard components being rendered, when we click the button the age only displays for one of the cards, and not all of them. This is because state belongs to the individual component. In other words, each ContactCard component that renders is a copy, and has its own state/data.
Introducing Props
So now we have a lovely new ContactCard component that we’re reusing a few times. Although its not really reusable, since the name, email, age and avatar are the same for each of our components. Oh dear! We can make this data more dynamic with what are called props.
Since you’re just getting started with React, you can think of*Props* as data that gets passed to a component, which the component can then use. For example, we can pass in our avatar , ** email*, **name* and age as props to our Contact Card component like so:
<ContactCard
  avatar="https://via.placeholder.com/150"
  name="Jenny Han"
  email="jenny.han@notreal.com"
  age={25}
/>
As you can see, we define a prop by giving it a name. Eg. name and using the equals to assign some value to that prop e.g Jenny Han.
We can have as many props as we want, and we can name these props whatever we want, so they’re pretty flexible.
Props can hold different types of data, i.e strings, numbers, booleans, objects, arrays and so on.
NOTE: Props must be defined using quoted text (e.g name=“Jenny Han”) or within braces (e.g
age={25}. If we leave out the braces for anything other than strings things start to break -age=25);
Go ahead and replace the current*ContactCard* components within our App component with the following:
<ContactCard
  avatar="https://via.placeholder.com/150"
  name="Jenny Han"
  email="jenny.han@notreal.com"
  age={25}
/>

<ContactCard
  avatar="https://via.placeholder.com/150"
  name="Jason Long"
  email="jason.long@notreal.com"
  age={45}
/>

<ContactCard
  avatar="https://via.placeholder.com/150"
  name="Peter Pan"
  email="peter.pan@neverland.com"
  age={100}
/>
All we’re doing here is passing the data that the component needs to each component as props. Notice how the data is different for each component.
Using Props within a component
We’ve sent a bunch of props down to the ContactCard component, so let’s tell the ** ContactCard** how to use them.
Until now, our ** ContactCard** function doesn’t accept any parameters. React, being the magical thing that it is, automatically puts all our props into a lovely props object, that gets passed into the component:
const ContactCard = props => {
    //...other code
};
Notice the props variable. This is an object containing the props we defined previously. We can access our defined props by using the dot notation like so:
const ContactCard = props => {
    console.log(props.avatar);
    console.log(props.name);
    console.log(props.email);
    console.log(props.age);

    //...other code
};
Finally, we want to replace the hardcoded values in our JSX, with the values we receive from the props:
return (
  <div className="contact-card">
    <img src={props.avatar} alt="profile" />
    <div className="user-details">
      <p>Name: {props.name}</p>
      <p>Email: {props.email}</p>
      <button onClick={() => setShowAge(!showAge)}>Toggle Age </button>
      {showAge && <p>Age: {props.age}</p>}
    </div>
  </div>
);
Notice how we have set the image source using whatever value we received from props. We did similar for name, email, and age. Also notice how we wrap this code in curly braces, so it gets executed as JavaScript.
Our final App.js file looks like this:
// App.js
const App = () => {
  return (
    <>
      <ContactCard
        avatar="https://via.placeholder.com/150"
        name="Jenny Han"
        email="jenny.han@notreal.com"
        age={25}
      />
      <ContactCard
        avatar="https://via.placeholder.com/150"
        name="Jason Long"
        email="jason.long@notreal.com"
        age={45}
      />
      <ContactCard
        avatar="https://via.placeholder.com/150"
        name="Peter Pan"
        email="peter.pan@neverland.com"
        age={100}
      />
    </>
  );
};

const ContactCard = props => {
  const [showAge, setShowAge] = useState(false);

  return (
    <div className="contact-card">
      <img src={props.avatar} alt="profile" />
      <div className="user-details">
        <p>Name: {props.name}</p>
        <p>Email: {props.email}</p>
        <button onClick={() => setShowAge(!showAge)}>
            Toggle Age
        </button>
        {showAge && <p>Age: {props.age}</p>}
      </div>
    </div>
  );
};
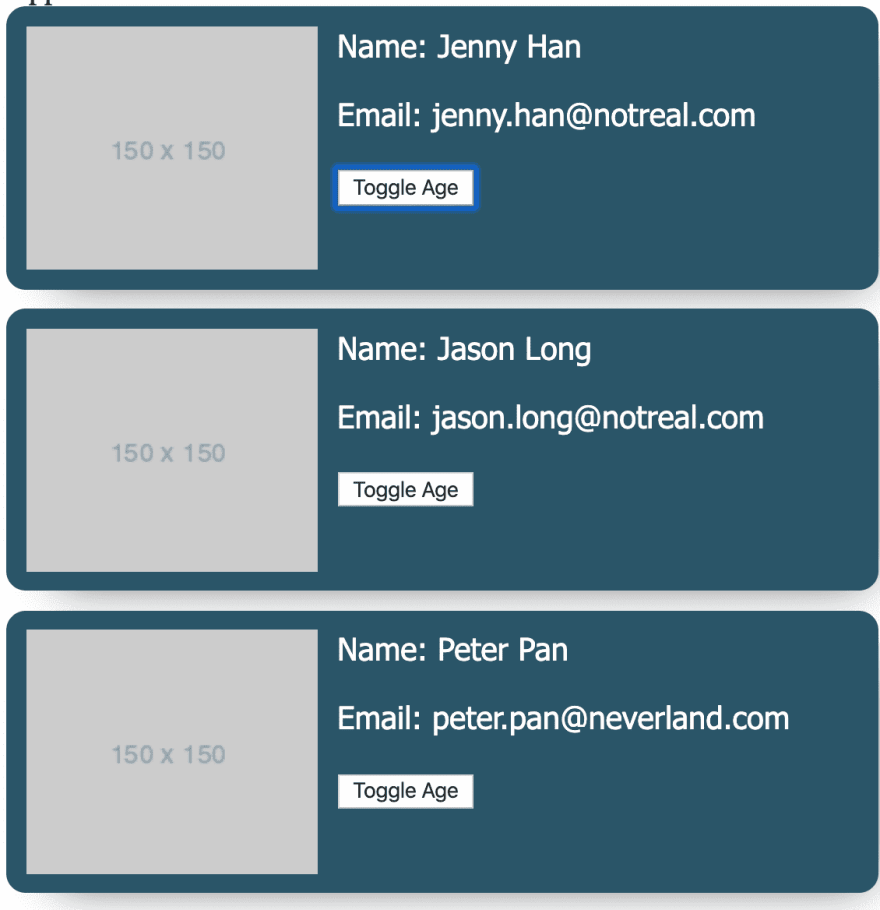
If you run this in the browser, you should see something similar to this:
Hurray! Our component works the same as before, but its now more dynamic. We can reuse the same ContactCard but passing in different data - whilst keeping the layout, styles, and state objects the same.
Rendering components from a List
Our contacts list is coming along nicely, we have some well crafted, reusable code so time to leave it alone right? Wrong! Let’s take it a step further.
In a real application, data usually comes in the form of an array of data, e.g after an API call. Let’s pretend we’ve made an API call to retrieve some users from a database and have received the following data:
const contacts = [
    { name: "Jenny Han", email: "jenny.han@notreal.com", age: 25 },
    { name: "Jason Long", email: "jason.long@notreal.com", age: 45 },
    { name: "Peter Pan", email: "peter.pan@neverland.com", age: 100 }
];
Paste this into the App() component at the top of the function. The eagled eye amongst you will notice how this data is similar to what we already have. But how we we turn this data into ContactCard components? Well, remember all those days you spent learning how to loop over an array using .map()? Now is the day we put that into action!
To display a list of components, we:
1) Loop over the array using .map()
2) For each item in the array, create a new ContactCard component
3) Pass the data from each object in the array to the ContactCard component as props
Let’s see how this works. In our app*App()* component, replace the return statement with this:
return (
  <>
    {contacts.map(contact => (
      <ContactCard
        avatar="https://via.placeholder.com/150"
        name={contact.name}
        email={contact.email}
        age={contact.age}
      />
    ))}
  </>
);
As you can see, we map over the array. For each object in the array, we want to create a new ContactCard component. For the props, we want to take the name, email, and age from the current object the map function is on. In other words, from the contact variable.
NOTE: I’ve left the “avatar” prop alone, as this is the same for now - it’ll change later in the tutorial
And that’s it! Our App.js file looks like this:
//App.js
const App = () => {
  const contacts = [
    { name: "Jenny Han", email: "jenny.han@notreal.com", age: 25 },
    { name: "Jason Long", email: "jason.long@notreal.com", age: 45 },
    { name: "Peter Pan", email: "peter.pan@neverland.com", age: 100 },
    { name: "Amy McDonald", email: "amy@email.com", age: 33 }
  ];

  return (
    <>
      {contacts.map(contact => (
        <ContactCard
          avatar="https://via.placeholder.com/150"
          name={contact.name}
          email={contact.email}
          age={contact.age}
        />
      ))}
    </>
  );
};
Run this in the browser and things should look the same. We haven’t change our ContactCard, merely changed where we got the data from. The cool thing about this is that if you added another row to the contacts array, the extra component will get rendered automatically- you don’t have to do anything else! Try this for yourself and see.
Pulling data from an API
We’ve got a nice looking React App now, nice and dynamic and things are working well. Which is a good place to be since we’re just getting started with React! But there are some tidy ups we need to make. In a real application, data will be pulled in from an API.
For the next part of the tutorial, we are going to get real contacts (when I say real contacts, I mean fake contacts - you know what I mean) from a real API: [https://randomuser.me/]. Feel free to browse the website and look at the response we will get back — this is where we will get our data to populate our components.
Firstly, let’s create a state variable to hold the data we get back from the API. Remember, state is good for holding that that can change. Our contacts list can definitely change!
In App.js, remove the contacts array add the following:
const [contacts, setContacts] = useState([]);
Here, we’re doing here is creating a state object, and initialising it to an empty Array. When we make the API call, we’ll update the state to contain a list of contacts. Since we named this state object contacts, our rendering logic within the JSX will look for this array instead (as opposed to the old contacts array we just deleted).
Next, let’s grab the data from the API. We’ll use the standard Fetch API. For now, we’ll log the data to the console. Add the following below the state object we just created:
fetch("https://randomuser.me/api/?results=3")
  .then(response => response.json())
  .then(data => {
    console.log(data);
  });
All we’re doing here is:
- Making a GET request to the randomuser API, asking for three results
- Convert the response into JSON
- Logging the JSON to the console.
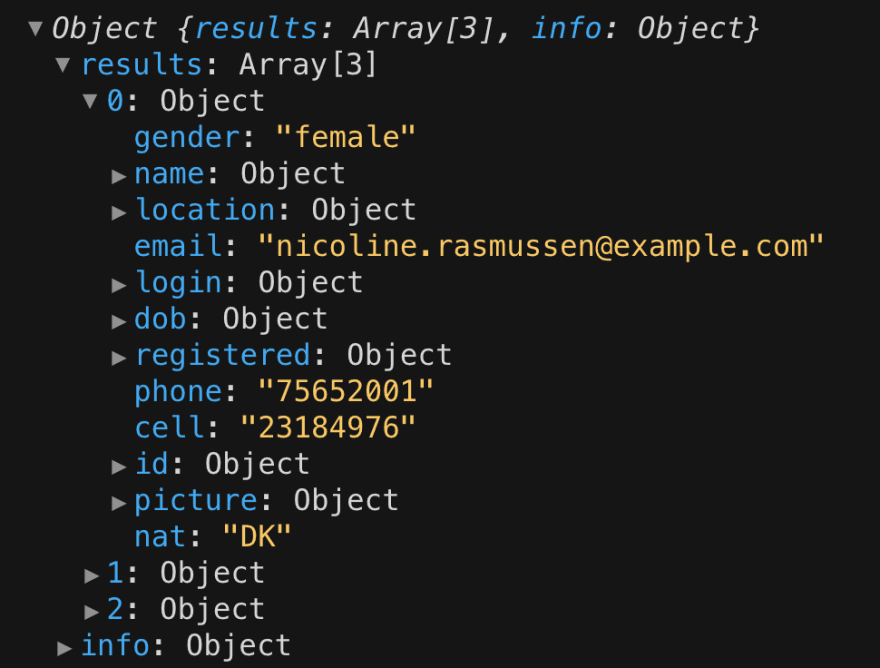
If you run this in the browser, you’ll notice the ContactCard components no longer render - thats fine, we haven’t saved any new data to state yet, and our state variable is currently empty. If you look at the console (in your browser dev tools) you’ll notice the response object is logged. Which will look something like this:
You’ll see we have a results array, which has 3 objects. Each of these objects contain the details of a user (or a “Contact” in our case). This is similar to the contacts array we manually created ourselves in the previous section - just an array full of objects.
Let’s update our App components JSX to pick data from this object. Update the JSX like so:
return (
  <>
    {contacts.map(contact => (
      <ContactCard
        avatar={contact.picture.large}
        name={contact.name.first + " " + contact.name.last}
        email={contact.email}
        age={contact.dob.age}
      />
    ))}
  </>
);
This works similar to what we had before:
- We are looping through the contacts variable (which, at the moment is an empty array)
- When we eventually save the response to state (the next step) we look through each object in the array, for the appropriate things we need: in this case picture, name, email, and dob objects.
Next we want to store the results array in state, so our JSX can loop over it (using the map() function we seen previously) and render some lovely ContactCards. Within our fetch function, add the call to setContacts(data.results) like so:
fetch("https://randomuser.me/api/?results=3")
  .then(response => response.json())
  .then(data => {
    console.log(data);
    setContacts(data.results);
  });
Our App component now looks like this:
//App.js
const App = () => {
  const [contacts, setContacts] = useState([]);

fetch("https://randomuser.me/api/?results=3")
  .then(response => response.json())
  .then(data => {
    console.log(data);
    setContacts(data.results);
  });

  return (
    <>
      {contacts.map(contact => (
        <ContactCard
          avatar={contact.picture.large}
          name={contact.name.first + " " + contact.name.last}
          email={contact.email}
          age={contact.dob.age}
        />
      ))}
    </>
  );
};
If you save this, and run it in the browser, you’ll see something like this:
“WTF is going on everything is broken!”, don’t panic just yet (If you’re on a slower machine or just getting a bit freaked out, you can comment out the setContacts(data.results) line within the fetch function for now).
What’s happening here is that we’re stuck in a bit of a loop:
1) We make a call to fetch and get some data back
2) We then save this data to state
3) Remember, React does a re-render when the state changes
4) When the component re-renders, the fetch api call happens again, and sets the state
5) Since the state updated, the component re-renders again
6) After the component re-renders, fetch is called again…
7) You get the idea
So how do we stop this? We have to delete everything and start again. Nah just kidding, don’t run away yet. We can fix this with another built in React Hook - useEffect.
Introducing useEffect
The useEffect hook is a special hook that runs a function. By default, the useEffect hook runs on every re-render. However, we can configure it to only run under certain condition, e.g when a component mounts, or if a variable changes. The useEffect hook looks like this:
useEffect(() => {
    // code to run
});
This will run every time. If we want to specify “only run once” we pass in an empty array as a second argument like so.
useEffect(() => {
    // code to run
},[]); //<-- notice the empty array
This is called a dependency array. When the dependency array is empty, this means the useEffect function will only run when the component loads for the first time. For additional re-renders, the useEffect function is skipped.
This is a perfect place to put our API call, as we only want to get the data once, when the component loads. Go ahead and place a useEffect()function into our*App* component, and move the fetch API call into the useEffect function. Our App component now looks like this:
//App.js
const App = () => {
  const [contacts, setContacts] = useState([]);

  useEffect(() => {
    fetch("https://randomuser.me/api/?results=3")
      .then(response => response.json())
      .then(data => {
        setContacts(data.results);
      });
  }, []);

  return (
    <>
      {contacts.map(contact => (
        <ContactCard
          avatar={contact.picture.large}
          name={contact.name.first + " " + contact.name.last}
          email={contact.email}
          age={contact.dob.age}
        />
      ))}
    </>
  );
};
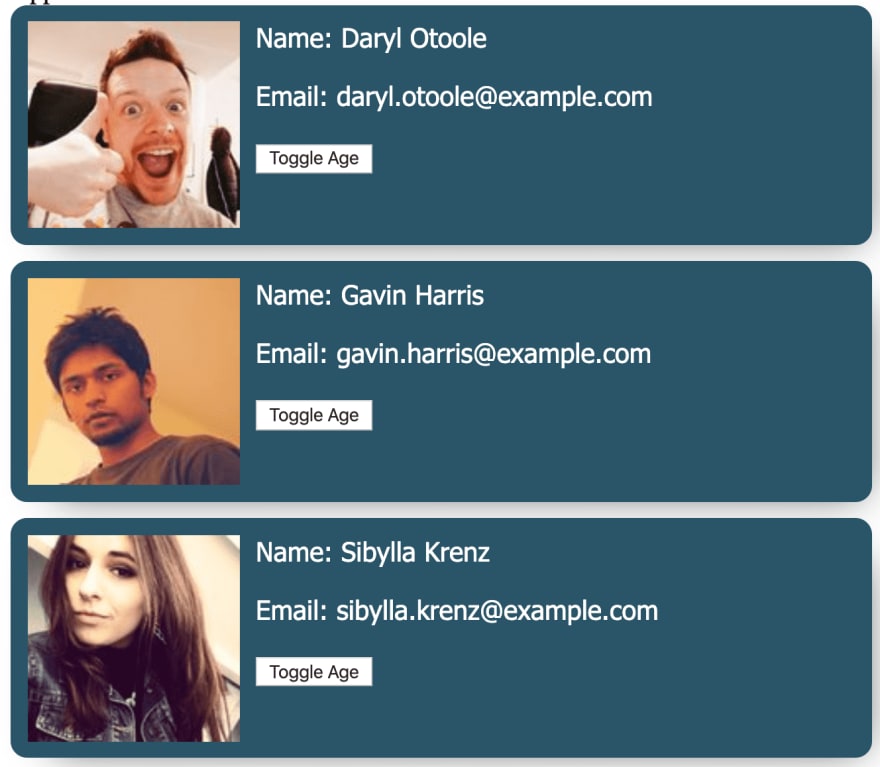
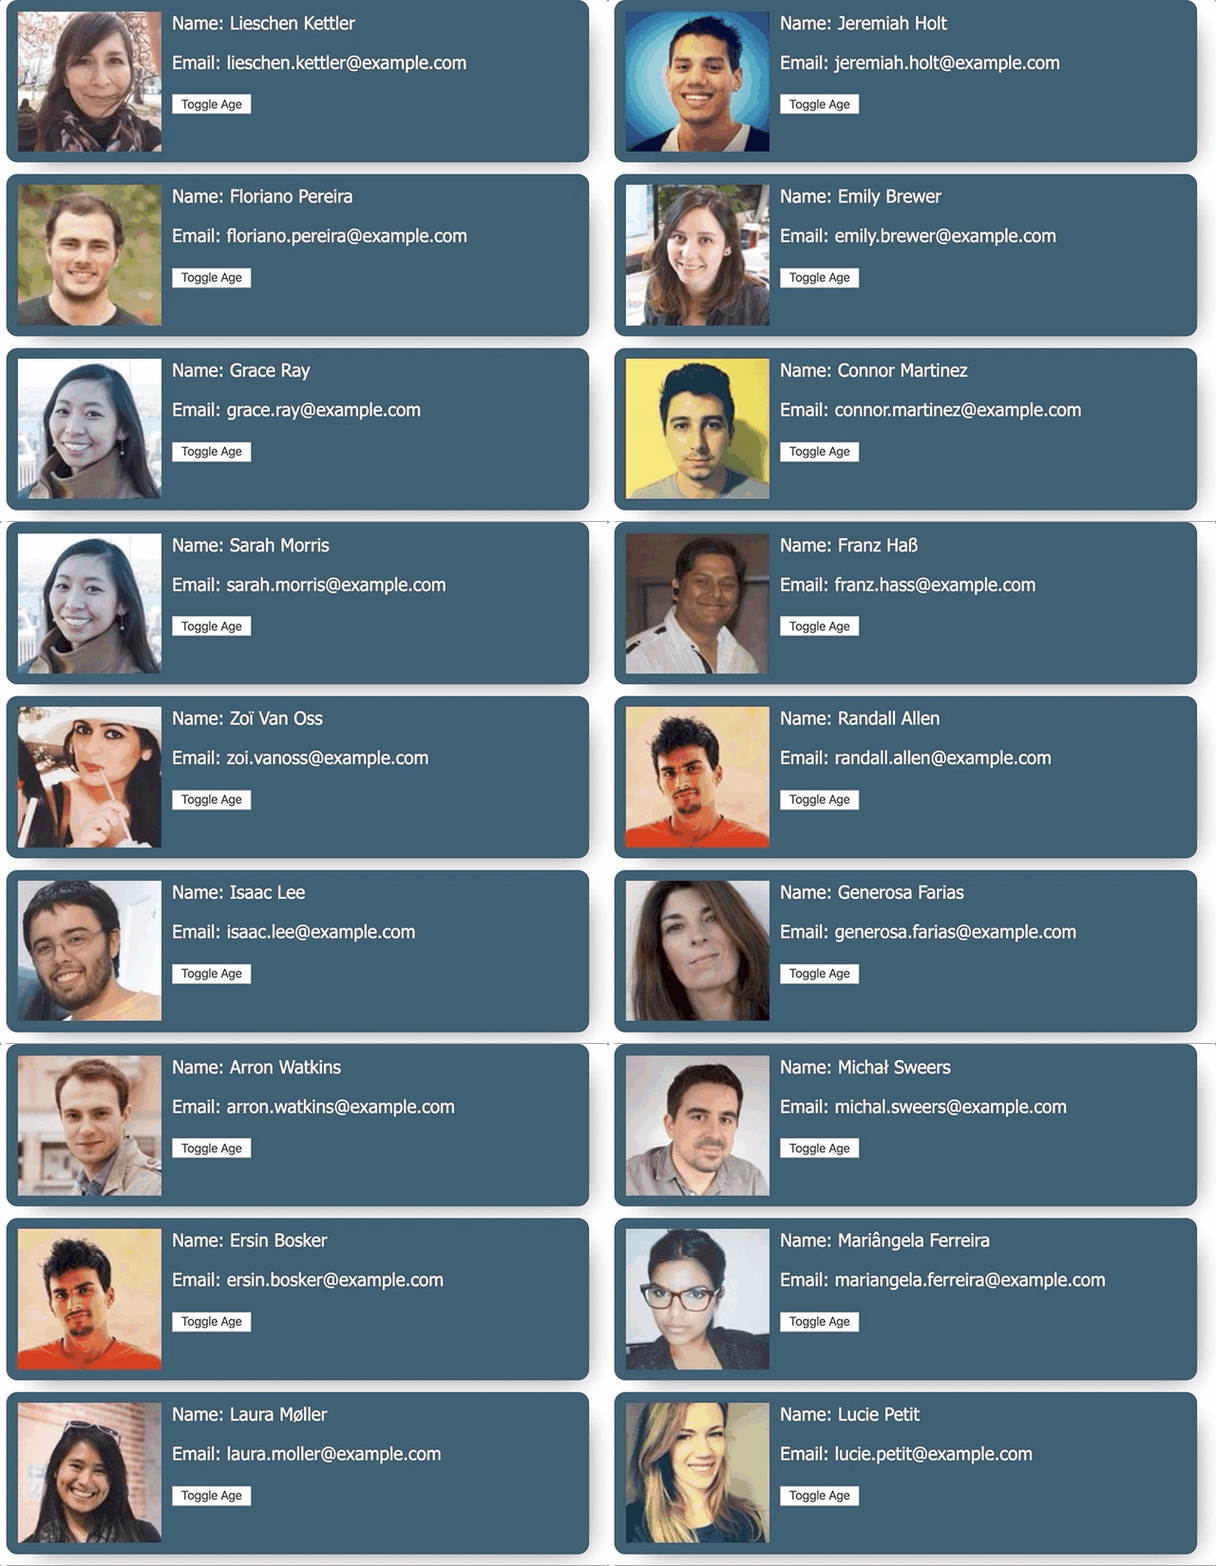
Now, if you run the code in your browser, you should see 3 contact cards appear! Refresh the page to see another randomised list of contacts:
Conclusion
Congrats! You just completed your first real-world app and laid the foundation to move onto more advanced topics.





Top comments (0)